Smart Sensor Setup for Monitoring Black-Eyed Susans
Last July, a neighbor asked why her black-eyed Susans looked like they’d “given up” overnight. The bed had been fine on Friday—by Monday the leaves were limp, blooms were smaller, and the whole planting looked tired. The twist? She’d been watering faithfully every evening. When we dug in, the top inch was wet, but the root zone below was dusty and hot. A basic moisture probe (and later, a smart sensor) confirmed what her hose routine hid: she was watering often, but not deeply—so the plants never built resilient roots.
Black-eyed Susans (Rudbeckia) are tough, but they still respond to what’s happening at the root zone, not what we think is happening from a quick glance. Smart sensors are useful because they catch those sneaky mismatches: damp surface, dry roots; sunny day spikes; sudden drop in moisture after a windy afternoon; or a heavy rain that didn’t actually soak where the roots live. This article walks you through a practical sensor setup that supports real plant care decisions for Rudbeckia, not gadget collecting.
What you’re really monitoring (and why Rudbeckia cares)
Black-eyed Susans thrive when soil moisture swings are moderate (not bone-dry then flooded), and when the plant dries down between waterings enough to keep roots oxygenated. They bloom best with steady sun, decent fertility, and good airflow. The problem is that “steady” depends on your soil type, bed depth, and heat. A smart sensor setup helps you measure what your garden is doing so you can water and feed like a pro.
Most home gardeners get the biggest payoff from monitoring:
- Soil moisture at root depth (not the surface)
- Soil temperature (hot roots change water use dramatically)
- Light exposure (helps diagnose weak bloom/legginess)
- Optional: electrical conductivity (EC) if you fertilize heavily in containers
“Soil moisture sensors are most useful when they’re used to guide irrigation timing and confirm that water is reaching the root zone.” — Utah State University Extension Fact Sheet (2021)
Sensor gear that actually helps (without overcomplicating)
Pick the sensor type based on where you’re growing
For in-ground black-eyed Susans, a single reliable moisture/temperature probe per bed section is usually enough. For pots and raised beds, sensors are even more useful because those dry out fast and unevenly.
Here’s a quick, practical comparison of common monitoring approaches.
| Method | Typical Depth Measured | Best Use Case | Watering Decision Quality | Real-World Notes |
|---|---|---|---|---|
| Finger test / trowel check | 2–4 in (5–10 cm) | Small beds, quick checks | Medium | Misses dry zones deeper than 4 in; great habit but not “data” |
| Basic analog moisture meter | 4–8 in (10–20 cm) | Occasional diagnostics | Medium | Can drift; doesn’t log trends; still better than guessing |
| Smart soil moisture + temp sensor (app-based) | 4–8 in (10–20 cm) or deeper | Busy gardeners; new beds; raised beds | High | Trend lines show dry-down speed after heat/wind; helps stop overwatering |
| Smart sensor + drip irrigation timer/controller | Root-zone depth | Hot climates; vacations; large plantings | Very high | Best when you set conservative thresholds and still sanity-check weekly |
What “good enough” looks like for home gardens
A practical setup for most Rudbeckia beds:
- 1–2 soil moisture/temperature probes per bed (more if the bed has very different sun exposures)
- App that shows 7–30 days of history (trend lines matter more than single readings)
- Optional light sensor if bloom is weak and you suspect shade creep
Don’t get hung up on chasing lab-grade accuracy. Consistency and placement matter more. You’re looking for actionable patterns: how fast the bed dries, how deep water penetrates, and whether roots are sitting wet.
Placement: the make-or-break step
Most “my sensor is wrong” complaints trace back to placement. If the probe sits in a pocket of compost, right next to a dripper, or too shallow, it will lie to you.
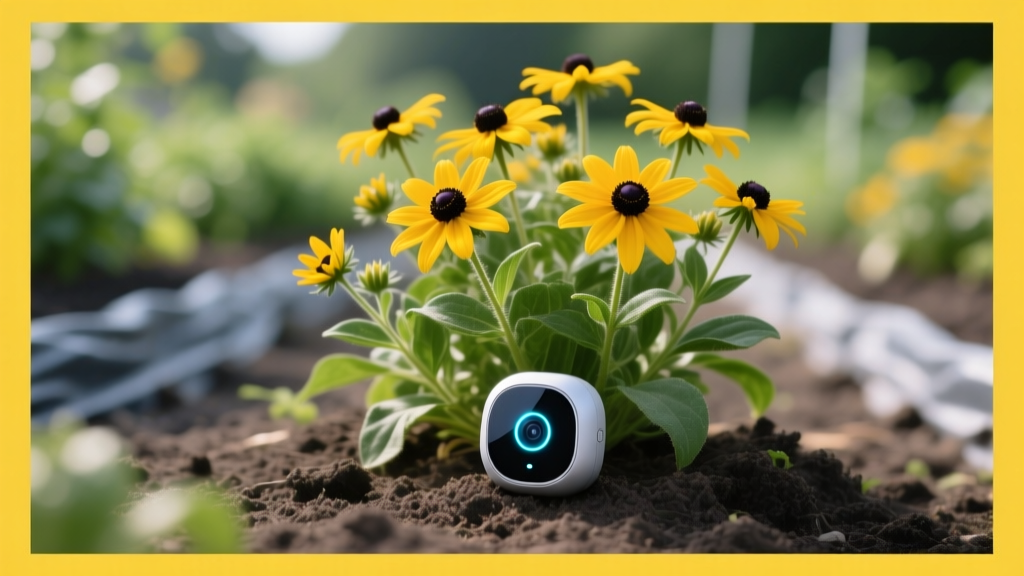
Where to put sensors for black-eyed Susans
Black-eyed Susans typically root in the top 6–12 inches (15–30 cm) of soil in garden beds, with the most active feeder roots often in the upper half of that zone. Your sensor should represent where roots actually live.
- In-ground beds: place the probe at 4–6 inches (10–15 cm) deep, about 4–8 inches (10–20 cm) away from the plant crown.
- Raised beds: place at 5–7 inches (13–18 cm) deep; raised beds dry faster at edges, so avoid the outer 3 inches.
- Containers (12–18 inch pots): place the probe halfway down the root ball, not hugging the pot wall.
Install it like you mean it (step-by-step)
- Water the bed lightly first if soil is rock-hard dry. Installing into powdery soil creates air gaps and false “dry” readings.
- Make a pilot hole with a dibber or thin trowel so you don’t smear the soil and create a glazed pocket.
- Insert the probe firmly so the sensing area has full soil contact—no wobble.
- Mark the spot with a small stake so you don’t stab it later with a weeder.
- Wait 30–60 minutes for readings to stabilize after installation (especially for moisture).
Watering: using sensor data to avoid the two classic mistakes
The two most common watering mistakes with black-eyed Susans are: (1) frequent shallow watering that trains shallow roots, and (2) keeping the root zone constantly wet, which encourages rot and leaf diseases. Your sensor’s job is to show you the dry-down curve so you can water deeply and then let the soil breathe.
What to aim for in real numbers
Because different sensors report moisture differently (percentages, centibars, arbitrary scales), treat the first two weeks as calibration time: you’re learning what “just watered,” “good,” and “too dry” look like in your soil.
That said, practical targets that work for many home gardens:
- New transplants (first 2–3 weeks): keep the root zone from fully drying out. Expect watering every 2–4 days in hot weather, less in cool spells.
- Established in-ground plants: aim for about 1 inch (2.5 cm) of water per week total (rain + irrigation), delivered in 1–2 deep soakings rather than daily sprinkles.
- Heat waves: when daytime highs hit 90–95°F (32–35°C), water use can jump quickly—watch the trend line after windy days.
These numbers align with common extension guidance for many landscape perennials: deep, infrequent watering promotes deeper rooting and better drought tolerance. For example, Colorado State University Extension emphasizes deep watering and allowing soil to dry between cycles for many established landscape plants (Colorado State University Extension Fact Sheet, 2023).
How to translate readings into a watering decision
Instead of reacting to a single “dry” alert, use this simple pattern:
- Water when: your sensor shows a steady decline for 2–3 days and the plant shows mild midday wilt that recovers by evening.
- Hold off when: moisture stays high for more than 48 hours after watering/rain (especially in heavy soil), or leaves look puffy/soft.
- Confirm monthly: do a trowel check to verify the sensor matches reality at the same depth.
Comparison analysis: shallow vs deep watering (what sensors reveal)
Here’s what I typically see in sensor graphs when gardeners switch methods:
- Shallow daily watering: moisture spikes high, then drops fast within 12–24 hours; deeper layers stay dry. Plants look okay until a hot day, then crash.
- Deep watering 1–2x/week: moisture rises and stays moderately elevated for several days; roots expand downward; plants handle heat better.
Real-world result: in a sunny bed with loamy soil, a deep soak that wets 6–8 inches down can keep Rudbeckia comfortable for 4–6 days in typical summer weather, while a quick sprinkle might only help for 12–18 hours and mostly feeds weeds near the surface.
Soil: what sensors can’t fix (but can help you diagnose)
Rudbeckia is adaptable, but it performs best in well-drained soil. If your sensor shows “wet” all the time and your plants still look stressed, your issue may be oxygen-starved roots, compaction, or water sitting in a perched layer.
Drainage checks you can do in 10 minutes
- In-ground percolation check: dig a hole 12 inches deep, fill with water, let it drain once, then fill again. If the second fill drains in under 2 hours, drainage is usually fine. If it’s still holding water after 4+ hours, you’ve got a drainage problem that sensors will only confirm, not solve.
- Texture check: if soil forms a slick ribbon when wet, you likely have high clay content—plan on fewer, deeper waterings and consider compost top-dressing (not tilling around crowns).
Soil improvements that pair well with sensor monitoring
Use your sensor trend line to see whether changes help:
- Top-dress with compost: add 1 inch of finished compost in spring to improve structure and moisture buffering.
- Mulch: maintain 2–3 inches of shredded bark or leaf mulch, keeping it 2 inches away from crowns to prevent rot.
- Avoid frequent cultivation: it breaks soil structure and can dry the root zone faster than you realize.
Light: monitoring sun so you can predict bloom quality
When black-eyed Susans don’t bloom well, gardeners often blame fertilizer. More often, it’s shade. Trees leaf out, fences cast longer shadows, and what was “full sun” in May becomes “half day sun” in July.
Practical light targets
Most black-eyed Susans bloom best with 6+ hours of direct sun. Some will tolerate light shade, but you’ll usually see fewer flowers and leggier stems.
If you add a light sensor or use a phone app to track sun:
- If you’re under 4–5 hours of direct sun: expect leaning, fewer blooms, and more foliar disease (slower drying).
- If you’re at 6–8 hours: you’ll get sturdier stems and stronger flowering, but you must watch soil moisture in heat.
Feeding: keep it modest so you don’t grow floppy stems
Black-eyed Susans are not heavy feeders. Overfeeding—especially high nitrogen—often creates lush leaves and weak, floppy flowering stems that need staking.
Simple feeding plan (in-ground)
- Spring: top-dress with 1 inch compost, then water in.
- If growth is pale or slow: apply a balanced slow-release fertilizer (something like 10-10-10) at half the label rate once in late spring.
- Midseason: skip fertilizer unless you’re growing in containers or very sandy soil.
Container feeding (where sensors shine)
Pots leach nutrients quickly. If you’re watering frequently and your sensor shows rapid dry-down, nutrients are probably flushing out too.
- Use a slow-release fertilizer at planting time (follow label rates), or
- Feed with a liquid fertilizer every 14–21 days at a mild dilution during active growth.
If you use an EC-capable sensor in containers, it can help catch fertilizer buildup (salts) after repeated feeding—especially when the pot dries hard between waterings.
Common problems: what your sensor data can tell you faster
Good monitoring doesn’t prevent every problem, but it shortens the time between “something’s off” and “here’s why.” For disease and pest identification, use your eyes first—then use sensor patterns to confirm conditions that triggered the issue.
Problem 1: Powdery mildew (white dusting on leaves)
Likely trigger: humid conditions and poor airflow; leaves staying damp overnight.
Sensor clue: consistently high moisture plus shade (low light) often correlates with longer leaf-wetness periods.
What to do:
- Thin overcrowded stems; aim for better airflow.
- Water early in the day; avoid overhead watering late afternoon.
- Mulch to reduce soil splash.
- If recurring, choose resistant cultivars and avoid excess nitrogen.
Powdery mildew tends to worsen when plants are stressed but still in humid air—so it’s not simply “too dry” or “too wet.” Your moisture history helps you see if you’re keeping the bed overly damp.
Problem 2: Wilting despite wet soil (the overwatering trap)
Symptoms: limp leaves, dull color, sometimes yellowing lower leaves; soil reads “wet,” especially for days after watering.
Likely cause: low oxygen in the root zone (poor drainage, overwatering, compacted soil).
Fix:
- Pause irrigation until the sensor shows a meaningful dry-down.
- Check drainage with the 12-inch hole test.
- Improve soil structure with compost top-dressing and avoid foot traffic.
- If in a pot, confirm drainage holes are open and the mix isn’t broken down.
Problem 3: Crispy edges and stunted blooms (underwatering or heat stress)
Symptoms: leaf edge scorch, smaller flowers, buds dropping; plants recover at night but look rough by late afternoon.
Sensor clue: sharp moisture drop within 24 hours after watering, and soil temperature spiking above 85°F (29°C) in full sun.
Fix:
- Switch to deeper irrigation so moisture reaches 6–8 inches down.
- Increase mulch to 2–3 inches to buffer heat.
- Water in the morning so plants go into the hottest part of the day hydrated.
Problem 4: Floppy stems and fewer flowers (too much nitrogen, not enough sun)
Symptoms: lush leaves, long weak stems, blooms sparse.
Sensor clue: light readings show fewer than 6 hours of direct sun, while moisture stays high (plants are “comfortable” but not pushed to bloom).
Fix:
- Stop feeding nitrogen-heavy fertilizer.
- Increase sun exposure if possible (move container, thin overhead branches where appropriate).
- Stake temporarily, then adjust care for next season.
Troubleshooting by symptom (fast diagnostics)
If you’re standing in the garden thinking “what happened here?”, use this quick symptom-to-solution list. The goal is to pair what you see with what your sensor history shows.
Symptom: Leaves yellowing from the bottom up
- If sensor stays wet for days: reduce watering; check drainage/compaction.
- If sensor shows very dry swings: water deeper; consider mulch.
- If moisture is stable: consider natural aging of older leaves or mild nutrient shortage; compost top-dress is usually enough.
Symptom: Buds form, then shrivel or drop
- Likely: drought stress during bud set, or heat stress.
- Sensor check: look for a steep moisture decline 2–3 days before bud drop.
- Fix: deep water as buds begin forming; keep mulch intact; don’t fertilize heavily at this stage.
Symptom: Plant looks fine, but flowering is weak
- Likely: not enough sun (common), too much nitrogen, or too much shade-induced moisture.
- Sensor check: light hours; compare to the 6+ hour target.
- Fix: improve sun exposure; ease off fertilizer; deadhead to encourage more blooms.
Three real-world setups (and how I’d run the sensors)
Scenario 1: New bed, full sun, loamy soil, first summer
This is where sensors earn their keep because new beds often have uneven moisture—especially if soil was recently amended.
- Install one probe at 5 inches deep near the center of the bed.
- Water deeply after planting, then watch the dry-down curve for 10–14 days.
- Expect watering every 2–4 days initially in warm weather; stretch intervals as roots establish.
Once the plants stop wilting midday and bounce back quickly, start shifting to once- or twice-weekly deep watering depending on weather and rainfall.
Scenario 2: Established clump that suddenly wilts after rain
This one surprises people: wilting after rain often points to oxygen starvation, not drought.
- Check whether the sensor stays “wet” for 48–72 hours after rain.
- If yes, reduce supplemental watering and address drainage (compost top-dress, avoid compaction, consider slight regrading).
- If the bed is in a low spot, consider lifting and replanting on a gentle mound in early fall.
University extension resources commonly stress that poor drainage and saturated soils predispose plants to root issues (Penn State Extension, 2022).
Scenario 3: Container black-eyed Susan on a hot patio
Pots on concrete behave like little ovens. Your sensor will show fast moisture drops and high soil temperatures.
- Place the probe mid-root zone.
- When highs hit 90°F (32°C), expect watering every 1–2 days depending on pot size.
- Use morning watering; if moisture drops sharply by late afternoon, add temporary shade cloth during extreme heat or move the pot to morning sun/afternoon shade.
If you notice repeated “dry to soaked” cycles, switch to a slower, longer watering so the mix hydrates evenly. A drip emitter for 10–20 minutes can be better than a quick splash that runs down channels.
Keeping your sensor honest (maintenance and seasonal rhythm)
Smart sensors are tools, not babysitters. Give them a little care so you can trust the trends.
- Monthly: verify readings with a trowel check at the same depth.
- After heavy storms: confirm the probe didn’t shift or develop an air gap.
- Battery check: set a reminder every 90 days during the growing season.
- Winter: in freezing climates, remove probes from containers and shallow beds to prevent damage from freeze/thaw.
The best part of monitoring black-eyed Susans is that after one season you’ll know your garden’s “normal.” You’ll recognize the moisture line that leads to strong blooms, the temperature spikes that speed up dry-down, and the light pattern that separates a flower machine from a leafy green plant with a couple of blooms. Once you’ve seen those patterns a few times, you’ll water less often, with better results—and your Rudbeckia will look like it belongs in a showy border instead of in survival mode.
Sources: Utah State University Extension Fact Sheet (2021); Colorado State University Extension Fact Sheet (2023); Penn State Extension (2022).