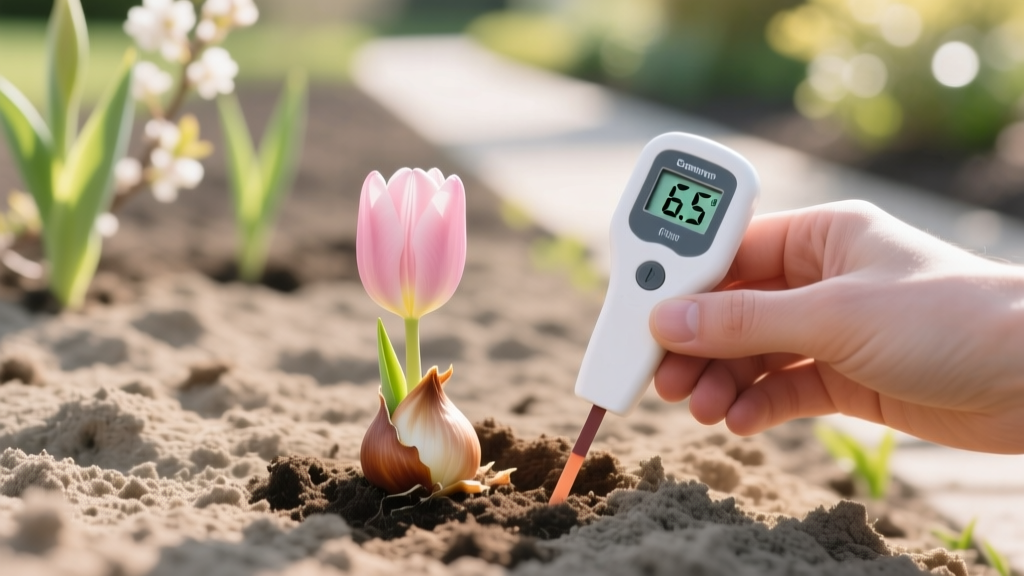
Testing Soil pH Before Planting Tulips
The year my neighbor “did everything right” with tulips—planted on time, bought big bulbs, mulched nicely—he still got short stems, pale leaves, and flowers that fizzled fast. When we finally tested his soil, the pH read 7.8. That one number explained almost everything: nutrients were there, but the tulips couldn’t access them well. A $15 pH test saved him from repeating the same disappointment the next fall.
Tulips aren’t the fussiest bulbs, but they are honest. If the soil chemistry is off, they show it. Testing pH before planting is the simplest “insurance policy” you can buy—because pH affects nutrient availability, root health, and even how well bulbs overwinter.
This article walks you through practical pH testing (not lab-coat stuff), how to interpret results, and exactly what to do if your soil is too acidic or too alkaline. I’ll also weave in watering, light, feeding, and troubleshooting—because pH doesn’t live in a vacuum. It shows up in the way your tulips grow.
Soil pH and tulips: the target range and what it really means
For most home gardens, tulips perform best in slightly acidic to neutral soil. A practical target is pH 6.0–7.0, with many gardeners landing in the sweet spot around 6.5. Outside that range, tulips can still grow, but you’ll fight more issues: weak growth, poor color, and increased disease pressure when roots aren’t thriving.
Soil pH influences:
- Nutrient availability (especially phosphorus, iron, manganese, and boron)
- Microbial activity that supports root function
- Breakdown of organic matter and how fast nutrients release
According to Penn State Extension (2023), pH strongly affects nutrient solubility and plant access to nutrients, which is why plants can show deficiency symptoms even when soil tests “high” for certain nutrients. Similarly, University of Minnesota Extension (2024) emphasizes that soil pH governs how available nutrients are to plants and is a key first step before making fertilizer decisions.
“Soil pH is one of the most important measurements you can make—because it controls the availability of nutrients plants need.” — University of Minnesota Extension soil management guidance (2024)
Three real-world scenarios where a quick pH test changes everything
Scenario 1: New construction, “mystery fill” soil. If your home is less than 10 years old, you may have subsoil brought to the surface, bits of concrete, and lime-heavy materials that push pH high. Tulips can survive, but they often look chlorotic (yellowed) and stunted. This is the classic “my bulbs came up but never looked right” situation.
Scenario 2: You’ve been liming the lawn for years. If tulip beds are near a lawn that gets lime applications, rain and irrigation can move that alkalinity into your bed. I’ve seen beds drift from pH 6.6 to 7.4 over a few seasons just from repeated liming nearby.
Scenario 3: Heavy rain region + lots of pine needle mulch. In high rainfall areas, soils can naturally acidify over time. Add acidifying mulches and you can slide into pH 5.2–5.5. Tulips may still bloom, but you’ll notice reduced vigor and smaller flowers as bulbs fail to size up year after year.
How to test soil pH (and when it’s worth paying for a lab)
Timing: when to test for the most useful result
Test soil pH 4–8 weeks before planting tulip bulbs. Planting time is typically when soil temperatures drop to about 55°F (13°C) or lower in fall. Testing ahead gives you time to adjust pH, especially if you need lime (which reacts gradually).
If you can only test once a year, test in late summer or early fall. Don’t test right after adding compost, fertilizer, lime, or sulfur—wait at least 3–4 weeks so you’re measuring the soil, not the fresh amendment.
Method comparison: home kits vs digital meters vs lab tests
| Method | Typical accuracy | Cost (USD) | Time to results | Best use | Common pitfalls |
|---|---|---|---|---|---|
| Color-change chemical kit | ±0.5 pH | $10–$20 | 5–15 minutes | Quick screening (good enough for most beds) | Hard-to-read colors; affected by muddy samples |
| Digital pH meter (soil probe) | ±0.2 to ±0.5 pH (varies widely) | $15–$60 | 1–2 minutes | Repeat checks in multiple spots | Needs calibration; unreliable in very dry soil |
| Lab soil test (Extension/soil lab) | ±0.1 pH | $20–$60 | 1–3 weeks | When you’re correcting pH or diagnosing chronic issues | Slower; sampling errors can mislead results |
If your tulips have struggled for more than 2 seasons, or you’re planning a big planting (say 50–200 bulbs), a lab test is worth it. You’ll get pH plus recommendations for lime or sulfur amounts based on your soil type—something home kits can’t do reliably.
Extension-backed soil tests are usually the most dependable for homeowners. For example, Penn State Extension (2023) and other Extension services routinely recommend lab testing when making pH corrections because texture and buffering capacity matter.
Step-by-step: sampling your bed the way pros do
Bad sampling is the #1 reason gardeners get nonsense pH readings. Here’s a field-tested process:
- Gather tools: clean trowel, bucket, zip bag, and your test kit (or lab mailer).
- Skip odd zones: avoid spots near downspouts, compost piles, pet areas, or where lime/fertilizer was dumped.
- Take 8–12 subsamples from the tulip bed, each from a depth of 6 inches (15 cm).
- Mix thoroughly in the bucket and remove stones, roots, and mulch chunks.
- Air-dry the sample for 12–24 hours if it’s wet (especially important for accurate color kits).
- Test or mail according to your kit/lab instructions.
Pro tip: Label the bag with the bed name and date. You’d be surprised how quickly “that one bed by the fence” becomes a mystery later.
Fixing pH problems before planting tulips
If your soil is too acidic (below pH 6.0)
Acidic soil isn’t automatically bad, but tulips in very acidic conditions often fail to build strong bulbs for next year. If your test reads pH 5.0–5.8, consider a gentle correction.
Best amendment: garden lime (calcitic or dolomitic). Dolomitic lime adds magnesium—useful if a lab test shows low Mg.
Practical rates (general guidance):
- For mild correction (raise pH about 0.3–0.5): apply roughly 5 lb per 100 sq ft.
- For larger correction needs, use a lab recommendation—because clay soils need more lime than sandy soils.
How to apply: Spread evenly and incorporate into the top 6 inches if possible. For established beds, surface-apply and let rain move it down; it’s slower but still works.
Timing: Lime works gradually. Apply at least 4–8 weeks before planting for best effect, though even fall applications help spring performance.
If your soil is too alkaline (above pH 7.0)
High pH is a common tulip problem in areas with calcareous soils or where mortar/concrete dust is present. At pH 7.4–8.2, iron and manganese become less available, and tulips often show pale foliage even when watered correctly.
Best amendments:
- Elemental sulfur (slow, effective, needs soil bacteria and warmth)
- Iron sulfate (faster acidifying effect but can be harsher; follow label)
- Organic matter (compost) to buffer extremes—won’t “fix” pH alone, but helps roots cope
Practical rates (general guidance): For elemental sulfur, a cautious homeowner approach is 1–2 lb per 100 sq ft for a small shift. Stronger corrections should be based on a lab test because over-acidifying a bed is an avoidable mess.
Reality check: If your soil is naturally chalky/limestone-based, lowering pH dramatically can be an uphill battle. In those cases, tulips can still be grown successfully by improving drainage, avoiding over-liming, and using balanced bulb fertilizer—while accepting that pH may hover above ideal.
Soil preparation for tulips beyond pH: drainage is the make-or-break factor
Tulip bulbs hate sitting in cold, wet soil. Even at perfect pH, poor drainage leads to basal rot and bulbs that simply vanish. Your goal is soil that drains well yet holds enough moisture to root in fall.
Quick drainage test: Dig a hole about 12 inches deep and fill with water. If water is still sitting after 4 hours, your drainage is poor for tulips.
Practical fixes:
- Work in 2–3 inches of compost into the top 8–10 inches of soil.
- Plant on a slight berm (even 3–4 inches higher helps).
- Avoid heavy mulches that stay soggy through winter.
If you garden in clay, don’t try to “solve” it by adding sand alone—it can create a concrete-like texture. Compost and leaf mold are safer, steadier improvements.
Light: where tulips actually perform best
Tulips want strong spring sun. Aim for at least 6 hours of direct light during the growing season. Under deciduous trees, tulips can do fine because they bloom before full leaf-out—just make sure the bed isn’t root-bound and bone-dry.
Case: under maples. Tulips often struggle under shallow-rooted maples because those roots drink the soil dry in spring. In that setting, pH might be perfect and the bulbs still underperform. Your fix is targeted watering in spring and adding compost to improve moisture holding.
Watering: the schedule that supports rooting without rotting
Tulips need moisture in fall to root, then relatively dry conditions during summer dormancy. The most common watering mistake is keeping the bed “garden moist” all summer, which invites bulb diseases.
Fall planting and rooting
- After planting, water deeply to settle soil: about 1 inch of water total (rain + irrigation).
- Then water only if the top 2 inches of soil are dry and you’re in a dry fall.
Spring growth and bloom
- Provide roughly 1 inch per week during active growth if rainfall is lacking.
- Water in the morning; avoid soaking foliage late in the day.
After bloom (important for next year’s bulb)
Keep lightly watering for about 2–3 weeks after flowering while leaves are still green. Once foliage yellows and dies back, stop regular irrigation unless you’re in extreme drought.
Feeding: fertilize based on soil reality, not habit
Here’s the blunt truth: fertilizer won’t compensate for bad drainage or wildly off pH. But once pH is in range, tulips respond well to modest feeding.
When:
- At planting (fall): light feeding if your soil is low in nutrients
- Early spring: as shoots emerge (a reliable time to support bloom and bulb sizing)
What and how much:
- Use a balanced bulb fertilizer or a general granular fertilizer. A common approach is 1–2 lb per 100 sq ft (follow your product label).
- Keep fertilizer a few inches away from direct bulb contact to avoid burn.
pH tie-in: In alkaline soils, adding more phosphorus often doesn’t help because high pH can lock it up. This is where a soil test saves money: it tells you what’s missing versus what’s just unavailable due to pH.
Common problems linked to pH (and how to tell what’s really going on)
Tulips give clear signals, but symptoms overlap. Use this troubleshooting approach: check pH, drainage, and watering patterns before you blame pests or bad bulbs.
Troubleshooting chart: symptoms and targeted fixes
- Symptom: Leaves pale yellow, green veins still visible (interveinal chlorosis), growth stunted.
Likely causes: High pH (often >7.2), iron/manganese unavailability; waterlogged roots can mimic this.
Fix: Confirm with pH test; add compost; consider elemental sulfur at 1–2 lb per 100 sq ft (cautious correction); improve drainage; avoid lime drift from nearby lawn. - Symptom: Leaves reddish or purplish tint, slow growth, small flowers.
Likely causes: Low phosphorus availability (can happen in very acidic soil below 5.5), or cold soil slowing uptake.
Fix: Test pH; if below 6.0, apply lime (about 5 lb per 100 sq ft for a mild raise); mulch lightly to moderate temperature swings; avoid overwatering cold soil. - Symptom: Bulbs disappear, mushy bulbs, plants collapse at ground level.
Likely causes: Bulb rot from poor drainage; sometimes aggravated by heavy fertilizing or constant summer irrigation.
Fix: Improve drainage (berm or raised bed); reduce summer watering; remove and discard rotted bulbs; replant in a faster-draining spot. - Symptom: Great bloom first year, weak or no bloom in year two.
Likely causes: Many modern tulips are short-lived perennials in warm climates; also nutrient stress from pH imbalance, too much shade, or early leaf removal.
Fix: Keep leaves until fully yellow (often 6–8 weeks after bloom); ensure at least 6 hours sun; test and correct pH; feed lightly in early spring.
Planting practices that work with your pH test (not against it)
Once pH is where you want it—or at least understood—you can plant with confidence. Tulips reward proper depth and spacing, and those details matter even more in soils that tend toward wetness or alkalinity.
Planting depth: A good rule is 6–8 inches deep for most tulips (measured from the bulb base), or about 3 times the bulb height. In sandy soils, go toward the deeper end; in heavy clay, don’t plant excessively deep if drainage is marginal.
Spacing: Place bulbs about 4–6 inches apart. Tighter spacing looks lush but increases humidity around foliage and can worsen disease in poorly ventilated beds.
Planting temperature cue: Aim to plant when soil has cooled to about 55°F (13°C)—cool enough to reduce disease pressure, warm enough for rooting.
pH and mulch: the quiet influence most gardeners miss
Mulch won’t radically change pH overnight, but it does influence moisture and decomposition, which affects root health and nutrient cycling.
- In alkaline soils: Compost and shredded leaves help buffer and improve nutrient access over time. Avoid repeated liming anywhere nearby.
- In acidic soils: Don’t panic about pine needles. Their effect is usually mild in established soils, but if your pH is already <5.8, prioritize lime correction and use compost as your main mulch.
Keep mulch depth around 1–2 inches over tulip beds. A thick, soggy blanket in winter can keep bulbs too wet.
Extra troubleshooting: three “head-scratcher” cases I see often
Case 1: pH is perfect, but tulips are still small. Check bulb size and cultivar expectations. Many bargain bulbs are smaller grades. Also check sun: fewer than 4–5 hours of spring sun often equals short stems and quick fade, no matter how good the soil is.
Case 2: pH reads different in two parts of the same bed. That’s common near foundations, walkways, or old mortar. Concrete and limestone can push localized areas above 7.5. In that case, plant tulips in the more neutral zone and use the higher-pH strip for plants that tolerate alkalinity better, or build a slightly raised bed with imported topsoil and compost.
Case 3: you lowered pH, then plants looked worse. Overcorrection happens, especially with sulfur. If pH drops below 5.5, nutrient imbalance and root stress can follow. The fix is to stop acidifying, add compost, and—if needed—apply small amounts of lime based on a retest. Always retest 6–8 weeks after major amendments.
A practical pH action plan you can follow this season
If you want the simplest, most reliable routine, do this:
- Late summer/early fall: Take a composite soil sample (8–12 subsamples, 6-inch depth).
- Test pH: Use a quality home kit for quick direction, or send to a lab if you’ve had recurring problems.
- If pH is 6.0–7.0: Focus on drainage, planting depth (6–8 inches), and spring sun (6+ hours).
- If pH is <6.0: Apply lime (start modestly around 5 lb per 100 sq ft for mild correction), mix into top 6 inches if possible, then retest later.
- If pH is >7.0: Add compost and consider cautious sulfur correction (1–2 lb per 100 sq ft), especially in non-calcareous soils; retest before repeating.
- Plant at the right time: when soil cools near 55°F (13°C), water in once (~1 inch), then let the bed run on the dry side.
The best tulip beds I’ve worked in aren’t the ones with the most products thrown at them. They’re the ones where the gardener knows their soil pH, keeps drainage sharp, waters with restraint, and feeds lightly at the right moments. Start with that one simple number—pH—and you’ll plant tulips with a lot more confidence and a lot fewer surprises.
Sources: Penn State Extension soil fertility/pH management resources (2023); University of Minnesota Extension soil pH and nutrient availability guidance (2024).