Spring Garden Prep: Soil Testing and Amendment
The window for spring soil work is short: once soils hit workable moisture and daytime highs begin holding in the 50–65°F range, weeds wake up, cool-season crops want to go in, and perennials start pushing new growth. If you wait until beds are already planted, you’ll be trying to “fix” soil around roots instead of building it from the ground up. This is the moment to test, amend, and reset your garden’s foundation so everything you plant in the next 6–10 weeks has what it needs.
Use this guide like a seasonal checklist: prioritize soil testing first, then amendments, then planting and pruning that depend on soil conditions, and finally protection and prevention as spring pests and diseases begin cycling.
Priority 1: Prepare (Soil Testing First, Then Targeted Amendments)
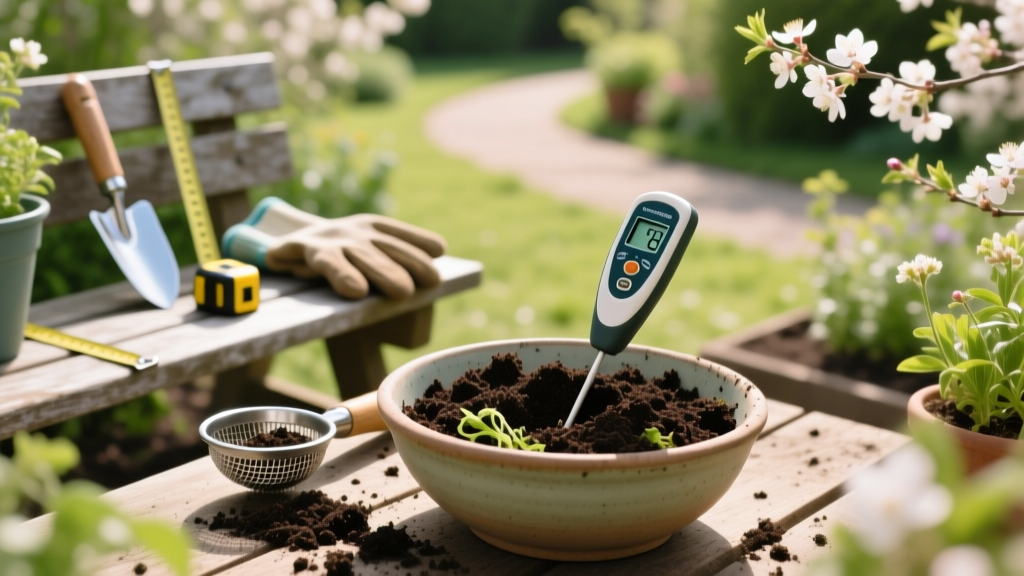
Week 1 (or as soon as soil is workable): Take a real soil test, not a guess
Soil testing is most useful when it changes what you do. That means: collect good samples, use a reputable lab, and request recommendations for your crops (vegetables vs. lawn vs. fruit). Many state extension labs return results in 7–14 days in spring—plan accordingly.
- Timing trigger: Soil is “workable” when you can squeeze a handful into a ball and it crumbles when poked. If it smears or stays ribboned, wait 3–7 days and retest moisture.
- Temperature trigger: When soil temps at 2–4 inches are consistently 45–50°F, microbial activity and nutrient release begin increasing; amendments start to “wake up.”
- Frost-date trigger: Aim to collect samples 6–8 weeks before your average last spring frost date so lime/sulfur and organic matter have time to start shifting pH and nutrient dynamics.
How to sample (fast, accurate): Use a clean trowel or soil probe. Take 10–15 subsamples from each distinct area (front bed vs. veggie plot vs. under a pine tree), mix in a clean bucket, and submit about 2 cups. Sample depth: 0–6 inches for gardens; if you’re also managing perennial fruits, consider a second sample at 6–12 inches in a separate bag.
What to request: At minimum: pH, buffer pH (for lime requirement), phosphorus (P), potassium (K), calcium, magnesium, organic matter, and soluble salts if you’ve been using manure/compost heavily. If you suspect problems, add micronutrients (boron, zinc) or a heavy metals screen (urban gardens).
Citations that matter: Soil testing and fertilizer recommendations are designed to prevent over-application of nutrients—especially phosphorus, which can build up and contribute to runoff. Penn State Extension emphasizes that soil testing is the basis for sound nutrient management and avoids unnecessary fertilization (Penn State Extension, 2023). University of Minnesota Extension notes that excess phosphorus is common in gardens receiving repeated compost/manure applications and recommends testing before adding more P (University of Minnesota Extension, 2020).
“Soil testing is the only way to know whether phosphorus and potassium are needed; routine applications can lead to excessive soil test levels.” — University of Minnesota Extension (2020)
Week 2: Read your results like a grower
When your lab report arrives, focus on three decision points: pH, phosphorus level, and organic matter. These drive the biggest performance changes in spring gardens.
- Target pH for most vegetables: 6.2–6.8. Potatoes prefer slightly more acidic (5.0–6.0) to reduce scab pressure.
- Phosphorus: If your P is already high, skip “bloom booster” fertilizers. Overdoing P doesn’t improve yields and can interfere with micronutrient uptake.
- Organic matter: If you’re under 3%, prioritize compost and mulching strategies; if you’re already 5%+, use compost strategically and avoid piling it on every year without need.
Practical rule: If your report flags high P and K, your main spring work is often pH correction and nitrogen management (slow-release N sources and cover crops), not more “complete” fertilizer.
Week 2–3: Amend with intent (and avoid the spring mistakes)
Spring amendments should be chosen for speed and safety. Some materials act slowly (lime), others are fast but risky if misused (soluble fertilizers). Keep it simple:
- Compost: Apply 1/2–1 inch over beds and gently incorporate the top 2–4 inches, or leave on top as a biological mulch if you’re no-till. Avoid raw manure in spring for food safety.
- Lime (to raise pH): Pelletized lime is easiest to spread. Expect pH change to take weeks to months; the buffer pH in your report tells you how much is needed. Incorporate if possible for faster response.
- Sulfur (to lower pH): Use only with lab guidance; it’s easy to overcorrect. In cold soils (<55°F), sulfur oxidation is slow.
- Gypsum: Useful mainly when a lab indicates calcium need without pH change, or for sodic soils (rare in home gardens). Don’t use as a “cure-all.”
- Nitrogen: In early spring, favor slow-release sources (feather meal, alfalfa meal) or modest doses of balanced fertilizer where recommended. Cold, wet soils increase leaching risk for nitrate forms.
Don’t till wet soil. If you work it when it’s sticky, you’ll create clods and compaction that can last all season. For heavy clay, spring is about surface structure: compost topdressing, broadforking (not turning), and mulch.
Quick “Right Now” Soil Prep Checklist
- Collect and submit soil samples (10–15 subsamples per area)
- Mark beds that will grow potatoes separately (pH strategy differs)
- Stock compost and mulch before spring demand spikes
- Calibrate your spreader or measure by area (sq ft) to avoid over-application
- Plan 7–14 days for lab results; don’t guess-add phosphorus
Priority 2: What to Plant (Based on Soil Temps and Frost Dates)
Planting decisions in early spring should follow soil temperature and your average last frost date (ALFD), not just the calendar. Use a soil thermometer; it’s one of the cheapest tools that prevents costly mistakes.
Plant now (as soon as soil is workable and 45–50°F)
- Peas: Sow when soil is 45°F+. In many Zone 5–6 gardens, this is often 4–6 weeks before ALFD.
- Spinach, arugula, lettuce: Direct sow at 40–45°F soil; cover lightly and keep evenly moist.
- Radishes and turnips: Fast in cool weather; stagger sowings every 10–14 days.
- Onion sets and potatoes: Plant when soil is consistently above 45°F and not waterlogged.
Plant soon (2–3 weeks before ALFD; soil 50–55°F)
- Carrots and beets: Better germination once soil holds around 50°F.
- Brassicas (broccoli, cabbage, kale transplants): Harden off and set out when nights are mostly above 28–32°F and plants are acclimated.
Hold off (until after ALFD; soil 60–70°F)
- Beans: Wait until soil is 60°F+ to reduce rot.
- Tomatoes and peppers: Transplant when nights are reliably above 50°F (especially peppers) and soil is warming.
- Squash and cucumbers: Prefer soil 65°F+.
Soil amendment tie-in: If your soil test calls for lime and your warm-season crops are still weeks away, incorporate lime now so it has time to react before tomatoes and peppers go in.
Priority 3: What to Prune (So You Don’t Remove This Year’s Flowers)
Spring pruning is less about “cleaning up” and more about timing cuts to plant biology and disease pressure. Do the cuts that prevent problems and delay the cuts that sacrifice blooms.
Prune now (late winter to early spring, before bud break)
- Apple and pear trees: Dormant pruning improves airflow and reduces disease. Aim for a dry day when temps are above 25–30°F.
- Grapes: Prune before sap flow becomes heavy; late pruning can cause “bleeding” but typically doesn’t harm the vine.
- Summer-blooming shrubs: (e.g., panicle hydrangea) prune before new growth accelerates.
Wait to prune (after bloom)
- Spring bloomers: Forsythia, lilac, azalea—these set flower buds on old wood. Prune within 2–3 weeks after flowering.
Perennial cleanup: cut smart, not scalped
Cut back last year’s perennial stalks when you can see new growth at the base and when a 7-day forecast shows fewer hard freezes. Leaving a little stubble (2–4 inches) protects crowns from sudden cold snaps and reduces accidental damage.
Priority 4: What to Protect (Frost, Pests, and Disease Prevention)
Spring protection is about anticipating swings: warm days that trigger growth followed by radiational frost nights, and wet periods that favor fungal disease. Put protections in place before you see damage.
Frost protection: use thresholds, not anxiety
- Row cover (floating): Protects cool-season crops and transplants during dips to 28–32°F.
- Plastic tunnels: Warm soil faster but vent on sunny days above 75°F to prevent overheating and condensation disease.
- Mulch timing: For strawberries and perennials, pull winter mulch back gradually as nights stay above 28–30°F, but keep it nearby for surprise cold snaps.
Spring pest prevention you can do this week
Cutworms: If seedlings get clipped at soil line, install collars (cardboard or plastic) around transplants, 1 inch into soil and 2 inches above. Remove weeds early—cutworms hide in debris.
Slugs: Cool, wet springs (common in coastal and Pacific Northwest gardens) favor slugs. Reduce hiding spots by pulling boards and thick debris; water in the morning; use iron phosphate bait if pressure is high.
Aphids on early greens: Strong water sprays work best when populations are small. Avoid high-nitrogen quick feeds that create tender growth aphids prefer.
Disease prevention tied directly to soil work
- Damping-off: Most common in cold, wet soils and crowded seedlings. Improve drainage, avoid overwatering, and don’t sow warm-season crops into cold beds.
- Apple scab and fungal leaf spots: Sanitation matters: remove last year’s infected leaves and fruit. Pruning for airflow reduces leaf wetness duration.
- Clubroot in brassicas: More severe in acidic soils. If your lab shows pH below 6.2 in beds used for cabbage family crops, prioritize liming per recommendations.
Regional Scenarios: Adjust the Plan to Your Spring Reality
Spring soil testing and amendment is universal, but the order of operations changes by climate, soil type, and how quickly your garden warms.
Scenario 1: Cold spring in USDA Zones 3–5 (Upper Midwest, Northern New England)
Your limiting factor is often soil temperature and late frosts. Start with soil testing as soon as the top layer thaws and dries enough to sample. If your ALFD is around May 10–25, aim to sample in late March to early April (as conditions allow) and amend in April. Use row cover to buy you 1–2 weeks on brassicas and greens, but don’t force beans into 50°F soil—rot is common.
- Target: Get lime/compost in 4–6 weeks before ALFD
- Plant peas/spinach when soil hits 45°F
- Delay warm-season planting until nights are above 50°F
Scenario 2: Heavy clay in USDA Zones 5–7 (many inland and Mid-Atlantic gardens)
Clay tempts gardeners into early tilling—then punishes them with compaction. Your spring win is structure, not deep turning. Topdress compost (1/2–1 inch), broadfork to relieve compaction without inversion, and use mulch pathways to keep feet off beds. If drainage is chronically poor, consider raised beds or widening beds so you never step where you grow.
- Don’t work soil until it passes the crumble test (wait 3–10 days after rains if needed)
- Prioritize compost + surface aggregates (avoid pulverizing)
- Watch for nitrogen tie-up if you incorporate high-carbon material
Scenario 3: Mild winter/early spring in USDA Zones 8–10 (South, coastal areas)
Your risk is not “too cold,” it’s too late—heat arrives fast and cool-season crops bolt. Soil tests are still valuable, especially where repeated fertilization has driven high salts or excess phosphorus. If your ALFD is as early as Feb 15–Mar 15, your soil prep window may be January through early February. Shift compost applications lighter if your organic matter is already high and focus on mulching to preserve moisture before warm winds arrive.
- Start soil testing 8–10 weeks before your main spring planting push
- Plant cool-season crops early; succession sow every 2 weeks
- Prepare shade cloth and drip irrigation before consistent 85–90°F days
Seasonal Timeline: What to Do and When (Soil Testing → Amendments → Planting)
Use this schedule as a working template. Adjust by your USDA zone and your average last frost date.
| Time Window | Soil & Bed Tasks (Priority) | Planting Tasks | Protection & Prevention |
|---|---|---|---|
| 6–8 weeks before ALFD | Sample soil; submit to lab; inventory compost/mulch; map beds by crop family | Start onions/greens indoors if needed; direct sow only if soil workable | Remove diseased leaf litter from fruit trees; check row cover supplies |
| 4–6 weeks before ALFD | Apply compost (1/2–1 inch); incorporate lime/sulfur per report; broadfork if compacted | Sow peas, spinach, lettuce if soil is 45–50°F | Slug monitoring in wet regions; set cutworm collars at transplant time |
| 2–4 weeks before ALFD | Side-dress slow-release N only where needed; prep seedbeds; mulch paths | Carrots/beets (soil ~50°F); transplant brassicas after hardening off | Row cover for frost dips to 28–32°F; vent tunnels on warm days |
| ALFD to +2 weeks | Finalize irrigation layout; avoid heavy amendments around new transplants | Transplant tomatoes when nights are 50°F+; sow beans at 60°F soil | Begin disease scouting; maintain sanitation; avoid overhead watering late day |
Amendment Comparison: What to Use (and When It Pays Off)
| Material | Best Spring Use | How Fast It Acts | Common Mistake |
|---|---|---|---|
| Compost (finished) | Boost biology, improve structure, gentle nutrients | Weeks (structure immediate; nutrients gradual) | Applying 2–3 inches yearly without testing → excess P/salts |
| Pelletized lime | Raise pH for veggies/brassicas; add calcium | Weeks to months | Applying without buffer pH guidance; over-liming |
| Elemental sulfur | Lower pH for blueberries/acid lovers | Months (slower in cool soils) | Over-application; expecting fast change in cold spring soil |
| Balanced granular fertilizer | Only where soil test shows need; pre-plant for hungry beds | 1–6 weeks depending on product | Using “complete” fertilizer when P is already high |
| Mulch (leaf mold, straw) | Moisture control, weed suppression, soil protection | Immediate (surface effect) | Mulching cold soil too early and slowing warm-up for warm-season crops |
Targeted To-Do Lists (Print and Work Through)
This weekend (2–4 hours)
- Do the crumble test in each bed; only work what’s ready
- Collect soil samples and submit them (label areas clearly)
- Remove last year’s diseased debris from fruit tree areas and rose beds
- Topdress compost on beds that won’t be planted for 2+ weeks
Next week (after results arrive or while waiting)
- Stage amendments: lime/sulfur/fertilizer based on recommendations
- Prep row cover hoops and clamps for rapid frost protection
- Direct sow peas/spinach if soil is 45–50°F and workable
- Harden off brassica transplants over 7–10 days
By 2 weeks before your last frost date
- Finish pH-related amendments (the sooner the better)
- Set up irrigation before plants fill in beds
- Mulch paths to prevent compaction and mud splash (disease reduction)
Soil work in spring is most effective when it’s calm and measured: test, amend only what’s needed, and time planting to soil temperature—not impatience. Do that, and you’ll spend the rest of spring watching seedlings grow instead of diagnosing yellow leaves and stunted starts.
Sources: Penn State Extension (2023), soil testing and nutrient management guidance for home gardens; University of Minnesota Extension (2020), guidance on soil testing and phosphorus management in gardens.