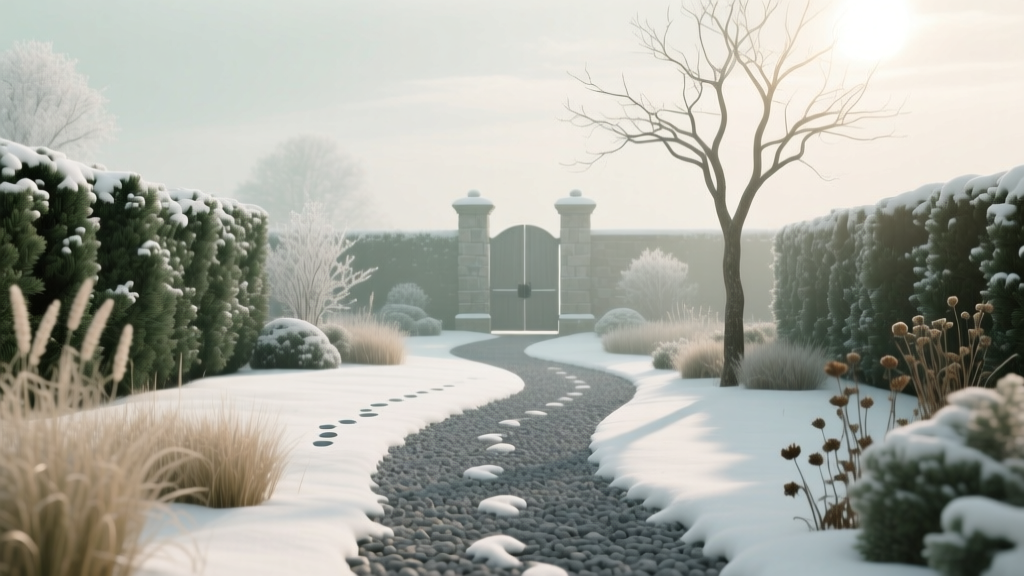
Winter Garden: Planning Garden Path Improvements
Winter is the one season that gives you permission to slow down in the beds—and speed up on infrastructure. If you wait until spring to fix paths, you’ll be hauling stone and fighting mud right when plants need attention. Right now, while growth is paused and your garden is stripped down to its bones, you can see every traffic pattern: where you cut corners, where puddles linger, where wheelbarrows sink, and where soil compaction is stealing next season’s yields.
This guide focuses on what to do now, in winter, to improve garden paths while still handling core seasonal jobs. You’ll work by priority: plant what’s still possible, prune what can be safely pruned, protect what winter can damage, and prepare your path upgrades so you can build as soon as weather opens a window.
Priority 1: What to Prepare (Design and Plan Path Improvements Now)
Most winter path work is planning, measuring, staging materials, and doing any digging only when soil is workable (not frozen, not saturated). Your goal: a path system that stays firm in rain, drains away from beds, and fits how you actually move through the garden.
Week-by-week winter timeline (use your local last frost date)
Use your average last spring frost date as a reference point. If you don’t know it, look it up by ZIP code and treat it as a planning anchor. Here’s a practical countdown.
- 10–8 weeks before last frost: Map current paths; mark puddles after rain; measure widths; plan materials and drainage.
- 8–6 weeks before last frost: Order materials (gravel, edging, stepping stones); schedule deliveries; sharpen digging tools; line up labor help.
- 6–4 weeks before last frost: Build during “thaws” if daytime highs stay above 40°F (4°C) for several days and soil is not sticky-wet.
- 4–2 weeks before last frost: Finalize top dressing (fines, stone dust, or woodchips); reset edging; check slope and drainage before spring rains.
Concrete numbers to keep you on track:
- Build only when daytime temperatures are consistently above 40°F and nights above 25°F (-4°C) for a few days (reduces freeze-thaw heaving during installation).
- Aim for 2% slope (a 1/4 inch drop per foot) away from beds on hard paths to shed water.
- Minimum functional path width: 24–30 inches for foot traffic; 36–48 inches if you use a wheelbarrow or garden cart.
- Base depth guideline for gravel paths: 3–4 inches of compacted base in mild climates; 4–6 inches where freeze-thaw is common.
- Keep stepping stones 18–24 inches apart (center-to-center) for a comfortable stride.
Start with a “mud map” after precipitation
Don’t guess where drainage fails—observe it. After a rain or melting snow event, walk the garden and place flags where water stands for more than 24 hours. Those are the spots that need regrading, a crown in the path, a French drain, or a switch from woodchips to gravel.
Choose materials based on winter behavior (not summer looks)
Winter reveals whether a material is stable or slick. Make your choice based on drainage, traction, and maintenance in your climate.
| Path Material | Best Use | Winter Strength | Winter Weakness | Maintenance Notes |
|---|---|---|---|---|
| Woodchips | Informal paths, low budgets, around perennials | Good traction; easy to refresh | Can float/shift in heavy rain; can harbor slugs in mild-wet winters | Top up 2–4 inches yearly; use arborist chips for longer life |
| Crushed gravel (angular) | High-traffic, all-weather paths | Excellent drainage; firm underfoot when compacted | Needs proper base; can migrate into beds without edging | Install landscape fabric only if necessary; better is a compacted base + edging |
| Stepping stones over mulch | Kitchen garden access; between beds | Keeps feet out of mud; flexible layout | Can heave in freeze-thaw; slick algae in shade | Reset stones in late winter; scrub algae with stiff brush |
| Decomposed granite / stone dust | Formal paths, accessible walking surface | Compacts well; clean look | Freeze-thaw can crack/sink if base is thin | Requires careful compaction and edging to hold shape |
Edging is not decoration—it’s containment
Winter rains push mulch and gravel. If you’re seeing material creep into beds, install edging before spring. Practical options: steel edging, pressure-treated or rot-resistant lumber (where appropriate), brick, or stone. Aim for edging that sits 1–2 inches above grade to catch runoff material.
Drainage fixes you can plan now
- Regrade: Raise the center of paths slightly (a “crown”) so water moves off.
- French drain in chronic wet spots: Plan a trench that moves water away from beds and structures; schedule digging for thaw windows.
- Downspout routing: If roof runoff crosses your garden, reroute downspouts now—this is one of the biggest hidden causes of path failure.
“Good drainage is critical to plant health; soils should not remain saturated for extended periods.” —University of Minnesota Extension (2020)
That statement applies to paths, too. A path that stays saturated is a compaction machine—every step squeezes out air and collapses soil structure at bed edges.
Winter checklist: planning and staging
- Sketch the garden and highlight main routes (house to compost, shed to beds, gate to water source).
- Measure and write down exact lengths and widths (don’t eyeball materials).
- Mark “pinch points” narrower than 30 inches that block wheelbarrows.
- Decide where you need turning space (at least 48 inches square is comfortable for carts).
- Order materials early (spring shortages are common).
- Stage materials on a tarp or pallet to keep them out of mud.
Priority 2: What to Protect (Plants, Soil, and Paths Through Winter Weather)
While you plan upgrades, protect the areas that will be damaged by winter foot traffic and freeze-thaw cycles. This is the season when “just one shortcut” can compress soil for months.
Keep feet off wet soil to prevent compaction
If you walk on soil when it’s saturated, you can create dense layers that roots struggle to penetrate. Penn State Extension notes that compaction reduces pore space needed for water and air movement (Penn State Extension, 2019). Treat winter beds as “no step zones” and route all traffic onto existing paths—even if they’re imperfect.
Quick traction fixes until you rebuild
- Throw-down chips: Add a temporary 2–3 inch layer of coarse woodchips on muddy stretches.
- Straw with caution: Works for traction, but can bring weed seed; reserve for short-term emergencies.
- Cardboard + chips: For a temporary winter path, lay overlapping cardboard (no glossy print) and top with chips; it suppresses weeds and keeps boots cleaner.
Protect perennials and edges from salt and ice melt
If your garden paths connect to a driveway or sidewalk, avoid sodium-based deicers near planting areas. Use sand for traction or choose a plant-safer deicer and apply sparingly. Salt runoff can damage roots and burn foliage on evergreens.
Pest and disease prevention tied to winter path work
Path improvements disturb soil and move debris—this is a chance to reduce overwintering habitat for pests and disease.
- Remove mummified fruit and diseased leaves from under fruit trees before you lay new path material. Many diseases overwinter in plant debris.
- Clean up fallen leaves in tight corners where paths meet fences—these can shelter slugs and sowbugs in mild-wet climates (Zones 8–10).
- Sanitize tools used for pruning and bed edging. A simple wipe-down and disinfectant helps reduce disease spread.
Priority 3: What to Prune (So Path Work Doesn’t Damage Plants Later)
Pruning in winter is about safety, access, and timing. The goal is to open up working room for path installation and reduce storm breakage—without triggering growth at the wrong time.
Prune for access first: branches that block paths
If shrubs and low branches force you to step off-path into beds, you’ll keep compacting soil all winter. Remove the minimum needed to restore clear passage:
- Lift low branches that drag across paths.
- Thin crossing branches that snag coats and tools.
- Remove dead, damaged, or rubbing wood any time you see it (weather permitting).
Temperature thresholds for pruning
In very cold weather, wood can be brittle. Avoid pruning when temperatures are below 20°F (-6°C) to reduce unnecessary breakage and ragged cuts. Choose a milder day above 32°F (0°C) when possible.
Regional pruning cautions (don’t prune the wrong thing at the wrong time)
In Zones 3–6, many spring-flowering shrubs (lilac, forsythia) set buds the previous season. Heavy winter pruning can remove blooms. In Zones 7–10, winter can be a prime time for shaping many landscape shrubs, but watch for early warm spells that trigger new growth vulnerable to late frosts.
Pruning checklist for winter path projects
- Clear 12–18 inches of “air space” beside intended path edges so edging and wheelbarrows fit.
- Remove deadwood over paths to reduce storm hazards.
- Tag plants you’re unsure about (spring-bloomers) and postpone hard pruning until after flowering.
Priority 4: What to Plant (Only What Makes Sense in Winter)
Winter isn’t a primary planting season in most regions, but there are smart exceptions—especially when your main focus is infrastructure. The key is to plant only when conditions support root establishment without turning your garden into a mud pit.
Cool-climate scenario (USDA Zones 3–6): plant only in mild windows
If the ground is frozen or snow-covered, hold off. But during thaws, you can sometimes plant:
- Bare-root trees and shrubs in late winter when soil is workable and daytime highs are consistently above 40°F. Keep roots moist and plant promptly.
- Onion family starts (in some Zone 6 areas) about 4–6 weeks before last frost, if soil can be worked and isn’t waterlogged.
Mild-winter scenario (USDA Zones 7–9): keep growing while you build
In many Zone 7–9 gardens, winter is prime production time. You can plant:
- Garlic (if not planted in fall, plant as soon as soil is workable; expect smaller bulbs).
- Leafy greens (spinach, arugula, lettuce) in protected beds; use low tunnels when nights drop below 28°F (-2°C).
- Cover crops on idle beds to protect soil while you upgrade paths nearby.
Wet coastal scenario (Pacific Northwest / maritime climates): plant for soil protection
Where winters are wet and relatively mild, planting often means soil stewardship:
- Cover crops (cereal rye, crimson clover mixes) to reduce erosion and keep soil from splashing onto paths.
- Living mulch borders (hardy thyme in sunny edges) only where drainage is excellent—avoid creating slick edges in shade.
Planting checklist that supports path upgrades
- Plant only when you can stay on existing paths and avoid stepping into wet beds.
- Keep new plantings back from path edges by 6–12 inches so you can install edging and top-dress material later.
- Mulch newly planted shrubs with 2–3 inches of mulch, keeping it off the trunk flare.
Regional Game Plans (3+ Real-World Scenarios)
Scenario 1: Freeze-thaw winters (Upper Midwest, Northeast; Zones 3–6)
Freeze-thaw cycles can heave stones and shift gravel. Your winter plan should emphasize a strong base and drainage.
- Best path choice: Compacted crushed gravel with a proper base (4–6 inches), or raised boardwalk-style sections in the wettest zones.
- Timing: Install during a stable thaw when soil is not frozen and not saturated; aim for late winter into very early spring (6–4 weeks before last frost) if conditions cooperate.
- Protection move: Keep stepping stones slightly proud of surrounding grade to reduce puddling and ice sheets.
Scenario 2: Mild, wet winters (Pacific Northwest, parts of Southeast; Zones 7–9)
Your enemy is persistent moisture and mud, not deep freezing.
- Best path choice: Coarse woodchips topped up regularly, or gravel paths with edging to prevent migration into beds.
- Timing: You can build more often in winter, but avoid digging when soil is saturated—if you can squeeze water out of a handful, wait.
- Pest note: Slugs and snails remain active in many Zone 8–9 winters. Keep chip piles away from tender winter greens, and remove hiding boards periodically.
Scenario 3: Dry winter with cold nights (Intermountain West; Zones 4–7)
Snow may be intermittent, and soils can be workable between cold snaps.
- Best path choice: Gravel with a well-compacted base, plus wind-stable edging (steel or stone).
- Timing: Build on sunny stretches when daytime highs exceed 45°F (7°C) and nights stay above 25°F for a few days.
- Protection move: Use temporary mats or boards to avoid rutting if you must move materials across soft ground during a thaw.
Monthly Work Schedule: Winter Path Improvements + Core Garden Tasks
| Month | Path Improvement Focus | Garden Tasks That Pair Well | Watch Outs |
|---|---|---|---|
| December | Observe drainage; flag puddles; sketch path plan; measure widths | Clean up diseased debris; mulch tender perennials after ground cools | Avoid walking on saturated beds; don’t trap moisture against crowns |
| January | Choose materials; source edging; schedule delivery; prep tools | Prune dead/damaged wood on mild days; sanitize tools | Don’t prune brittle wood below 20°F; watch for ice hazards |
| February | Install during thaw windows; set base layers; test slope (2%) | Late winter pruning for access; start seeds indoors based on frost date | Freeze-thaw heaving—compact in layers; avoid saturated soil |
| March | Top-dress paths; reset edging; sweep gravel back into place | Early planting in mild zones; remove winter coverings gradually | Spring rains expose weak drainage fast—fix low spots immediately |
Build Notes: How to Prep for a Gravel or Chip Path Without Regrets
These are the practical details that determine whether your path looks good for a season—or stays functional for years.
Base prep: do less digging, but do it correctly
For most home gardens, you don’t need road-grade excavation. You do need consistent grade and compaction.
- Remove vegetation and scrape off the top layer of organic matter where the path will go.
- Compact in layers (even a hand tamper helps). Add base material in 2-inch lifts and compact each layer.
- Keep the path slightly higher than surrounding beds so water sheds away rather than pooling.
Landscape fabric: use with intention
Fabric can help separate soil from gravel in very soft sites, but it can also clog over time and complicate maintenance. If you use it, overlap seams by 6–8 inches and pin securely. In many gardens, a well-compacted base and routine topping is simpler than fabric.
Edge control prevents spring mess
Without edging, your spring weeding time increases because gravel migrates into beds and mulch migrates onto paths. Install edging before top dressing so you can compact material cleanly against it.
Winter Safety and Plant Health While Working on Paths
Winter work is slower and heavier—wet boots, cold hands, and unstable ground. Build efficiently, but don’t damage soil structure or plants for the sake of progress.
- Never work frozen soil. Digging frozen ground fractures structure and creates voids that collapse into spring ruts.
- Avoid saturated soil. If your boot leaves a shiny smear, you’re compacting—pause and switch to planning or indoor tasks.
- Protect tree roots. Keep heavy compaction away from the dripline of trees; route paths outward rather than tightening around trunks.
- Stage materials close to the work site so you’re not repeatedly crossing beds.
Extension-Based Winter Reminders That Support Path Success
Two research-backed themes matter most for winter path planning: drainage and compaction. University of Minnesota Extension emphasizes that poor drainage and saturated soils are damaging to plant health (University of Minnesota Extension, 2020). Penn State Extension describes how compaction reduces pore space and limits water and air movement (Penn State Extension, 2019). A path system that keeps feet off beds during wet months is one of the simplest, most powerful ways to protect soil tilth year-round.
Ready-to-Use Winter Path Improvement Checklist
This week (next 7 days)
- Walk the garden after rain/snowmelt; flag puddles lasting 24 hours.
- Measure path widths and lengths; note any stretches under 30 inches.
- Identify at least one “main artery” path to prioritize first.
Within 2–3 weeks
- Choose materials based on your climate (freeze-thaw vs. mild-wet vs. dry-cold).
- Order edging and base materials; plan delivery on a dry day.
- Do access pruning to keep traffic on paths.
During the next thaw window (daytime > 40°F, soil not saturated)
- Regrade low spots and establish a 2% slope away from beds.
- Install edging; compact base in 2-inch layers.
- Top dress and test by walking—fix any rocking stones or soft pockets immediately.
If you treat winter like your garden’s “infrastructure season,” spring gets easier fast. The reward is immediate: cleaner harvest boots, fewer compacted beds, less splash-borne disease, and a garden you can move through efficiently—no matter what the weather decides to do next week.