12 Garden Hacks for Focal Point Creation
The most common “why does my garden feel messy?” mistake isn’t plant choice—it’s too many focal points fighting for attention. If everything is special, nothing is special. One strong visual anchor per main view beats five cute little features scattered around like yard confetti.
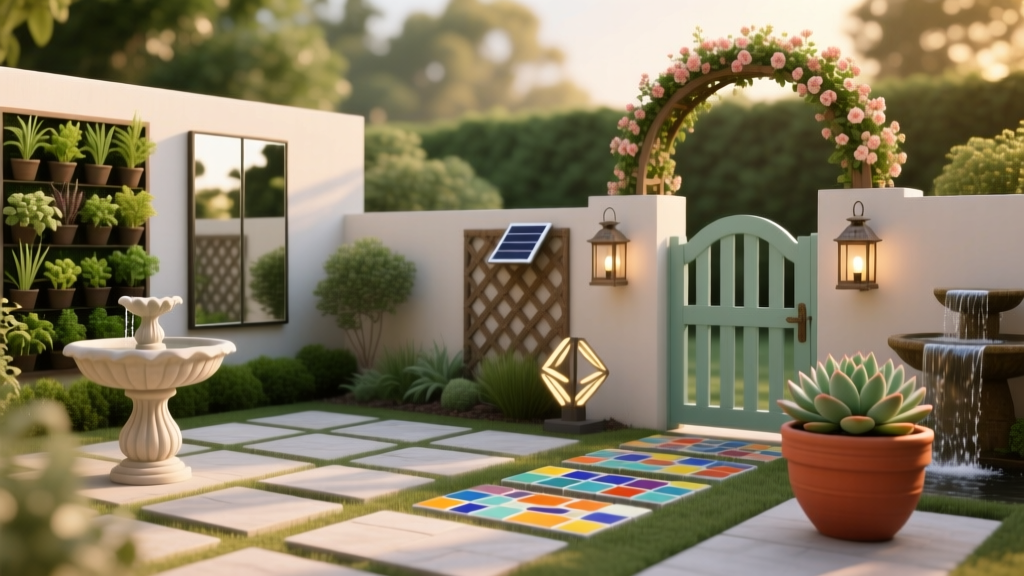
A focal point doesn’t have to be a fountain or a pricey sculpture. It can be a plant with bold form, a simple painted panel, a curved path that reveals something, or even one perfectly placed pot—if you control contrast, scale, and sightlines. Let’s build focal points the shortcut way.
Start with sightlines (so your focal point actually gets noticed)
1) Use the “3-Step Pause” test to pick the right spot
Stand at your most-used viewing location (kitchen sink window, patio chair, back door), then walk three normal steps into the yard and stop. Whatever your eyes land on first is where your focal point should live—because that’s where attention naturally goes. Mark that spot with a stake or upside-down pot and check it from 2–3 angles before committing.
Example: In a narrow side yard, the 3-step pause often lands on the fence midpoint. That’s perfect for a painted panel or a tall pot instead of trying to “feature” the whole walkway.
2) Cap your focal points: one per view, not one per flowerbed
For one main viewing area, plan for 1 focal point and at most 2 supporting accents (smaller, quieter elements). This keeps the eye from bouncing around and makes the featured item feel intentional instead of random. If you have two major viewing areas (say patio and kitchen), give each its own focal point—just keep them visually different (form vs. color vs. height).
Case example (small suburban backyard): A 20' x 30' yard felt chaotic with multiple decor items. Swapping three small statues for one 36" glazed pot at the patio sightline instantly made the space feel “designed.”
3) Frame it on purpose with a “viewfinder” gap
Create a frame by leaving a deliberate opening in taller plants or fencing—think of it as a living picture frame. Aim for a gap about 24–36 inches wide so it reads as intentional from a distance. The focal point sits beyond the gap; the surrounding plants guide your gaze like arrows without looking like arrows.
Example: Two clumps of ornamental grass on either side of a 30" opening can frame a birdbath or a bright pot so it pops even from inside the house.
Use contrast hacks (high impact, low effort)
4) Make one thing “different” in three ways: color, texture, and shape
A focal point works when it contrasts with the background. Pick one main feature and make it different in at least 3 attributes: a bold color against green, a smooth surface against fine foliage, and a strong shape against soft mounds. This is why a single black obelisk in a cottage border often looks more dramatic than another flowering shrub.
Example: In a sea of green hostas, a matte-black trellis + a single red clematis bloom reads like a spotlight moment.
5) Use the “60–30–10” color trick with plants and hardscape
Borrow the interior design ratio: 60% dominant (usually green foliage), 30% supporting (secondary foliage/flower color), and 10% accent (your focal point color). That 10% is the magic—too much and it becomes noise. You can do this with one painted bench, one bright container, or a repeated accent flower color used sparingly.
Real-world scenario (front yard curb appeal): A homeowner kept adding more flower colors and it looked busy. Switching to mostly green + white, then adding one “10%” accent (deep purple pot by the walkway) made the entry read clean from the street.
6) Cheat with black or charcoal backgrounds (instant depth)
Paint a section of fence or a simple plywood panel charcoal/black behind your intended focal point. Dark backdrops visually recede, making brighter flowers and lighter foliage appear closer and more vivid. A quart of exterior paint is often $12–$25 and can transform a messy fence into a purposeful stage.
DIY alternative: If painting isn’t allowed, hang a piece of outdoor fabric or reed screening in a dark tone using zip ties.
7) Create a focal point with one “hero” plant in a pot—then underplant
Instead of trying to make an entire bed the star, use one large container (at least 18–24 inches wide) with a bold plant: canna, dwarf conifer, cordyline, hydrangea, or a tall grass. Underplant with a simple spiller (sweet potato vine) and a filler (calibrachoa) so the pot looks finished. This hack is especially useful when your soil is poor or your beds are still “in progress.”
Cost note: A new glazed pot can be $60–$150, but you can often find a sturdy used one for $15–$40 at thrift stores or marketplace listings—just check for cracks at the base.
Hardscape and layout shortcuts (structure beats clutter)
8) Use the “odd-number rule” for repeating anchors—then stop at three
Repeating an element makes the garden feel cohesive, but overdoing it makes it feel like a showroom. Use 3 matching anchors (three boulders, three upright evergreens, three tall pots) to create rhythm, then add one standout focal point to break the pattern. Odd numbers are easier for the eye to group naturally.
Example: Three matching 24" terracotta pots along a path look intentional; a single taller cobalt-blue pot at the end becomes the focal point.
9) Hide the hose, highlight the feature: clean edges are a focal point multiplier
Even a gorgeous feature loses impact if the surrounding area looks sloppy. Tighten edges around your focal point with a defined border and a clean mulch line about 3–4 inches deep (deep enough to suppress weeds, not so deep it smothers). The visual contrast of crisp edge + tidy surface is like putting a mat around a photo.
Expert-backed note: Over-mulching can harm roots and encourage problems; many extension services recommend keeping mulch a few inches deep and away from trunks. Penn State Extension cautions against “mulch volcanoes” and recommends mulch kept off the bark (Penn State Extension, 2023).
10) Build a cheap “destination” with a stepping-stone reveal
A focal point feels stronger when the garden leads you to it. Lay a short run of stepping stones that ends at the feature—only 5–7 stones can do the job. Space stones about 18–24 inches apart (comfortable stride), and angle the final stone toward the focal point like an arrow.
Case example (rental backyard): A renter used 7 concrete pavers (about $2–$4 each) to create a mini path to a single pot and folding chair. The “destination” made the whole yard feel bigger without permanent changes.
11) Add nighttime focus with one low-voltage spotlight (or a solar cheat)
If you can only light one thing, light the focal point—not the whole yard. A single 3–5 watt LED spotlight aimed upward at a small tree, sculpture, or textured wall creates drama and makes the garden feel designed after dark. A basic low-voltage kit can run $30–$80; if you want the cheapest route, a bright solar spotlight can work, just place it where it gets 6+ hours of sun.
Timing tip: Adjust the angle at dusk so the light hits the feature, not your seating area or a neighbor’s window.
Planting tricks that create instant “look here” moments
12) Use bloom timing to keep one focal point “on stage” for months
Instead of chasing constant color everywhere, stack bloom times around a single feature so it stays interesting. Pair an early bloomer (tulips), a mid-season performer (salvia), and a late-season finisher (sedum or asters) around the same focal point. You get a rotating show without redesigning the whole yard.
Example planting combo: Under a small Japanese maple focal point, plant 15 tulip bulbs in fall, then add salvia starts in spring, and finish with sedum for late summer structure.
“Good landscaping is about directing attention—strong lines and focal points keep the eye moving where you want it.”
— Adapted from landscape design principles taught through extension horticulture programs
Research-backed note: When choosing the “hero” plant for your focal point, match it to site conditions so it stays healthy (and attractive) with less fuss. Many extension programs emphasize “right plant, right place” as the foundation for lower-maintenance landscapes (University of Maryland Extension, 2022).
Quick comparison: fast focal point options (and what they really cost)
| Focal point method | Typical cost | Time to install | Best for | DIY shortcut |
|---|---|---|---|---|
| Large statement pot (18–24") | $15–$150 | 30–60 minutes | Patios, small yards, rentals | Use a food-grade bucket inside a thrifted cachepot |
| Painted backdrop panel (black/charcoal) | $12–$40 | 1–2 hours | Making plants pop, hiding ugly fences | Outdoor fabric or reed screen instead of paint |
| Simple arbor/trellis | $25–$200 | 1–3 hours | Entry points, path endings | Cattle panel arch with T-posts |
| Single spotlight (3–5W LED) | $30–$80 | 30–90 minutes | Night drama, highlighting texture | Solar spotlight placed in full sun |
Three real-life focal point “fixes” you can copy
Scenario A: The long, skinny side yard that feels like a hallway
Place one vertical focal point halfway down—like a 6' trellis with a vine—then keep plantings simple and repeated (same groundcover, same edging). Add a “viewfinder” gap so the trellis is framed, not swallowed. One tall element breaks the hallway feeling and gives the eye a reason to stop.
Scenario B: The busy cottage bed that looks chaotic from the porch
Pick one anchor (a shrub rose or upright evergreen), then use the 60–30–10 approach: keep most foliage green, limit flower colors to one supporting color, and save one bold accent color for near the anchor. Pull random decor out of the bed—if it’s under 12" tall, it usually disappears visually once plants grow in. The focal point should be tall enough to read at porch distance (often 30"+).
Scenario C: The new-build backyard with no shade, no character, and sad soil
Start with containers and one painted backdrop panel while you build soil over time. Put a large pot (24") near where you’ll eventually want a tree, and underplant it so it feels lush immediately. Then use 3–4 inches of mulch and crisp edging to make the space look finished while plants establish.
If you try only one hack this weekend, do the 3-step pause test and commit to a single “hero” feature you can see from where you actually live—your chair, your kitchen window, your back door. Once that anchor is in place, everything else in the garden suddenly has a job: either support the focal point, frame it, or get out of the way.
Sources: Penn State Extension (2023) guidance on proper mulching practices and avoiding trunk contact; University of Maryland Extension (2022) landscaping principle of selecting plants matched to site conditions (“right plant, right place”).