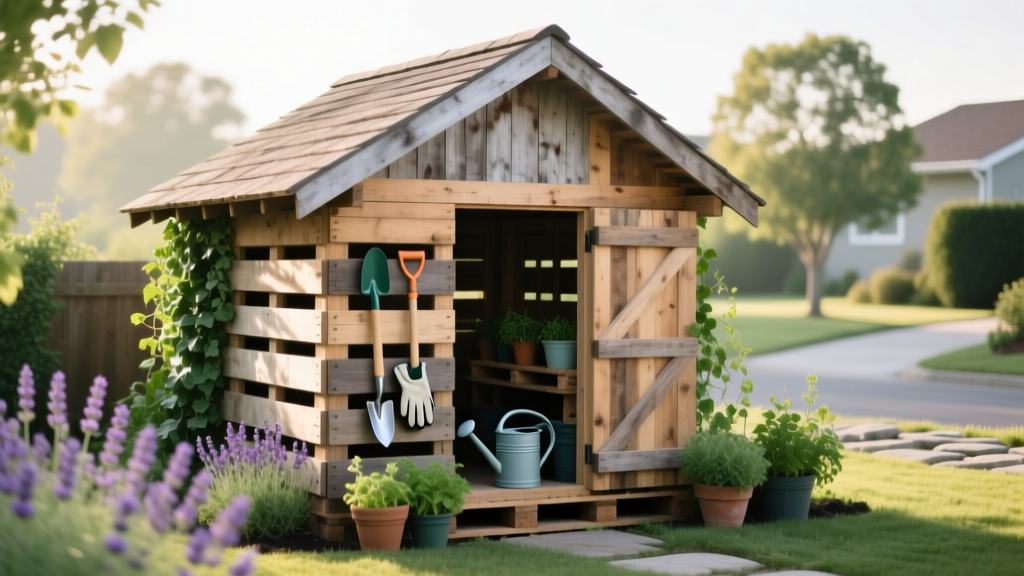
DIY Garden Storage Shed from Pallets
The most common pallet-shed mistake isn’t ugly walls or a crooked door—it’s building straight onto soil and then wondering why the “free” shed turns into a sponge. Untreated wood sitting within 1–2 inches of damp ground can wick moisture fast, and once the bottom boards stay wet, the whole structure starts to twist, soften, and smell musty. The fix is simple: treat pallets like framing lumber and give them a real base, a real roof, and real airflow.
Below are the shortcuts and proven tricks that keep a pallet shed solid for years (not just one season), plus a few ways to spend money only where it actually matters.
Start with the right pallets (and skip the sketchy ones)
Tip: Read the pallet stamp like a pro
Flip a pallet over and look for the IPPC stamp. Choose “HT” (heat-treated) pallets and avoid “MB” (methyl bromide fumigated) stamps—MB pallets can carry chemical residues you don’t want around potting soil, tools, or kids. If there’s no stamp and you don’t know the source, treat it as a “maybe” and use it only for exterior cladding, not anything that might touch garden supplies.
Real-world example: A community garden in Oregon swapped out unmarked pallets for HT pallets on a shared shed rebuild; the musty smell disappeared once they rebuilt with a raised base and cleaner wood sources.
Tip: Standardize dimensions before you design the shed
Most pallets you’ll find are either 48" x 40" (common in North America) or 48" x 48". Measure 6–10 pallets before you finalize your layout because “same size” pallets can vary by 1/2" to 1". Designing a 4' x 8' shed footprint works nicely because two 48" pallets make a clean 8-foot wall run.
Real-world example: If your pallets average 48" x 40", a simple 8' long wall is two pallets side-by-side, and a 6' 8" deep shed can be made by trimming one pallet down to 32" depth and pairing it with a full 40" pallet.
Tip: Don’t overbuild with rotten “free” wood
Do a quick “bounce test”: stand a pallet on edge and press down hard on the top deck boards; if you hear cracking or see nails lifting, it’s not worth using for structural walls. You can still harvest slats for trim, shelves, or a door skin, but rely on solid pallets (or 2x framing) where strength matters. Saving $20 on lumber is not a win if the wall racks in the first windstorm.
Foundation tricks that stop rot (and keep doors working)
Tip: Raise the shed at least 4 inches off soil
A pallet shed lasts dramatically longer when air can move underneath. Aim for a minimum of 4" clearance using concrete pavers, deck blocks, or a gravel pad with sleepers. This keeps the lowest boards from staying wet after rain, which is the #1 cause of early failure.
Numbers that help: A 4' x 8' pad uses about 16 pavers at 12" x 12" each (set on leveled gravel), often costing $2–$4 per paver.
Tip: Build a cheap gravel pad that drains like a champ
Scrape sod, then lay down landscape fabric and add 3–4" of 3/4" crushed stone, compacted in two lifts. Slightly crown the center (about 1/2" higher) so water sheds away. This is a weekend job that prevents the “squishy corner” that makes doors stick every spring.
Cost reality: A small 4' x 8' pad at 4" depth is roughly 1/2 cubic yard of gravel; depending on your area, that’s often $25–$60 delivered.
Tip: Square the base before you attach a single pallet
If the base is out of square, your roof will fight you and your door will never close right. Use the 3-4-5 method (or 6-8-10 for bigger builds): measure 6' on one side, 8' on the adjacent side, and the diagonal between those marks should be 10'. Adjust until it’s perfect, then anchor your base frame.
Real-world example: A gardener in Pennsylvania rebuilt only the base (kept the pallet walls) and fixed a door that had been rubbing for two years—turns out the shed was 1 1/4" out of square.
Wall building: sturdy, straight, and not a nail festival
Tip: Use pallets as panels, not as “random boards”
The shortcut is to stand pallets upright and treat them like wall sections. Tie them together with 2x4 posts at corners and every 4 feet, then screw through pallet stringers into the posts. Screws (like 3" exterior deck screws) resist pull-out better than nails when the shed flexes in wind.
Specific build note: Pre-drill near the ends of older, dry stringers to prevent splitting.
Tip: Add a top plate to stop racking
Pallet walls love to rack (lean into a parallelogram) unless you clamp them together at the top. Run a continuous 2x4 top plate around the perimeter, screwed into each pallet stringer and corner post. This one piece of lumber is usually under $10–$15 and makes the whole shed feel “real.”
Real-world example: On a windy hill site, adding a top plate and two diagonal braces stopped a noticeable sway when the door slammed.
Tip: Brace corners with diagonals, not hope
Pick two walls (usually the back wall and one side) and install diagonal bracing from bottom corner to opposite top corner. You can use a 1x4, a ripped pallet slat bundle, or metal strap bracing. The goal is to stop side-to-side movement that loosens fasteners and creates gaps for rain.
Roof hacks: keep it light, keep it dry, keep it simple
Tip: Give the roof real pitch (2:12 minimum)
A flat-ish roof is the fastest way to rot a pallet shed. Aim for at least a 2:12 pitch (2 inches of rise per 12 inches of run); for a 4-foot deep shed, that’s about 8 inches of rise from front to back. You can build this by making the front wall taller or adding a sloped rafter system.
Timing tip: Frame and sheath the roof the same day you set walls if rain is in the forecast—wet pallets swell and shift.
Tip: Use inexpensive corrugated panels for speed
Corrugated metal or polycarbonate panels install fast and are lightweight—great for pallet walls that aren’t perfectly flat. Use neoprene washer screws and overlap panels by one ridge. Add a 1x4 purlin under the panel seams if your roof framing is spaced wider than 24" on center.
Cost comparison: Corrugated roofing is often cheaper than shingles for tiny sheds because you buy fewer accessories (no underlayment, starter strips, or bundles).
Tip: Add 6–8 inches of roof overhang to protect pallet edges
Pallet slats and end grain soak up water, so protect them with overhangs. A 6–8" overhang on the front and sides reduces splashback and keeps rain from running down the wall face. Even a simple drip edge or bent metal flashing makes a big difference.
Weatherproofing: keep water out without trapping moisture in
Tip: Seal gaps with “wood + air,” not caulk everywhere
Pallet walls naturally have gaps; trying to caulk every crack is frustrating and usually fails. Instead, staple heavy-duty landscape fabric or housewrap to the inside of the wall, then add an interior layer of thin plywood or more pallet slats if you want it prettier. This blocks wind-driven rain but still allows drying.
Expert-backed note: The U.S. Forest Products Laboratory highlights that moisture control is the key factor in preventing decay—keeping wood dry and allowing it to dry quickly matters more than most surface treatments (Forest Products Laboratory, 2010).
Tip: Use a simple borate treatment on vulnerable areas
If you’re using pallets that will live outdoors year-round, brush a borate wood preservative onto the bottom pallet stringers and any cut ends before assembly. Follow label directions, but as a practical approach, focus on the first 12" above the floor where splashes and humidity concentrate. Let it dry fully (often 24 hours) before painting or staining.
DIY alternative: If borate isn’t available, at least prime and paint cut ends with exterior primer plus two coats of exterior paint—end grain is where moisture rushes in.
Tip: Vent it on purpose so tools don’t rust
Airtight sheds trap humidity; pallet sheds can do the opposite and breathe too much. Add two vents—one low on a side wall and one high on the opposite wall—to encourage natural airflow. Even a pair of 4" round soffit vents can noticeably reduce condensation on metal tools.
Research tie-in: University extension guidance on storage structures consistently emphasizes ventilation to reduce moisture buildup and corrosion risk (University of Minnesota Extension, 2018).
“Decay fungi require moisture, oxygen, and favorable temperatures—control the moisture and you control the decay.”
—USDA Forest Products Laboratory, 2010
Doors, floors, and storage: where pallet sheds usually fail first
Tip: Build the door first, then frame the opening to fit
Door openings are where “close enough” becomes annoying fast. Build a simple door from pallet slats over a 2x3 frame, keeping it about 1/2" smaller than the opening on all sides. Then frame the opening with straight lumber so the hinges and latch land on solid wood, not pallet slats.
Real-world example: For a wheelbarrow-friendly shed, a 36" wide door is a sweet spot—wide enough for bulky tools but narrow enough to stay stiff without fancy hardware.
Tip: Skip a full pallet floor if you store fertilizer or gas
Pallet floors look convenient but collect spilled granules and hold odors. If you store fertilizer bags, lawn chemicals, or a gas can, consider a simple gravel floor inside the shed with stepping stones—easy to sweep and it doesn’t trap moisture. If you need a solid floor, use 3/4" exterior plywood over joists spaced 16" on center.
Money-saving move: One sheet of 3/4" exterior plywood often costs less than the time you’ll spend trying to level and fasten multiple pallets into a flat, squeak-free floor.
Tip: Use French cleats for flexible tool walls
Instead of committing to fixed hooks, screw a French cleat (a 1x4 ripped at a 45° angle) across a wall at about 60" high. Then hang tool holders, mini shelves, and bins that can move around as your gear changes. It’s the fastest way to keep a small shed organized without buying a full pegboard system.
DIY alternative: No table saw? Use two straight 1x4s—one on the wall, one on the accessory—overlapping like a ledge. Not as strong as a true cleat, but works for lightweight hand tools.
Fasteners, safety, and smart spending
Tip: Spend on screws and hinges, save everywhere else
Pallet wood is hard on fasteners, and cheap screws snap at the worst times. Use exterior-rated deck screws (2 1/2" to 3") for structure, and step up to a real set of T-hinges for the door. You can often build the entire shed with “free” pallets and spend $60–$150 on the stuff that actually keeps it standing.
Example budget: $80 for screws + $25 for hinges/latch + $60 for roofing panels can still land under $200 total if pallets are free.
Tip: Pre-drill and use an impact driver to avoid split slats
Old pallet slats split easily—especially near ends. Pre-drill with a 1/8" bit for most deck screws, and drive screws with an impact driver so you don’t cam-out and strip heads. It’s one of those “buy once, enjoy forever” tools if you do any DIY around the garden.
Tip: Plan for the weight of what you’ll store
Garden storage gets heavy fast: a string trimmer, a stack of pots, 6 bags of mulch, and a couple of shovels add up. If you’re hanging anything heavier than 20–30 lb on a wall (like a hose reel or a loaded shelf), anchor into posts or add a backing board that spans multiple pallet stringers.
Three real builds (so you can steal what works)
Scenario: The tiny “patio shed” for a townhouse garden
Footprint: 4' x 4' using four 48" pallets cut down to fit, with a single-slope roof rising 8" front-to-back. The owner used polycarbonate corrugated panels so the shed stayed bright inside, and added two 4" vents to prevent mildew. Total spend was about $140, mostly on roofing and hardware.
Scenario: The “mower + tools” shed on uneven ground
Footprint: 4' x 8' set on 12" x 12" pavers over 4" compacted gravel. The trick here was leveling the pavers with a long 2x4 and a bubble level before any walls went up; the door worked perfectly on day one. The builder added a 6" roof overhang and a simple drip edge to stop splashback rot on the pallet faces.
Scenario: The community garden shed that had to survive heavy use
This shed used pallets as cladding but relied on a basic 2x4 frame at 16" on center so it could handle constant opening/closing and lots of shovels slammed onto hooks. They skinned the outside with pallet slats for the “rustic” look and used a metal roof for durability. Their biggest upgrade was a French cleat wall so volunteers could reconfigure storage instead of piling tools in a corner.
Quick comparison: roof options that actually make sense on pallet sheds
| Roof option | Upfront cost (typical small shed) | Best use | Watch-outs |
|---|---|---|---|
| Corrugated metal panels | $60–$150 | Fast installs, long life, lightweight | Needs proper screws with washers; can be loud in rain |
| Corrugated polycarbonate | $80–$180 | Letting light in, small shaded yards | Can expand/contract; pre-drill oversized holes |
| Asphalt shingles | $90–$200 | Matching your house or other buildings | Heavier; needs solid sheathing + underlayment |
| Tarp “temporary roof” | $15–$40 | Short-term cover while you finish | Not a real roof; will flap and trap moisture if left too long |
Small upgrades that feel like cheating (because they work so well)
Tip: Add a gutter and one rain barrel if the shed sits near beds
If you’re already building a roof, you’re one cheap gutter away from free irrigation water. A 4' or 8' length of vinyl gutter plus a downspout can feed a 30–55 gallon rain barrel, which is perfect for hand-watering seedlings nearby. Put a screen over the inlet to keep leaves and mosquitoes out.
Tip: Put the shed on the “dry side” of your yard, not the convenient side
The most convenient location is often the worst: low spots near gates and paths get compacted, puddly, and muddy. Walk your yard after a hard rain and find where water sits for more than 2 hours—don’t build there. If you must, raise the pad an extra 2" and add a shallow swale to move runoff away.
Tip: Paint only after the wood has had a few dry days
Pallet wood often starts damp, and paint over damp wood peels quickly. Give it at least 2–3 dry days (longer in humid weather) before priming and painting, and focus paint on end grain and horizontal surfaces. A solid exterior stain is more forgiving than paint on mixed pallet wood because it flexes without cracking.
Build it like a tiny cabin: get it off the ground, make the roof do the heavy lifting, and don’t cheap out on the few parts that keep everything square. If you do those three things, a pallet shed stops being a “cute weekend project” and becomes the kind of garden storage you’ll use every single day—without the door sticking, the roof dripping, or the bottom boards turning to compost.
Sources: USDA Forest Products Laboratory (2010), Wood Handbook: Wood as an Engineering Material. University of Minnesota Extension (2018), guidance on moisture management/ventilation in outbuildings and storage spaces.