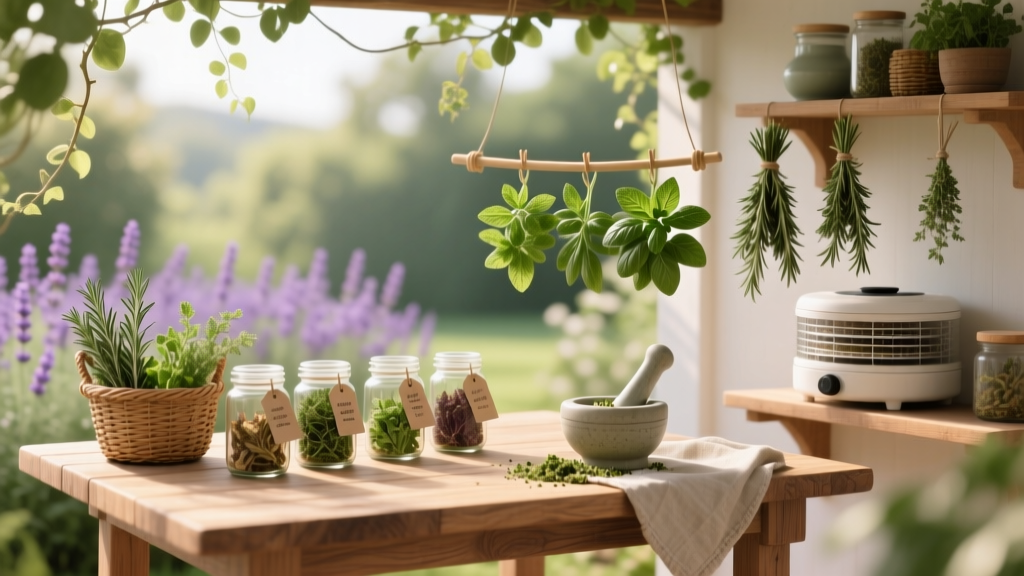
10 Garden Hacks for Herb Drying and Storage
If your dried basil smells like “green dust” instead of summer, you didn’t buy the wrong plant—you probably dried it too slowly or stored it like pantry décor (clear jar, sunny shelf, warm stove-side). Light, heat, and humidity are flavor thieves, and herbs can lose aroma shockingly fast when they’re mishandled. The good news: a few small hacks—most of them cheap or free—can make dried herbs taste like you just snipped them.
Before we get clever, one grounding rule: quality starts at harvest. As Oregon State University Extension notes, herbs should be harvested before flowering for best flavor, and dried quickly to retain oils (OSU Extension, 2019). And once they’re dry, storage conditions matter just as much as the method you used to dry them.
Group 1: Harvest & Prep Hacks (Because Drying Can’t Fix a Bad Start)
1) Harvest after the dew dries—then give herbs a 10-minute “shade cool-down”
Pick herbs mid-morning, after dew has evaporated but before the day heats up. If you harvest at 4 p.m. when leaves are warm, you’re starting with volatile oils already “gassing off.” After cutting, lay sprigs in a single layer in the shade for 10 minutes to let field heat dissipate before you bundle or process.
Example: When I harvest oregano at 10 a.m. instead of late afternoon, the finished dried leaves keep that sharp, pizza-shop aroma longer—especially noticeable in the first 2 weeks.
2) Don’t wash unless you must—use a “dry clean” first
Water is the enemy of fast drying. If your herbs are clean, skip washing; instead, shake sprigs hard and brush off soil with a soft pastry brush. If you do need to wash (dusty roadside garden, heavy rain splash), rinse quickly, then spin in a salad spinner for 15–20 seconds and pat with towels—your goal is “dry to the touch” before drying starts.
Case example: A gardener in a community plot near a gravel path found their dill carried grit. Switching to brush + quick rinse + spinner cut drying time from 3 days to about 36 hours on a rack indoors.
3) Use the “two-pile rule”: tender herbs vs. woody herbs
Tender herbs (basil, cilantro, parsley, mint) and woody herbs (rosemary, thyme, sage, oregano) behave differently. Tender leaves bruise and darken easily, so strip them sooner and dry them in thinner layers; woody herbs tolerate bundling and slower handling. Keeping two piles prevents you from using one method that’s wrong for half your harvest.
Real-world use: Strip basil leaves off stems immediately, but keep thyme on stems—then rub it off once dry. You’ll save time and keep basil greener.
Group 2: Drying Speed Hacks (Fast Drying = Better Flavor)
4) Paper bag + rubber band = cleaner air-drying with fewer crumbs
If you like hanging bundles, slip each bundle into a paper lunch bag and secure the bag around the stems with a rubber band. Cut a few small holes (about 1 cm) in the bag for airflow. This keeps dust off, catches falling leaves, and reduces light exposure—three wins for almost $0 if you reuse bags.
Example: Hanging sage openly over a laundry area can pick up lint; bagging it prevents that and makes cleanup easy when leaves drop.
5) Screen-rack drying: the $10 hardware-cloth trick that beats bulky dehydrators
Make a quick drying rack by stapling fiberglass window screen or 1/4-inch hardware cloth onto a scrap wooden frame (or even across a cardboard box cut-out). Spread herbs in a single layer; flip once per day. This increases airflow above and below, often drying small leaves in 24–48 hours instead of 3–5 days in a stagnant room.
Cost note: A 24 in x 36 in roll of window screen is often around $10–$15, and you can make multiple racks.
6) Use a fan the smart way: aim for “moving air,” not “blast air”
A box fan on low, placed 3–6 feet away, speeds drying dramatically without turning leaves brittle on the outside while the inside stays moist. You want gentle, consistent airflow across the herbs—think “laundry drying line,” not hair dryer. If your room is humid, add a small dehumidifier or dry in the driest room (often a bedroom, not the kitchen).
Timing tip: With a fan, many leafy herbs hit “crumbly dry” in about 24–36 hours indoors.
7) Dehydrator hack: set it lower than you think, and use a “brittle test” schedule
Most herbs do best at low temperatures—generally around 95–115°F (35–46°C). Higher heat dries faster but can drive off aromatic compounds. Start checking at 1 hour for small leaves, 2–4 hours for woody sprigs; you’re done when leaves crumble easily and stems snap cleanly.
Citation: University of Minnesota Extension recommends drying herbs in a dehydrator at about 95–115°F for best quality (University of Minnesota Extension, 2020).
| Method | Typical time | Best for | Flavor retention | Cost |
|---|---|---|---|---|
| Air-drying bundles | 3–10 days | Woody herbs (rosemary, thyme) | Good if dark + airy | $0–$5 |
| Screen rack + fan | 24–72 hours | Leafy herbs (mint, parsley) + woody | Very good (fast + cool) | $10–$20 DIY |
| Dehydrator (low temp) | 1–6 hours | All herbs, especially in humidity | Excellent if kept at 95–115°F | $40–$150 |
| Oven (lowest setting) | 30–120 minutes | Emergency small batches | Fair (easy to overheat) | $0 if you already own it |
Group 3: High-Control Hacks (For Small Spaces, Humid Weather, and “I Need This Tonight”)
8) The “car-on-a-hot-day” trick—only for seeds and woody sprigs, and only with a thermometer
This one surprises people: a closed car in the sun can act like a warm drying box, but it can also get too hot and cook your herbs. If you use it, put herbs on a rack in a cardboard box with vent holes, and place an oven thermometer inside. Only do this if the interior stays around 100–120°F (38–49°C) for a few hours—if it spikes higher, abort.
Scenario: During a rainy week, a gardener without a dehydrator dried rosemary sprigs in a car that held at 110°F for 3 hours, then finished indoors overnight. The rosemary stayed fragrant; basil would have turned brown.
9) Microwave “burst drying” for emergencies (and how not to scorch it)
Microwaves can work for tiny batches when you need herbs immediately. Place leaves between two paper towels, microwave on high for 20 seconds, then 10-second bursts until crisp—most herbs take 40–90 seconds total depending on moisture. Let them rest 1 minute before crumbling; trapped steam finishes the job.
Example: Need mint for tea tonight? A handful of leaves microwaved in 60 seconds can taste fresher than week-old “quick-dried” mint that sat in a warm kitchen.
“The key to high-quality dried herbs is drying them quickly at low temperatures and storing them away from light and moisture.” — University of Minnesota Extension (2020)
Group 4: Storage Hacks (Where Most Flavor Dies)
10) Store whole leaves, not powder—crush only what you’ll use in 1–2 weeks
Grinding exposes a lot more surface area to air, which accelerates flavor loss. Store herbs as whole leaves (or whole sprigs) and crumble them right before cooking; you’ll notice stronger aroma even 6 months later. For convenience, keep a small “kitchen jar” and refill it from a larger, tightly sealed backup stored in a cool cabinet.
Case example: A home cook who always powdered oregano found it tasted flat by month 2. Switching to whole-leaf storage kept it punchy past month 6—same harvest, different handling.
Bonus Tricks That Multiply Results (Use These With the 10 Hacks Above)
Label like a pro: add date + location + method
Write three things on every jar: herb name, drying date, and a quick note like “rack+fan” or “dehydrator 105°F.” It takes 15 seconds and turns your pantry into a feedback loop. You’ll quickly learn, for instance, that “mint dried in 36 hours” beats “mint dried in 5 days” in your own house.
Use the “condensation check” to avoid moldy jars
Even if herbs feel dry, residual moisture can hide in stems. After jarring, seal for 24 hours, then check for fogging or clumping; if you see condensation, dump back onto the rack for another 12–24 hours. This one check prevents the heartbreaking “white fuzz” surprise a week later.
Light-proof your storage for under $2
Clear jars look nice, but light fades flavor. If you don’t want to buy amber jars, slip clear jars into brown paper lunch bags, or wrap with a tea towel and a rubber band—ugly? Maybe. Effective? Absolutely. If you do buy dedicated jars, amber glass often costs about $1–$3 per small jar when purchased in multi-packs.
Skip the “fridge jar” habit—unless you live in the tropics
Refrigerators are humid environments, and every time you open the jar you invite moisture in. For most homes, a cool, dark pantry is better. If your climate is consistently humid (think 70%+ indoor humidity), use the freezer instead and keep herbs in thick freezer bags with as much air pressed out as possible.
DIY desiccant: use rice—but keep it separated
If you want extra insurance, add a small DIY moisture buffer: put 1 tablespoon of uncooked rice in a tied piece of cheesecloth and drop it into the storage container. Don’t pour rice directly into herbs unless you enjoy fishing grains out while cooking. Replace the rice packet every 2–3 months if your pantry runs humid.
Three Real-World Herb-Drying Setups (Pick One That Matches Your Life)
Scenario A: Apartment gardener with one sunny window
Use a screen rack on a bookshelf, plus a small desk fan on low aimed across (not directly down onto) the herbs. Dry in the room farthest from the stove, and store finished herbs in a shoebox “dark cabinet” if your kitchen shelves are bright. With this setup, you can dry a week’s worth of mint and parsley in about 2 days without buying a dehydrator.
Scenario B: Humid summer, backyard garden explosion
Batch-process by herb type: woody herbs hang in paper bags; tender herbs go on racks with a fan. If your indoor humidity stays high, a dehydrator at 105°F pays for itself quickly—especially if you’re preserving 10+ bundles per season. Store bulk herbs in larger jars in a cool closet; keep only a small jar in the kitchen to avoid frequent “humidity hits.”
Scenario C: Busy cook who wants weeknight convenience
Dry herbs whole, then create a couple of go-to blends so you’re not crumbling leaves every night. A simple Italian mix could be 2 tablespoons oregano, 1 tablespoon basil, 1 tablespoon thyme—kept in a small jar you’ll use up within a month. Your bulk jars stay sealed, and your blend stays fresher because it’s rotated fast.
A final insider move: treat dried herbs like a seasonal ingredient, not a forever ingredient. If your jar is older than a year, do the “rub test”—crush a pinch between your fingers and smell it. If it’s faint, compost it and make room for the next harvest; you’ll cook better and waste less time shaking flavor out of tired leaves.
Sources: Oregon State University Extension (2019), “Harvesting and Preserving Herbs” guidance; University of Minnesota Extension (2020), “Drying Herbs” recommendations on low-temperature drying and storage conditions.