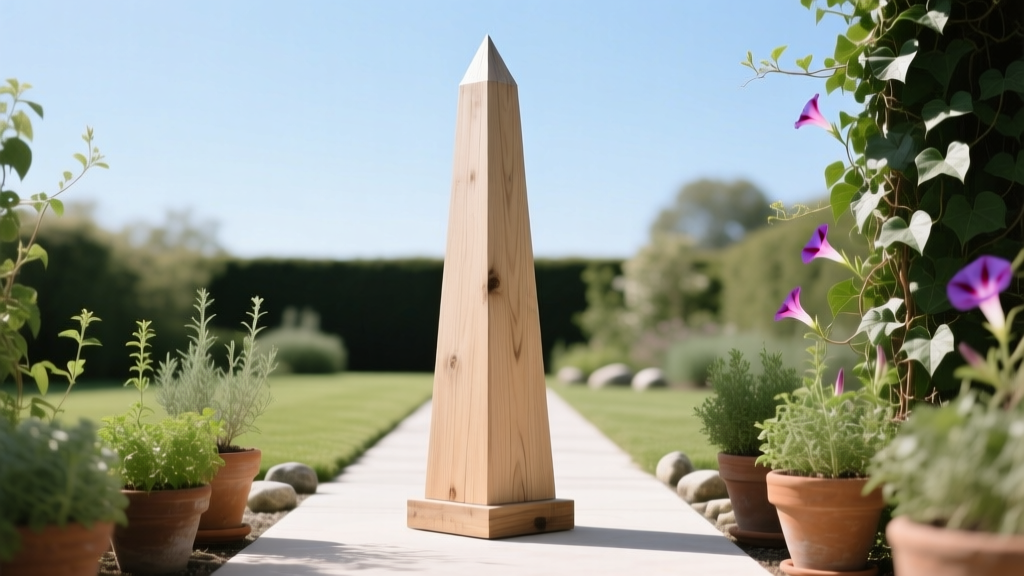
How to Build a Simple Garden Obelisk
The most common garden-obelisk mistake isn’t choosing the “wrong” design—it’s building one that’s too flimsy for the first real wind or the first time a cucumber vine turns into a wet, heavy curtain after rain. A 6-foot obelisk can look sturdy in the garage, then rack itself sideways in July because the legs weren’t braced and the base wasn’t anchored. The good news: you can build a simple obelisk in an afternoon that actually stays put, climbs beautifully, and costs less than a nursery version.
Below are the shortcuts, little layout tricks, and proven build details that make the difference between “cute for photos” and “still standing in October.”
Start With the One Decision That Controls Everything: Height, Footprint, and Load
Tip: Match height to plant weight (not just how tall you want it)
Light climbers (sweet peas, black-eyed Susan vine) are forgiving; heavy climbers (pole beans, cucumbers, small gourds) demand a wider stance and tighter bracing. For mixed plantings, a reliable sweet spot is 6 ft tall with a 18–24 in base footprint—tall enough to look elegant, wide enough to resist tipping. If you’re growing cucumbers, assume the plant can load the frame with 10–20 lb of wet foliage and fruit across a season and build accordingly.
Example: A 7-foot obelisk with a 12-inch base looks sleek, but it’s a lever—great for peas, risky for cucumbers unless it’s anchored like a fence post.
Tip: Choose a footprint that fits your bed access (so you don’t hate it later)
Obelisks that block harvesting get “retired” fast. In a 4x8 raised bed, a footprint around 20 in lets you plant 3–4 climbers around the legs while still reaching behind it. If you’re working in a narrow border, drop to 14–16 in base and keep the obelisk closer to 5 ft tall to prevent it from shading everything behind it.
Example: In a 3-foot-wide side yard bed, a 5-foot obelisk with a 16-inch base keeps tomatoes reachable and avoids turning the bed into a jungle wall.
Tip: Plan the “anchoring story” before you cut a single piece
Most failures happen at ground level. Decide if you’ll stake it, screw it into a wooden bed, or sink the legs. A simple, sturdy approach is pushing the legs 6–8 in into soil and tamping firmly; in loose soil, add 10–12 in landscape staples or tent stakes over the base rails.
Source note: Wind load and plant weight are real structural forces; extension services routinely recommend sturdy trellises for vining crops to reduce breakage and improve airflow (University of Minnesota Extension, 2020).
Materials That Work (and the Cheapest Ways to Get Them)
Tip: Use 1x2s or 2x2s for wood—don’t overbuild with bulky lumber
For a simple wooden obelisk, 1x2 furring strips are the budget hero: light, easy to cut, and cheap. Four 8-foot strips are often $2–$4 each, meaning a basic frame can land around $12–$20 before screws. If you expect heavy vines, bump the legs up to 2x2s and keep the lattice pieces as 1x2s.
Example: A 6-foot obelisk built with 1x2 legs is great for clematis and annual vines; the same design in 2x2 legs handles pole beans without wobbling.
Tip: Cedar is nice, but “cheap wood + protection” is usually the best deal
Cedar lasts, but it adds cost fast. A money-saving combo is kiln-dried pine plus a quick seal: one coat of exterior deck stain or a plant-safe exterior oil on the lower 12–18 in of each leg (the part that suffers most). You’ll often spend $8–$15 on finish and get multiple obelisks out of one can.
Example: If you build three obelisks from furring strips, sealing just the bottoms can triple their lifespan in damp beds without paying cedar prices.
Tip: For metal, concrete mesh is the fastest “zero carpentry” hack
If you want fast and tough, a roll of concrete remesh (often 6 ft tall panels) can be cut and bent into a tapered tower, then wired shut. It’s not as “furniture pretty,” but it’s incredibly rigid and usually costs less per square foot than wood. Wear gloves—cut wire ends are sharp—and cap the top points with wine corks or tubing.
Real-world note: This is the obelisk style you build once and keep forever behind the shed, then drop into beds as needed.
Build Geometry: The Layout Tricks That Keep It Straight
Tip: Make a simple taper jig so all four sides match
A lopsided obelisk usually comes from eyeballing the taper. On your driveway or a sheet of plywood, draw two lines: base width 20 in, top width 6–8 in, height 72 in. Lay your leg boards on those lines and mark cut angles—this gives you consistent taper on all four sides.
Example: If one side tapers to 5 inches and another to 9 inches at the top, your “square” becomes a twist, and bracing won’t sit flush.
Tip: Pre-drill every screw hole (it’s faster than fixing splits)
Furring strips love to split at the ends. Use a 1/16 in drill bit for pilot holes and keep screws at least 3/4 in from the board edge. This adds maybe 5 minutes, and it prevents the annoying “everything was perfect until the last screw” crack.
Example: When attaching a top ring, one split can weaken an entire leg right where stress concentrates in wind.
Tip: Add one “anti-rack” brace level, even if you want a minimalist look
Obelisks fail by racking (turning into a parallelogram), not by snapping. Add one mid-level brace band (a square or ring) at about 30–36 in high. It’s the invisible hero that keeps your frame square when vines pull unevenly.
Example: On a windy corner bed, a mid-band can be the difference between “still upright” and “leaning like a tired fence post” by August.
A Simple Wooden Obelisk Build (No Fancy Tools Required)
Tip: Use this proven cut list for a 6-foot obelisk
Here’s a straightforward build that works for most home gardens and fits standard lumber lengths. Cut four legs to 72 in. Cut base rails to 20 in (4 pieces) and a top ring to 7 in (4 pieces). Then cut 8–12 lattice slats per side at 16–18 in depending on your spacing.
Example: If you space lattice slats about 6–8 in apart, peas and beans find the structure easily without needing constant tying.
Tip: Assemble two panels first, then join them like a box
Build two flat “ladder” sides on the ground: legs + slats. Then stand them up and connect with the remaining two sides. This keeps everything aligned and prevents the classic problem of trying to hold four wobbly legs in midair while you drive screws.
Example: If you’re building solo, clamp one panel to a chair or a bucket so it doesn’t skate across the patio while you attach slats.
Tip: Use exterior screws and a tiny washer trick for thin slats
Use 1-1/4 in exterior deck screws for slats and 2 in screws for main joints. If slats are thin and you worry about screw heads pulling through, add small washers (or even cut a strip of thin scrap as a backing). It costs pennies and saves you from slats popping off when vines tug.
Example: Cucumbers hooked onto a slat can yank surprisingly hard during a windy thunderstorm—washers keep that connection tight.
“Trellising vining crops improves air movement and can reduce disease pressure by keeping foliage off the soil.” — University of California Agriculture and Natural Resources (UC ANR), 2019
Make It Last Outdoors (Without Overcomplicating It)
Tip: Protect only the part that rots first—the bottom 18 inches
You don’t need museum-level finishing. The rot zone is where wood meets damp soil. Seal or paint the lower 12–18 in of each leg (and any base rails that touch soil) with exterior stain, exterior paint, or a plant-safe wood oil; let it dry 24 hours before installing.
Example: If you store obelisks outside year-round, this one step can be the difference between a 1–2 year lifespan and a 4–6 year lifespan in rainy climates.
Tip: Add “feet” if you use drip irrigation or mulch heavily
Constant moisture at the base speeds decay. Screw small blocks (like 1x1 in offcuts) under the base corners to lift rails slightly above wet mulch, or set the obelisk on flat pavers. This keeps wood drier and also makes leveling easier.
Example: In a strawberry bed with thick straw mulch, paver “feet” keep your obelisk from slowly sinking and tilting after every watering cycle.
Tip: Skip glue outdoors unless it’s rated for exterior use
Indoor wood glue fails with moisture and temperature swings. If you want glue, choose an exterior-rated waterproof wood glue, but screws are doing the real work here anyway. Spend your effort on bracing and anchoring—not fancy joinery.
Example: A glued joint that fails can trick you into thinking the whole design was wrong, when it was just the adhesive choice.
Training Vines: Fast Attachment Methods That Don’t Strangle Stems
Tip: Use the “8-loop” tie so stems can expand
When you tie a vine to a slat, make a figure-8: one loop around the support, one loop around the stem, crossing in the middle. This creates a buffer so the stem doesn’t rub or get pinched as it thickens. Soft plant tape or cloth strips work well; avoid thin wire.
Example: Indeterminate tomatoes trained up an obelisk-style support can scar where tight ties were used—an 8-loop prevents that.
Tip: Time your first training early (day 7–14 after planting)
Most vines are easiest to guide when they’re still flexible. Start training within 1–2 weeks of planting so you’re directing growth rather than wrestling it later. After a vine hardens, forcing it can crack stems.
Example: Pole beans can be gently wrapped around a leg when they’re 6–10 inches tall; wait until they’re 24 inches and they’ll snap if you over-bend.
Tip: Build in “grab points” every 6–8 inches for quick self-climbing
Plants climb better when the structure gives them frequent contact points. Slats, wire, or twine spaced 6–8 in apart helps tendrils find purchase without constant tying. If your obelisk has wide-open sides, add a simple crisscross of garden twine.
Example: Sweet peas climb dramatically faster on a twine-laced side than on smooth, widely spaced vertical legs.
Money-Saving and Speed Options (Pick Your Style)
| Option | Typical Cost | Build Time | Best For | Tradeoff |
|---|---|---|---|---|
| Furring-strip wood obelisk (1x2) | $15–$35 | 1.5–3 hours | Most gardens, lightweight to medium vines | Needs sealing at base for longevity |
| 2x2 wood obelisk | $25–$55 | 2–4 hours | Heavier vines (cucumbers, beans), windy yards | Bulkier look, more weight to move/store |
| Concrete remesh/wire tower | $20–$60 | 30–60 minutes | Fast, rugged, vegetable beds | Not as “decorative”; sharp wire ends |
| Bamboo cane obelisk (lashed) | $10–$30 | 45–90 minutes | Temporary/seasonal structures, light vines | Shorter lifespan; lashings loosen over time |
Tip: Bamboo + zip ties is the fastest seasonal obelisk
For a quick, good-looking seasonal structure, lash 6–8 ft bamboo canes into a teepee, then add 2–3 horizontal rings with zip ties or garden twine. Use 8 canes for better roundness and strength than 4. It’s ideal for peas and morning glories and takes under an hour.
Example: If you’re renting and don’t want permanent structures, bamboo obelisks can be built, used, and composted (or stored) with minimal hassle.
Tip: Repurpose tomato cages into a “stacked obelisk” for under $10
Two cheap round tomato cages can be wired together, then tightened at the top to create a tapered tower. Add a third cage for extra height and stability, and wrap the outside with jute twine to give tendrils something to grab. It’s not a showpiece, but it’s surprisingly effective for beans.
Example: In a pinch, this is a great solution when you realize you planted too many climbers and need support today—not next weekend.
Real-World Scenarios (So You Can Copy What Works)
Scenario: Windy corner lot + pole beans that act like sails
Go with a 2x2 leg build, a 24 in base, and one mid-level brace at 36 in. Anchor each leg with a 10 in landscape staple over the base rail, or screw the base into a wood-framed raised bed with 2-1/2 in exterior screws. This setup prevents the slow seasonal lean that happens when vines pull harder on the sunny side.
Scenario: Small patio containers where you need height without tipping
Use a 5 ft obelisk with a 14–16 in base and sink it into the pot before adding soil, so the legs are buried 8–10 in. For extra safety, zip tie the obelisk to the container handle or rim if the pot is lightweight. This keeps jasmine, mandevilla, or black-eyed Susan vine upright without a faceplant in a summer storm.
Scenario: Raised beds with drip lines and constant moisture near the base
Keep wood off soggy mulch by setting the obelisk on four small pavers or adding “feet” blocks under corners. Seal the bottom 18 in of legs and avoid placing drip emitters right at the wood—aim them 4–6 in away. You’ll reduce rot and keep the base from sinking unevenly over the season.
Scenario: A front-yard “pretty” obelisk for clematis or climbing roses
Prioritize symmetry and finish: use a taper jig, add a top cap (a small finial or a simple pyramid cap made from scrap), and keep slat spacing consistent at 6 in. Paint it matte black or soft white for a classic look; one quart of exterior paint usually covers 2–3 obelisks if you’re not slathering it on. For roses, make the footprint wider (24 in) so you can tie canes in a gentle spiral.
Little Add-Ons That Make Your Obelisk Easier to Use
Tip: Add a removable top hook for hanging a solar light or feeder
A simple eye screw at the top lets you hang a small lantern, solar light, or even a bird feeder in the off-season. Keep the hanging weight low—under 5 lb—so it doesn’t act like a pendulum in wind. It’s a small upgrade that makes the structure look intentional even before plants fill in.
Example: In early spring when vines are still tiny, a single lantern makes the obelisk feel like a design feature, not a bare frame.
Tip: Use twine “lacing” for plants that don’t naturally grab wood
Not all climbers cling well to smooth slats. Run jute twine in a crisscross pattern and staple it (or tie it) to the frame. Replace the twine each season for a clean reset—jute is cheap, usually $5–$8 for a roll that lasts multiple years of lacing.
Example: Nasturtiums and some climbing flowers behave better when they can lean into a web instead of a single vertical stick.
Tip: Mark the “north” side on the base so you can rotate it intentionally
If one side gets hammered by afternoon sun, vines may grow thicker there and pull the structure off balance over time. A small mark on the base helps you rotate the obelisk once a month for even coverage—especially useful in raised beds where one side faces open space and wind. It’s a tiny habit that prevents the seasonal lean.
Example: On a south-facing bed, rotating keeps beans from piling onto the hottest side and shading out the rest of the trellis.
If you keep your first build simple—solid taper, one mid-brace, and a real anchoring plan—you’ll end up with an obelisk that doesn’t wobble, doesn’t rot out immediately, and makes vining plants easier to harvest. Build one at 6 ft and you’ll quickly want a second, because once you see how much vertical growing space it creates in a small footprint, it’s hard to go back to letting vines sprawl everywhere.