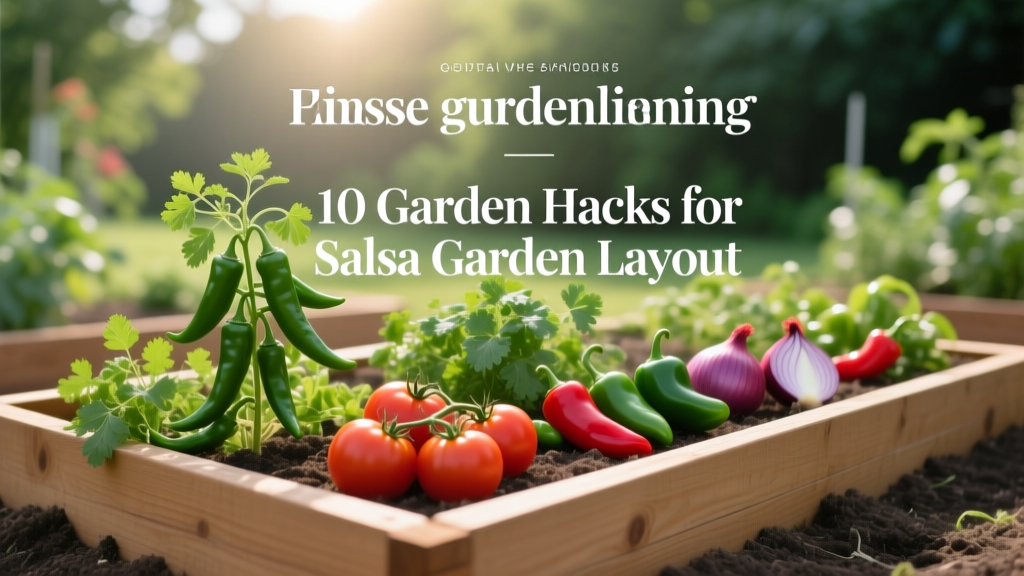
10 Garden Hacks for Salsa Garden Layout
Most “salsa gardens” fail for a surprisingly boring reason: people plant everything in one cute square, then wonder why the tomatoes shade the peppers, the cilantro bolts, and the basil gets mildew. Salsa ingredients don’t just need the same sun—they need different timing, spacing, and airflow. The good news: with a few layout hacks, you can pull a bowl of tomatoes, peppers, onions, cilantro, and a limey herb (or two) from a small space without babysitting it.
Below are 10 layout-first tricks I use to make salsa beds work in real gardens—front yards, patios, community plots, and those “I have exactly one sunny strip” situations.
Group 1: Layout that fixes 80% of salsa garden problems
1) Build the “tall-to-short” sun map (and stop the tomato shadow war)
Put the tallest crops on the north side of a bed (or the farthest side from the sunniest direction), then stair-step down: indeterminate tomatoes → tomatillos (if you grow them) → peppers → basil/cilantro → onions/garlic. This keeps 6–8 hours of sun hitting the shorter plants instead of living in tomato shade all summer. In a 4 ft x 8 ft bed, that often means tomatoes in the back row, peppers in the middle, and onions/cilantro along the front edge.
Real-world example: In a Denver community plot (high sun, low humidity), a gardener moved two tomato cages from the south edge to the north edge and instantly stopped “mystery” pepper stunting—same soil, same watering, just more light.
2) Use a “salsa strip” bed: 18 inches wide is the sweet spot
If you’re working along a fence, driveway, or patio, an 18–24 inch wide bed is a killer salsa layout. It’s wide enough for a single row of tomatoes on a trellis and a second row of peppers/onions tucked in front, but narrow enough that you can reach everything without stepping on soil. This layout also boosts airflow, which helps with common tomato issues like blight and leaf spot.
Cost hack: A DIY strip bed can be as simple as cardboard + 3 inches of compost + 3 inches of mulch. In many areas, a municipal compost pickup can be $0–$30, compared with $60–$120 for bagged soil to fill a new raised bed frame.
3) Swap cages for a flat trellis to reclaim 30–40% of bed space
Tomato cages are space hogs. A simple flat trellis (cattle panel, hog panel, or sturdy wire mesh) set vertically lets you plant tomatoes closer together while keeping leaves off the ground. Aim for 18–24 inches between indeterminate tomatoes on a trellis; with cages you often need 30–36 inches to avoid a tangled jungle.
DIY alternative: Two T-posts plus a 16 ft cattle panel is usually cheaper per season than buying three or four heavy cages, and it stores flat. If you only need small-scale, a piece of remesh concrete panel works great too.
4) Add a “walkway mulch moat” to stop splash disease
Salsa gardens tend to be tomato-heavy, and tomatoes hate soil splashing onto lower leaves during rain or watering. Create a 12–18 inch mulch zone (wood chips, shredded leaves, straw) around the tomato base and along the bed edge that faces your watering source. This is a layout trick more than a maintenance tip: it reduces mud splash, keeps paths cleaner, and makes you less likely to brush wet leaves when harvesting.
Research-backed: Many university extension programs recommend mulching to reduce soil-borne disease splash and stabilize moisture for tomatoes; for example, University of Minnesota Extension notes mulch helps maintain even soil moisture and reduces soil splash onto leaves (University of Minnesota Extension, 2020).
Group 2: Spacing and timing hacks (because cilantro doesn’t follow tomato rules)
5) Plant cilantro where it gets “afternoon shade”—on purpose
Cilantro bolts fast in heat. Instead of giving it prime real estate, plant it on the east side of taller plants (tomatoes or trellised tomatillos) so it gets morning sun and filtered afternoon shade. For continual harvest, sow a short row every 2–3 weeks; treat it like a rotating crop, not a one-and-done plant.
Case example: In a humid Atlanta backyard, a gardener couldn’t keep cilantro past June. After shifting cilantro to the east side of a tomato trellis and sowing every 2 weeks, they harvested usable leaves into July—still not forever, but long enough to matter for salsa season.
6) Use onion/garlic as a living border to “reserve” space early
Onions and garlic can mark your bed edges early in the season when tomatoes and peppers are still small. Plant onions 4 inches apart in a single or double border row; they act like a living measuring tape so you don’t accidentally overcrowd later. Bonus: you harvest onions earlier, freeing space for late basil or a final cilantro sowing.
Timing shortcut: Set out onion starts 2–4 weeks before your last frost date, then transplant peppers after nights stay above about 55°F—you’ll avoid stalled peppers and still use the space efficiently.
7) Give peppers their own “heat pocket” micro-zone
Peppers love warmth more than tomatoes do. Create a heat pocket by placing peppers along a south-facing wall, beside a reflective path, or in the warmest middle of a raised bed. Keep peppers 14–18 inches apart for most varieties; tighter spacing can trap humidity and increase disease pressure.
Money-saving trick: Instead of buying black plastic mulch, use a strip of dark landscape fabric you already have, pinned down for the first 4–6 weeks of pepper growth to warm soil, then remove or cover with organic mulch once summer heat kicks in.
Group 3: Watering and fertility shortcuts that start with layout
8) Run one soaker line per “ingredient lane” (not one line for the whole bed)
A salsa bed has plants with different water habits: tomatoes want steady moisture, onions prefer it drier as they size up, and cilantro likes consistent cool moisture. Instead of one irrigation line down the center, lay two parallel soaker hoses: one closer to tomatoes, one closer to peppers/herbs. If you’re hand-watering, this layout still helps—water lanes, not the entire bed, which cuts waste and keeps foliage drier.
Cost comparison: A basic 25 ft soaker hose is often $10–$20. Two lines in a 4x8 bed can save enough water over a season to pay for themselves in many climates, especially if your alternative is frequent overhead watering.
9) Pre-load each planting hole with a simple salsa-friendly mix (no guesswork)
Instead of amending the whole bed evenly, “target fertilize” the heavy feeders. For tomatoes and peppers, mix into each planting hole: 2 cups compost + 1 tablespoon balanced organic fertilizer (or a small handful of worm castings). Keep onions and cilantro in a lighter zone—too much nitrogen there gives you lush leaves and smaller bulbs or faster bolting.
Research-backed: Excess nitrogen can push leafy growth at the expense of fruiting in some crops; extension guidance commonly recommends balanced fertility and avoiding over-fertilization for tomatoes and peppers. Penn State Extension emphasizes soil testing and appropriate nutrient applications rather than blanket feeding (Penn State Extension, 2023).
“Soil testing is the only way to know what your soil needs. Guessing often leads to over-application of nutrients that can hurt plants and the environment.” — Penn State Extension, 2023
Group 4: Pest and disease prevention tricks built into the blueprint
10) Plant “sacrificial” basil and marigold pockets at bed corners to simplify scouting
Instead of dotting companion plants randomly, place them where you naturally pause: bed corners, trellis ends, and the gate side of a plot. A basil plant at each front corner (about 12 inches from the edge) becomes a scent marker and an easy place to check for aphids or leaf issues before they spread. Marigolds or alyssum at the opposite corners can increase beneficial insect activity and give you a quick “health snapshot” when you walk by.
Case example: In a small patio bed in Phoenix, basil placed at the front corners showed spider mite stippling before the tomatoes did—so the gardener sprayed the basil first and rinsed the tomatoes early, preventing a full infestation.
Quick comparison table: two proven salsa layouts
Not sure which layout style fits your space? Use this as a fast pick-your-path.
| Layout | Best for | Typical spacing plan | Pros | Trade-offs |
|---|---|---|---|---|
| 4x8 Raised Bed “Stair-Step” | Backyards, permanent beds | 2 tomatoes on north trellis (18–24" apart), 3–4 peppers mid-bed (14–18"), onions border (4"), cilantro/basil front edge | Easy rotation, tidy harvesting, good airflow if trellised | Can feel crowded if you use cages; needs a clear north/south orientation |
| 18–24" Salsa Strip | Fences, narrow sun corridors, patios | Tomatoes on vertical trellis at back, peppers in front row, onions interplanted as border, cilantro in partial shade zones | High efficiency per square foot, easy reaching, minimal soil compaction | Less room for sprawling varieties; must trellis to avoid blocking the strip |
Three real-world salsa garden setups (steal these)
You don’t need a perfect plot—just a layout that matches your constraints. Here are three setups that work with common situations.
Scenario A: One raised bed (4 ft x 8 ft), full sun, family wants weekly salsa
Put two indeterminate tomatoes on a trellis along the north side, four peppers in a staggered middle row, and an onion border around the front and sides at 4-inch spacing. Sow a 12-inch strip of cilantro on the east side of the tomato line every 2–3 weeks, and place basil at the front corners for quick harvesting. This gives you steady tomatoes/peppers, with onions and herbs cycling around them.
Scenario B: Apartment patio with (only) a sunny railing
Use a 24-inch wide trough or two large containers (at least 10–15 gallons each) for tomatoes on a vertical trellis, then tuck peppers in separate 5-gallon buckets in the warmest spot. Keep cilantro in a smaller pot that you can slide into afternoon shade when temperatures spike. This is one of the few times “moveable layout” beats fixed beds—your cilantro will thank you.
Scenario C: Humid climate, recurring tomato disease, gardener tired of spraying
Prioritize airflow: trellis tomatoes, prune to 1–2 main stems, and keep a mulch moat to reduce splash. Space peppers a bit wider (closer to 18 inches) and avoid cramming basil directly under dense tomato foliage. If you have only one bed, rotate the tomato position each year (even swapping “north row” to a different section) and clean up plant debris at season’s end to reduce disease carryover.
A few insider shortcuts that make salsa harvest easier (without adding work)
Label your lanes. Seriously. A simple painted rock or a $1 plant label at the start of each row prevents the classic mid-summer mistake: harvesting the wrong pepper because “they all looked the same last month.”
Choose varieties that match your layout. Indeterminate tomatoes shine on trellises; determinate tomatoes behave better in cages or stakes and won’t swallow a small bed. For peppers, compact varieties are perfect in strip beds; sprawling types need that full 18-inch spacing to avoid becoming a leafy pile.
And if you only do one thing from this whole list: stop putting cilantro in the sunniest, hottest spot you own. Give that space to peppers, and let cilantro live in the dappled edge where it belongs.
Once your layout is doing the heavy lifting, salsa gardening gets ridiculously satisfying—walk out with a bowl, grab tomatoes from the trellis lane, peppers from the heat pocket, onions from the border, and herbs from the shaded edge. That’s the kind of garden design that feels like a shortcut every single week.