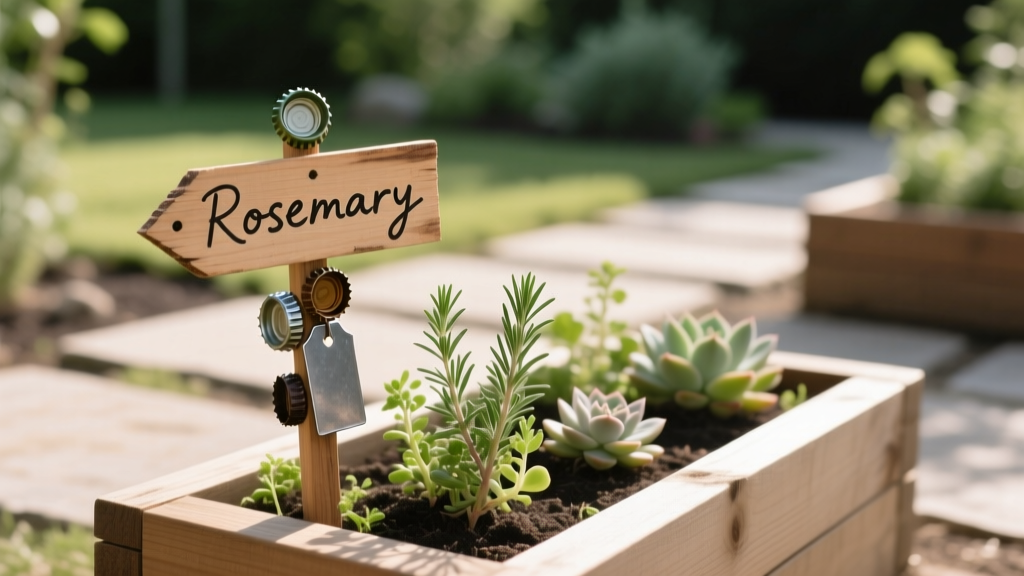
How to Make Garden Markers from Recycled Materials
If you’ve ever sworn you planted cilantro and somehow harvested parsley, you’re not alone—the most common “garden marker” mistake isn’t forgetting to label. It’s using a label that can’t survive the first month outside. Sunlight, irrigation, and soil microbes fade ink fast, and many adhesives give up as soon as things get wet. The good news: you can make long-lasting markers from stuff you already have, and you can do it in a way that’s actually readable come harvest time.
Below are the recycled-material marker methods that hold up in real beds, plus a few “don’t do what I did” notes that will save you replanting the wrong row.
First: Make Markers That Stay Legible Outdoors
Use UV- and water-resistant writing (and test it in 60 seconds)
Tip: Do the “soak + sun” test before you label the whole garden. Write on a scrap of your chosen material, dunk it in water for 10 minutes, then leave it in direct sun for 1 hour. If it smears or fades, it won’t last a season. For ink, oil-based paint markers or “garden marker” pens outperform regular Sharpies outdoors.
Example: If you’re labeling a dozen seedling trays, test one popsicle stick first; it’s a lot less annoying to redo one label than 48 cells.
Choose “engrave or emboss” when possible
Tip: If you can scratch, press, or burn letters into the marker, do that instead of relying on ink. Engraved labels don’t wash off, and they don’t care if a sprinkler hits them twice a day. A nail, awl, old screwdriver, or a ballpoint pen pressed hard into soft metal works surprisingly well.
Example: Pressing letters into an aluminum can strip (details below) takes about 2 minutes per marker and lasts multiple seasons.
Make the label big enough to read at a glance
Tip: Write in letters at least 10–12 mm tall (about 1/2 inch) for bed markers. Tiny writing is fine in seed trays, but it becomes a squint-fest once plants grow and shade the tag. Use a thick paint pen tip (2–4 mm) or carve larger letters.
Example: “TOMATO ‘SUN GOLD’” is easier to spot than “SG”—especially when you’re trying to differentiate multiple cherry varieties.
Seal ink with a clear topcoat (cheap and effective)
Tip: If you must use ink on a porous surface (wood, cardboard), seal it. A quick spray of clear acrylic, polyurethane, or even clear nail polish over the writing dramatically improves water resistance. One $6 can of clear acrylic often covers 50–80 small labels if you do one light coat.
Example: Coat popsicle-stick markers in batches: lay them on cardboard, spray, flip after 15 minutes, spray again.
“UV light is a major driver of plastic deterioration outdoors; sunlight breaks polymer chains and causes fading and brittleness.” — Washington State University Extension (2016)
Recycled Material Winners (and Exactly How to Use Them)
Aluminum can labels: nearly free, weatherproof, and readable
Tip: Turn cans into embossed labels that won’t fade. Cut the top and bottom off a rinsed aluminum can, slice it into strips about 2 cm × 15 cm, then round the corners with scissors so you don’t create a garden booby trap. Write by pressing hard with a ballpoint pen on a soft surface (like cardboard) to emboss the metal, then rub soil into the grooves for contrast.
Example: For a tomato bed, make 10 matching aluminum strips and twist-tie them to a short stake; even if the tag gets muddy, the embossed letters stay.
Wine cork markers: best for pots and small raised beds
Tip: Corks are great “quick labels” if you protect the writing. Slice a cork in half lengthwise, write on the flat face with an oil-based paint pen, and push a bamboo skewer or old chopstick into the cork as a stem. A dab of clear nail polish over the label keeps it from rubbing off when you handle pots.
Example: In a patio herb collection, cork-on-skewer markers are easy to move when you shuffle pots to chase the sun.
Plastic jug “stakes”: perfect for big, bold labels
Tip: Cut milk jugs and detergent bottles into durable stakes. Use the flat, non-curved parts; cut stakes roughly 3 cm × 18 cm and notch the bottom into a point. Write with a paint marker, then cover the label area with clear packing tape to protect it from abrasion.
Example: If you’re direct-sowing beans in 3 successive rounds, make three jug stakes labeled “Beans Round 1/2/3” with sow dates.
Old blinds or mini-blinds: the “pro nursery” hack
Tip: Vinyl or aluminum blinds make excellent long, reusable tags. Cut into strips (about 2.5 cm × 20 cm), punch a hole at the top, and hang from a stake or cage with twist ties. Use a paint pen or emboss if it’s aluminum; they’re flexible, weather-tough, and easy to write on.
Example: For tomatoes in cages, hang blind-strip tags from the cage wire so the label doesn’t get swallowed by foliage.
Takeout containers and yogurt lids: free “bed row” signs
Tip: Use thicker plastic lids for wider, highly visible signs. Cut a lid into a rectangle, punch two holes, and zip-tie it to a short stake. This is the fastest way to label “Carrots—Nantes” versus “Carrots—Imperator” in adjacent rows.
Example: In a kids’ garden bed, a big lid sign is readable from a few feet away, which cuts down on accidental harvesting of “the wrong green things.”
Make Markers That Don’t Disappear (Wind, Weeding, and Wildlife)
Anchor markers to something sturdier than the label itself
Tip: Pair your recycled label with a reliable stake. The label can be lightweight, but the support should be sturdy: a broken fiberglass driveway marker, scrap bamboo, old tent stake, or a pruned branch works. Aim for at least 15–20 cm in the soil so it doesn’t loosen with watering.
Example: Aluminum tags attached to bamboo stakes survive spring storms better than thin plastic stakes alone.
Keep labels out of the irrigation splash zone
Tip: Place bed markers 5–8 cm away from emitters or heavy drip points. Constant splatter accelerates fading and can bury small markers under soil over time. If you’re using overhead watering, mount tags slightly higher (like on a short stake) so they don’t get repeatedly soaked.
Example: In a strawberry patch watered daily, labels at soil level get algae-coated; labels raised 10 cm stay readable.
Use a two-label system for anything you’ll really regret losing
Tip: Duplicate labels for high-stakes plantings. Put one label at the row start and a second label right next to the plant. If one goes missing during a weeding session, you still have a backup.
Example: For a $4 packet of rare pepper seeds, a second label is basically free insurance.
Speed Labeling: Batch Workflows That Save an Hour
Make a “label-making station” and crank out 30 at once
Tip: Batch your cutting and writing instead of doing it one label at a time. Set up scissors/snips, hole punch, twist ties, and marker/pen in one spot. Cut 30 blanks first, then write all names, then seal (if needed), then attach—this reduces tool switching and keeps labels consistent.
Example: Before spring sowing, prep a stack of blind-strip tags for tomatoes, peppers, and basil; when seedlings move outside, you’re not hunting for a pen with dirty hands.
Add dates and spacing right on the tag
Tip: Put the “future you” info on the marker: sow date, transplant date, and spacing. A quick “Sown 4/10; thin to 10 cm” helps you avoid the classic over-crowded carrot jungle. It also helps you time succession sowings (like lettuce every 14 days).
Example: On a jug stake: “Spinach—sow 3/15, shade cloth by 5/1” is more useful than just “Spinach.”
Comparison Table: Pick the Right Recycled Marker for Your Situation
| Marker Material | Durability (Rain/Sun) | Best Writing Method | Best Use Case | Typical Cost per Marker |
|---|---|---|---|---|
| Aluminum can strips | Excellent (multi-season) | Emboss (ballpoint) or paint pen | Beds, perennials, long-term labels | $0–$0.05 |
| Plastic jug stakes | Good (1–2 seasons) | Paint pen + tape “lamination” | Big, readable annual labels | $0–$0.10 |
| Mini-blind strips | Very good | Paint pen or emboss (if aluminum) | Hanging tags on cages/trellises | $0 (scrap) |
| Wine cork + skewer | Fair (best in pots) | Paint pen + clear coat | Containers, indoor starts | $0.05–$0.20 |
| Popsicle sticks (reused) | Poor to fair unless sealed | Pencil (short-term) or sealed paint pen | Seed trays, temporary labels | $0–$0.05 |
3 Real-World Scenarios (and What Actually Works)
Scenario 1: The windy community garden plot
Tip: Use metal or blind-strip labels tied to a stake, not stuck in alone. In exposed plots, standalone plastic stakes wiggle loose and disappear after a couple gusty days. Attach an aluminum label to a bamboo stake using a twist tie, and push the stake at least 20 cm deep.
Example: A community gardener labeling 6 varieties of kale used embossed aluminum tags tied to stakes; after a spring storm, every label was still there while neighboring thin plastic markers had snapped or vanished.
Scenario 2: A raised bed with heavy mulch
Tip: Raise the label above mulch height by 5–10 cm. Mulch shifts, gets topped up, and can bury short markers in a week. Use a taller stake (or attach your label higher) so it stays visible after you add another 5 cm layer of straw.
Example: In a garlic bed mulched thickly for winter, tags mounted mid-stake stayed readable in spring, while ground-level tags were completely swallowed.
Scenario 3: Container garden that gets shuffled around
Tip: Put the label on the pot, not in the soil. Soil markers pop out when you move containers and can get mixed up on the patio. Zip-tie a blind-strip tag through a pot handle, or tape a plastic label to the outside of the pot where it won’t be disturbed by watering.
Example: For 12 pepper pots, hanging tags made it easy to rotate plants for even light without losing which was jalapeño vs. shishito.
Longevity Tricks: Make Recycled Markers Last Multiple Seasons
Clean plastic before writing (it matters)
Tip: Degrease recycled plastic with dish soap, then wipe with rubbing alcohol. Many containers have invisible oils that make ink bead up or peel. A quick wash and alcohol wipe takes 30 seconds and dramatically improves adhesion for paint pens and tape.
Example: Detergent-bottle plastic is especially slick—cleaning first prevents that annoying “flake-off” when you rub dirt off the label.
Round corners and smooth edges to stop cracking and cuts
Tip: Snip every sharp corner into a curve. Corners catch on gloves, weed cloth, and plant stems, and they’re where cracks start. For metal strips, a quick pass with sandpaper (or even a nail file) makes handling safer.
Example: Aluminum can labels with rounded corners don’t snag row cover fabric when you pull it on and off.
Don’t use ordinary permanent marker for long-term outdoor labels
Tip: Regular permanent marker fades faster than most people expect in full sun. Many “permanent” inks aren’t designed for months of UV exposure; they’re permanent on paper, not permanent in a garden. Penn State Extension notes that ultraviolet light is a key factor in outdoor material degradation and fading (2019), which is exactly what your labels face every day.
Example: If you want one set of labels to last from transplant to harvest (often 90–120 days for summer crops), use paint pen or embossing instead of standard marker.
DIY Alternatives for Common Problems
If you don’t have a paint pen, use pencil on wood (short term) and upgrade later
Tip: Pencil on a reused wooden stick survives rain better than water-based ink. Graphite doesn’t dissolve, though it can become faint over time. Use this for seed trays or short-duration crops, then switch to embossed metal or sealed paint pen for anything longer than 4–6 weeks.
Example: For radishes that mature in 25–35 days, pencil on a stick is often “good enough” and basically free.
If labels keep getting bleached, add shade with placement—not products
Tip: Put the label on the north side of a stake or tuck it under a leaf canopy. You’re reducing direct UV exposure without buying anything. Just make sure it’s still visible from the path so you’re not playing hide-and-seek.
Example: In a full-sun bed, moving tags from the south edge to the north edge of the same stake can noticeably slow fading.
If you hate the look of labels, hide a “map marker” system in plain sight
Tip: Use discreet numbered markers and keep a simple bed map on your phone. Cut small recycled plastic squares, label them “1–12,” and keep a notes app list matching numbers to varieties and dates. This works great in ornamental beds where you don’t want visible labels everywhere.
Example: A front-yard edible landscape can use tiny numbered tags near the base of plants, while details like “basil succession every 14 days” live in your notes.
Smart Label Content: What to Write So It’s Useful Later
Write variety + date + one care note you always forget
Tip: Think of the marker as a tiny cheat sheet. Add the cultivar name, planting date, and one key reminder like “pinch” (basil), “trellis” (peas), or “thin to 10 cm” (beets). This keeps you from guessing later and helps if someone else waters or harvests.
Example: “Cuke ‘Marketmore’ — transpl. 5/20 — trellis ASAP” is the kind of label that prevents the midsummer cucumber sprawl disaster.
Use abbreviations that you’ll still understand in 2 months
Tip: If you shorten names, do it consistently. “TOM-SG” might make sense now, but will it make sense when you’re tired and it’s 95°F? A consistent system like “TOM: SunGold” or “PEP: Jal” keeps things readable.
Example: In a bed with 4 tomato varieties, a consistent prefix (“TOM:”) makes scanning quick.
Once you find a recycled marker style you like, make a small “label kit” and keep it where you start seeds: a paint pen, twist ties, scissors, and a stack of pre-cut blanks. The real shortcut isn’t just saving money (though $0.05 labels feel great)—it’s saving your future self from playing plant detective when everything looks the same shade of green.
Sources: Washington State University Extension (2016) on UV impacts and outdoor material degradation; Penn State Extension (2019) on sunlight/UV as a driver of fading and breakdown in outdoor materials.