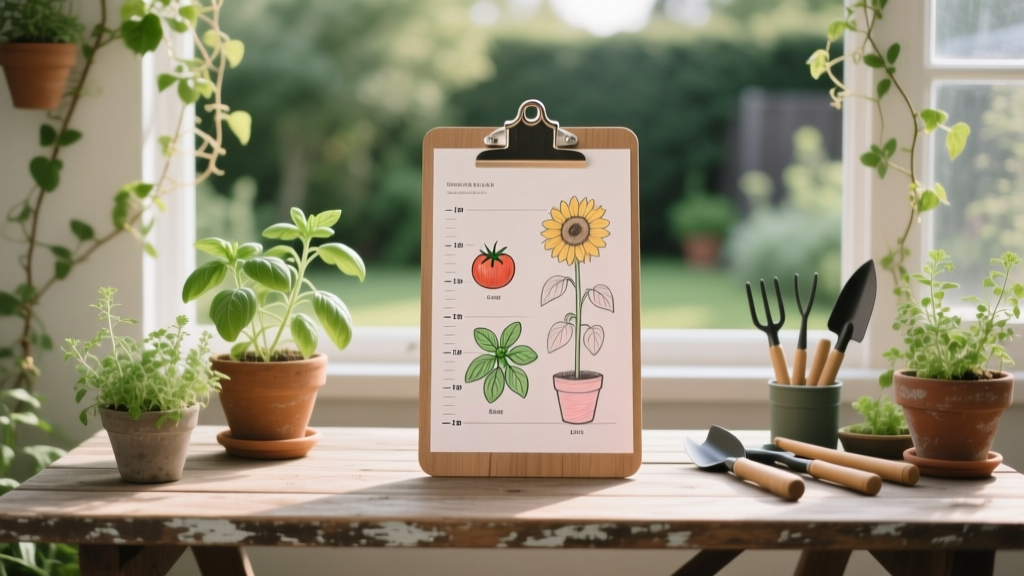
Making a Garden Plant Height Chart
The most common “mystery failure” in home gardens isn’t pests or fertilizer—it's height. People plant by color or bloom time, then wonder why the peppers sulk, the zinnias lean, and the basil stays stunted. Nine times out of ten, a taller plant quietly stole the light. A simple plant height chart—made with your actual varieties and your actual garden—fixes this faster than almost anything else.
This isn’t an art project. It’s a shortcut: a one-page reference that tells you what goes where, how close, and what will cast shade by mid-summer. Build it once, update it as you learn, and you’ll stop doing the “shuffle plants around in June” dance.
Start With Numbers That Don’t Lie (and Don’t Rely on Tag Hype)
Tip: Use “mature height” as a range, not a single number
Plant labels tend to give a best-case height, but real gardens produce ranges depending on spacing, fertility, and weather. Write heights as a range (example: 18–30 inches) and you’ll design with reality instead of optimism. When in doubt, bump the top end up by 20% for rich soil and consistent irrigation.
Example: A packet might say cosmos are 36". In a composty bed with weekly watering, they can hit 48"—which is the difference between “pretty backdrop” and “oops, I shaded my tomatoes.”
Tip: Anchor your chart to sunlight math, not aesthetics
Height matters because it changes light, and light changes yield. Most fruiting vegetables need strong direct sun; many extensions recommend at least 6–8 hours for best results (see University of Minnesota Extension, 2020). Put your tallest plants on the side that won’t block that window (often the north side in the Northern Hemisphere).
Example: If your bed runs east–west, tall trellised cucumbers on the north edge won’t cast a long shadow across peppers at midday.
Tip: Record your bed’s “usable height” for wind and flopping
A plant’s height on paper isn’t always its height in a storm. If your yard is windy, treat “upright height” and “flop height” separately. Add a simple note like: “needs support after 24 inches” so your chart prevents collapses, not just shade.
Example: Dahlias might be 36–48", but in a breezy side yard, they behave like 24" unless staked.
Tip: Pull height data from sources that test varieties
Seed catalogs are useful, but variety trials and extensions are better because they’re measured in the field. Two reliable places to check: extension crop sheets and university trial reports; you can also cross-check with RHS/major botanic sources for ornamentals. Keep at least one citation right on your chart so you remember where the number came from.
Citations you can use: University of Minnesota Extension (2020) for vegetable site/sun requirements; Penn State Extension (2018) discusses how plant spacing and canopy affect light interception and plant performance in gardens and small plots.
“Plant spacing and canopy management directly affect light distribution within the canopy, which can influence flowering and yield.” — Penn State Extension, 2018
Build the Chart Fast (Paper, Spreadsheet, or DIY Board)
Tip: Sort plants into 4 height bands before you place anything
This is the fastest way to turn a messy seed stash into a plan. Use four bands that match common bed behavior: 0–12", 12–24", 24–48", and 48"+. Once sorted, you’ll instantly see which band will dominate your sunlight.
Example: In one glance you’ll notice you have 10 “24–48"” plants (tomatoes, pole beans, tall marigolds) and only a few true low-growers—meaning you must protect the south edge for short crops.
Tip: Add “width” and “support” columns (height alone lies)
Two 36" plants can behave totally differently if one stays skinny and the other turns into a bush. Add a width/spread estimate (example: 18" wide) and whether it needs a cage/trellis. This turns your chart into a spacing cheat-sheet, not just a height list.
Example: A caged tomato might be 60–72" tall and 24–30" wide; a staked tomato could be similar height but only 18" wide.
Tip: Use a simple formula to prevent shading: “tall-to-short = 1:2 row depth”
If you’re arranging in bands, a good rule of thumb is to keep the “tall band” to the back 1/3 of a bed and reserve the front 2/3 for the shorter bands. It’s not perfect, but it prevents the classic mistake of putting a wall of foliage in front of everything else. Write this ratio right on your chart so you remember it mid-planting.
Example: In a 4 ft deep bed, aim for about 16 inches of tall/trellised crops at the back and 32 inches for medium/low crops in front.
Tip: Pick a format you’ll actually update (and keep it in the garden)
Charts fail when they live on a laptop inside. A laminated one-pager on a clipboard works, or a weatherproof board. If you’re digital, a Google Sheet is great because you can sort by height band and print it each season.
Cost hack: Laminate a printed sheet at an office store for around $2–$5, or DIY with clear packing tape over both sides for under $1.
Tip: Make a “seasonal height” note for the top 5 bullies
Some plants are polite in May and monsters by July. For your biggest shade-casters, add a note like “hits 36" by late June” or “explodes after heat.” This helps with succession planting and with not accidentally putting a spring crop in a soon-to-be jungle.
Example: Sunflowers might be 12" seedlings in late May, then jump to 6 ft by mid-summer; that changes everything behind them.
Placement Tricks: Turn the Chart Into a Layout That Works
Tip: Put the 48"+ plants on a “permanent edge”
Tall crops should have a consistent home so you don’t reinvent the wheel every year. Pick one edge—usually the north or northwest edge—and make it your tall zone. Your chart should show that edge as reserved for trellises, cages, and tall flowers.
Example: A north-edge strip for pole beans and indeterminate tomatoes keeps them from shading a whole bed of basil and lettuce.
Tip: Use “shadow buffers” for tall plants near short crops
If a tall plant must be near a short one, buffer with a medium-height “bridge plant.” The medium layer catches partial shade better and reduces the abrupt light drop that stunts short sun-lovers. In your chart, mark likely buffers: calendula, bush beans, determinate tomatoes, compact zinnias.
Example: Put 18–24" bush beans between 6 ft pole beans and 10" basil to keep basil from getting swallowed.
Tip: Chart trellis footprint, not just plant height
Trellises throw shade even before plants climb. Add the trellis height (say 6 ft) and the base width (say 12 inches) so you remember it’s a structure, not just a plant. A “trellis column” on the chart prevents you from forgetting the hardware.
Example: A cattle panel arch is amazing, but it can shade a 2–3 ft strip on each side at certain times—your chart should warn you.
Tip: Use the chart to schedule pruning and support at specific heights
Make your chart do double duty: add triggers like “stake at 12 inches” or “pinch at 8 inches.” These height-based reminders are more reliable than calendar reminders because plant growth depends on weather. You’ll catch plants before they flop or get leggy.
Example: Pinch basil at 6–8" to keep it bushy; tie tomatoes when they hit 12–18" so you don’t snap stems later.
A Quick Comparison: Charting Methods That Actually Stick
| Method | Setup Time | Approx. Cost | Best For | Gotcha |
|---|---|---|---|---|
| Laminated one-page chart on clipboard | 30–60 minutes | $2–$5 (or ~$1 DIY) | Most gardeners; fast updates with a marker | Needs occasional reprint when it gets crowded |
| Google Sheet + printed copy | 45–90 minutes | $0 | Data lovers; easy sorting by height band | Easy to forget to bring outside |
| Garden notebook + hand sketch | 20–40 minutes | $0–$10 | Small gardens; quick jotting while planting | Hard to compare multiple beds at once |
| DIY bed-edge “height ruler” stakes (marked inches) | 30 minutes | $0–$8 | Visual learners; pruning/staking triggers | Doesn’t replace the planning chart—best as an add-on |
Shortcuts and Hacks That Make Your Chart More Accurate Every Season
Tip: Measure your own plants once and “calibrate” the chart
After a season, your garden is the best research plot you have. Pick 5–10 plants you grow often (tomatoes, basil, zinnias, peppers) and measure actual height at peak season with a tape measure. Update your chart with “my garden height” in a separate column so you stop relying on generic averages.
Example: If your jalapeños always top out at 18" instead of the listed 24", you can safely place them where they won’t block low herbs.
Tip: Add a “days to height” note for succession planning
Not every plant fills its space at the same speed. Add quick timing notes like “tall by week 6” or “slow until heat.” This helps you sneak quick crops into gaps before the canopy closes.
Example: Sow radishes (ready in about 25–35 days) in front of slow-starting peppers; by the time peppers bush out, radishes are long gone.
Tip: Use cheap painter’s tape flags to test your layout before planting
Before you plant, mark the bed with painter’s tape on small stakes labeled with each crop’s height band. Walk around the bed and look from the south side—if you can’t “see” the low band, it will likely be shaded later. This is a 10-minute reality check that saves replanting.
Example: If your tape flags show three “48+” crops in a row on the south edge, you’ll spot the problem instantly.
Tip: Budget a “support line item” so tall plants don’t become a surprise cost
Height planning often fails when the trellis/cage plan is vague. On your chart, list the support and a rough cost: tomato cage, T-post, twine, bamboo, etc. A basic setup might be $3–$6 per tomato cage, while a DIY Florida weave (stakes + twine) can be under $1 per plant in materials if you already have stakes.
Example: If you’re growing 8 indeterminate tomatoes, that’s potentially $24–$48 in cages—unless you plan a twine system upfront.
Tip: Mark “shade-tolerant” plants right on the chart for problem corners
Every garden has a spot that gets less sun—near a fence, shed, or tree line. Instead of fighting it, label plants that accept partial shade so your chart tells you what to put there on purpose. Many greens and herbs cope better with 4–6 hours sun than fruiting crops (University of Minnesota Extension, 2020).
Example: Put mint (in a pot), parsley, chives, or leafy greens in that awkward corner rather than trying to force peppers there.
Real-World Scenarios: How a Height Chart Saves the Season
Scenario: The raised-bed veggie mix that kept disappointing
A gardener had a 4x8 ft raised bed with tomatoes, peppers, basil, and marigolds “mixed for diversity.” The tomatoes were on the south edge, reached 6 ft, and shaded peppers into low production. A height chart fix: move tomatoes to the north edge, keep peppers in the middle band (18–30"), and basil on the south/front (12–18")—same plants, better yield.
Scenario: Balcony container garden with weird leggy growth
On a balcony, sun angles are harsher and shadows are sharper. One gardener had a 5 ft tall trellis container placed in front of low pots, and the low pots got only morning light. A height chart made it obvious: tall/trellised container goes to the back wall, and low herbs stay at the railing where they get the most open sky.
Scenario: Flower border that kept flopping into the path
A mixed border looked great in June and then collapsed into the walkway by July. The chart solution was to add a “needs support after 24 inches” note and group floppy plants behind sturdier ones. The gardener also switched two varieties: a 48" floppy flower got replaced with a 30–36" sturdier cultivar, reducing staking time and keeping the path clear.
Scenario: Community garden plot where you can’t control neighbors’ shade
In shared plots, your neighbor’s sunflowers can throw shade you didn’t plan for. A height chart helps you design a “shade edge” on purpose: plant your most shade-tolerant crops on the side facing the neighbor’s tall plants. Add a note like “neighbor shade risk” so you don’t waste prime sun crops in that zone.
DIY Tools: Make Height Tracking Stupid-Simple
Tip: Build a reusable “height ruler stake” from scrap wood
Grab a straight scrap board (even a 1x2 works) and mark inches with a permanent marker up to 48". Stick it into the bed and you have an instant reference for pruning and support triggers. It’s faster than guessing and helps you record “actual height” for your chart.
Example: When your peppers hit 12", you can decide if they need a small stake before the first heavy fruit set.
Tip: Use color-coding for height bands so you can scan in seconds
Assign each height band a color (green for 0–12", blue for 12–24", orange for 24–48", red for 48"+). Put a tiny colored dot next to each plant name. When you’re standing in the garden with dirty hands, colors beat reading tiny print.
Example: A quick look shows too many red dots planned for one bed—time to relocate a couple tall crops to another spot.
Tip: Keep a “swap list” for mid-season rescues
Even with a chart, surprises happen: a volunteer sunflower appears, a tomato goes wild, a storm flattens something. Keep a small list of plants that transplant well at certain sizes (for example, lettuce and small herbs move better than large fruiting crops). This turns panic into a planned swap.
Example: If a tall volunteer starts shading your greens, you can relocate the greens while they’re still under 4–6" tall.
Make the Chart Pay Off Every Time You Plant
Tip: Print your chart with a “planting day checklist” at the bottom
Add a short checklist like: “Tall zone planted first,” “Trellis installed before seedlings,” and “Medium buffer row placed.” It keeps you from doing the classic move of planting everything, then realizing you can’t install a trellis without stepping on seedlings. This is especially helpful when you’re planting fast in a 2-hour window.
Tip: Put the top 10 plants you grow every year on a permanent template
If you always grow the same staples, don’t rewrite everything from scratch. Keep a base chart with your repeat crops and their proven heights, then add a small “new this year” section. That way, most of your planning is copy-paste, and only experiments require research.
Tip: Update the chart right after peak season—not in winter
The best time to correct heights is when the plants are still standing and you can measure them. Take 15 minutes in late summer to jot actual heights and any notes like “flopped at 30 inches” or “needed extra tie-ins.” Winter planning is easier when your data is already there.
A good height chart isn’t just a list—it’s a small system that prevents shade problems, saves money on last-minute supports, and makes your beds look like you knew what you were doing all along. Once you’ve used one for a season, you’ll start seeing your garden in layers, and that’s when planting gets way less stressful and a lot more productive.
Sources: University of Minnesota Extension. “Vegetable gardening basics / sunlight needs” (2020). Penn State Extension. “Light, spacing, and canopy management effects on plant performance” (2018).