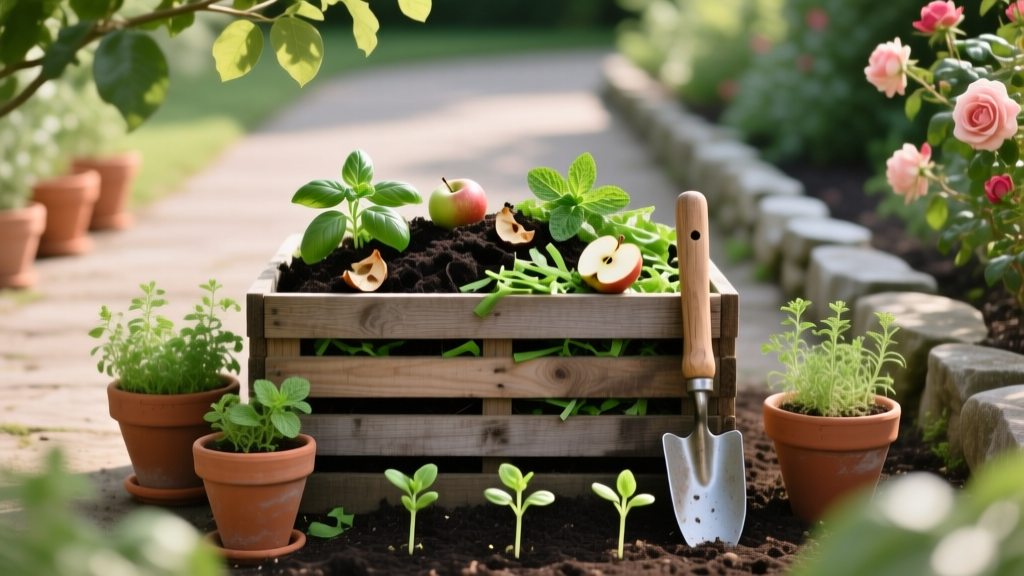
12 Garden Hacks for Garden Compost Balance
The fastest way to make compost that looks done but still wrecks your plants is a common mistake: tossing in a bunch of kitchen scraps, giving it a stir once, and calling it “healthy.” That pile usually turns slimy, smelly, and nitrogen-heavy—then it steals nitrogen from your beds while it finishes breaking down. Balanced compost isn’t about fancy gear; it’s about a few small controls (ratio, moisture, air, particle size) that make the microbes do the heavy lifting.
Below are 12 practical hacks I use to keep compost balanced—meaning it heats reliably, doesn’t stink, finishes on schedule, and feeds plants without surprises.
Balance the Recipe (Before You Touch a Pitchfork)
1) The “2-to-1 by Volume” Rule (Browns to Greens)
If you want one simple ratio that works in real gardens, use 2 parts browns to 1 part greens by volume. Browns are dry carbon stuff (dry leaves, shredded cardboard, straw); greens are nitrogen stuff (food scraps, coffee grounds, fresh grass). This lands you near the commonly recommended carbon-to-nitrogen range that compost microbes prefer (often cited around 25–30:1 C:N), without needing a lab test.
Example: For every 5-gallon bucket of kitchen scraps (greens), add two 5-gallon buckets of shredded leaves/cardboard (browns). If your pile smells like ammonia, you’re still too green—add another half-bucket of browns and mix.
2) Make “Brown Insurance” a Habit: Store a Leaf Bag Next to the Bin
The best compost piles don’t run out of browns in July. Keep a 30–50 gallon bag of dry leaves (or shredded paper) next to the compost area so every time you add wet scraps, you automatically cover them with a brown layer. This single habit prevents fruit-fly parties and that swampy anaerobic smell.
Money saver: A roll of contractor bags might cost $12–$18, but leaves are free—ask neighbors in fall and you can stockpile enough browns for months.
3) Know Your “Sneaky Greens” (Coffee Grounds Aren’t Browns)
Coffee grounds look brown, but they behave like a nitrogen-rich green in compost. Many extension resources classify coffee grounds as a green ingredient; treat them that way so your pile doesn’t tip into the “too wet/too much nitrogen” zone. Add grounds in thin layers and pair them with shredded cardboard or dry leaves.
Example: If you add a 1-quart container of coffee grounds, add at least 2 quarts of dry browns and stir. This prevents clumping that blocks airflow.
Moisture & Air: The Two Dials People Forget
4) The “Wrung-Out Sponge” Test (Plus a Cheap Fix for Too-Wet Piles)
Compost should feel like a wrung-out sponge: moist, but not dripping when squeezed. If you grab a handful and water streams out, it’s too wet and oxygen-starved—hello, rotten smell. Fix it fast by mixing in dry browns and creating air channels with a coarse layer (small sticks or chunky wood chips) at the base.
Example: After a week of rain, one gardener I worked with in Portland revived a sour pile by adding two full trash cans of dry leaves and turning it twice over 48 hours. The smell vanished, and the pile reheated.
5) Turn on a Schedule That Matches Your Goal (Fast vs. Low-Effort)
If you want compost in 4–8 weeks, you’ll need more turning—about once per week while the pile is hot. If you’re okay with compost in 6–12 months, you can turn it once a month (or less) and still get decent results. The big point is: turning isn’t moral virtue; it’s a speed lever.
Source: UC Agriculture & Natural Resources notes that active (hot) composting relies on managing moisture and aeration to keep microbes working efficiently (UC ANR, 2017).
6) Use a “Chimney Core” to Prevent Anaerobic Pockets (No Fancy Aerator Needed)
Here’s a simple hack for bins that tend to go slimy in the middle: create a vertical air “chimney.” Stand a perforated pipe (or a bundle of thin sticks) upright in the center as you build the pile, then pull it out after you’re done. You’ll leave an air channel that helps oxygen reach the core.
DIY option: Drill 1/2-inch holes every 4 inches along a scrap length of PVC. Cost is often under $10 if you buy a short section—free if you use offcuts.
Particle Size: The Speed Hack That Feels Like Cheating
7) Shred Leaves and Cardboard (Your Pile Will Heat Faster)
Microbes work on surfaces, so smaller pieces compost faster. Run leaves over with a mower or use a string trimmer in a trash can to make quick leaf confetti. Cardboard should be torn and soaked briefly, then wrung out so it doesn’t form dry plates that resist breakdown.
Real-world result: A community garden in Michigan cut their compost finishing time from “all season” to roughly 10–12 weeks by mowing leaves before adding them and turning weekly.
8) The “Lasagna Layer” Trick: Thin Greens, Thick Browns
Instead of dumping a full bucket of scraps in one spot, spread greens in a thin layer (1–2 inches) and cap with browns (3–4 inches). This balances moisture and prevents dense mats that go anaerobic. It also keeps critters less interested because food smells are muffled.
Example: In a suburban backyard with raccoons, a gardener eliminated bin tipping by switching to thin scrap layers and a heavier leaf cap—no new hardware required.
Temperature & Timing: Get the Biology Working for You
9) Hit the “Hot Zone” on Purpose (And Know When Not To)
Hot composting is efficient when your pile is big enough: aim for at least 3 ft x 3 ft x 3 ft. That volume helps the core reach 130–160°F, where decomposition accelerates and many weed seeds/pathogens are reduced when temperatures are maintained appropriately. Use a compost thermometer if you’re trying to be consistent; a decent one is often $20–$35.
Source: Washington State University Extension explains that effective hot composting typically occurs in the 131–160°F range, with management to maintain oxygen and moisture (WSU Extension, 2020).
“The organisms that do the work of composting need a balance of air and water. Too much water fills pore spaces and limits oxygen, slowing the process and causing odors.” — Washington State University Extension (2020)
10) “Finish Line” Hack: Cure for 2–4 Weeks Before You Use It
Even when compost looks dark and crumbly, it benefits from a curing period. Let it sit (moist, not wet) for 2–4 weeks so microbial activity stabilizes and any remaining hot spots settle down. This reduces the chance of tying up nitrogen right when your seedlings need it.
Example: A tomato grower who kept getting pale transplants solved it by curing compost for 3 weeks and blending it 1:1 with leaf mold for potting up—no more yellowing.
Problem-Solvers: Quick Fixes for Smell, Pests, and Weird Piles
11) If It Stinks, Diagnose in 30 Seconds (Ammonia vs. Rotten-Egg)
Ammonia smell means too much nitrogen: add browns and mix. Rotten-egg smell means anaerobic conditions: add coarse browns (straw, wood chips), fluff the pile, and stop compacting it. This is faster than guessing and hoping.
Case: A small city bin that reeked every time scraps were added stopped smelling after the owner switched to a strict “scraps get buried under 4 inches of shredded leaves” rule and added a stick chimney core.
12) The Critter-Proof “Bury & Blend” Method (No New Bin Required)
If rodents are an issue, stop putting food on top. Dig a pocket in the center, dump scraps, then mix with existing material and cover with a thick brown cap. Avoid meat, oil, and dairy in backyard compost; if you really want to compost those, consider a sealed system designed for it.
Example: In a rental yard where buying a new bin wasn’t an option, “bury & blend” plus a leaf cap reduced rat visits within 2 weeks.
Quick Comparison Table: Two Ways to Balance a Compost Pile
| Feature | Hot Composting (Active) | Cold Composting (Passive) |
|---|---|---|
| Typical pile size | At least 3 ft x 3 ft x 3 ft | Any size (even a small bin) |
| Turning frequency | About 1x/week | 1x/month or less |
| Time to finished compost | 4–8 weeks (plus 2–4 weeks curing) | 6–12 months |
| Odor risk | Low if managed; spikes if too wet | Moderate if greens pile up without browns |
| Best for | Fast results, lots of material, weed seed reduction | Low effort, steady trickle of inputs |
Three Real-World Compost Balance Scenarios (And the Fix That Works)
Scenario A: “I only have kitchen scraps—no yard waste” (Apartment or tiny yard)
Your compost balance problem is almost always a brown shortage. Stockpile cardboard egg cartons, paper towel rolls, and plain corrugated boxes; shred them and keep them dry. Aim for that 2:1 browns-to-greens by volume and freeze scraps until you have enough to mix a proper batch.
Cost hack: A basic hand shredder is optional; many people do fine tearing cardboard by hand. If you buy a small paper shredder, expect around $40–$80, but you can often find one secondhand for $10–$20.
Scenario B: “My pile is all grass clippings and turns into a stinky mat” (Spring mowing season)
Grass clippings are a classic “too green” ingredient and they mat down fast. Spread clippings to dry for 24 hours before adding, then mix them with chunky browns (dry leaves, straw) to keep airflow. Never add a thick grass-only layer—keep it under 2 inches per layer.
Example: A lawn-heavy household balanced their pile by mixing every bag of clippings with an equal bag of shredded leaves they’d saved from fall—heat improved and odors stopped.
Scenario C: “I compost right in my vegetable beds and worry about robbing nitrogen” (Trench composting)
Trench composting can be great, but burying high-carbon materials (like wood chips) can temporarily tie up nitrogen near plant roots. For in-bed composting, keep the inputs more balanced: mostly kitchen scraps plus shredded leaves, and let it sit at least 4–6 weeks before planting in that spot. If you’re burying a lot of paper/cardboard, sprinkle a nitrogen source (like fresh grass or a light dusting of blood meal) to offset it.
Simple rule: If you can still recognize the ingredients after a month, wait longer or move planting a few inches away from the trench line.
Two Extra Micro-Hacks for Better Balance (If You Want to Get Nerdy Without the Headache)
Use a “Moisture Buffer” Ingredient
If your compost swings between soggy and dry, add one reliable buffer ingredient: shredded leaves, coco coir, or finished compost. These hold moisture without turning into sludge, keeping microbial activity steadier. A single compressed brick of coco coir is often $5–$8, but dry leaves do the same job for free if you have them.
Screen Only the Amount You Need
Instead of screening the whole pile, screen just what you’ll use this week—unfinished bits go right back into the active pile as “inoculated” structure. Use 1/2-inch hardware cloth stapled to a simple wood frame; it’s faster than fussing with perfect fineness. This keeps your compost system moving without turning a Saturday into a chore marathon.
Compost balance is basically four knobs—ratio, moisture, air, and particle size—and you don’t need perfection. If you keep browns within arm’s reach, cap every food addition, and turn on a schedule that matches your patience, you’ll get compost that smells earthy, finishes predictably, and actually boosts plant growth instead of causing mystery problems.
Sources: UC Agriculture & Natural Resources (2017); Washington State University Extension (2020).