Surprising Uses for Coffee Grounds in the Garden
Most gardeners’ biggest coffee-ground mistake isn’t “using too much.” It’s using them the wrong way—as a thick, dry blanket on top of soil. Coffee grounds can clump, form a crust, and shed water, which is the opposite of what you want around roots and seedlings. Used thoughtfully (and usually mixed), they’re one of the cheapest “soil upgrades” you can get from a daily habit.
One quick reality check before we get clever: used coffee grounds are only mildly acidic to near-neutral for most home brewing, and their nutrients aren’t magic—they’re slow and need biology to unlock them. Washington State University Extension notes that coffee grounds are not a strong acidifier and are best used as a compost ingredient or mulch component rather than a stand-alone layer (WSU Extension, 2020). Keep that in mind and you’ll avoid 90% of the horror stories.
First: handle coffee grounds like an ingredient, not a product
Don’t let them turn into a water-shedding crust
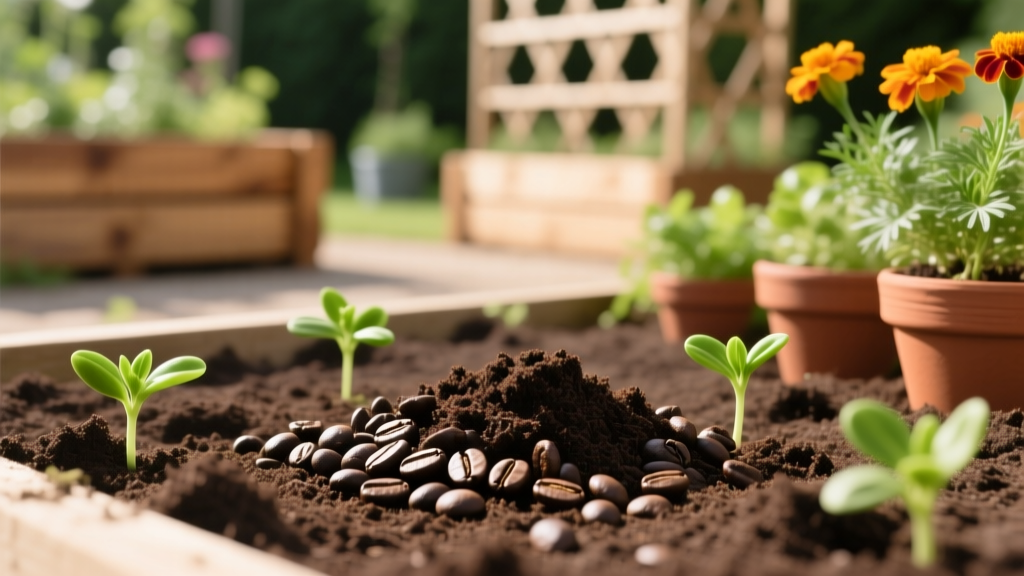
Tip: Dry or mix before you apply. If you’re applying grounds directly to beds, keep the layer thin—no more than 1/4 inch—and rake it in. Better: mix grounds with 3–4 parts shredded leaves, straw, or wood chips so they can’t mat together. Real-world example: a thin dusting around established tomatoes is fine; a half-inch ring around seedlings can harden and cause runoff.
Know what’s actually in the grounds
Tip: Treat coffee grounds as a “green” compost input. Used grounds typically behave like a nitrogen-rich ingredient; they’re often compared to other greens in compost recipes (not a replacement for fertilizer). Oregon State University Extension highlights coffee grounds as a compostable material and recommends mixing them with other ingredients rather than using them in thick layers (OSU Extension, 2019). Example: if your pile is mostly dry leaves, a bucket of grounds helps kick-start decomposition.
“Coffee grounds are best used as part of a compost mix, not as a thick mulch layer. Mixed with leaves or wood chips, they break down well and improve soil structure over time.” — Extension guidance summarized from WSU Extension (2020) and OSU Extension (2019)
Soil-building hacks (where coffee grounds actually shine)
1) Compost “accelerator” when your pile is too brown
Tip: Use grounds to balance a leaf-heavy pile. If your compost is mostly dry leaves or shredded cardboard, add coffee grounds at roughly 1 part grounds to 3 parts browns by volume, then moisten until it feels like a wrung-out sponge. The grounds add nitrogen and fine texture that helps microbes work faster. Example: in fall, a single 5-gallon bucket of grounds can “wake up” a pile that’s stalled in cold weather.
2) Trench-composting for heavy feeders (fast, tidy, no bin)
Tip: Bury grounds 6–8 inches deep under future planting rows. Dig a narrow trench, sprinkle in a thin band of grounds (think 1–2 cups per linear foot), then cover with soil so they decompose underground where they won’t crust. This works especially well for squash, corn, and tomatoes when done 2–3 weeks before planting. Example: one raised bed row prepped this way can reduce how much bagged compost you need on top.
3) “Micro-mulch” for worms and soil life—mixed, not straight
Tip: Blend grounds into mulch to feed the biology without matting. Mix 1 part coffee grounds with 4 parts shredded leaves or aged wood chips and apply a 1-inch layer around established plants (not touching stems). The mulch stays porous, earthworms pull bits down, and you avoid the dreaded crust. Example: in a shade bed, this mix can keep hosta soil cooler while slowly adding organic matter.
4) DIY “soil texture booster” for sandy beds (small doses)
Tip: Add grounds only as a minor ingredient in a bigger amendment plan. In very sandy soil, mix used grounds into compost first, then apply compost at 1–2 inches per season. Grounds alone won’t hold water like compost does, but inside compost they contribute fine particles that help with aggregation. Example: a coastal garden bed amended this way will hold moisture a bit longer between waterings without turning muddy.
Plant-specific tricks (what to use them on—and what to skip)
5) Blueberries: use grounds as a compost ingredient, not an acidifier shortcut
Tip: If you’re chasing low pH, use the right tool. Coffee grounds are not a reliable way to acidify soil long-term; for blueberries, soil testing and sulfur are more predictable. Use grounds by composting them and top-dressing with that compost, while adjusting pH separately if needed (WSU Extension, 2020). Example: if your blueberry leaves are yellowing from high pH, spend the money on elemental sulfur rather than dumping grounds and hoping.
6) Roses and flowering shrubs: light scratch-in before rain
Tip: Apply a thin dusting and water it in immediately. For established roses, sprinkle 1/2 cup of used grounds around the drip line, then lightly scratch into the top 1 inch of soil and water. This keeps it from crusting and integrates it with organic matter already there. Example: do this once in spring when you’re already adding compost—think of it as a bonus ingredient, not a feeding program.
7) Seedlings: skip direct grounds entirely
Tip: Keep grounds away from tiny roots. Seedling mixes need consistent moisture and air; coffee grounds can compact and mess with water movement, especially in small cells or pots. If you want to recycle grounds for starts, compost them first or add a tiny amount (<5% by volume) to a finished compost-based mix. Example: basil seedlings that damp off easily will do worse with direct grounds on the surface.
Pest and disease: the real “surprises” (and the fine print)
8) Slug and snail management: use as a gritty barrier mixed with something sharp
Tip: Don’t rely on grounds alone—pair them with texture. Coffee grounds by themselves aren’t a guaranteed slug stopper, especially after rain, but a mixed barrier can help in dry stretches. Combine 1 part grounds with 1 part crushed eggshells and make a 2-inch-wide ring around vulnerable plants, refreshing after heavy watering. Example: around new lettuce transplants, this can reduce nibbling long enough for plants to size up.
9) Fungus gnat pressure in pots: dry-surface strategy
Tip: Use grounds only if you can keep the top layer from staying wet. Fungus gnats love moist organic surfaces; coffee grounds can make the problem worse if your potting mix stays soggy. If you’re battling gnats, focus on drying the top 1 inch of soil between waterings and use yellow sticky cards; skip coffee grounds on the surface. Example: a houseplant shelf with overwatered pots is the perfect gnat nursery—grounds just add more buffet.
10) Ant trails: disrupt with a disposable “coffee stripe”
Tip: Use grounds as a temporary trail blocker in dry weather. Sprinkle a thin line of dried grounds where ants are marching, especially along paver edges or bed borders. It’s not a permanent fix, but it can interrupt trails for a few days and costs basically nothing. Example: if ants are farming aphids on a pepper plant, blocking trails while you hose aphids off can slow re-infestation.
Weird-but-useful DIY garden projects
11) Make a “browns stretcher” for compost with shredded paper + grounds
Tip: Turn junk mail into compost gold with a simple ratio. Shred plain paper, dampen it, then mix with grounds at about 4 parts paper to 1 part grounds. Paper alone can mat and stay too dry; grounds add moisture-holding fines and nitrogen. Example: if you don’t have enough leaves in summer, this combo keeps your compost pile active without buying anything.
12) Deodorize your garden tool bucket (and compost it later)
Tip: Use dried grounds as a “shop absorbent” for the garden. Sprinkle a handful of dried grounds into the bottom of a bucket where you toss prunings, pulled weeds, or fishy fertilizer scoops—grounds absorb smells and moisture. Then dump it all into the compost. Example: if you use fish emulsion and hate the lingering stink, this trick keeps your shed from smelling like low tide.
13) DIY worm bin feed: small, buffered portions only
Tip: Feed worms coffee grounds like seasoning, not the main course. Add grounds at no more than 10–15% of your worm bin inputs, and always bury them under bedding (shredded cardboard) to prevent fruit flies. If your bin smells sour, you’re overdoing it—add more dry bedding and pause the grounds for a week. Example: a countertop worm bin can handle a few tablespoons every few days, not a whole coffee shop haul.
Money-saving moves: where to get grounds and how to use them efficiently
14) Coffee shop “grounds haul”: ask for 10–20 lb per week and store it right
Tip: Pick a volume you can actually process. Many cafes will bag used grounds for free, but a typical bag can be heavy and wet; start with 10 lb weekly and scale up only if you have a compost system that can absorb it. Store in a lidded bucket and use within 3–5 days to avoid moldy anaerobic funk. Example: one gardener with two 4x8 raised beds can easily use a weekly bag by composting it with shredded leaves.
15) Compare: direct-apply vs compost-first (what’s safer and what’s faster)
| Method | Best for | How to do it | Risk level | Cost |
|---|---|---|---|---|
| Compost-first | Most gardens, beginners, steady soil improvement | Mix grounds with browns at 1:3; compost 4–12 weeks | Low (hard to mess up) | $0 if DIY composting |
| Direct thin application | Established perennials/shrubs, quick tidy use | Max 1/4 inch, rake in + water | Medium (crusting, overuse) | $0 |
| Trench-composting | Veg rows, heavy feeders, no bin space | Bury 6–8 inches deep; 1–2 cups/ft; wait 2–3 weeks | Low-medium (animals digging if too shallow) | $0 |
| Replace with bagged compost | Instant results, no time/space | Apply 1–2 inches bought compost | Low (if quality compost) | Often $5–$8 per 40-lb bag |
Tip: Use grounds to cut compost costs, not replace compost entirely. If you’re currently buying four 40-lb bags of compost per season (roughly $20–$32), adding free grounds into a home compost system can let you buy fewer bags over time. Example: one suburban gardener I worked with reduced purchased compost from 6 bags to 3 bags per spring by composting coffee grounds with fall leaves and shredded cardboard.
Real-world scenarios (what this looks like in actual gardens)
Scenario 1: The raised-bed veggie grower with limited space
Move: Trench-compost plus a thin compost top-up. In a 4x8 bed, dig two shallow trenches between rows, add a total of about 6–8 cups of grounds, cover, and wait 2 weeks. Then top-dress with 1 inch of finished compost for planting. Result: less waste going to trash, fewer purchased amendments, and no crusting on the soil surface where drip irrigation needs to soak in.
Scenario 2: The gardener who keeps getting slug damage on lettuce
Move: Mixed barrier + habitat cleanup. Use the 1:1 grounds-and-eggshell ring around new transplants, but also remove boards, pots, and dense weeds where slugs hide during the day. Result: the barrier buys time for seedlings to establish, while cleanup reduces the slug “base camp” so you’re not refreshing the ring every night.
Scenario 3: The compost nerd with a pile that keeps stalling
Move: Paper + grounds + moisture check. Every time you add a kitchen caddy of grounds, add 4 times as much shredded paper and a sprinkle of water, then turn the pile weekly. Result: temperatures rise more consistently, the pile shrinks faster, and you stop getting that dry, unchanged layer of leaves that looks the same three months later.
Quick “don’t do this” list (so you don’t learn the hard way)
Don’t spread a thick mat of grounds as mulch. If you can clearly see a dark layer sitting on top of the soil, it’s probably too much—break it up and mix it with coarse mulch or compost.
Don’t use coffee grounds to “fix” alkaline soil for acid-loving plants. Use a soil test and targeted amendments (like sulfur) instead; use grounds as compost input, not a pH hack (WSU Extension, 2020).
Don’t dump huge wet loads in one spot. A big anaerobic blob can stink and attract critters—spread it out into compost layers or bury it properly.
Don’t apply around seedlings or in seed trays. Save grounds for compost or for established plants where soil structure is more forgiving.
Coffee grounds are one of those garden “freebies” that reward restraint. Keep them thin, keep them mixed, and think in weeks (composting, trenching, soil life) instead of expecting an overnight fertilizer effect. Once you start treating grounds like a flexible ingredient—something you blend, bury, or buffer—you’ll find they slot neatly into the garden jobs that cost money otherwise.
Sources: Washington State University Extension (2020), guidance on coffee grounds in gardens and composting; Oregon State University Extension (2019), composting recommendations including coffee grounds and mixing with other materials.