Balcony Compact Fruit Tree in a Pot
The first time you notice it, it’s usually mid-summer: the balcony is bright, the air is warm, and yet your “garden” feels like a row of mismatched pots that don’t quite add up to anything. You want shade without darkness. Privacy without a wall. And you’d love something that gives back—blossoms in spring, fruit in summer, maybe a little scent when you brush past it with your morning coffee.
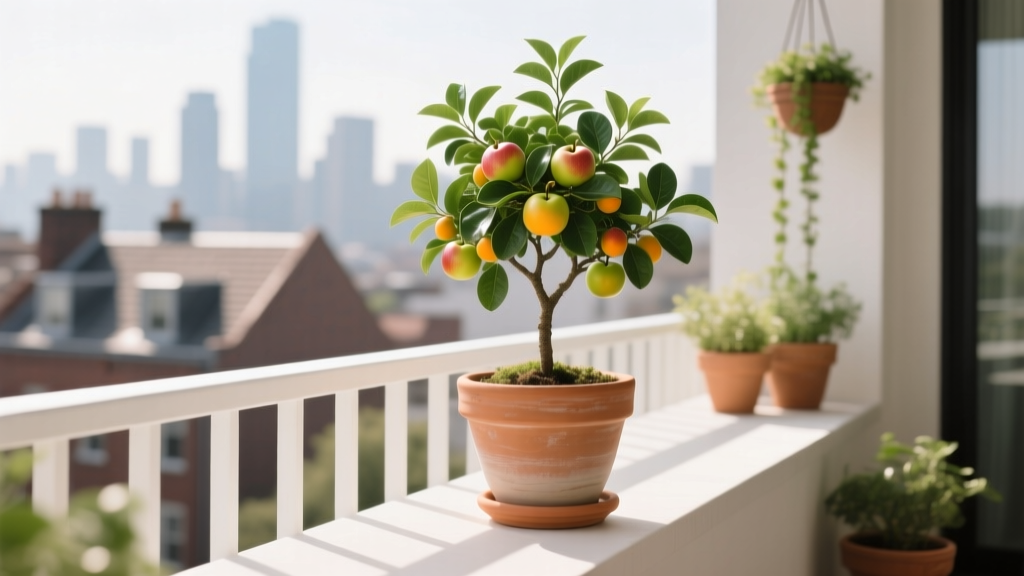
This is where a compact fruit tree in a pot earns its place. Not as a novelty, but as the anchor of a small-space layout—the tall element that organizes everything else around it. If you can give a tree a stable container, enough sun, and an intentional spot in the plan, your balcony stops feeling like storage and starts feeling designed.
Design principles: treat the fruit tree as your balcony’s “center of gravity”
A compact fruit tree works best when it’s planned like a piece of outdoor furniture—placed for comfort, movement, light, and sightlines. The goal is to make the tree feel inevitable in the space, not squeezed in at the last minute.
Start with circulation: keep a clear path
On most balconies, the biggest mistake is blocking the walkway. A good rule is to preserve a 24–30 inch clear path from your door to the far end so the balcony is easy to use (and less likely to become clutter).
Place your fruit tree so its pot sits 6–12 inches off the railing or wall. That gap prevents trapped heat, allows airflow, and makes watering and pest checks realistic—because if it’s annoying to reach, it won’t get cared for consistently.
Use vertical layering: tall tree, mid-layer herbs, low layer flowers
Think in three layers:
- Vertical anchor: the fruit tree (4–7 feet tall in a container is common with dwarf/rootstock selections).
- Mid-layer: herbs and compact edibles (basil, thyme, chives) in 6–8 inch pots.
- Low layer: spillers or pollinator flowers (alyssum, nasturtium) softening the base and attracting beneficial insects.
Layering does two things: it makes the design feel lush without crowding, and it turns watering into a single “zone” you can manage efficiently.
Choose a “sun seat” and design around it
Fruit needs sun more than ornamentals do. Many fruit trees perform best with 6–8 hours of direct sunlight, though some tolerate slightly less. Before buying anything, watch your balcony on a clear day: note where sun hits at 9 a.m., 12 p.m., and 3 p.m.. Your sunniest pocket becomes the tree’s home base.
If your sun is blocked by buildings, choose fruit types that cope better with partial sun (like some figs) rather than forcing apples or peaches to struggle.
Weight and wind are part of the layout, not an afterthought
Balconies get gusty. A fruit tree with a top-heavy canopy in a light pot can become a sail. Plan for stability:
- Use a substantial container: typically 18–24 inches wide for long-term growth.
- Pick a pot you can’t easily knock over. A planted container can weigh 50–120 lb depending on soil mix and materials—confirm your building’s limits if you’re unsure.
- Position the tree where it’s protected by a side wall, corner, or screen, rather than centered in open wind.
“A container should be large enough to support the root system and provide adequate drainage; undersized containers lead to frequent drought stress and poor growth.” — University of Maryland Extension, Container Gardening (2023)
Balcony layout strategies that actually work
Below are three layouts I return to again and again as a designer. Each treats the fruit tree as structure, not decoration.
Layout 1: The corner anchor (best for narrow balconies)
Best for: a balcony around 3 feet wide where you need a straight walking lane.
Put the fruit tree in the sunniest corner—usually the outer corner away from the door. Then line the railing with slimmer pots (6–8 inches deep) for herbs or strawberries. The corner placement gives you the most canopy without narrowing the path.
Spacing target: keep 24 inches of walkway and let the canopy overhang above the railing line rather than into your walking space.
Layout 2: The “green privacy screen” (best for overlooked balconies)
Best for: renters who need privacy from neighbors across the way.
Place one fruit tree slightly off-center, then add a second vertical element (a trellis with a vine, or a tall grass) to create a layered screen. A potted fig or columnar apple can filter views without feeling like a fence.
Design trick: put the fruit tree pot on a 12–16 inch plant caddy so you can rotate it for even growth and roll it back from storms.
Layout 3: The edible “room” with a chair (best for deep balconies)
Best for: balconies 5–6 feet deep where you want seating.
Set the fruit tree behind or beside the chair so you get dappled shade and a sense of enclosure. Add a small side table and keep the tree slightly to the side of your sightline so you’re not staring into a pot—your eyes go through foliage to the view beyond.
Minimum footprint: a chair area needs about 30 x 30 inches plus a clear access path. If you can’t fit that, skip the chair and design for standing use (a slim bar shelf at the railing works well).
Plant selection: compact fruit trees that earn their keep in pots
In containers, variety selection is half the battle. You’re looking for natural compactness, reliable fruiting, and manageable pruning—plus a cultivar that fits your chill hours and pollination situation.
Top performers for balcony containers
1) Fig (Ficus carica) — ‘Petite Negra’, ‘Little Miss Figgy’, ‘Chicago Hardy’
Figs are famously container-friendly and tolerate pruning well. ‘Little Miss Figgy’ stays compact (often 3–5 feet in a pot) and produces sweet fruit without needing a second tree (common figs are typically self-fruitful). Figs also handle heat reflected off balcony walls better than many fruit trees.
2) Citrus for warm zones or indoor overwintering — ‘Improved Meyer’ lemon, ‘Calamondin’
Citrus loves sun and does best with 8+ hours if possible. If you can roll it inside for winter or you’re in a mild climate, citrus is one of the most rewarding balcony fruits. ‘Calamondin’ is compact and decorative, with fragrant blossoms.
3) Dwarf apple on the right rootstock — ‘Gala’ (dwarf), ‘Honeycrisp’ (dwarf), columnar ‘Northpole’
Apples can work in large containers, but pollination matters: many need a compatible partner nearby. Columnar apples like ‘Northpole’ are designed for tight spaces and maintain a narrow form with minimal training.
4) Dwarf peach or nectarine — ‘Bonanza’ peach, ‘Necta Zee’ nectarine
These are balcony showstoppers in bloom. They require strong sun and consistent watering. If you can provide 6–8 hours and keep the pot evenly moist, you’ll get both spring flowers and summer fruit.
5) Self-fertile cherry (where suited) — ‘Stella’
If your climate supports cherries and you have enough sun, ‘Stella’ is a commonly recommended self-fertile sweet cherry. In containers, keep expectations realistic: fewer fruits, but still worth it for the spring display and the novelty of harvesting cherries steps from your door.
A quick comparison to match fruit tree to balcony conditions
| Fruit tree | Minimum pot size (starting point) | Sun target | Pollination | Why it works on a balcony |
|---|---|---|---|---|
| Fig (‘Little Miss Figgy’) | 18–20" wide | 6+ hours | Typically self-fruitful | Heat tolerant, forgiving pruning, compact habit |
| Meyer lemon | 20–24" wide | 8+ hours | Self-fruitful | Fragrant bloom, long seasonal interest, evergreen |
| Columnar apple (‘Northpole’) | 20–24" wide | 6–8 hours | Often needs partner nearby | Narrow form, easy to fit near railings |
| Dwarf peach (‘Bonanza’) | 20–24" wide | 6–8 hours | Self-fertile (often) | Big spring bloom, true “mini orchard” feel |
Citation note: For general container fruit guidance and the importance of appropriate container sizing and drainage, see University of Maryland Extension (2023). For broader fruit tree care and sunlight expectations, Royal Horticultural Society resources on fruit growing and training also emphasize full sun for best cropping (RHS, 2022).
Step-by-step setup: a designer’s build order
This is the sequence that keeps the project clean, stable, and easy to maintain.
- Measure the balcony and sketch a rectangle. Mark doors, railings, and the sunniest area. Decide where you need a 24–30 inch clear path.
- Select the container first, then the tree. Aim for 18–24 inches wide with drainage holes. If you’re renting, choose a lightweight resin or fabric pot and add weight low (see DIY options below).
- Add a stable base layer. Use a plant caddy if you need mobility. If winds are strong, skip tall stands and keep the pot low.
- Use a high-quality potting mix. Avoid garden soil (it compacts). Plan on roughly 2–4 cubic feet of mix for a large container.
- Plant at the correct depth. Keep the trunk flare visible; don’t bury the graft union (common on apples/peaches).
- Install a discreet support. A single stake or short tripod can prevent wind rock for the first year.
- Top-dress and mulch lightly. A 1–2 inch layer helps slow evaporation, but keep mulch away from the trunk.
- Arrange companion pots. Place smaller pots on the shaded side of the tree where they won’t steal prime sun. Leave a hand-width gap between containers for airflow.
- Water deeply. On planting day, water until it runs out the drainage holes; this settles the mix and eliminates dry pockets.
Three real-world balcony scenarios (and how I’d design each)
Scenario A: The renter’s windy 4th-floor corner balcony
Conditions: strong gusts, bright sun, limited storage, landlord doesn’t want railing attachments.
Design solution: A compact fig like ‘Petite Negra’ in a 20-inch resin pot on a locking caddy. Place it in the most sheltered corner (near a side wall), then add a low semicircle of herbs in 6-inch pots at its base.
DIY stability trick: instead of heavy stone (hard to move), add a few sealed water jugs or sandbags inside the bottom of a decorative outer pot and nest the planted pot inside. It adds weight low, where you want it.
Scenario B: The shaded city balcony with only 4–5 hours of sun
Conditions: sun arrives late, disappears behind buildings, bright shade the rest of the day.
Design solution: Don’t force a peach here. I’d choose a fig (again, your best bet) and design for a “Mediterranean corner”: fig + thyme + oregano + nasturtium. Keep the layout minimal so the limited sun hits the tree, not a crowd of tall companions.
Expectation setting: With 4–5 hours, fruiting may be lighter, but you’ll still get a beautiful, architectural plant and occasional harvest—especially if you keep feeding and watering consistent.
Scenario C: The deep, sunny balcony that needs privacy from across the courtyard
Conditions: 7–8 hours sun, neighbors opposite, space for seating.
Design solution: A ‘Improved Meyer’ lemon in a 24-inch pot placed behind a lounge chair to create a leafy backdrop. Add a tall, narrow trellis with jasmine or a non-invasive climber to the side, so privacy is layered rather than a single wall. Use underplanting (alyssum) for pollinators and softness.
Design payoff: You get scent, evergreen structure, and a “room” feeling—your chair becomes the destination, not an afterthought.
Budget, costs, and smart DIY alternatives
A balcony fruit tree can be done elegantly on a modest budget, or you can spend for instant maturity. Here are realistic price points:
- Dwarf/compact fruit tree: typically $45–$120 depending on size and rarity.
- Large container (18–24"): about $30–$90 for resin/ceramic; fabric grow bags can be $10–$25.
- Potting mix (2–4 cu ft): roughly $20–$60.
- Plant caddy: about $20–$40 (worth it if you need to rotate or roll inside).
- Fertilizer and micronutrients: $10–$25 to start.
DIY alternatives I recommend:
- Food-grade barrel or tote as a planter: Drill multiple drainage holes and place it on a saucer or risers. This can cut container cost in half.
- Make your own wind buffer: A simple freestanding screen (wood frame + outdoor fabric) is often cheaper than specialty balcony panels and doesn’t require railing hardware.
- Use grouped small pots instead of one long trough: Easier to rearrange for sun and easier to move if you relocate.
Maintenance expectations: what it really takes
Container fruit trees reward consistency more than intensity. Plan on 20–40 minutes per week during the growing season for watering checks, quick pruning touch-ups, and scouting.
Weekly rhythm (spring through early fall)
- Water: In hot weather, you may water 3–5 times per week (sometimes daily during heat waves). Always water until it drains; shallow sips encourage weak roots.
- Check moisture: Stick a finger 2 inches into the mix. If it’s dry there, water.
- Feed: During active growth, fertilize about every 2–4 weeks depending on product type and plant response. Citrus often appreciates regular feeding.
- Pest scouting: Look under leaves for aphids/scale; early intervention is easier on a balcony.
Seasonal tasks (the designer’s calendar)
Late winter / early spring: Structural pruning while the tree is dormant (for apples/peaches). Remove dead wood and open the canopy for light and airflow.
Spring bloom time: If pollinators are scarce on your balcony, help out by adding flowers and avoiding broad-spectrum pesticides. Some gardeners hand-pollinate with a small brush for better set on calm, enclosed balconies.
Summer: Thin fruit if overloaded—especially peaches and apples—so branches don’t snap and fruits size up.
Fall: Reduce feeding as growth slows. Clean up fallen leaves and old fruit to reduce disease pressure.
Winter: Protect pots from freeze-thaw cycles if you’re in a cold climate. Group pots together and insulate the container (burlap wrap or bubble wrap under an outer cover). For citrus, plan an indoor bright spot or supplemental light if winters are harsh.
Citations: Seasonal container care and the importance of appropriate potting media and drainage are reinforced by University of Maryland Extension (2023). Training and fruiting performance in full sun conditions are consistently emphasized by the Royal Horticultural Society’s fruit growing guidance (RHS, 2022).
Small design details that make the whole balcony feel intentional
Hide the “working parts.” Keep your watering can, pruners, and fertilizer in a slim deck box or a lidded storage bench. A tidy maintenance setup is part of good design.
Repeat materials. If your main fruit tree pot is matte black, echo that finish in two smaller herb pots. Repetition makes a small space feel calmer and more planned.
Light the trunk and canopy. A short strand of warm outdoor lights wrapped loosely around the stake or set at the pot base turns the tree into an evening feature—useful if your balcony is your after-work decompression spot.
Plan for harvest access. Leave enough room to stand beside the tree with a bowl. A fruit tree you can’t reach easily becomes decorative only, and you’ll miss the best part.
The nicest thing about a compact fruit tree on a balcony isn’t just the fruit—though picking a warm fig steps from your kitchen is hard to beat. It’s the way one well-placed tree turns a narrow outdoor strip into a space with shape: a ceiling of leaves, a focal point, a reason to step outside. Start with the sunniest spot, give the roots a generous container, and design the rest of the balcony as if the tree has always belonged there.