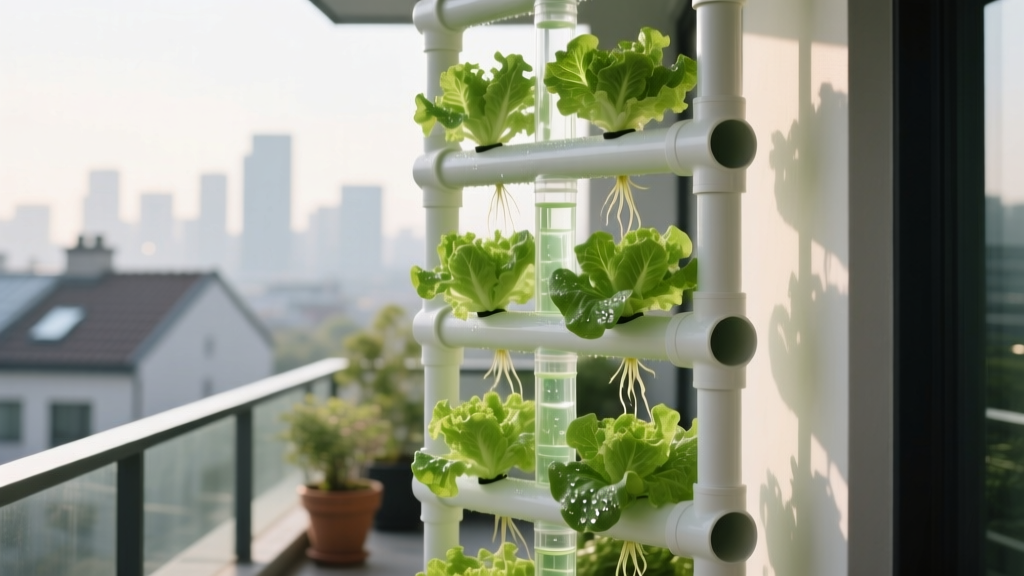
Balcony Hydroponic Lettuce Tower Setup
The first time you notice it is on a Tuesday evening: the basil is sulking, the potting soil feels like a brick, and your balcony has exactly one strip of sun that moves like a spotlight across the floor. You want salad greens on hand—fresh, crisp, not a plastic clamshell that wilts by Thursday—but you don’t have a yard, and you’re tired of sacrificing precious walking space to wide containers. This is where a hydroponic lettuce tower earns its footprint: it grows up instead of out, and it turns that narrow ribbon of sunlight into a vertical harvest.
I’ll walk you through a balcony-friendly tower layout the way I’d sketch a small courtyard: start with circulation and light, design around wind and water, then choose plants that match the microclimate. Along the way, you’ll get real measurements, realistic costs, and a few scenarios so you can picture how this fits on your balcony—renter or homeowner.
Start with the balcony as a “micro-site”
A lettuce tower isn’t just a gadget; it’s a small piece of landscape architecture. The goal is to create a compact “grow zone” that doesn’t block doors, doesn’t splash neighbors, and doesn’t tip in wind. Before buying anything, take three measurements and one observation.
Measure the usable footprint (and keep a walkway)
On most balconies, comfort comes down to a clear path. Reserve at least 24 inches (61 cm) for walking—more if your door swings outward. A typical DIY lettuce tower with a reservoir bucket needs roughly a 20–24 inch diameter footprint (51–61 cm). If your balcony is 4 ft x 10 ft (1.2 m x 3 m), you can fit a tower plus a chair if you keep the tower tucked into a corner.
Count your sun hours where the tower will stand
Lettuce will grow with less light than fruiting crops, but hydroponics still needs consistent energy. Aim for 4–6 hours of direct sun, or bright indirect light most of the day. If you only get 2–3 hours, plan on adding a slim LED grow light strip (more on that in the budget section). For reference, Cornell University notes lettuce is a cool-season crop and generally prefers moderate conditions over intense heat (Cornell University, 2023).
Watch the wind like a designer (because it is one)
Balconies create wind tunnels. If you’ve ever had a lightweight chair scoot across the floor, assume your tower will feel that force too. In exposed high-rise situations, design for anchoring: a heavy reservoir (5 gallons) and a discreet tie to a railing can make the difference between stable and stressful.
Layout strategies: place the tower like a focal point that behaves
In small spaces, every object is both functional and visual. A tower is tall—typically 4 to 6 feet (1.2–1.8 m)—so it reads like a vertical sculpture. Place it intentionally.
The “corner anchor” layout (most balconies)
Set the tower in the corner that gets the best light. Keep the reservoir opening accessible from the inside edge so you’re not reaching over plants to top off water. Maintain a 6–8 inch (15–20 cm) gap between tower and wall for airflow and for wiping down condensation or algae.
The “rail-side light catcher” layout (shallow balconies)
If your balcony is narrow (say 3 ft deep), place the tower closer to the railing where light is strongest. Use a saucer or waterproof mat under the reservoir to prevent drips. A slim bench or storage box against the wall keeps circulation clear and gives you a place to store nutrients and a watering jug.
Designing for water and power (quietly, neatly)
Most towers rely on a small pump that cycles nutrient solution. Plan a weather-protected outlet or a rated extension cord. Keep cords off the walking line—clip them along the baseboard or railing. If you’re renting, avoid permanent fasteners; removable outdoor command hooks or zip ties can route cables cleanly.
“Good design is as little design as possible.” — Dieter Rams (often cited in design studies and interviews; principle widely attributed to Rams’ 1970s-era work)
For balcony hydroponics, that principle translates to: fewer tripping hazards, fewer leak points, fewer fussy steps between you and a harvest.
Choose your tower format: PVC DIY vs. modular kits
Two balcony-friendly approaches dominate: a DIY PVC tower (budget, customizable) and a modular commercial tower (clean, quick to assemble). Both can work; your decision depends on your tolerance for drilling and your desire for a polished look.
| Option | Typical Height | Plant Sites | Footprint | Estimated Cost (USD) | Best For |
|---|---|---|---|---|---|
| DIY PVC Tower (4"–6" pipe + 5-gal reservoir) | 60" (5 ft) | 16–24 | 20"–24" diameter | $65–$140 | Budget builds, custom spacing, tinkerers |
| Modular Tower Kit (stacked rings) | 48"–72" | 20–40 | 18"–24" diameter | $150–$450 | Renters, tidy aesthetics, fast setup |
| Countertop Hydroponic Unit + Vertical Shelving | 18"–24" (unit) + shelf | 6–12 | 12"–18" deep shelf | $90–$300 | Low-light balconies, smallest spaces |
If you’re optimizing for a “balcony landscape” feel, modular towers look intentional—like a designed element. DIY towers can look just as clean with a matte spray paint and a simple cedar screen behind them to hide cords.
Plant selection: lettuce varieties that thrive in a tower
In towers, plants sit in small net cups with their roots in moving nutrient solution. That favors compact, quick-growing lettuce types that don’t demand huge root volume. It also favors varieties with heat tolerance if your balcony runs warm.
Reliable tower lettuces (and why they work)
Mix textures and growth rates so you can harvest continuously instead of all at once.
- ‘Black Seeded Simpson’ (leaf lettuce): Fast, forgiving, and easy to cut-and-come-again. Great for beginners and for frequent harvesting.
- ‘Red Sails’ (leaf lettuce): Adds color, performs well in cooler weather, and gives your tower a designer’s palette—greens and burgundies instead of a flat green column.
- ‘Buttercrunch’ (butterhead): Compact heads, tender texture, and a classic “salad bowl” bite. Works well in net cups if you space it a little wider.
- ‘Little Gem’ (mini romaine): Upright habit is perfect for vertical systems; less flopping, cleaner airflow, and a tidy look.
- ‘Salanova’ types (multi-leaf): If you can find them, they’re bred for uniform leaf production and are excellent for repeated harvests.
For food safety and plant health, start with clean seed and a clean system. The U.S. Food and Drug Administration emphasizes that water quality and sanitation are key considerations in produce growing systems (FDA, 2022). You don’t need to be sterile—just consistent about cleaning between cycles.
Best companion plants for the top and edges
Think like a balcony designer: place the plants that tolerate more sun and wind on the top tier and outer ring.
- Arugula ‘Astro’: Quick, peppery, and tolerant of cool weather; harvest young for a steady supply.
- Spinach ‘Space’ (baby leaf): Works in hydroponics when temperatures stay moderate; place in the shadiest pockets.
- Herbs: Basil can work in summer (needs more light), while parsley and cilantro do better in cooler shoulder seasons.
Spacing, site counts, and the “don’t-overplant” rule
The most common design mistake is packing every opening with a seedling on day one. A tower looks sparse for the first two weeks—then it turns into a traffic jam.
Use these practical spacing targets:
- Leaf lettuce: 6–8 inches between mature plants (tower pockets can be closer if you harvest young).
- Butterhead/mini romaine: 8–10 inches for better airflow and cleaner heads.
- Total sites: 16–24 sites is a sweet spot for most balconies; beyond that, maintenance and shading increase.
If your tower has 24 pockets, consider planting only 16 at first, leaving gaps for airflow and for staggered succession planting every 2 weeks.
Step-by-step: a balcony-friendly lettuce tower build
This setup assumes a simple recirculating tower with a bottom reservoir, submersible pump, and drip ring. Adjust the details for your kit, but keep the layout logic.
- Choose the reservoir: A 5-gallon (19 L) bucket with a lid is the standard. Paint it or wrap it to block light (prevents algae).
- Set the base on a waterproof mat: Use a 24" x 24" rubber tray or washing machine pan if you’re cautious about drips.
- Assemble the tower column: Aim for 60" height if you want a substantial harvest, or 48" if wind is a concern.
- Install the pump and tubing: A small pump around 200–400 GPH is common for towers. Route tubing so it can’t kink when you rotate the tower.
- Add net cups and media: Use 2" net cups with clay pebbles or rockwool starter plugs. Keep media tidy—spilled pebbles on balconies are ankle-twisters.
- Mix nutrients and fill: Start at about 1/2 strength for seedlings. Top up with plain water as the week goes on.
- Test run for 30 minutes: Look for splashing, leaks, or uneven flow. Adjust the drip ring or top distributor until the column wets evenly.
- Plant seedlings: Transplant when roots are showing (typically 10–14 days from germination). Keep crowns above the wet zone.
- Stabilize the tower: In windy locations, add weight (extra water volume) and discreetly strap the tower to a railing with a reusable strap.
Budget planning and smart DIY alternatives
A good balcony project respects both aesthetics and the monthly budget. Here are realistic line items, with a few swap-outs if you’d rather DIY than buy a kit.
- DIY tower materials: $65–$140 (pipe, fittings, bucket, pump, tubing, net cups).
- Modular kit: $150–$450 depending on size and brand.
- Nutrients: $15–$35 for a starter set that lasts 1–3 months in a small tower.
- Timer: $10–$20 (helps consistency and reduces noise if you schedule cycles).
- Optional LED light: $30–$120 for a slim bar if sun is limited to 2–3 hours.
DIY alternatives that keep the look clean:
- Use a matte vinyl wrap on PVC instead of paint for a finished, renter-friendly appearance.
- Hide the reservoir inside a wood-look deck box (leave ventilation and access for refills).
- Use a simple bamboo screen behind the tower to mask cords and create a “garden room” feel.
Three real-world balcony scenarios (and how to design each)
Let’s make this concrete. These scenarios mirror the most common balconies I’m asked to “fix”: too hot, too shady, or too exposed.
Scenario 1: The south-facing summer furnace (high sun, high heat)
You get 6+ hours of direct sun, and the balcony reflects heat off glass and stucco. Lettuce can bolt quickly here. Place the tower where it gets morning sun and a touch of afternoon shade—often just 12–18 inches back from the railing, where the building casts a later shadow. Plant heat-tolerant leaf lettuces (like ‘Red Sails’) and harvest smaller, more often. Add a light shade cloth (30%) during heat waves and keep the reservoir water cooler by wrapping it in reflective insulation.
Design note: treat shade cloth like an overhead pergola element—neat edges, secured corners, no flapping. Your neighbors will appreciate the intentional look.
Scenario 2: The bright-but-shaded north-facing balcony (limited direct sun)
You have bright ambient light but only 2–3 hours of direct sun, if any. A tower can still work, but plan for supplemental lighting. Mount a 2 ft LED grow bar on a removable stand or shelf so it washes light down the tower face. Choose leaf lettuces (‘Black Seeded Simpson’) and baby greens rather than heading types. Keep the tower closer to the railing to catch the brightest sky exposure, and use a white or light-colored backing panel to reflect light onto plants.
Maintenance adjustment: in lower light, growth is slower—so stagger plantings every 3 weeks instead of every 2.
Scenario 3: The high-rise wind corridor (gusty, exposed)
If you feel wind most afternoons, choose a shorter, heavier build: a 48" tower rather than 72". Use a full 5-gallon reservoir and consider placing the tower behind a windbreak element—like a slatted screen or tall, stable planter that doesn’t trap wind like a solid panel. Plant more compact varieties (‘Little Gem’, butterhead) and prune outer leaves that flap and bruise.
Layout trick: position the tower so you can rotate it slightly to even out light, but not so freely that wind can spin it. A small wedge at the base or friction mat helps.
Operating rhythm: pump schedule, refills, and weekly time
A tower should simplify your life, not add chores. Once dialed in, expect about 30–60 minutes per week of total care, plus a few minutes to harvest.
- Daily (2–3 minutes): Quick glance for wilt, check that water is flowing, listen for pump noise changes.
- Twice per week (5 minutes): Top off reservoir with water. In warm weather, a small tower can drink 0.5–1 gallon (2–4 L) per week.
- Weekly (15–25 minutes): Check nutrient strength and pH if you monitor them; wipe algae-prone surfaces; thin crowded pockets.
- Every 2–3 weeks (20 minutes): Partial reservoir change if water is getting cloudy or imbalanced.
- Between crops (45–60 minutes): Full clean—disassemble key parts, scrub, rinse, and restart fresh.
Seasonally, your tasks shift. In spring and fall, lettuce is effortless. In mid-summer, your “designer move” is shade and airflow. In winter, growth slows; you’ll either add light or accept a gentler harvest pace.
Harvest design: keeping the tower productive and good-looking
Harvesting is part of the layout strategy. If you cut from the same side repeatedly, the tower becomes lopsided. Rotate your harvest around the column like you’re pruning a hedge.
For leaf lettuces, use the “outer leaf” method: remove the largest leaves first and leave the center growing point intact. Plan on first harvest around 30–45 days after planting, depending on light and temperature.
For butterhead and mini romaine, you can either harvest whole heads or take a few leaves at a time. Whole-head harvest keeps the tower visually neat—clean openings you can replant immediately.
Troubleshooting as part of the design (not a panic)
A well-designed balcony system anticipates hiccups.
- Algae in the reservoir: Block light. Even a small gap can green up quickly. Wrap the bucket and keep the lid snug.
- Tip burn on inner leaves: Often tied to rapid growth and calcium movement; improve airflow with a small clip fan and avoid letting the tower dry down.
- Bolting (bitter, tall lettuce): Too hot or too much stress. Add shade, harvest younger, and switch to heat-tolerant varieties in summer.
- Uneven growth around the tower: Light imbalance. Rotate the tower a quarter turn every few days, or reposition slightly closer to the brightest exposure.
Making it feel like a balcony garden, not a science project
This is the part renters and design-minded homeowners appreciate: the tower can be productive and beautiful. Add one supporting element so it reads intentional—like a small courtyard installation.
- Backdrop: A simple wood trellis panel behind the tower makes the greens pop and hides cords.
- Flooring cue: A 2 ft x 3 ft outdoor mat under the base defines the “garden zone.”
- One companion pot: A single, low planter with trailing nasturtiums or calendula softens the base and makes the tower look planted-in, not placed-on.
When it’s set up thoughtfully, you’ll step outside and see a vertical column of edible texture catching the light—something that looks designed, yet feeds you weekly. And the best part is how quickly it becomes routine: a quick top-off, a small harvest, and dinner tastes like you actually have a garden, even if your “yard” is four feet wide.
Sources: Cornell University (2023) crop guidance on lettuce as a cool-season vegetable; U.S. Food and Drug Administration (FDA) (2022) considerations related to agricultural water and produce safety in growing systems.