Balcony Compact Composting System
The first time you notice it, it’s always the same moment: you’re holding a dripping tea bag or a handful of onion skins over your kitchen bin, and the smell that greets you is not the “small-space sustainable living” vibe you were promised. You look out at your balcony—three paces wide, already busy with a chair, a basil pot, and a watering can—and you think, Where would compost even go?
Here’s the good news: a balcony can host a composting system that’s tidy, neighbor-friendly, and genuinely productive. The trick is treating it like a design project, not a pile project. We’ll lay out a compact system that fits into a corner, manages moisture and airflow, and pairs composting with a few plants that actually like living next to the action.
Start with the “balcony triangle”: sunlight, traffic, and drip zone
Before you buy anything, stand on your balcony at three times of day (morning, midday, late afternoon). Note what gets sun and for how long. Most balcony edibles need 6+ hours of sun for best yields; leafy greens tolerate 3–5 hours. Your composter doesn’t need sun; in fact, too much direct sun can dry it out and intensify odors.
Now map three functional zones:
- Traffic lane: Keep at least 24 inches clear from the door to your main seating or rail view so you’re not shuffling around a bin.
- Drip zone: Put compost where drips won’t stain flooring or bother downstairs neighbors—ideally over a waterproof tray.
- Sun lane: Reserve the brightest section for pots and planters; compost can tuck into shade.
A good balcony compost layout is usually an L-shape: compost and tools in the shadiest corner, plants along the rail or sunniest edge, and a clear center lane.
Design principles for a compact composting layout
1) Containment first: choose a system that seals, breathes, and fits
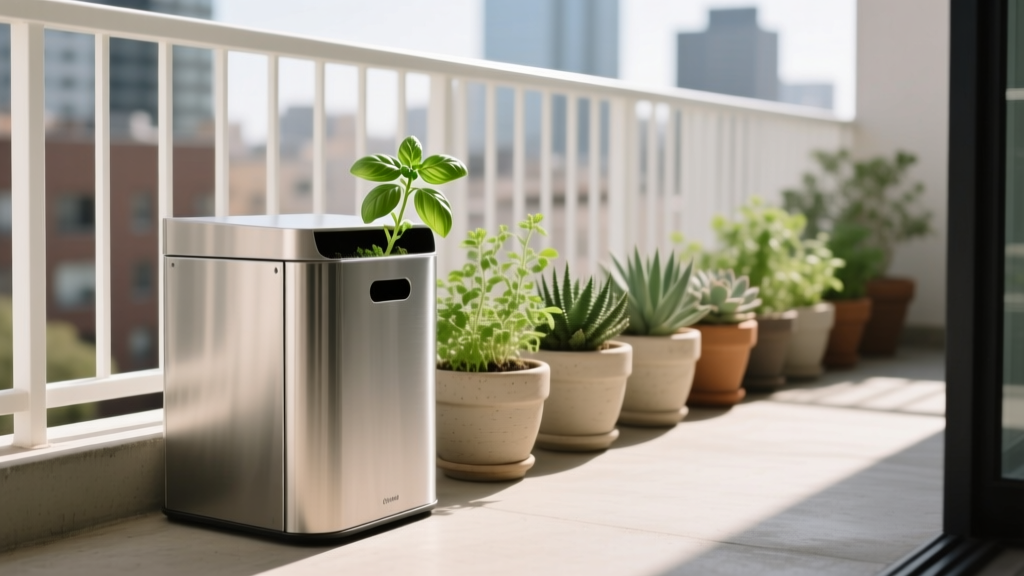
Your compost setup succeeds or fails on two things: containment (no mess, no pests) and airflow (no stink). On balconies, the most common winners are:
- Sealed aerobic countertop-to-balcony caddy + outdoor bin: a small kitchen caddy that empties into a balcony unit.
- Worm bin (vermicomposting): excellent for renters; fast, low-odor when managed well.
- Bokashi fermenting bucket: very compact; good if you have mostly kitchen scraps and little “brown” material.
Dimension check: most balconies can spare a footprint of 18 x 24 inches in a corner without feeling crowded. If you can’t, aim for a vertical system (stacked worm tray) with a footprint closer to 15 x 15 inches.
2) Build a “clean edge” with trays and a micro-utility wall
Compost looks intentional when it has a clean boundary. Set the bin on a boot tray or waterproof plant tray (common sizes: 24 x 36 inches). Add a slim vertical element behind it—a trellis panel, a narrow shelving rack, or even a tension rod—so tools and carbon materials have a place to live.
What hangs well in a vertical strip?
- A small lidded container of shredded cardboard (your primary “brown”)
- A hand trowel and a compost scoop
- Twist ties or clips for securing liners and breathable fabric
3) Moisture management: design for “damp sponge,” not “dripping soup”
Balcony compost gets extra wind, and wind dries the top layer quickly. Your layout should make it easy to add browns and keep the bin covered. The U.S. EPA notes that compost works best with a balanced mix of “greens” (nitrogen-rich) and “browns” (carbon-rich) and adequate moisture and oxygen (EPA, 2023).
A simple practical rule: keep a lidded container of browns within arm’s reach of the bin. If you must go back inside to find cardboard every time you add scraps, you’ll stop doing it—and the bin will go wet and smelly.
4) Odor control is a layout strategy, not just a compost trick
Place the system:
- Downwind from your door if your building has a consistent breeze pattern.
- Away from outdoor seating by at least 3 feet if possible.
- Against a wall where temperatures are more stable (especially helpful in shoulder seasons).
“The best small-space compost systems succeed when the designer prioritizes user behavior—make the right action the easiest action.” — Adapted from Donella Meadows’ systems thinking principles in Thinking in Systems (Meadows, 2008)
That’s why we’re designing the bin next to the browns, on a tray, with clear access. If it’s easy, it stays clean.
Choosing the right compact system: a quick comparison
| System | Typical footprint | Best for | Odor risk | Estimated cost (USD) | Notes |
|---|---|---|---|---|---|
| Stacked worm bin | 15" x 15" | Kitchen scraps, renters | Low if balanced | $80–$180 | Works indoors or outdoors; protect from heat/freezing |
| Bokashi bucket | 12" x 12" | Very small balconies, cooked scraps | Very low (sealed) | $60–$120 | Produces fermented pre-compost; needs finishing step |
| Compact aerobic tumbler | 24" x 24" | Gardeners with browns available | Medium if too wet | $90–$250 | Easy turning, but can be bulky and sun-exposed on balconies |
If your balcony is under 40 sq ft, a worm bin or bokashi bucket usually fits best. If you have a generous corner and produce lots of shredded paper/cardboard, a small tumbler can work—just keep it shaded to reduce drying and odors.
The layout plan: a 2-foot-wide compost corner that feels intentional
Picture a corner that measures roughly 24 inches wide by 24 inches deep. That’s your compost “room.” Inside it, we’re going to stack functions vertically.
Corner layout components (with dimensions)
- Base tray: 24" x 36" waterproof tray (catches drips, defines the zone)
- Bin: worm bin (15" x 15") or bokashi bucket (12" diameter) placed on one side
- Brown stash: lidded 5-gallon container (12"–14" diameter) for shredded cardboard
- Vertical storage: slim shelf or wall hooks set at 48–60" height for scoop, gloves, and a small spray bottle
- Optional privacy screen: a 6-foot trellis panel with a vine (doubles as windbreak)
This is the designer’s secret: you’re not “adding a compost bin.” You’re creating a small utility corner that looks like it belongs—like any outdoor kitchen station, just greener.
Step-by-step setup instructions (a weekend project)
- Measure your corner. Confirm you can preserve a 24-inch traffic lane from the door. Mark the bin footprint with painter’s tape.
- Add a waterproof base. Place a 24" x 36" tray or a recycled rubber mat. If your balcony slopes, shim so liquids don’t run toward the door.
- Install vertical storage. Use a narrow shelf unit (about 10–12 inches deep) or adhesive hooks rated for outdoor use. Keep it stable and renter-friendly.
- Set the bin in shade. Place worm bin/bokashi bucket on the tray. If the corner gets more than 4 hours of direct sun, add a small shade panel or tuck the bin behind taller planters.
- Create your “brown station.” Fill a lidded container with shredded cardboard, paper egg cartons, and dried leaves if you can collect them. Keep it within 12 inches of the bin.
- Start with a base layer. For worms: add moist bedding (shredded cardboard) about 4–6 inches deep. For bokashi: add a handful of bran and start layering scraps.
- Label and simplify. Add a small waterproof note: “Add browns every time.” This sounds silly, but it prevents the most common error—too many greens.
Plant pairing: balcony varieties that love compost-adjacent living
The best plants near a compost system do three jobs: they handle variable moisture, they soften the look of the utility corner, and they give you a reason to interact with the system regularly (which keeps it balanced).
Herbs that thrive in containers and forgive you
- ‘Genovese’ basil: Loves warmth and regular watering; place in the sun lane with 10–12 inches spacing from neighboring pots for airflow. Great payoff for small space.
- ‘Greek’ oregano: Drought-tolerant, compact, and aromatic—helpful near compost corners where you want everything to smell fresh.
- Common chives: Tough, cold-hardy, and a natural “edge” plant for a compost zone; stays upright and neat.
Edibles that make smart use of homemade compost
- ‘Tom Thumb’ lettuce: Compact heads, excellent for 3–5 hours of sun; top-dress containers with a thin layer of finished compost.
- ‘Patio Baby’ eggplant (container variety): If you get 6–8 hours sun, this is a showpiece plant that appreciates compost-rich mix.
- ‘Sugar Snap’ peas (dwarf or balcony trellis): Use the privacy trellis behind the compost corner; peas visually screen the bin and fix nitrogen.
Design-forward plants for screening and scent
- Jasmine (star jasmine, Trachelospermum jasminoides): A fragrant trellis cover; creates a living screen. Best with 5–6 hours sun.
- Lavender (‘Hidcote’): Compact, aromatic, and visually crisp. Keep it in the sunniest spot and don’t overwater.
Spacing note: if you line planters along a rail, leave 2–3 inches between pots for drainage and to prevent trapped moisture (which attracts gnats). Compost systems behave better when the whole balcony has good airflow.
Budget planning and DIY alternatives (so this stays renter-friendly)
Let’s talk realistic numbers. A compact balcony compost corner can be done with a modest spend, and you can scale it up later.
- Low-cost DIY (approx. $25–$60): 5-gallon bucket bokashi-style (with spigot kit), boot tray, and a lidded browns container you already own.
- Mid-range (approx. $90–$180): Stacked worm bin + tray + small shelf.
- Polished setup (approx. $200–$350): Premium worm bin with stand, attractive storage rack, and a trellis screen with a vine.
DIY alternative that works surprisingly well: a 27-gallon tote with a tight lid, drilled ventilation holes high on the sides, and shredded cardboard bedding for worms. Pair it with a simple spigot-free leachate strategy: keep it dry enough that liquid doesn’t pool (that’s where odors start).
Three real-world scenarios (and what I’d build for each)
Scenario 1: The 6th-floor renter with a 4' x 8' windy balcony
Wind is your main enemy: it dries compost and stresses plants. I’d use a stacked worm bin (15" x 15") placed against the building wall on a 24" x 36" tray. Add a trellis panel as a windbreak and grow ‘Sugar Snap’ peas or star jasmine to soften the corner.
Plant plan: two rectangular rail planters for greens, one larger pot for basil. Expect the worm bin to process roughly 1–3 lb of scraps per week once established (varies by worm population and temperature). Keep bedding stocked because wind will dry the top tray.
Scenario 2: The shaded balcony (3–4 hours of sun) with lots of coffee grounds
Shade is actually fine for compost—better than blazing sun. Here, the challenge is nitrogen-heavy inputs (coffee grounds) that can compact. I’d choose bokashi to keep it sealed and tidy, then “finish” the fermented material in a lidded soil factory pot (a 5–7 gallon container with potting mix) where it breaks down further.
Plant plan: ‘Tom Thumb’ lettuce, chives, mint in a contained pot (never loose in shared planters), and a shade-tolerant ornamental like ferns to create a calm green wall. Keep a dedicated browns container: shredded paper and torn cardboard egg cartons work well with coffee inputs.
Scenario 3: The family balcony with one seating area and strict odor worries
When comfort rules the space, layout matters even more than compost technique. I’d keep compost as far from seating as possible—ideally 3–6 feet away—and hide it behind tall planters. Bokashi is excellent here because it’s sealed, and you can store the bucket discreetly.
Plant plan: a visual “screen” of compact bamboo (in a proper container), or tall grasses, plus herbs near the kitchen door for convenience. You’ll interact with the herbs daily, which encourages regular compost maintenance—small actions, big payoff.
Composting performance: what to expect (time, smell, and output)
Composting on a balcony should not become a second job. A well-designed system typically takes 15–30 minutes per week for feeding, balancing browns, and wiping down the tray. Worm bins may need a slightly longer check-in every couple of weeks when you harvest castings.
Seasonal reality check:
- Summer: bins dry faster; plan on adding moisture (a light mist) and extra bedding. Keep out of direct sun. If your balcony hits above 90°F, worms can struggle—move them indoors or add insulation.
- Winter: microbial activity slows. Bokashi can continue indoors; worm bins can overwinter indoors if temperatures drop near freezing. A study in Bioresource Technology notes that composting processes are strongly temperature-dependent, affecting decomposition rates (Awasthi et al., 2014).
- Spring/Fall: the easiest seasons—steady moisture, moderate temps, fewer pests.
Odor expectations: a correctly balanced system smells earthy or mildly sweet (bokashi smells pickly/sour). If you smell rot, treat it as a design cue: you need more browns within reach, better drainage, or a smaller feed rate.
Maintenance routines that keep neighbors happy
Think of maintenance as three layers: daily habits, weekly rhythm, and seasonal resets.
Daily/Every time you add scraps (2 minutes)
- Add scraps in small pieces (faster processing).
- Add a handful of browns immediately (especially with wet scraps like melon rinds).
- Close the lid fully and wipe the rim if needed.
Weekly (15–30 minutes)
- Stir or fluff the top layer (aerobic bins) or rotate feeding zones (worm bins).
- Check moisture: aim for “wrung-out sponge.”
- Rinse the tray and inspect for drips.
- Freeze any fruit scraps first if fruit flies are common in your building (a simple preventative step).
Seasonally (30–60 minutes)
- Harvest castings or finished compost and top-dress containers (a 1/2-inch layer is usually plenty for balcony pots).
- Replace worn trays, refresh bedding, and clean lids/vents.
- Reassess layout: as plants grow, the shade pattern changes—move the bin if it’s baking.
Small design refinements that make it feel like part of your balcony
If you want this corner to read as “designed,” not improvised, borrow these landscape tricks:
- Repeat materials: match the compost tray color to your planters (all black, all terracotta, or all neutral).
- Create a visual screen: one trellis with a vine turns “utility” into “garden feature.”
- Use one neat container for browns: a single lidded bin looks intentional; a pile of paper bags looks temporary.
- Keep the floor clean: a quick sweep is the difference between “garden studio” and “messy corner.”
And remember the point: a balcony compost system isn’t just waste management—it’s a supply chain. When you top-dress your basil with your own compost, you’re closing a loop in a space that most people treat as decorative only.
When you’re done, step back and look at your balcony again. You should still have your chair, your clear walkway, and your sunlight saved for plants. But now you’ll also have a quiet little workhorse in the corner—contained, breathable, and set up so well that the sustainable choice becomes the easy one.
Sources: U.S. Environmental Protection Agency (EPA), “Composting At Home” (2023); Meadows, D., Thinking in Systems (2008); Awasthi, M.K. et al., composting temperature/process relationships discussed in Bioresource Technology (2014).