Indoor Living Wall Installation Guide
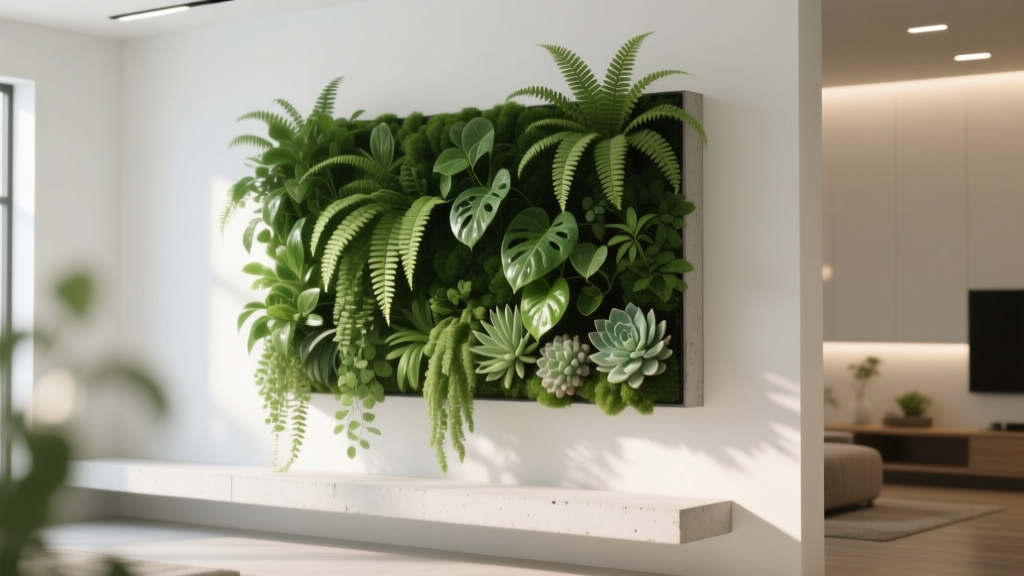
It’s 7:30 p.m. The overhead lights are harsh, the air feels a little stale, and the “plant corner” you promised yourself is now three tired pots leaning toward a window that doesn’t quite deliver. You want green—real green—but you don’t have floor space to spare. This is the moment an indoor living wall earns its keep: it turns a blank vertical surface into a planted, living finish that makes a room feel calmer and more intentional without demanding another square foot of walking space.
I’m going to walk you through designing and installing an indoor living wall the same way I’d approach it for a client: start with the wall’s conditions, choose a system that matches your habits and budget, then plant with restraint and a designer’s eye. Along the way, you’ll see three real-world scenarios—rental-friendly, low-light, and “I want a statement wall”—with specific dimensions, spacing, costs, and maintenance expectations.
Start with the wall: light, load, and logistics
Before you buy a single plant, stand where the wall will go and answer three questions: How much light do you really have? What can the wall safely hold? And where will water go (and not go)? Indoor living walls fail for predictable reasons—usually light or water management—not for lack of enthusiasm.
Measure your usable planting rectangle
Most homeowners pick a wall, then forget about outlets, furniture clearance, and door swing. Tape out the actual planting area. A very workable starter size is 24 in × 48 in (about 8 sq ft): it’s large enough to read as a “wall,” yet still manageable to water and maintain.
Design tip: keep 6–8 inches of clearance from the top of a sofa or console so foliage can drape without becoming a hair-brushing nuisance.
Confirm sunlight hours and light quality
Count light in hours, not vibes. For most common indoor living-wall plants:
- Bright indirect: about 6–8 hours/day near an east window or a few feet back from a south/west window with sheer curtain.
- Medium light: about 4–6 hours/day of indirect light.
- Low light: under 4 hours/day—possible, but your plant palette narrows and supplemental LEDs become your best friend.
If you’re relying on grow lights, plan for 10–12 hours/day on a timer. Position LED bars 8–14 inches from foliage for even coverage (follow the fixture’s guidance).
Understand weight and moisture risk
Water plus saturated media adds up quickly. A small planted panel can weigh 8–15 lb per sq ft depending on system and moisture level. If you’re mounting to drywall, locate studs and use appropriate fasteners. Renters should strongly consider freestanding frames or rail systems that use minimal holes.
Also decide where water will go during maintenance. You need a drip edge, tray, or removable modules you can carry to a sink. Moisture management matters not only for the wall but for indoor air quality. The U.S. EPA notes that controlling moisture is key to preventing mold indoors (U.S. Environmental Protection Agency, 2023).
Layout strategies that look designed (not just “plants on a wall”)
A living wall is a composition. The best ones read clearly from across the room and still reward you up close. Use these layout principles to make the wall feel intentional.
Design rule: anchor + rhythm + negative space
Anchor with 1–2 “structural” plants (larger leaves or a bolder form) placed slightly off-center. Add rhythm by repeating 2–3 textures in a pattern. Preserve negative space by leaving a few pockets open at first—plants grow, and a little breathing room prevents the dreaded green blob.
For a 24 in × 48 in panel, a clean starting plan is 10–14 plants total, depending on pocket size. Overstuffing is the fastest way to invite rot and frustration.
Use a simple grid so spacing stays consistent
If your wall uses pockets or small pots, think in a grid. A common module is a 4-inch pot or pocket. Spacing guidelines:
- 4-inch pockets: place plants on 6–8 inch centers for airflow.
- 6-inch pockets: use 10–12 inch centers; choose fewer, bigger-leaf plants.
Color strategy: two greens, one accent
Indoors, too many colors can read messy under artificial light. I like a “two greens + one accent” approach: one deep green (philodendron), one lighter or patterned green (pothos variety), plus a controlled accent (burgundy peperomia or a neon pothos) used sparingly in 2–3 spots.
Choose a living wall system that fits your life
Your system choice should match your tolerance for watering, your wall type, and your willingness to tinker. Here’s a practical comparison you can use when shopping.
| System | Best for | Typical cost (small wall) | Watering approach | Rental-friendly? |
|---|---|---|---|---|
| Modular plastic panels with pockets | Clean look, easy expansion | $150–$400 for ~8 sq ft (plus plants) | Hand-water or add drip line | Sometimes (depends on mounting) |
| Felt pocket hangers | DIY budget installs | $40–$120 for 12–18 pockets | Hand-water; needs drip tray | More friendly (few anchors) |
| Freestanding rack + pots | Renters, no wall drilling | $80–$250 for rack + saucers | Water at sink; simple | Yes |
| Hydroponic recirculating wall | High-impact statement walls | $600–$2,000+ depending on kit | Pump + reservoir; monitor nutrients | Usually no |
If you want the easiest maintenance path, choose a system with removable pots or modules. If you’re drawn to hydroponics, budget time for monitoring and cleaning—beautiful, but less forgiving.
“The most successful interior planted walls are designed as irrigated systems with planned access for maintenance—if you can’t easily reach plants, you won’t care for them.” — Prof. Gary W. Mohr, interior plantscape guidance cited in extension horticulture discussions (University outreach publications, 2019)
Plant selection: reliable varieties and where they shine
Indoor living walls reward plants that tolerate consistent moisture (but not soggy roots), adapt to indoor light, and recover quickly from a missed watering. Below are designer-friendly staples that perform in vertical systems.
Workhorse vines (coverage and flow)
Epipremnum aureum (pothos) varieties are my go-to for beginners and for renters who need forgiving plants.
- ‘Golden Pothos’: fast coverage, handles medium light, forgiving if you miss a watering.
- ‘Marble Queen’: brighter variegation; keep it closer to light for best color.
- ‘Neon’: use as an accent; reads modern against white walls.
Philodendron hederaceum (heartleaf philodendron) is slightly tidier than pothos and has a softer, more “designed” drape. Great for repeating in a pattern.
Texture plants (make it look curated)
- Asplenium nidus (bird’s nest fern): bold rosette form; place as an anchor. Likes humidity and consistent moisture.
- Peperomia obtusifolia (baby rubber plant): compact, glossy, and slower-growing—ideal for keeping a design crisp.
- Fittonia albivenis (nerve plant): high pattern impact; best in bright indirect light and evenly moist pockets.
Low-light survivors (for north windows and hallways)
Low light doesn’t mean no light, but these are more tolerant:
- Spathiphyllum (peace lily): good for medium-to-lower light; communicates thirst clearly by drooping.
- Aglaonema (Chinese evergreen), e.g., ‘Silver Bay’: steady growth, forgiving, excellent for consistent structure.
- Dracaena ‘Janet Craig’ (compact forms): use sparingly; prefers to dry slightly between waterings.
Indoor air studies often get quoted in broad strokes, but one of the most cited is the NASA Clean Air Study (Wolverton et al., 1989), which explored how certain houseplants can remove volatile organic compounds in controlled conditions. In real homes, ventilation and moisture control matter more day-to-day, but plants still meaningfully improve perceived comfort and the psychological feel of a space.
A quick plant spacing and quantity plan (example)
For an 8 sq ft wall with 12 pockets (roughly 4-inch to 5-inch pockets), start with:
- 2 anchors: bird’s nest fern + peace lily (top third)
- 6 mid-layer plants: heartleaf philodendron + peperomia repeats
- 4 drapers: pothos to cascade from mid and upper positions
Step-by-step installation (DIY-friendly, designer-approved)
This sequence assumes a modular pocket panel or pocket hanger. The steps are nearly identical for a freestanding rack—just skip wall mounting and focus on drip protection.
- Mark the footprint. Tape a 24 in × 48 in rectangle on the wall. Stand back across the room and confirm height and centering.
- Locate studs and plan fasteners. Use a stud finder; mark studs with painter’s tape. If you can’t hit studs, use heavy-duty anchors rated for your estimated load.
- Add wall protection. Install a waterproof backer board or a sealed panel behind the system, especially on drywall. Even a thin PVC sheet can protect paint from moisture.
- Install a drip solution. Mount a slim drip tray, or plan to remove modules to water in the sink. For felt pockets, a tray is non-negotiable.
- Mount the system. Level it carefully. A wall that’s off by even 1/4 inch looks crooked once plants grow.
- Prep your planting media. Use a light, airy mix: indoor potting soil cut with orchid bark and perlite. Avoid heavy garden soil—it compacts in vertical pockets.
- Plant from top to bottom. Top plants get watered first and may shade lower plants. Place anchors first, then repeats, then drapers.
- Water slowly and observe. Do the first watering in stages so media hydrates evenly. Check for drips and adjust the tray or watering volume.
- Set a light and watering schedule. Put grow lights on a timer (10–12 hours/day if needed). Start with watering every 5–10 days and refine.
Three real-world scenarios (and how I’d design each)
Scenario 1: The renter’s “no-drill” green wall in a small apartment
Space: 600–900 sq ft apartment, limited natural light, strict lease rules.
Layout strategy: Use a freestanding metal rack 36 inches wide with 3–4 shelves, and train vines upward with removable adhesive hooks (on the rack, not the wall). You get the vertical effect without risking your deposit.
Plant palette: Golden pothos, heartleaf philodendron, and one peperomia for structure. These tolerate missed waterings and adapt to medium light near a window.
Budget: Rack $120, 10 plants at $8–$18 each ($80–$180), saucers $20. Total: $220–$320.
Scenario 2: The low-light hallway that needs life (but won’t grow much)
Space: A hallway with under 4 hours/day of indirect light, no good window adjacency.
Layout strategy: Keep it smaller and tighter: a 18 in × 36 in panel at eye level, paired with a slim LED bar above. Instead of chasing fast growth, aim for a clean, slow-evolving composition.
Plant palette: Aglaonema ‘Silver Bay’ for structure, peace lily for softness, and a small amount of pothos to drape. Skip ferns here unless humidity is high.
Lighting plan: LED grow bar on timer for 12 hours/day. Expect slightly slower growth and less frequent pruning.
Budget: Panel $140, light $60–$120, plants $100. Total: $300–$360.
Scenario 3: The statement wall behind the dining table (high style, controlled maintenance)
Space: Dining area with an east-facing window delivering 6–8 hours/day bright indirect light.
Layout strategy: Go wider for impact: 48 in × 48 in (16 sq ft). Use a clear grid with repeating textures so it reads as art. Plan a drip tray and a protected wall backer—this is a “finish,” like tile.
Plant palette: Two bird’s nest ferns as anchors, repeating peperomia, philodendron, and marble queen pothos for variegation. Add 2 pockets of fittonia as a close-up detail near eye level.
Budget: Larger panel system $350–$700, plants (20–26 plants) $200–$450, waterproof backer $40–$90. Total: $590–$1,240.
Costs, budgets, and smart DIY alternatives
Indoor living walls can be surprisingly affordable if you choose the right format. The biggest cost “creep” comes from buying too many plants too quickly or choosing a system that requires specialized irrigation.
Budget breakdown you can actually plan around
- Small DIY pocket wall (8 sq ft): $40–$120 for pockets + $100–$250 plants = $140–$370
- Modular panel wall (8–16 sq ft): $150–$700 panels + $150–$450 plants = $300–$1,150
- Grow lighting: $60–$200 depending on length and output
- Moisture protection (backer + tray): $30–$150
DIY alternatives that still look polished
If you want the look without the irrigation complexity, try these:
- Rail + hanging planters: A simple wall-mounted rail with 6–8 hanging pots keeps watering easy (take them down to water). Use consistent pot color for a designed effect.
- Pegboard plant wall: Great for renters if mounted with minimal anchors; rearrangeable and practical. Choose lighter pots and keep a drip plan.
- Framed “plant shelves”: Two narrow shelves stacked vertically can mimic a living wall. Use trailing plants to visually connect the layers.
Maintenance expectations (the honest version)
A living wall isn’t hard, but it is a commitment. The trick is building access and routine into the design so it feels like caring for a few houseplants—not running a greenhouse.
Weekly care (time and tasks)
Plan on 20–45 minutes per week for a small-to-medium wall.
- Water check: Feel media in 2–3 pockets. Water only when the top inch feels dry (varies by light and airflow).
- Leaf check: Remove yellowing leaves promptly to discourage pests.
- Rotate drapers: Tuck and guide vines so they cover evenly rather than clumping.
Monthly care
- Light pruning: Trim pothos/philodendron tips to encourage branching; replant cuttings if you want denser coverage.
- Wipe leaves: Dust reduces photosynthesis; a damp cloth makes a visible difference indoors.
- Fertilize lightly: Use a balanced liquid fertilizer at 1/4 strength during active growth (typically spring through early fall).
Seasonal adjustments
Indoor conditions shift more than people expect. In winter, heating dries air and slows growth; in summer, brighter light and warmth speed everything up.
- Winter: Water less often; watch for crispy edges (humidity). Consider a small humidifier nearby if ferns are part of your design.
- Spring: Refresh the composition—swap one struggling plant rather than trying to “save” the layout.
- Summer: Increase watering frequency if the wall dries faster; monitor for fungus gnats (avoid overwatering).
Troubleshooting like a designer (quick diagnostics)
Yellow leaves across multiple plants: usually overwatering or poor drainage. Reduce watering volume and confirm your pockets aren’t staying soggy.
Leggy growth and sparse coverage: light is too low or too far away. Increase light hours or move the wall closer to a window; add a grow bar if needed.
Brown leaf tips on ferns: low humidity or inconsistent moisture. Group humidity-loving plants together on the wall and water more evenly.
Pests (sticky leaves, webbing, specks): isolate affected plants if possible. Wipe leaves and treat with insecticidal soap; repeat weekly for 2–3 cycles.
Make it feel like it belongs in your room
The final layer is styling—where design becomes lived-in comfort. Match the wall’s lines to what’s already there: align the panel edges with a dining table width, a sofa length, or a rug boundary. Add a nearby lamp with warm light so the wall reads beautifully at night. And leave yourself access space; the best living walls are the ones you can reach without dragging a chair every time.
If you build for your actual light, pick a system you can maintain, and start with a restrained plant palette, your indoor living wall won’t be a short-lived project. It becomes part of the architecture of your home—softening corners, improving the mood of a room, and giving you a small, satisfying gardening ritual even when outdoor space is limited.
Sources: U.S. Environmental Protection Agency (2023) guidance on moisture control and mold prevention; Wolverton, B.C., Johnson, A., & Bounds, K. (1989) NASA Clean Air Study on indoor plants and VOCs in controlled environments.