Sunroom Fernery Design Ideas
The sunroom looked perfect on the real estate listing: bright windows, a view of the yard, a spot for morning coffee. Then real life moved in—glare at noon, dry air in winter, and a sad row of crispy houseplants that never quite recovered. If that’s familiar, here’s the good news: a sunroom is one of the best places in a home to build a fernery—lush, layered, and calming—because you can control the light, humidity, and layout more predictably than outdoors.
I’ll walk you through designing a fernery like a small landscape project: assessing light, shaping a floor plan, selecting ferns (and a few companions), then building in maintenance so it stays beautiful on a normal schedule—not just the week you set it up.
Start with the site read: light, heat, humidity, and traffic
Measure sunlight in hours, not guesses
Ferns don’t want “shade” so much as they want consistent light. In a sunroom, you’ll typically see 2–6 hours of direct sun depending on orientation and window size. Track it for one day:
- At 9 a.m., 12 p.m., and 3 p.m., note where sun patches land on the floor and shelves.
- Count how many hours any given spot gets direct sun (a sharp shadow) vs bright indirect light.
- Map three zones: bright indirect, gentle morning sun, and hot afternoon sun.
Most classic indoor ferns prefer bright indirect light and will scorch in prolonged midday sun. The University of Minnesota Extension notes that many houseplants perform best with bright, filtered light rather than intense direct sun (University of Minnesota Extension, 2020).
Plan around heat swings near glass
Expect the perimeter next to windows to run hotter in summer and cooler in winter. In practical terms, I treat the first 12–18 inches from the glass as a “buffer strip” for tougher plants or for display items (moss poles, stones, a humidity tray) rather than your most delicate ferns.
Know your baseline humidity
Most indoor ferns look their best around 40–60% relative humidity. Winter heating can push many homes below 30%. If you can, confirm with a small hygrometer (often $10–$20). You don’t need rainforest conditions—you just need to avoid chronic dryness that browns tips and invites spider mites.
“Relative humidity of 40–60% is comfortable for people and helps many houseplants perform better indoors.” — University of Georgia Extension, “Humidity and Houseplants” (UGA Extension, 2019)
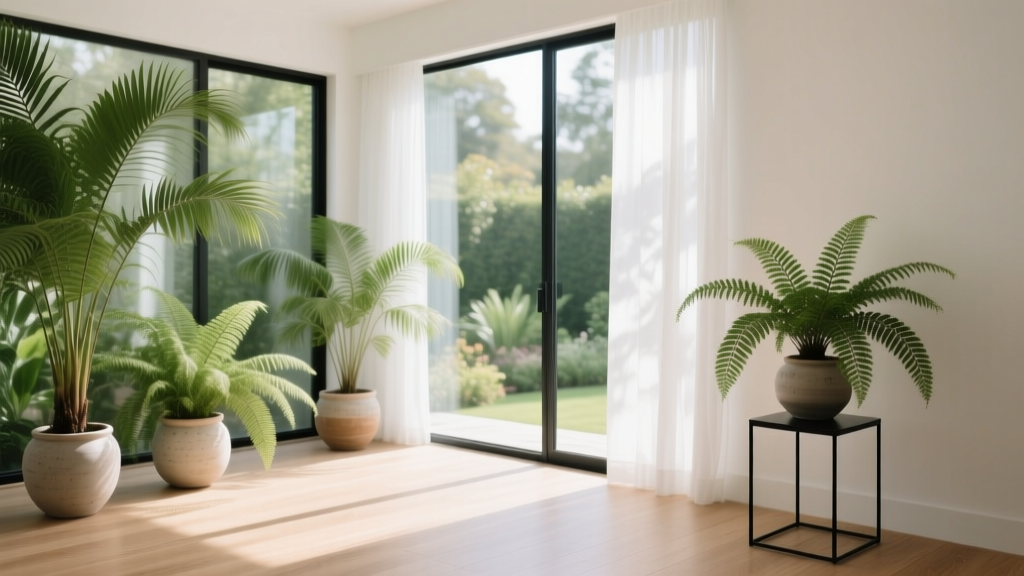
Layout strategies: design a fernery that works like a room
Think in layers: floor, midstory, canopy
A satisfying fernery is less about having many plants and more about having the right structure. Use three vertical layers:
- Floor layer (pots 10–14" diameter): big, arching ferns that anchor corners.
- Midstory (table height 28–30" or plant stands): feathery textures at eye level.
- Canopy (hanging baskets 8–10" diameter): trailing ferns and a few companions to soften edges.
Spacing matters for airflow. As a rule, give most ferns 8–12 inches between pot rims so fronds can expand without constant rubbing (which leads to broken tips and fungal spots).
Use a “U” or “L” footprint to keep seating usable
Most sunrooms fail as plant rooms because the plants steal the walking path. Aim for a clear circulation lane of at least 30 inches (comfortable for one adult) and ideally 36 inches if it’s a main passage.
Two layouts I return to:
- L-shape: plants along two adjacent window walls; seating in the opposite corner.
- U-shape: plants on three sides, but keep the open end facing the door to avoid a “green tunnel.”
Create a humidity “harbor” without remodeling
If your sunroom is dry, don’t fight the entire room—build a microclimate:
- Cluster plants in groups of 3–7 rather than lining them up singly.
- Add a shallow pebble tray under the densest cluster (budget: $12–$30).
- Use one small ultrasonic humidifier near (not under) foliage. A reliable unit is often $35–$80.
Clustering plus a humidifier can turn a struggling collection into a stable fernery with minimal fuss.
Three practical sunroom fernery concepts (with real-world scenarios)
Scenario 1: A rental sunroom (6' x 8') with strict “no holes, no leaks” rules
In a compact rental, your design job is to create impact with portable elements. Here’s a layout that fits a 6' x 8' footprint:
- One 48" wide metal shelving unit (wire shelves breathe and reduce mildew) placed on the brightest wall.
- Two floor anchors: a Kimberly Queen fern and a rabbit’s foot fern in 12" pots.
- A boot tray under the shelf to catch runoff (about $10–$18).
DIY alternative: If you can’t buy a shelf, use two sturdy end tables and a board to create a long plant bench—just protect the surface with a vinyl tablecloth.
Scenario 2: A family sunroom (10' x 12') that still needs seating and toy storage
For multipurpose rooms, I design the fernery like a “green backdrop” behind furniture. Keep the center open and build an L-shaped planting zone. Example:
- Along the long wall: a 60" x 16" plant bench behind a loveseat.
- Along the short wall: a tall corner plant stand (48–60" height) to lift fronds away from toddlers and pets.
- Use lidded storage ottomans for toys, then place a humidity tray on top out of reach.
This approach keeps the fernery lush without turning the room into an obstacle course.
Scenario 3: A bright south-facing sunroom with 5–6 hours of direct sun
South-facing light can be glorious—and too intense. Here you design with filtration and distance from glass:
- Install a sheer curtain or UV-filtering film; budget $25–$120 depending on window size.
- Set delicate ferns back 24–36 inches from the glass.
- Use tougher plants (or shade-loving companions) in the buffer strip nearest the window.
If you’re seeing frond bleaching or crispy tips only on the window side, that’s a classic sign your plants are too close to the solar “hot zone.”
Plant selection: ferns that actually behave indoors
Not all ferns enjoy indoor life. Below are varieties that regularly succeed in sunrooms, plus what they’re good at in a design.
Anchor ferns (big presence, steady performance)
- Kimberly Queen fern (Nephrolepis obliterata): Upright, tidy fronds; handles slightly lower humidity better than Boston fern. Great for corners and near seating because it sheds less.
- Australian tree fern (Cyathea cooperi) in a large container: Architectural and dramatic, but needs consistent moisture and space. Give it at least 3 feet of clearance in diameter for frond spread.
- Machо fern (Nephrolepis biserrata ‘Macho’): Big, lush mass for a “jungly” look; best in bright indirect light with room to expand.
Midstory texture ferns (the “lace and feather” layer)
- Maidenhair fern (Adiantum raddianum): Unmatched delicacy, but it demands even moisture and higher humidity. Place it in the most protected, stable zone—often the interior side of a plant cluster.
- Button fern (Pellaea rotundifolia): Compact and forgiving; excellent for shelves where you want a neat outline.
- Bird’s nest fern (Asplenium nidus): Broad fronds contrast beautifully with lacy ferns; tolerates medium light better than many ferns and looks intentionally sculptural.
Trailing and hanging choices (soft edges, vertical payoff)
- Boston fern (Nephrolepis exaltata): Classic hanging fern, but thirstier and more humidity-sensitive than Kimberly Queen. Great when you can maintain moisture and airflow.
- Rabbit’s foot fern (Davallia fejeensis): Character rhizomes that creep over pot edges; excellent in hanging baskets or elevated planters where you can see the “feet.”
Companion plants that make ferns look better (and solve problems)
A fernery feels designed when you add a few non-ferns that support the same conditions:
- Spider plant (Chlorophytum comosum): Great filler on shelves; tolerates a wider range of light and acts as a “bridge” plant in brighter spots.
- Peperomia varieties: Compact, tidy, and useful where ferns might sprawl into pathways.
- Moss poles with vining aroids (if you like): Use sparingly; they can compete visually. If you add one, make it your “feature” and let ferns support it.
Quick comparison: choose ferns based on your sunroom conditions
| Fern | Best light in a sunroom | Humidity tolerance | Design role | Typical container |
|---|---|---|---|---|
| Kimberly Queen (Nephrolepis obliterata) | Bright indirect; gentle morning sun | Moderate (for a fern) | Floor anchor, corner mass | 10–14" pot |
| Boston fern (N. exaltata) | Bright indirect; avoid hot direct sun | Higher needs | Hanging cascade | 8–12" basket |
| Maidenhair (Adiantum) | Filtered light; stable placement | High needs | Fine texture highlight | 6–8" pot |
| Bird’s nest (Asplenium nidus) | Medium to bright indirect | Moderate | Sculptural contrast | 8–12" pot |
| Rabbit’s foot (Davallia fejeensis) | Bright indirect | Moderate | Character plant; elevated display | 6–10" pot |
Step-by-step: setting up a sunroom fernery (designer workflow)
- Sketch the room to scale. Even a rough drawing helps. Mark doors, vents, and window walls. Identify a 30–36 inch clear path.
- Assign your three light zones. Use the sunlight-hour notes you took. Put your “no direct sun” plants in the safest zone first.
- Place furniture before plants. Seating and pathways are non-negotiable. Then design the fernery around them like a border around a patio.
- Install one vertical structure. A 48–72 inch shelf or a tiered plant stand creates instant layering.
- Add two anchors. Start with two larger ferns in 10–14 inch pots to establish mass and reduce the “collection of small pots” look.
- Fill the midstory. Add 3–5 medium plants with contrasting frond shapes (e.g., bird’s nest + button fern + rabbit’s foot).
- Handle humidity last. Add pebble trays, cluster plants, and only then decide if you need a humidifier. If your hygrometer stays below 35% for days, a small humidifier will save you time and plant loss.
- Dial in watering with a schedule. Plan to check moisture 2x per week at first; once stable, most sunroom ferneries settle into a predictable rhythm.
Soil, pots, and drainage: keep it lush without making a mess
Ferns like evenly moist—not waterlogged—roots. The fastest way to fail indoors is a pot with no drainage or a saucer that stays full.
- Use pots with drainage holes. If you love a cachepot look, keep the fern in a nursery pot inside a decorative outer pot.
- Choose a moisture-retentive but airy mix. A practical blend is quality indoor potting mix plus extra perlite and fine bark to improve oxygen at the roots.
- Protect floors. A simple waterproof mat under your plant cluster costs less than replacing warped trim. Boot trays and plant caddies are your friends.
For indoor plant care guidance, the Royal Horticultural Society emphasizes matching compost and watering habits to plant needs and avoiding chronic waterlogging (RHS, 2023).
Budget planning: what a fernery really costs (and where to save)
A sunroom fernery can be built gradually. Here are realistic ranges I use when clients ask for a ballpark:
- Starter fernery (6–8 plants): $120–$250 (plants, basic pots, one shelf).
- Mid-level fernery (10–14 plants + humidifier): $250–$500.
- Statement fernery (feature plant + lighting + upgraded planters): $500–$1,200.
Where to save money without sacrificing the look:
- Buy smaller ferns in 4"–6" pots and give them one growing season. The design still works because you’re relying on layering and grouping.
- Use consistent pot colors (even inexpensive ones). Visual cohesion reads “designed” more than expensive specimen plants.
- DIY humidity trays with thrifted baking sheets and river stones.
Where not to skimp:
- A stable shelf/stand (wobble leads to broken fronds and spills).
- A decent watering can with a narrow spout for accurate watering on shelves.
Maintenance expectations: what it takes to keep a fernery looking intentional
If you set the layout and humidity correctly, maintenance is steady and predictable rather than constant drama.
Weekly (about 30–60 minutes total)
- Moisture checks: Test pots with your finger or a moisture meter; most ferns prefer soil that’s lightly moist, not soggy.
- Grooming: Snip brown fronds at the base to keep the fernery crisp.
- Rotate pots: A quarter turn every week or two helps keep growth even toward the windows.
Monthly (about 30 minutes)
- Clean fronds: Dust blocks light. A gentle shower or wipe improves plant health and appearance.
- Inspect for pests: Watch for spider mites in dry conditions—fine webbing and stippled leaves.
Seasonal tasks
- Winter: Keep ferns away from heating vents; run a humidifier if indoor humidity drops below 35–40%.
- Spring: Refresh the top 1–2 inches of potting mix and consider repotting crowded plants.
- Summer: Use sheers or reposition if you get more direct sun than expected; watch for faster drying.
Design finishing touches that make it feel like a real room
Once the plants are thriving, add a few materials that “landscape” the space:
- A neutral outdoor rug to define the fernery zone and hide inevitable soil crumbs.
- A small bench or café chair placed so you sit just outside the frond line—close enough to feel immersed, not tangled.
- One consistent light element (a warm floor lamp or discreet grow light). If winter light is low, a simple LED grow bulb can support growth without turning the room into a laboratory.
The goal is to make your fernery read as a planted border: layered, textured, and comfortable to live next to. When you can walk through the sunroom without dodging pots, when the fronds aren’t crisping at the edges, and when watering feels like a calm weekly ritual instead of an emergency—your sunroom fernery has officially become part of the home.
Sources: University of Georgia Extension (2019); University of Minnesota Extension (2020); Royal Horticultural Society (RHS) (2023).