Rooftop Lightweight Modular Garden System
The first time you carry a bag of potting mix up six flights of stairs (or wrestle it out of an elevator while your neighbor holds the door with a grocery cart), you start making different design decisions. On a roof, every pound matters. So does wind, sun glare, and the fact that your “yard” might be a rectangle of membrane roofing with a drain you absolutely cannot block. This is where a lightweight modular garden system shines: you get the look and productivity of a lush garden, but in pieces you can lift, rearrange, and scale as your lease—or your needs—change.
Think of this as a rooftop project I’d walk a client through: we’ll set a simple layout, keep loads reasonable, choose plants that thrive in containers, and build modules that can be moved without drama. The goal is a roof garden that feels intentional, not like a collection of random pots.
Start With Constraints: Weight, Wind, Water, and Access
Before we talk style, we talk physics. Roofs are engineered systems, and the quickest way to ruin a good design is to ignore load and drainage. If you’re renting, you also need a system that can be removed with minimal trace.
Know your load limits (and design to a safe “garden weight”)
Many roofs are designed for specific live loads; the safe approach is to confirm allowable loads with your building management or a structural engineer. As a practical design habit, I treat saturated soil as “heavier than you think,” because it is. For context, extensive green roofs commonly use lightweight growing media and shallower depths to keep weight manageable; the FLL Guideline (2008) is widely referenced for green roof standards and emphasizes the relationship between system build-up, water retention, and load.
For a modular system, aim to keep each module liftable by one person: a target of 25–40 lb per module when planted and watered is realistic for most homeowners. That might mean smaller planters, shallower media, and more modules rather than fewer gigantic troughs.
Wind is your invisible design partner
On roofs, wind can desiccate plants and tip tall containers. A simple rule: keep heavier modules on the perimeter corners (where uplift and turbulence are strongest), and keep tall, leafy plants (tomatoes, trellises) closer to the center where the roof surface breaks wind speed slightly.
Drainage is sacred
Never place modules directly over drains or scuppers. Maintain a clear service zone: 18 inches around drains and any roof equipment. This is a layout principle, not a suggestion—future you (or maintenance staff) will thank you.
Access determines how much you’ll actually garden
If your roof access is a narrow stairwell, use smaller modules and carry media up in 10–20 lb increments. If you have elevator access, you can size up slightly. Either way, modularity is what keeps the project doable.
Design Principles for a Modular Roof Layout (That Doesn’t Feel “Potted”)
A good modular garden reads as a composed space: edges, paths, and focal points. The modules are just the building blocks.
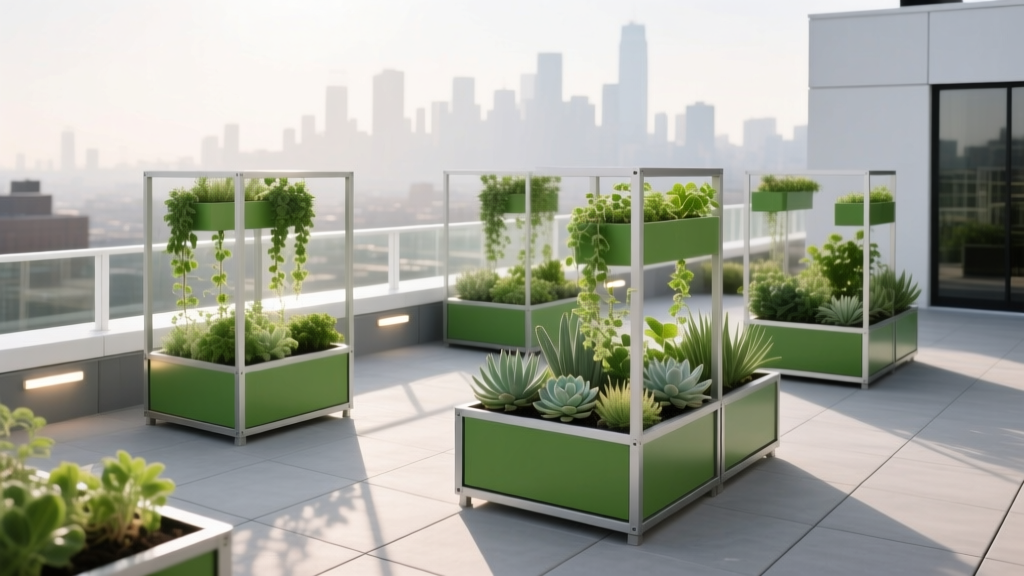
1) Build a grid you can edit
Choose a base module footprint and stick to it. My favorite for rooftops is a 24" x 24" (2 ft x 2 ft) footprint because it’s easy to carry, easy to reconfigure, and makes math simple.
With 2x2 modules you can create:
- A straight run of planters for a “green wall” effect
- An L-shaped windbreak corner
- A central herb “island” that doubles as a gathering point
2) Prioritize circulation: a real path beats squeezing between pots
Design a path you can walk with a watering can. Minimum comfortable width is 30 inches; 36 inches feels generous, especially if you’re carrying harvest baskets. On small roofs, I often do a single loop path so you can reach everything without stepping over irrigation lines.
3) Layer heights for comfort and microclimate
Use three height zones:
- Low (8–14" tall planters) for herbs and greens
- Medium (16–24") for peppers, compact eggplants, flowering pollinator plants
- Tall (trellis modules 5–6 ft) used sparingly and placed near the center
This creates wind buffering without turning the roof into a sail.
4) Use repetition to make modules look intentional
Repeat materials and shapes: the same planter color, the same corner brackets, the same mulch. Then repeat plants in drifts (three thyme planters, not one lonely thyme pot). This is how a modular system becomes a “garden.”
System Anatomy: Lightweight Modules That Perform
Here’s a practical modular kit that balances weight, cost, and durability.
Planter options and what they weigh (and cost)
| Module Type | Typical Size | Approx. Empty Weight | Durability | Estimated Cost (each) | Best Use |
|---|---|---|---|---|---|
| Fabric grow bag | 10–15 gal | 0.5–1.5 lb | 3–5 years | $6–$15 | Renters, seasonal crops, weight-sensitive roofs |
| HDPE/resin planter box | 24" x 24" x 12" | 6–12 lb | 5–10+ years | $35–$90 | Permanent modular grid, clean look |
| Cedar planter (thin stock) | 24" x 48" x 12" | 20–35 lb | 5–8 years | $60–$140 | Anchoring edges, mixed perennials |
| Self-watering container | 20–24" wide | 10–18 lb | 5–10 years | $45–$120 | High-sun roofs, busy schedules |
For the “lightweight but lush” sweet spot, I often mix resin planters (structure) with fabric grow bags (flexibility). The resin planters form the visible edges; the bags tuck behind, filling in volume.
Soil and media depth: match depth to crops
On roofs, use a high-quality container mix, not native soil (too heavy, compacts, drains poorly in pots). Depth targets:
- 6–8 inches: lettuce, arugula, spinach, chives
- 10–12 inches: basil, cilantro, peppers, strawberries
- 14–18 inches: compact tomatoes, dwarf citrus (with careful watering), deep-rooted herbs
If you want a reference point: research and extension publications consistently emphasize matching container volume to crop rooting needs; for example, UF/IFAS Extension notes that container vegetables require adequate volume and consistent watering to avoid stress (University of Florida IFAS Extension, 2019).
Irrigation: modular, not complicated
A simple drip system is the most “roof-friendly” upgrade you can make. Use a battery timer, 1/2" main line, and 1/4" drip lines to each module. Budget $80–$180 for a small setup serving 10–20 planters. If you’re truly DIY, hand watering works—but plan for it (more on maintenance below).
“Green roofs can reduce roof surface temperatures dramatically compared to conventional roofs, improving building performance and creating more stable growing conditions for plants.” — U.S. EPA, Using Green Roofs to Reduce Heat Islands (updated 2023)
Even if you’re not installing a full green roof system, the principle matters: plants moderate heat and glare. Your modular garden will be more comfortable to sit beside—and less punishing for the plants—when you cluster containers to shade the roof surface in key areas.
Layout Strategies That Make a Roof Feel Like a Room
Now for the fun part: composing the space. Below are layout moves I use over and over because they solve multiple roof problems at once.
Create an “edge band” to anchor the design
Set a band of modules along one edge—typically the least windy edge or the one with the best view. Use 4–6 modules in a line, each 24" wide, to make an 8–12 ft planted edge. This becomes your visual anchor and a wind-softening element.
Design a service corridor
Place your watering supply, soil storage bin, and tool tote in a single service zone. Keep it tight: a 24" x 48" footprint is enough if you use vertical storage. The point is to avoid “garden stuff” drifting all over the roof.
Cluster by water needs (hydrozones)
Modular systems are perfect for hydrozoning. Group thirsty plants (leafy greens, cucumbers) together, and keep drought-tolerant herbs (thyme, rosemary) in a separate cluster. This prevents the common rooftop mistake: overwatering half your plants to keep the other half alive.
Plan for shade windows: count your sun hours
Most edible crops want 6–8 hours of direct sun. If your roof gets only 4–5 hours because of taller buildings, shift your plant palette to greens, herbs, and compact fruits like alpine strawberries. Sun mapping matters more on roofs because shadows can be sharp and consistent.
Plant Selection: Varieties That Thrive in Containers (and Wind)
Rooftop plants need strong stems, tolerance for heat swings, and reliability in containers. Here are designer-approved, container-proven picks with spacing that fits modular layouts.
Edibles for the core modules
Tomato (compact/dwarf): ‘Patio Choice Yellow’
Why it works: bred for containers, shorter internodes, heavy yields in limited soil. Give it a 12–14" deep container and stake early. Spacing: one plant per 10–15 gal grow bag.
Pepper: ‘Lunchbox Red’ or ‘Lunchbox Orange’
Why it works: compact plants, early and steady production, less top-heavy than large bells. Spacing: one plant per 3–5 gal container; place modules 18" apart for airflow.
Eggplant: ‘Fairy Tale’
Why it works: smaller fruit, ornamental look, handles heat well with consistent moisture. One plant per 5–7 gal pot.
Cucumber (compact): ‘Bush Champion’
Why it works: shorter vines; still benefits from a small trellis to keep leaves off hot surfaces. One plant per 7–10 gal container; provide a 4 ft trellis panel in the center zone.
Greens and herbs for the “quick harvest” band
Basil: ‘Prospera’ (downy mildew resistant)
Why it works: rooftops can be humid at night and hot by day—disease resistance is insurance. Plant spacing: 8–10" apart in a 24" module.
Arugula: ‘Astro’
Why it works: fast, tolerates cooler shoulder seasons, easy to succession sow. Sow a new patch every 2–3 weeks for steady harvest.
Thyme: ‘Creeping Thyme’ (Thymus serpyllum)
Why it works: wind tolerant, drought tolerant once established, softens planter edges visually. Great in shallow modules (6–8").
Rosemary: ‘Arp’
Why it works: one of the more cold-tolerant rosemaries; upright structure makes a good “mini-shrub” in your layout. Give it a heavier module so it doesn’t tip.
Pollinator plants that earn their footprint
Salvia: ‘Mystic Spires Blue’
Why it works: long bloom season, strong stems, handles heat. Great companion near tomatoes and peppers.
Lavender: ‘Hidcote’
Why it works: thrives in well-drained containers, aromatic, drought tolerant. Place in your low-water hydrozone.
Three Real-World Rooftop Scenarios (and How the Modular System Adapts)
Scenario 1: The renter’s roof—small, strict rules, needs to move
You have a 10 ft x 12 ft roof corner, no drilling allowed, and you may move in two years. The best approach is a fabric-and-resin hybrid: 8 resin planters create the visible border, and 6–10 grow bags fill the interior.
Layout: a U-shape border on two sides (wind buffering), a 36" path down the middle, and a small chair tucked into the open side. Planting: greens and herbs at the edges for easy snipping, one dwarf tomato and two peppers near the center. Expected cost: $250–$550 depending on planter quality and whether you add drip irrigation.
Scenario 2: The entertaining roof—needs seating, shade, and low mess
This roof gets used at night, which means you want fragrance and minimal soil scatter. Use lidded storage and top-dress planters with fine gravel to reduce splash and mess. Add two larger anchor planters, 24" x 48", flanking a bench. These become your “green walls.”
Planting: rosemary and lavender for scent, salvia for color, and compact peppers for edible conversation starters. Keep tomatoes limited (they can look scruffy late season). Budget: $600–$1,200 for higher-end planters, gravel top-dressing, and a basic lighting upgrade.
Scenario 3: The productivity roof—maximum food in minimum footprint
This is the “I want salads and sauces all summer” roof. Use a strict grid: 12 modules at 24" x 24" fits neatly into an 8 ft x 6 ft growing zone while preserving a 30–36" path. Add one vertical trellis module in the center for cucumbers.
Planting plan:
- 2 modules: cut-and-come-again lettuce mix and arugula (succession sown)
- 2 modules: basil (two varieties) + parsley
- 2 modules: peppers
- 1 module: dwarf tomato
- 1 module: ‘Bush Champion’ cucumber with trellis
- 2 modules: strawberries (‘Seascape’ everbearing) for long harvest
- 2 modules: pollinators (salvia + calendula) to keep yields strong
Expected upkeep is higher, but the reward is real harvest. Budget: $400–$900, largely dependent on whether you DIY the planters and add drip.
Step-by-Step Setup: Build and Install Without Overloading the Roof
- Confirm rules and basics. Check building policies and identify drains, roof equipment, and no-go zones. Mark an 18" clearance around drains.
- Map sun and wind. Spend one day noting direct sun hours. Identify the windiest edge (often the highest exposure side).
- Choose your module standard. Commit to a base footprint (e.g., 24" x 24") and two heights (low and medium).
- Protect the roof membrane. Place planters on risers or protective pads designed for roofs so water can drain underneath. Keep everything breathable and avoid trapping moisture.
- Stage materials in small loads. Carry media up in 10–20 lb increments. If possible, hydrate coir or lightweight mix on the roof to reduce carry weight.
- Set the layout empty first. Arrange empty modules and walk the paths. Adjust until the circulation feels natural.
- Install irrigation (optional but recommended). Add a battery timer and run a main line along the back edge; branch to each module with 1/4" lines.
- Fill and plant in hydrozones. Group thirsty plants together; group drought-tolerant herbs separately.
- Mulch and stabilize. Top-dress with compost (for edibles) or fine gravel (for ornamental/cleanliness), then stake tall plants early.
- Set a maintenance rhythm. Put “check moisture” on your daily routine during heat waves—roofs dry quickly.
Budget Planning and DIY Alternatives (Without Sacrificing the Look)
Costs can swing widely depending on planters and irrigation. Here’s how I keep projects cost-smart.
Budget-friendly approach ($250–$450): fabric grow bags, a few resin planters for visual structure, hand watering, and DIY trellis panels made from PVC or recycled wood (secured safely so they don’t become wind hazards).
Mid-range approach ($450–$900): consistent resin planters, drip irrigation kit ($80–$180), quality potting mix, and a small storage bench that doubles as seating.
Higher-end approach ($900–$1,800+): self-watering containers, cedar or composite statement planters, professional drip layout, and integrated lighting.
DIY tip I use often: buy a single “hero” planter for the main sightline, then repeat inexpensive bags behind it. From the seating area, it reads as a cohesive planting bed.
Maintenance Expectations: The Real Time Commitment
On rooftops, watering is the make-or-break task. Expect to spend 30–60 minutes per week in mild weather and 10 minutes per day during hot spells if you hand water. With drip irrigation, weekly time drops closer to 20–40 minutes (mostly harvesting, pruning, and checking emitters).
Weekly tasks:
- Check moisture in at least three modules (sunny edge, shaded corner, center).
- Deadhead flowering plants to keep them blooming.
- Pinch basil to prevent early flowering and keep it bushy.
Monthly tasks:
- Feed heavy fruiting plants with a container-appropriate fertilizer (follow label rates).
- Inspect for aphids and spider mites—roof heat and dryness can invite them.
- Check that no planters have drifted into drainage clearance zones.
Seasonal tasks:
- Spring: refresh the top 2 inches of potting mix with compost; re-check irrigation lines.
- Summer: add shade cloth if plants scorch in extreme heat; adjust timer as days lengthen.
- Fall: plant cool-season greens; reduce watering frequency.
- Winter: consolidate planters away from the windiest edges; protect tender perennials or bring them inside.
Practical Notes That Prevent Rooftop Headaches
Keep at least one module “empty” at the start of the season. It becomes your swap space when you need to move plants for a party, isolate a pest issue, or rotate crops. Modular systems work best when you leave yourself a little flexibility.
Also, don’t underestimate glare. Light-colored roofs can reflect heat upward, increasing plant stress. Clustering planters and adding a small outdoor rug in your seating area can make the space feel cooler and more comfortable—functionally and visually.
Finally, treat your rooftop garden like a room you’re furnishing. The planters are your walls, the path is your hallway, and the central cluster is your living area. When the modules are laid out with intention—clear circulation, repeated forms, and plants matched to sun and water—you get a garden that feels calm and designed, even when it’s made of movable parts.
Sources: Forschungsgesellschaft Landschaftsentwicklung Landschaftsbau (FLL). Guideline for the Planning, Execution and Upkeep of Green-Roof Sites, 2008. U.S. Environmental Protection Agency (EPA). Using Green Roofs to Reduce Heat Islands, 2023. University of Florida IFAS Extension. Growing Vegetables in Containers, 2019.