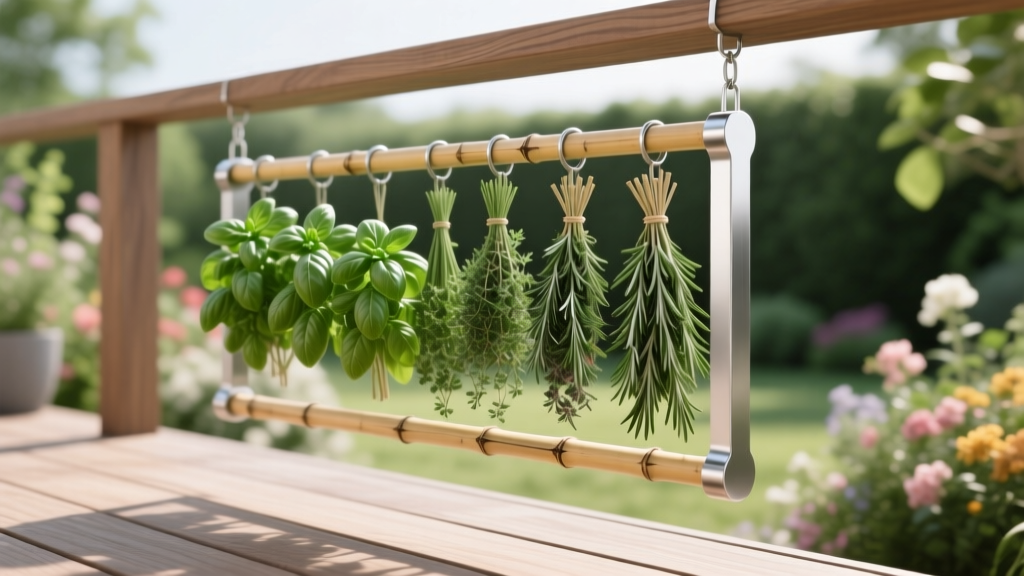
Deck Hanging Herb Drying Rack
The basil is finally lush, the rosemary is throwing out new growth, and the mint has—of course—taken over its pot. You snip a basketful on a warm evening, step onto the deck… and then realize you have nowhere to dry it that isn’t the kitchen counter, the dining table, or the back of a chair. The sun is still blasting the boards, the dog is doing laps, and the next gust of wind will scatter leaves like confetti. A deck hanging herb drying rack solves that moment: it turns “Where do I put this?” into a tidy, good-looking system that fits the way outdoor spaces actually get used.
Think of this as a small architectural feature—part utility, part garden style statement. Done well, it keeps herbs shaded, ventilated, and protected while staying out of your traffic lanes. And because it hangs, it works for renters and homeowners alike: you can install it with minimal hardware, or build a freestanding frame that moves with you.
Design principles: where a drying rack should live on a deck
Prioritize airflow, not sun
Most herbs dry best in a warm, dark-ish place with steady air movement. Direct sun can bleach color and drive off aromatic oils faster than you want. The goal is bright shade with good ventilation—think of the north or east side of a pergola, under an awning edge, or beneath a deck roof where breezes still pass through.
For deck placement, aim for a spot that gets 0–2 hours of direct sun and at least 6 hours of ambient daylight. If your deck is full-sun all day, create shade for the rack using an outdoor curtain panel, shade sail, or even a section of reed fencing mounted behind it to block afternoon rays.
Keep it out of the “collision zone”
A hanging rack is like a pendant light outdoors: it needs headroom. Standard deck circulation paths want a clear height of about 80 inches (203 cm). If you hang a rack under a beam, keep the lowest point at least 78–84 inches above the walking surface, or tuck it over a side zone where people don’t pass through (near a railing corner, beside a grill station, or behind a lounge chair).
Design for drip, debris, and easy cleanup
Fresh-cut herbs will shed tiny bits as they dry. Plan what’s beneath the rack: a small outdoor mat, a narrow tray table, or even a planted container that doesn’t mind a little herbal “mulch.” I like placing the rack above a long, skinny planter—thyme and oregano below, bundles above—so cleanup becomes a quick sweep into soil.
Match the rack scale to your harvest reality
People often build drying setups that are either too tiny (one bunch at a time) or too massive (in the way all season). A practical capacity target for most deck gardeners is 8–16 bundles at once. That aligns with a weekly harvest from 6–10 containers without turning your deck into a drying barn.
Layout strategies: three rack configurations that work in real decks
1) The “beam hang” (best for pergolas, porch roofs, and covered decks)
If you have an overhead beam, joist, or pergola slat, you can hang a rectangular rack like a light fixture. The sweet-spot rack size is 24 inches by 36 inches with 4–6 crossbars or a grid panel. Hang it using chain or coated cable so you can adjust height with the seasons.
Plan for at least 12 inches of clearance between the rack and the nearest wall or curtain so air can circulate. If your deck roof traps heat, keep the rack 8–12 inches below the ceiling to avoid the hottest dead-air layer.
2) The “railing arm” (best for renters, small balconies, and tight decks)
No overhead structure? Use the vertical plane. A railing-mounted arm (like a plant hanger bracket) can support a smaller rack that hangs outward over the deck edge, freeing your interior floor space. Choose a bracket rated at 25–40 lb and keep the rack footprint around 18 inches by 24 inches so it doesn’t act like a sail in wind.
This layout is especially good when your deck gets sun but the outside face of the railing is shaded for much of the day.
3) The “freestanding drying frame” (best for strict rental rules or no-drill decks)
If you can’t attach anything, build a narrow A-frame or goalpost frame that stands behind furniture. A simple goalpost can be 60 inches tall, 36 inches wide, and only 18 inches deep. Add a crossbar and hang strings or S-hooks. It’s stable, movable, and can be stored flat in winter.
Materials and drying surfaces: what actually performs outdoors
You’re balancing four needs: strength, airflow, cleanability, and weather resistance.
| Rack Surface | Best For | Airflow | Outdoor Durability | Typical Cost (USD) |
|---|---|---|---|---|
| Stainless steel grid panel | Mixed herbs, heavier bundles | Excellent | High (won’t rust) | $20–$45 |
| Coated wire shelf (closet shelving) | General use, easy DIY | Very good | Medium-High (coating can chip) | $12–$30 |
| Wood slats (cedar) | Light bundles, rustic look | Good (depends on spacing) | Medium (needs sealing) | $18–$60 |
| Mesh screen (food-grade) | Loose leaves, flowers, seeds | Excellent | Medium (UV can degrade) | $10–$25 |
For hanging hardware, choose stainless or galvanized components outdoors. A pair of 1/4-inch eye bolts, two 36-inch chains, and four S-hooks can assemble a robust system without specialized tools. For renters, removable options like heavy-duty clamp brackets can work, but always test stability with a 5 lb load before trusting it with a big harvest.
“Dry herbs in a warm, well-ventilated place out of direct sunlight to preserve color and flavor.” — Penn State Extension, 2019
This principle is why deck placement matters: you’re designing microclimate as much as structure.
Step-by-step setup: a practical rack you can build in an afternoon
This setup assumes a pergola beam or covered-deck joist. If you’re using a railing arm or freestanding frame, the rack assembly is the same—only the support changes.
- Choose the rack size. Start with 24" x 36" for most households. If you harvest lightly, go 18" x 24".
- Pick a drying surface. A coated wire shelf is the easiest: it’s rigid, already finished, and has built-in gaps for airflow.
- Mark hanging points. Measure and mark two points on the beam spaced 18–24 inches apart, centered over where you want the rack.
- Install eye bolts or screw hooks. Use hardware sized for your structure (common: 1/4" diameter). If you’re unsure about the beam, locate solid wood and pre-drill to prevent splitting.
- Attach chain/cable. Hang two equal lengths so the rack sits level. A starting drop of 12–18 inches below the beam is usually comfortable.
- Hang the rack. Use S-hooks or carabiners so you can remove it quickly for storms or winter storage.
- Add bundling points. Clip small binder clips, mini clothespins, or herb-drying clips along the grid. Plan on 2–3 inches between bundles for airflow.
- Test with weight. Hang a 10 lb test load (a bag of potting mix works) and gently shake the rack to check sway and fasteners.
Cost-wise, a simple DIY rack commonly lands around $35–$85 depending on materials you already have. A pre-made hanging herb dryer can range $25–$70, but many are designed for indoor use—so prioritize rust-resistant pieces for the deck.
Plant selection: herbs that dry beautifully on a deck rack
Not all herbs behave the same once cut. Some hold flavor and structure, others want special handling (or they’re better frozen). Here are deck-friendly container herbs with specific varieties that dry reliably.
Rosemary (Rosmarinus officinalis) — ‘Arp’
‘Arp’ is cold-tolerant and sturdy in containers. Rosemary needles dry quickly without molding, especially when bundled small. Strip dried needles into jars for rubs and roasted vegetables.
Thyme (Thymus vulgaris) — ‘English Thyme’
Thyme dries fast and keeps fragrance. Harvest as small sprigs and lay them on mesh if you don’t want to fuss with bundling.
Oregano (Origanum vulgare) — ‘Greek Oregano’
Greek oregano is punchy and holds its flavor well when dried. It’s also compact in pots, which matters for renters. Give it 6+ hours of sun for best oil content before harvest.
Sage (Salvia officinalis) — ‘Berggarten’
Broad, velvety leaves dry into thick, usable pieces. ‘Berggarten’ is a classic for drying because leaves are substantial and less likely to shatter than thinner-leaved types.
Mint (Mentha) — ‘Moroccan Mint’ (in a pot only)
Mint dries well, but it can darken if sun hits it directly. Your rack’s shade is perfect. Keep bundles small to prevent interior leaves from staying damp.
Chives (Allium schoenoprasum) — better frozen than dried
Chives lose a lot of their fresh character when dried. If you want long-term storage, snip and freeze instead. Still, you can dry chive blossoms for a mild onion note and a pretty garnish.
For food safety and quality, remember the baseline: herbs should dry quickly enough to avoid mold. The National Center for Home Food Preservation notes that herbs are typically dried at low temperatures to retain quality (NCHFP, 2020). Your rack’s airflow is the “low-tech temperature control” that makes deck drying viable.
Three real-world deck scenarios (and how the rack changes the layout)
Scenario 1: Small rental balcony, no drilling allowed
Picture a 6 ft x 10 ft balcony with a railing and one bistro set. The win is to keep the floor clear. Use a railing arm bracket and a compact rack (18" x 24"). Hang it on the shadier side—often the side facing away from the afternoon sun. Pair it with a vertical herb wall: three rail planters holding ‘Greek Oregano,’ ‘English Thyme,’ and ‘Berggarten’ sage.
Drying workflow: harvest into a small basket, clip bundles immediately, and bring the rack indoors only during heavy storms. This setup costs roughly $40–$75 if you buy a bracket and shelf new; less if you repurpose a closet shelf.
Scenario 2: Family deck with grill traffic and kids running through
This is where “collision zone” design matters. Put the rack at the perimeter, not over the main seating or the grill prep path. If your deck is 12 ft x 16 ft, dedicate a 2 ft-deep strip along one side as your “garden utility lane”: a slim potting bench, a tall herb pot cluster, and the overhead rack under a pergola beam.
Choose herbs that tolerate frequent snipping: rosemary ‘Arp’ in a 14–18 inch pot, mint in a dedicated container, oregano and thyme in 10–12 inch pots. You’ll harvest little and often—perfect for keeping rack capacity manageable.
Scenario 3: Windy rooftop deck with intense sun
Rooftops dry herbs fast—sometimes too fast, and wind can whip bundles until stems break. Here, a freestanding frame with a partial windbreak is the practical move. Set the frame behind a slatted screen or tall planters so the rack sits in bright shade and calmer air. Use carabiners so you can unclip the rack quickly when gusts are forecast.
On a rooftop, keep bundle spacing generous: 3 inches between bundles, and avoid big, dense bunches of mint or basil. Basil is usually better as pesto or frozen cubes; if you do dry it, use small sprigs and expect lighter flavor.
Drying technique: bundle size, spacing, and timing
Harvest after morning dew has dried but before the hottest sun—often late morning. For most leafy herbs, aim for bundles about 1 inch in diameter at the stems. Anything thicker dries unevenly and risks mold in the center.
Spacing matters more than people expect. Leave 2–3 inches between bundles on the rack, and don’t let leaves touch. If you’re using a mesh shelf to dry loose leaves, spread them in a single layer, no more than 1 leaf thick.
Most herbs on a well-ventilated deck rack will dry in 3–10 days depending on humidity. The test: leaves should crumble between fingers; stems should snap rather than bend.
Budget choices and DIY alternatives that still look intentional
If you want the rack to feel like part of the deck design (not a temporary contraption), repeat finishes: black metal to match railings, warm wood to match furniture, or stainless to match grill hardware. But you can do that on a budget.
- Budget build ($20–$40): Repurpose a coated wire shelf + two lengths of chain + two screw hooks. Use binder clips as hangers.
- Mid-range build ($45–$95): Stainless grid panel + stainless eye bolts + carabiners + a small outdoor curtain panel behind it for shade.
- Upgraded build ($120–$250): Custom cedar frame with stainless mesh insert, decorative chain, and a dedicated “drying lane” with a narrow bench and herb containers.
If you’re a renter worried about damage, the freestanding frame is the kindest option. A basic frame from 1x2 lumber can be screwed together and painted, and it stores flat. Add small felt pads at the feet to protect deck boards.
Maintenance expectations: what it takes week to week
This is one of those garden features that’s easy to live with if you give it tiny, regular attention. Plan on 10–15 minutes per week during harvest season.
- Weekly: wipe the rack bars with a damp cloth, shake out debris onto a mat, and check hooks/chain for rust or loosening.
- After rain: if herbs got damp, increase spacing and consider moving the rack under deeper cover for 24 hours.
- Monthly: tighten hardware, inspect any wood parts for cracking, and re-level the rack so bundles hang straight.
- Seasonal (end of season): deep-clean with mild soap, dry fully, then store indoors if your winters are wet or freezing. If wood is unfinished, apply an exterior-safe sealer before spring.
Also plan for the plants themselves: container herbs typically want watering 2–4 times per week in summer depending on pot size and sun. A good drying rack encourages harvesting, and harvesting encourages bushier, healthier plants—so your maintenance shifts from “rescue watering” to “regular clipping,” which is a nicer rhythm.
Small design details that make the rack feel built-in
To make the rack look like it belongs, give it a visual partner: a vertical herb shelf, a narrow bench, or a row of matching pots beneath. If your deck is modern, keep lines simple and hardware minimal. If your deck is cottage-style, a cedar frame and natural rope can look right—just remember rope weathers faster outdoors.
Lighting helps too. A small, warm outdoor string light nearby (not blasting the herbs, just gently illuminating the corner) turns your drying station into an evening feature rather than something you hide.
Once you’ve lived with a deck hanging herb drying rack for a month, it stops feeling like a project and starts feeling like infrastructure—like a hose bib or a potting bench. You step out, snip what’s ready, clip it up, and your deck stays clear for life happening: dinner, company, quiet mornings, and the steady, satisfying habit of putting your harvest to work.
Sources: Penn State Extension (2019); National Center for Home Food Preservation (2020).