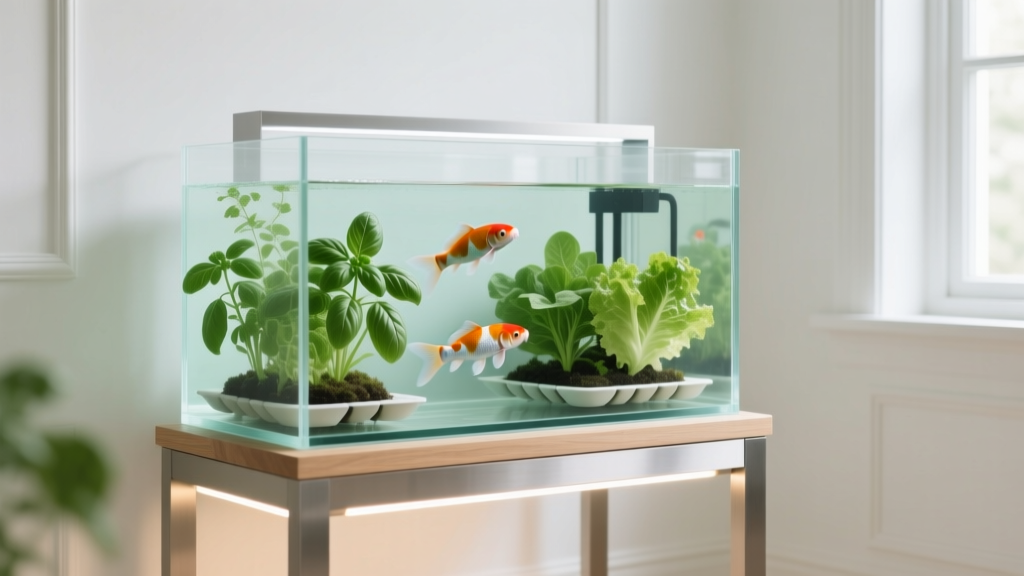
Inductive Aquaponic Fish and Plant System
The first time I saw a patio aquaponics setup fail, it wasn’t dramatic—no fish flopping on the ground, no overflowing tank. It was quieter than that: basil that never quite thickened, lettuce that stayed pale, and a water surface filmed with algae like an unwanted skin. The owner had “all the parts” (pump, tank, grow bed), but the layout fought the biology. The system wasn’t designed to teach itself balance.
An inductive aquaponic fish and plant system is a layout approach where you build in cues—flow paths, plant density, shading, access points, and filtration stages—so the system naturally nudges itself toward stability. Instead of constantly correcting problems, you design so water, light, and nutrients “want” to move the right way. Think of it as a landscape plan, but the landscape is water, pipes, fish, and plant roots.
Below, I’ll walk you through a practical design you can adapt to a balcony, a side yard, or a small suburban corner—without turning your life into aquarium maintenance.
Design principles: make the system teach you what it needs
Principle 1: Put the water on a loop you can read at a glance
Aquaponics rewards clarity. If you can visually track where solids settle, where roots are thriving, and where water returns to the fish tank, you’ll catch issues early. I like a “single-loop with branches” layout:
- Fish tank (primary volume)
- Solids capture (swirl or radial flow filter)
- Biofiltration zone (media bed or moving bed)
- Plant grow zones (media bed, NFT rails, or raft)
- Sump (optional) for stable water level and easy top-ups
This isn’t about adding complexity—it’s about giving each job a defined “room,” like a well-planned garden with paths, beds, and a compost corner. If you’re working with limited space, you can compress these into stacked modules, but keep the logic visible.
Principle 2: Choose dimensions that buffer temperature and mistakes
Home systems fail most often because volumes are too small, not because the gardener is careless. Water volume is your thermal and nutrient buffer. For most patios and small yards, a sweet-spot baseline looks like this:
- Fish tank: 200–300 gallons (757–1,136 L). A 275-gallon IBC tote is a common, affordable anchor.
- Grow bed area: 20–30 sq ft (1.9–2.8 m²) of productive plant space for a 275-gallon tank.
- Media bed depth: 12 inches (30 cm) to support nitrifying bacteria and robust roots.
- Walking clearance: 24–30 inches (61–76 cm) around at least two sides for feeding, harvest, and netting fish.
These numbers aren’t decorative—they’re comfort. A 55-gallon barrel system can work, but it’s less forgiving when the weather swings or you miss a top-up.
Principle 3: Design for oxygen like it’s sunlight
Plants need oxygen at the roots; fish need dissolved oxygen in the water; bacteria need oxygen to convert ammonia. Oxygen is the quiet currency. A small air pump and good agitation prevents so many headaches that I treat aeration as non-negotiable.
“Dissolved oxygen is one of the most critical water quality parameters in aquaculture… low dissolved oxygen can reduce feeding and growth and increase stress and susceptibility to disease.” — FAO, Small-scale aquaponic food production (2014)
Layout strategy: place your water return so it splashes back into the tank, and include an air stone or diffuser. If you’re running a 275-gallon tank, plan on at least 20–40 liters/minute of air capacity depending on stocking density and temperature (more if water is warm).
Principle 4: Make sunlight a controllable input
Aquaponics isn’t just gardening; it’s horticulture plus water management. Light drives plant demand for nutrients, and excess light on open water drives algae. Aim for:
- Leafy greens: 4–6 hours of direct sun (or bright shade with reflective surfaces).
- Fruiting crops (tomatoes/peppers): 6–8 hours of direct sun.
In real spaces, you’ll get mixed conditions—morning sun and afternoon shade, or vice versa. Use shade cloth (30–50%) as a seasonal tool rather than treating your site as “good” or “bad.”
Layout strategies for an inductive aquaponic system
The “L-shaped working edge” plan (my favorite for small homes)
If I’m designing for a patio or side yard, I like an L shape because it creates a cockpit: you can stand in one place to feed fish, check the filter, and harvest greens. Here’s a reliable footprint:
- Long leg: 8 ft (2.4 m) along a wall or fence—fish tank + filter line.
- Short leg: 5 ft (1.5 m) perpendicular—grow bed(s) and/or vertical herbs.
- Work aisle: 30 inches (76 cm) clear.
Place the fish tank on the shaded side if possible, and the grow bed on the brighter side. You’re using the structure of the space to “induce” stability: cooler water, less algae, and more predictable plant growth.
Gravity is your friend: stack zones to reduce pumping costs
A common DIY mistake is pumping water up and down multiple times. A cleaner approach:
- Keep the fish tank lowest if you’re doing a flood-and-drain bed that returns by gravity.
- Or use a CHOP2-style layout (Constant Height One Pump) with a sump so the fish tank water level stays stable.
Electricity is a real budget line item. A 35–60 watt pump running 24/7 can cost roughly $4–$12/month depending on rates and pump size—worth estimating before you build.
Build in “quiet corners” for solids management
Solids are not the enemy; unmanaged solids are. Give solids somewhere to go that isn’t your plant roots. Even a simple swirl filter made from a 20–30 gallon barrel can make your system feel “self-correcting.”
Keep the filter accessible—don’t tuck it behind the tank like a guilty secret. If you can open a drain valve and flush it into a bucket in 60 seconds, you will do it. If it takes 20 minutes, you won’t.
Comparison table: matching grow method to space and lifestyle
| Grow Method | Best For | Typical Depth/Size | DIY Difficulty | Notes for Inductive Stability |
|---|---|---|---|---|
| Media Bed (flood & drain) | All-around home systems | 12 in (30 cm) deep bed | Medium | Acts as biofilter; forgiving; handles solids better |
| NFT (nutrient film technique) rails | High-yield leafy greens in narrow spaces | 2–4 in (5–10 cm) channels | Medium–High | Needs cleaner water; add solids filtration first |
| DWC raft (floating) | Fast lettuce in warm climates | 8–12 in (20–30 cm) water depth | High | Stable water temps help; strong aeration required |
| Vertical tower (drip) | Renters maximizing a balcony | 4–6 ft (1.2–1.8 m) tall | Medium | Great light capture; watch drying and clogging; prefilter water |
Step-by-step setup: a practical build you can scale
This is a proven “inductive” layout: it encourages good behavior (clear flow, solids capture, oxygenation, easy maintenance). It works as a 275-gallon IBC system, but you can scale down to barrels or up to multiple beds.
Materials and cost checkpoints
Costs vary by region and what you can salvage, but here are realistic planning numbers:
- IBC tote (275 gal): $80–$200 used (food-grade preferred).
- Pump (800–1200 GPH): $60–$140 (aim for one full turnover per hour after head loss).
- Air pump + stones: $35–$120 depending on capacity.
- Expanded clay media: $30–$45 per 50-liter bag; a 20 sq ft bed at 12 in depth can take ~15–18 bags.
- Plumbing (PVC, bulkheads, valves): $50–$150.
Build steps (numbered for a weekend project)
- Place the tank. Set your fish tank on level pavers. If using an IBC, plan for a footprint around 48 in x 40 in (122 x 102 cm). Keep it within 20 ft (6 m) of an outlet if possible.
- Add a solids filter next. Install a 20–30 gallon swirl/radial filter immediately after the tank outflow. Include a bottom drain you can flush into a bucket.
- Set your grow bed height for comfort. Top edge at 30–36 inches (76–91 cm) is a comfortable harvest height. Your back matters.
- Plumb a simple loop. Tank → filter → grow bed → return to tank (or sump). Add a ball valve to control flow.
- Install aeration. Put at least one air stone in the fish tank, and if running DWC, add additional diffusers there.
- Rinse media thoroughly. Cloudy water isn’t just ugly; it can clog and stress fish.
- Cycle the system before stocking heavily. Allow beneficial bacteria to establish. University of Florida notes that nitrifying bacteria convert ammonia to nitrite and then nitrate, a process central to water safety (UF/IFAS Extension, 2020).
- Start with plants first, fish second. Plant immediately; stock fish lightly at first. Let your system “teach” you its rhythm—how quickly nitrates rise, how fast plants drink, how temperature shifts day to night.
Citation: FAO’s aquaponics manual emphasizes the central role of nitrification and balanced system management (FAO, 2014). UF/IFAS Extension materials detail the nitrification pathway and how water quality parameters relate to system health (UF/IFAS Extension, 2020).
Plant selection: varieties that actually behave in aquaponics
I choose plants the way I choose shrubs for a landscape: not just for beauty, but for temperament. In aquaponics, you want plants that tolerate consistently moist roots, respond well to nitrate-based fertility, and match your light levels.
Leafy greens (best early success + steady harvesting)
- Butterhead lettuce (‘Bibb’ or ‘Adriana’): Fast, compact heads; handles 4–6 sun hours; great for rafts or NFT.
- Romaine (‘Parris Island Cos’): More upright, good airflow; tolerates warmth better than many lettuces.
- Swiss chard (‘Bright Lights’): One of the most forgiving; keeps producing with “cut-and-come-again” harvesting.
- Kale (‘Lacinato’): Tough, productive, and less likely to melt in temperature swings.
Spacing: Lettuce 8–10 in (20–25 cm); chard 10–12 in (25–30 cm); kale 12–18 in (30–45 cm). Tight spacing increases humidity—fine outdoors, riskier in enclosed greenhouses.
Herbs (high value per square foot)
- Basil (‘Genovese’): Loves aquaponic nitrate; prune weekly to prevent legginess.
- Mint (spearmint): Put it in a contained basket or separate tower; it will dominate if given room.
- Chives/garlic chives: Compact, pest-resistant, and reliable in media beds.
- Cilantro (‘Slow Bolt’): Excellent in cool seasons; bolt-resistant strains buy you extra weeks.
Design note: Put basil where it gets 6+ hours of sun. If it’s shaded, switch to mint, chives, and parsley.
Fruiting plants (only after the system is stable)
- Cherry tomato (‘Sungold’ or ‘Sweet 100’): Productive, but nutrient-hungry; needs trellis planning.
- Sweet pepper (‘California Wonder’): Steady producer; appreciates warm water and strong light.
- Cucumber (‘Diva’): Great for vertical training; needs consistent pruning and airflow.
Spacing: Tomatoes 18–24 in (45–60 cm) plus trellis space; peppers 14–18 in (35–45 cm); cucumbers 12–18 in (30–45 cm) on a trellis.
Three real-world layout scenarios (and how I’d design each)
Scenario 1: The rental balcony (6 ft x 10 ft) with weight limits
Balcony aquaponics works when you respect load and simplify. Water weighs about 8.34 lb/gal (1 kg/L). A 275-gallon tank is not a balcony idea. Here’s a renter-friendly version:
- Fish tank: 40–60 gallons (151–227 L) in a reinforced corner, on a waterproof tray.
- Grow style: One vertical tower (4–5 ft tall) + a small media bed (2 ft x 3 ft).
- Plants: lettuce, basil, chives, strawberries (‘Albion’ day-neutral) for high yield in small footprint.
Inductive trick: keep the tank shaded with a simple wrap (reed screen or insulated panel) to reduce algae, and place the tower where it gets morning sun but not the harshest afternoon heat.
Scenario 2: The side yard strip (4 ft x 20 ft) with fence shade
This is where the L-shaped working edge shines. Put the fish tank at the shadiest end and run a row of media beds down the length.
- Layout: Tank + filter at one end, then two beds each 2 ft x 6 ft (61 x 183 cm).
- Sun plan: If you only get 4–5 hours of sun, commit to greens and herbs rather than fighting for tomatoes.
- Planting: alternating blocks of lettuce and chard for continuous harvest; trellis peas (‘Sugar Snap’) in spring where light is best.
Inductive trick: install a simple reflective panel (even a light-colored fence paint) to bounce light onto plants without changing your space.
Scenario 3: The suburban patio (12 ft x 12 ft) with room for an IBC
This is the “most satisfying” scale: large enough to buffer problems, small enough to manage alone. Use a 275-gallon IBC fish tank and one large media bed.
- Footprint: Tank (about 4 ft x 3.3 ft) + bed (about 4 ft x 8 ft) + 30 in access aisle.
- Plant mix: 60% greens/herbs, 40% fruiting crops once stable.
- Seasonal add-on: a lightweight hoop cover over the grow bed for shoulder seasons.
Inductive trick: create a “service shelf” on the fence—hooks for nets, a place for test kits, a dedicated bucket. Systems that are easy to service stay healthy.
Maintenance expectations: what you’re really signing up for
A well-laid-out aquaponic system is less work than a needy vegetable garden, but it’s more routine than a few pots on a deck.
- Weekly time: plan on 45–90 minutes total for feeding, checking water level, quick inspections, and harvesting.
- Twice weekly (hot weather): add 10–20 minutes for topping up water and checking for algae growth.
- Monthly: flush solids filter; rinse pump intake; check airline and stones.
- Seasonally: shade cloth on/off, adjust planting mix, clean out any dead root mats (especially in NFT), and inspect for leaks after freezes.
Keep a small notebook or phone log for water tests. You don’t need to obsess, but trendlines matter. If fish are gasping, plants are yellowing, or water smells swampy, test immediately.
Budget considerations and DIY alternatives that still look intentional
I design systems that don’t scream “science project” unless that’s the aesthetic you want. You can keep it tidy and still be frugal.
- Use a reclaimed IBC tote for the tank and cut the top portion as a grow bed. This can save $150–$400 versus buying new containers.
- DIY swirl filter from a food-grade barrel instead of a branded clarifier (often saving $100+).
- Choose one grow method first. A single media bed is usually the best starting point. Add NFT rails later once water is cleaner and your routine is consistent.
- Upgrade strategically: spend money on a reliable pump and air pump first; save on cosmetic framing until the system proves itself.
If you want it to feel like part of the landscape, screen the tank with slatted wood panels (leave airflow) and plant ornamental edibles nearby—nasturtiums, calendula, or compact rosemary in pots—so the aquaponics reads as a garden feature, not equipment.
Once your layout is working, you’ll notice something satisfying: the system starts to “tell” you what it needs. Lettuce tips burn slightly? You’re likely running hot or nutrients are concentrating—shade a bit, top up water, harvest more aggressively. Fish hang near the surface? Increase aeration, check temperature, and verify flow. The point of an inductive design is that the cues are visible and the fixes are simple.
Set it up so you can stand in your aisle with a cup of coffee, watch the return water ripple, scan leaves for color, and reach every valve without kneeling in a puddle. When an aquaponic system fits your body and your space, it stops being a fragile experiment and becomes what it should be: a living, productive garden that runs on thoughtful layout.