Rooftop Herb Spiral and Planter Combo
The wind up on the roof always feels stronger than you remember. You carry a watering can out the door, and by the time you reach the sunniest corner, the basil looks thirsty again and a pot has tipped slightly—nudged by last night’s gusts. The space is bright, but it’s also exposed, hot, and short on room. You want herbs you’ll actually use, a little beauty, and a layout that doesn’t turn every watering session into a balancing act.
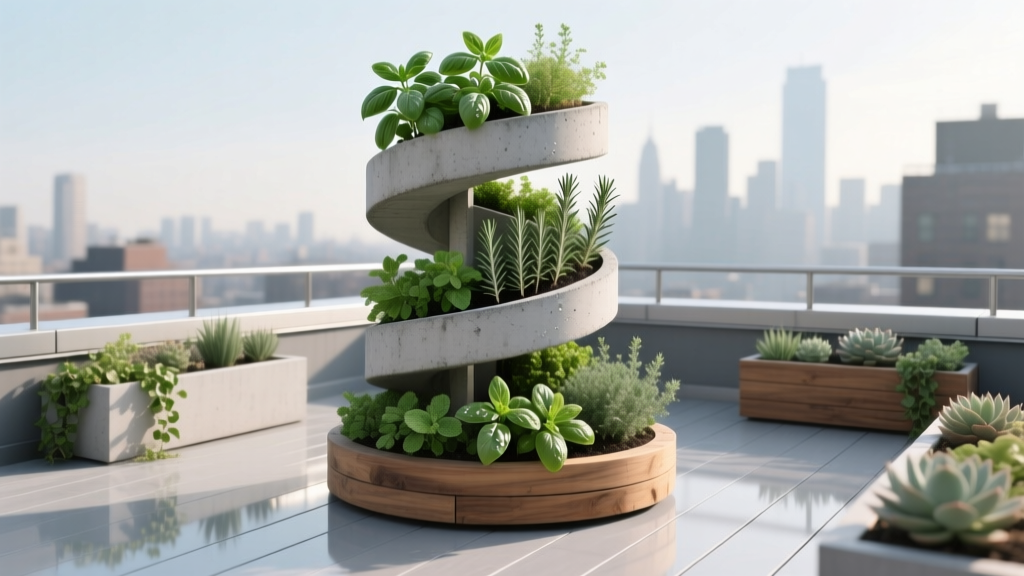
This is where a rooftop herb spiral and planter combo shines: one sculptural, space-efficient planting feature that creates multiple microclimates (dry-to-moist, hot-to-cool), plus a set of planters that behave like “supporting actors”—catching overflow plants, holding larger perennials, and stabilizing the whole garden visually and physically.
I’ll walk you through a practical designer’s layout: a compact spiral you can build without permanent changes (renter-friendly), paired with smart container placement for wind, sun, and foot traffic. Along the way, you’ll get specific dimensions, plant varieties, costs, and maintenance expectations so you can plan with confidence.
Design principles for rooftops: control wind, weight, and water
Start with the three rooftop constraints
1) Wind: Rooftops desiccate plants faster than ground-level gardens. That means more frequent watering and sturdier structures. Taller plants go where they’re sheltered; low, aromatic herbs (thyme, oregano) handle exposure well.
2) Weight: Soil, wet containers, and masonry add up quickly. Before you build, check building rules and, if possible, structural load guidance. As a general planning number, saturated potting mix can weigh roughly 60–80 lb/ft³ depending on blend; a small change in container size can matter. When in doubt, favor lightweight builds (wood + liner, foam-core “faux stone,” or stacked planters) over solid stone.
3) Water management: Rooftops demand tidy drainage. Plan for saucers, drip trays, or a contained watering zone so water doesn’t run across walking paths or toward door thresholds.
“Urban rooftops can be significantly warmer than surrounding areas due to the urban heat island effect, and vegetation is one of the proven strategies to mitigate that heat.” — U.S. Environmental Protection Agency (EPA), Using Green Roofs to Reduce Heat Islands (updated 2023)
That heat can be a gift for Mediterranean herbs—if you design for it with controlled moisture and some afternoon shade for sensitive plants.
The layout strategy: one spiral, three planter roles
The core footprint (fits many rooftops)
A rooftop-friendly spiral doesn’t need to be massive. Aim for a footprint around 4 ft (1.2 m) diameter with a maximum height of 24–30 in. That size creates real microclimates while staying buildable with lightweight materials.
Leave a comfortable access ring: 24–30 in of walking space around at least half the spiral so you can harvest without stepping over pots. If your roof is narrow, keep access on the side facing the door and let the back edge tuck near the guardrail.
Role 1: “Windbreak planters” (stability + microclimate)
Place two rectangular planters on the windward side of the spiral to buffer gusts. Ideal size: 36 in L × 16 in W × 16–18 in H. Fill them with heavier, deep-rooted plants that won’t snap—think rosemary, bay laurel (in a pot), or dwarf blueberries if your sun is strong.
Role 2: “Utility planters” (high-turnover herbs)
Keep two to four smaller containers near the kitchen door or seating area for the herbs you cut constantly. A set of 12–14 in round pots is plenty. These become your rotation zone for basil, cilantro, parsley, and chives—plants that benefit from richer soil and steadier moisture than the spiral’s dry top.
Role 3: “Season extenders” (shade cloth, trellis, or cloche)
On the hottest roofs, tender herbs scorch. Add one planter with a simple trellis or hoop that can hold shade cloth in July and a light frost cover in October. A 18–24 in deep planter works well if you want to grow a small tomato or a trellised nasturtium alongside your herbs.
Spiral geometry: make microclimates on purpose
Orientation: place the dry side in the sun
If you can, orient the spiral so the highest point leans toward the sunniest direction (often south or southwest). The top will be the driest, warmest zone—perfect for thyme and oregano. The lower, inner curve holds more moisture—better for parsley and chives.
Most culinary herbs want 6–8 hours of direct sun. If your rooftop only gets 4–5 hours, you can still grow many herbs; you’ll just lean into partial-shade picks like mint, chives, parsley, and lemon balm, and keep basil in your brightest utility pot.
Soil zoning: one spiral, two mixes
Use two soil blends to make the spiral work harder:
Dry-zone mix (top third): potting mix cut with 20–30% mineral drainage (pumice, perlite, or coarse sand).
Moist-zone mix (bottom two-thirds): quality container mix with 10–20% compost for water-holding.
The Royal Horticultural Society notes that many Mediterranean herbs thrive in “free-draining” soil and dislike winter wet (RHS, 2022). That principle matters even more in containers where roots sit in moisture longer.
Materials and budget: build it sturdy without pouring concrete
Two build approaches (renter-friendly vs. long-term)
Option A: Lightweight “stacked planter” spiral (best for renters). Use interlocking modular raised-bed blocks, recycled plastic edging, or cedar boards with an internal liner. This avoids masonry weight and is easier to dismantle.
Option B: Stone-look spiral with lightweight cores (best for long-term). Use thin stone veneer or pavers as a façade, but build the internal structure with lightweight fill (inverted nursery pots, foam, or empty bottles) under a geotextile layer to reduce soil volume and weight.
Typical cost ranges (U.S. pricing varies by region):
$120–$220 for a lightweight spiral build (edging + soil + liner),
$250–$450 for a more finished spiral with pavers/stone-look materials,
and $25–$60 per medium planter depending on material.
If you’re keeping it lean, prioritize money on good potting mix and one reliable watering tool (a wand or drip kit). Containers fail more often from inconsistent moisture than from lack of fertilizer.
Step-by-step setup: a rooftop spiral you can actually build
- Confirm the rules and the route. Measure your roof access door and stair turns. If your largest planter is 24 in wide, can it physically reach the roof?
- Pick the footprint. Mark a 4 ft diameter circle with chalk or painter’s tape. Confirm you still have at least 24 in of walking clearance on the access side.
- Protect the roof surface. Lay down a heavy-duty rubber mat or contractor’s tarp, then a layer of drainage mat (or even old outdoor carpet) to prevent abrasion.
- Build the spiral wall. Start at the outer circle and coil inward, rising gradually. Target a maximum height of 24–30 in. Keep the wall thickness about 6–8 in for stability.
- Add a gravel/drainage base. Place 1–2 in of lightweight drainage layer (pumice or expanded shale) inside the spiral.
- Fill with soil in zones. Put the moist-zone mix in the lower two-thirds; switch to dry-zone mix for the top third.
- Place your windbreak planters. Set the two larger rectangular planters on the windward side, leaving at least 18 in between planter and spiral for airflow and access.
- Plant from top to bottom. Start with the drought lovers at the peak; finish with moisture lovers at the base.
- Mulch lightly. Use 1 in of pea gravel or fine bark on the top zone to reduce splash and slow evaporation.
- Water deeply, then adjust. First watering should saturate the whole spiral. After that, water by zone: top less often, bottom more often.
Plant selection: varieties that thrive in a rooftop spiral
Think of the spiral as four bands: top/dry, mid-slope, lower/moister, and outer edge/spillover. The planter combo lets you keep aggressive or thirsty plants from taking over.
Top of the spiral (hot, dry, windy)
Thyme — Thymus vulgaris ‘German Winter’ stays compact and handles heat. Space plants 8–10 in apart; it will knit together over time.
Oregano — Origanum vulgare ‘Hot & Spicy’ delivers strong flavor and tolerates dry soil better than many herbs. Space 10–12 in.
Lavender — Lavandula angustifolia ‘Hidcote’ works if your winter isn’t brutally wet and you can keep the crown dry. Give it 12–18 in and keep it near the outer top edge for airflow.
Mid-slope (sunny, moderate moisture)
Sage — Salvia officinalis ‘Berggarten’ has broad leaves that are easy to harvest and less prone to flopping than some varieties. Space 12–18 in.
Greek basil in a pocket — Ocimum basilicum var. minimum forms a tight mound and handles wind better than large-leaf types. Space 8–10 in. If your roof is very hot, keep basil in a utility pot instead so you can water more often.
Lower spiral (cooler, more consistent moisture)
Chives — Allium schoenoprasum ‘Staro’ stays upright and is cold-hardy. Space clumps 8 in.
Parsley — Petroselinum crispum ‘Italian Flat Leaf’ tolerates partial shade and appreciates the spiral’s lower moisture. Space 8–10 in.
Cilantro — Coriandrum sativum ‘Slo-Bolt’ buys you extra harvest time before heat triggers flowering. Space 6–8 in, and plan to re-sow every 3–4 weeks in peak season.
Planters (use these to solve rooftop realities)
Rosemary — Salvia rosmarinus ‘Arp’ is a cold-tolerant choice compared to many rosemaries. Put it in a windbreak planter with the sunniest exposure. Give it a container at least 14–18 in wide.
Bay laurel — Laurus nobilis (often sold as a standard/topiary) is ideal in a dedicated pot you can move for winter protection. It’s also a great “anchor” plant that makes the rooftop garden feel designed, not improvised.
Mint (contained!) — Mentha ‘Mojito’ or ‘Kentucky Colonel’ belongs in its own pot because it spreads aggressively. Keep it in partial shade if your roof bakes.
Comparison table: spiral vs. typical containers on a roof
| Feature | Herb Spiral | Standard Pots/Planters |
|---|---|---|
| Footprint efficiency | High: multiple zones in ~4 ft diameter | Medium: each pot is one zone |
| Watering complexity | Moderate: water by zone (top less, base more) | Low–moderate: each pot similar if soil is consistent |
| Wind resistance | Good if built stable; can act as a windbreak mass | Varies: small pots tip more easily |
| Best for | Mixed herb collection, microclimates, visual centerpiece | High-turnover herbs, large shrubs, mobility |
| DIY cost range | $120–$450 depending on materials | $20–$80 per container plus soil |
Three real-world scenarios: how the combo adapts
Scenario 1: The renter with a strict “no permanent changes” rule
You can still get a spiral look without building a heavy structure. Use three to five crescent-shaped or rectangular planters, stepping up in height like a spiral. The “top” planter gets the driest mix (thyme, oregano). The “bottom” planters get parsley and chives. Add two larger planters as windbreaks and you’ll feel the difference immediately when you step into the garden pocket.
DIY alternative: Replace edging blocks with cedar boards and corner brackets. If you can’t drill into anything, use weighted planters to pin boards in place.
Scenario 2: The small rooftop (or balcony roof deck) with only 6×10 ft available
In a 6×10 ft36 in diameter spiral at 18–22 in high, and pair it with a single 36 in windbreak planter plus two 12 in utility pots by the door. You’ll still get the microclimates, but you preserve an open strip for a chair or a narrow path.
Plant choices should skew compact: Greek basil, chives, thyme, curly parsley, and dwarf sage like ‘Compacta’ if you can find it. Keep mint and rosemary in separate pots to control size.
Scenario 3: The sun-blasted roof (8+ hours sun, reflective walls)
If your rooftop is surrounded by pale walls or glass, heat can compound. Use the spiral as a “heat manager” rather than fighting it. Put the toughest herbs at the top (oregano, thyme, lavender), and reserve tender herbs for utility pots you can move into afternoon shade.
Add a simple shade solution: a hoop of PVC or a lightweight trellis panel in one planter. A 30–40% shade cloth can reduce stress without sacrificing flavor. The EPA notes that green roofs and vegetation can reduce surface temperatures and ambient heat effects (EPA, 2023), and even small container plantings benefit from the same shading and transpiration dynamics on a micro scale.
Sunlight, spacing, and yield: making it usable day-to-day
Most culinary herbs produce best with 6–8 hours of sun, but flavor often improves when plants aren’t pushed into constant stress. Your goal is steady growth you can harvest weekly.
Spacing guidelines matter more in a spiral because overcrowding kills airflow. As a rule, give small herbs (thyme, cilantro, parsley) 6–10 in, and larger woody herbs (sage, lavender, rosemary) 12–18 in. If you’re planting densely for a “full” look, do it with the expectation that you’ll thin plants by midsummer—those thinnings are your first big harvest.
Maintenance expectations: what it really takes
Plan on 30–45 minutes per week in peak season for watering checks, harvesting, and quick grooming. In extreme heat or wind, watering can become 5–10 minutes daily—or you install a drip line and get your evenings back.
Weekly rhythm
- Water by zone: check the top of the spiral first (it dries fastest). Water the base only when the top 1–2 in of soil is dry.
- Harvest to shape: frequent cutting keeps basil and parsley productive and prevents cilantro from bolting as quickly.
- Wind check: after storms, re-level any pots and tighten trellis ties.
Seasonal tasks
- Spring (setup + sowing): refresh the top zone with a little extra drainage material if it compacted over winter. Direct sow cilantro every 3–4 weeks.
- Summer (heat management): add temporary shade for tender herbs; top-dress containers with 1 in compost if growth stalls.
- Fall (reset): cut back woody herbs lightly (don’t cut lavender into old wood). Move bay and tender rosemary closer to the building wall for warmth.
- Winter (protection): if your climate freezes, cluster pots together and wrap with burlap or frost cloth on the coldest nights. Avoid waterlogged soil—RHS guidance emphasizes that many herbs suffer in winter wet conditions (RHS, 2022).
Cost-conscious upgrades that feel high-end
If you want the rooftop to look intentional without spending designer money, focus on repetition and restraint. Use matching planters for the windbreak pair, keep utility pots in the same color family, and let the spiral be the one sculptural statement.
Budget swap ideas:
- Use food-safe 5-gallon buckets with a painted sleeve as utility pots.
- Turn a shallow storage tote into a “nursery tray” for starting cilantro and basil—then transplant into the spiral or pots.
- Choose one premium plant (a bay standard or a large rosemary) and keep the rest from starter herbs.
The best rooftop herb gardens feel close at hand: you step outside, take three snips, and go back in. When the spiral is positioned as the centerpiece and the planters are assigned roles—windbreak, utility, season extension—you’re not just fitting plants into a tight space. You’re building a small system that behaves predictably in sun and wind, looks good from indoors, and pays you back in flavor all season.
Sources: U.S. Environmental Protection Agency (EPA), “Using Green Roofs to Reduce Heat Islands” (updated 2023). Royal Horticultural Society (RHS), herb growing guidance emphasizing free-draining conditions for Mediterranean herbs (2022).