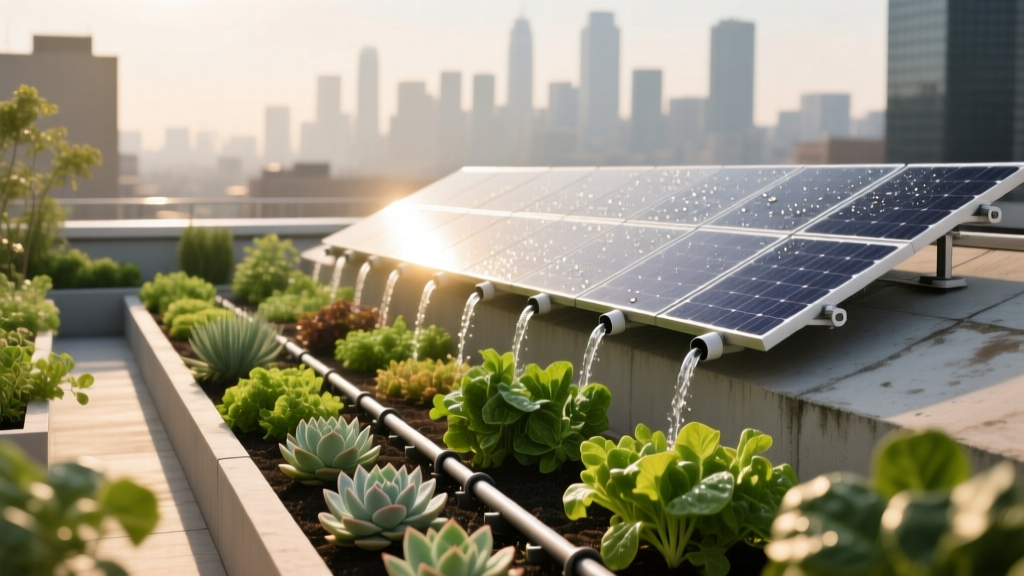
Rooftop Solar-Powered Irrigation Garden
The first time a rooftop garden fails, it usually doesn’t fail dramatically. It wilts quietly. A week of summer wind dries the potting mix into a crust, the basil goes limp, and you realize your “quick evening watering” plan doesn’t survive real life—late meetings, travel, or the simple fact that stairs are a deterrent. Up on a roof, sun and wind are harsher, and water disappears faster than you’d expect. The fix isn’t more guilt. It’s design: a layout that respects weight limits, a plant palette that thrives in containers, and a solar-powered irrigation setup that waters consistently—even when you’re not there.
This is a rooftop garden you can build in phases: start with a tight, efficient core (irrigation + a few raised planters), then expand as you learn the roof’s microclimates. I’ll walk you through the spatial strategy, a practical solar drip system, and plants that behave well in windy, exposed conditions.
Start With Reality: Load, Wind, and Water
A rooftop is not a backyard, and the best designs begin with constraints. Before buying planters, confirm three things: (1) the roof’s load capacity (ask the building manager or a structural engineer), (2) roof membrane protection (you need a barrier under planters), and (3) access to water (hose bib, indoor tap, or a rain barrel option).
Even without exact structural numbers, you can design conservatively: use lightweight soil blends, avoid filling huge containers with saturated soil, and spread weight across pavers or platforms. Wind is the other silent deal-breaker—on many roofs, prevailing winds turn watering into mist and topple tall plants. Design low, stable masses, and treat wind protection as part of the layout.
“Drip irrigation can reduce water use by 30 to 70 percent compared with conventional methods.” — U.S. Environmental Protection Agency (EPA), WaterSense program (2023)
That efficiency matters because rooftops dry out faster. A solar-powered drip system doesn’t just automate; it makes watering more precise.
Design Principles That Make Rooftops Work
1) Build a “Service Spine” for Water and Power
Think like a designer: you’re not placing pots randomly—you’re organizing a small landscape. Create a “service spine” where irrigation lines, the pump/controller, and the water reservoir live. This reduces clutter and makes maintenance simple.
Practical layout target: Reserve a 2 ft x 6 ft strip along a wall or parapet for utilities: reservoir, solar panel mount, filter, and a tidy manifold (a simple multi-outlet header). Keep it within 10–15 ft of your main planting zone to minimize line length and pressure loss.
2) Arrange by Microclimate: Sun Pockets vs. Wind Corners
Most roofs have at least two microclimates: a blazing, reflective zone near light-colored walls and a slightly calmer zone behind mechanical units or parapets. Map your roof for a day and note sun hours. Many roofs offer 6–8 hours of direct summer sun; some get 10+ hours with intense reflection.
Put the thirstiest, most sun-loving crops (tomatoes, peppers) in the brightest zone—closest to irrigation lines. Put Mediterranean herbs and hardy natives in windier corners where they can handle a missed cycle.
3) Choose Container Geometry That Matches Irrigation
Drip irrigation loves predictable shapes. Long rectangular planters or fabric grow bags in neat rows are easier to irrigate evenly than scattered pots of varying heights.
Designer’s rule: Standardize to 2–3 container sizes. For example:
- Two 2 ft x 4 ft raised beds for heavier feeders
- Six 10–15 gallon grow bags for flexible seasonal crops
- One 24–36 inch trough for herbs near the door
4) Plan for Drainage Like It’s Part of the Aesthetic
Rooftop drainage needs to be clean and predictable. Elevate planters on risers or rubber feet to allow water to flow underneath. Use saucers only if you can empty them; standing water can stain membranes and attract mosquitoes. A clean paver grid under the garden both distributes weight and creates a finished “outdoor room” feel.
A Layout You Can Copy: 12 ft x 20 ft Roof Zone
Here’s a proven footprint that fits many apartment rooftops: a 12 ft x 20 ft rectangle carved into three bands—service, planting, and seating/working space.
- Band 1 (Service Spine): 2 ft deep along the back wall (reservoir + controller + tools)
- Band 2 (Planting Zone): 6 ft deep (beds and grow bags in two rows with a hose/line corridor)
- Band 3 (Access + Seating): 4 ft deep (a narrow bench, a folding table, and a clear path)
Path widths: Aim for 30–36 inches for the main path so you can carry soil bags and harvest baskets without bumping foliage. Keep at least 18 inches between containers for airflow—rooftops can get fungal issues if plants are packed tightly and watered late.
Plant spacing in beds: Use square-foot logic with a rooftop twist: slightly wider spacing reduces wind stress and broken stems. Tomatoes at 18–24 inches, peppers at 14–18 inches, basil at 10–12 inches, lettuce at 8–10 inches.
Solar-Powered Irrigation: Practical System Options
For rooftops, solar irrigation usually means a small solar panel powering a controller/pump that draws from a reservoir and feeds drip lines. It’s ideal for renters because it can be non-permanent: no electrical wiring, no plumbing changes.
Comparison: Reservoir + Solar Pump vs. Hose-Timer Drip
| System | Best For | Typical Cost | Water Source | Strengths | Tradeoffs |
|---|---|---|---|---|---|
| Solar pump + reservoir + drip | Rooftops with no hose bib; renters | $120–$350 | 20–55 gallon reservoir | No electrical outlet; portable; efficient drip delivery | Must refill reservoir; pump pressure limits line length |
| Battery/solar hose timer + drip | Roofs with hose bib access | $50–$180 | Pressurized tap water | Strong pressure; longer runs; easy expansion | Needs a faucet; winterizing is essential |
| Self-watering planters (no pump) | Small setups; low-maintenance herbs/greens | $25–$120 per planter | Manual fill reservoir | Simple; steady moisture; fewer parts | Doesn’t scale well; still manual; limited for fruiting crops |
If you have a hose bib, a standard drip kit with a timer is the simplest. If you don’t, the solar reservoir system is the rooftop hero—especially for busy schedules and vacations.
Step-by-Step Setup (Solar Reservoir Drip System)
This assumes a moderate rooftop garden: two raised beds, six grow bags, and one herb trough—roughly 40–60 sq ft of planted area.
- Pick a reservoir size: Start with a 30-gallon food-grade barrel or lidded bin. In peak heat, many rooftop container gardens use 3–8 gallons/day depending on crop and wind exposure. A 30-gallon reservoir often covers 4–7 days between refills.
- Mount the solar panel: Attach to a railing or weighted stand. Angle it toward full sun and avoid shade from HVAC units. Even 6 hours of strong sun is usually enough for daily irrigation cycles.
- Add filtration: Install a simple inline filter (especially if using rainwater). Filters protect emitters from clogging.
- Lay mainline tubing: Run 1/2-inch mainline along the back of the planting zone. Secure with clips so wind doesn’t lift it.
- Branch to containers: Use 1/4-inch lines to each planter/grow bag. Keep lines as short and direct as possible.
- Install emitters: Use 0.5–2 GPH (gallons per hour) drippers. For a 10–15 gallon grow bag, start with two 1-GPH emitters spaced apart for even wetting.
- Program irrigation: Start with 10–20 minutes early morning. In heat waves, add a second cycle late afternoon (avoid night watering to reduce mildew).
- Test and tune: Run a cycle and check that every pot receives water. Adjust emitter count rather than running longer—shorter, targeted watering reduces runoff.
DIY alternative: If solar equipment is out of budget, you can still automate with gravity: place a reservoir on a sturdy stand 2–3 ft high and run drip lines with low-flow emitters. It’s less consistent than a pump, but it can maintain herbs and greens surprisingly well.
Plant Selection: Rooftop-Ready Varieties That Earn Their Space
Rooftop plants must tolerate wind, fast-drying soil, and temperature swings. The best performers are compact, disease-resistant, and productive in containers. Below are specific varieties that consistently behave well on exposed sites.
Fruiting Crops (Sun Lovers)
Tomato: ‘Sungold’ (cherry) — Reliable productivity in containers, quick ripening, and forgiving if watering fluctuates slightly. Give a 15–20 gallon container and sturdy trellis. Space 24 inches from other large plants to reduce wind-tangled stems.
Pepper: ‘Lunchbox’ — Compact plants with sweet snack-size fruit; excellent for renters because stakes stay small. Plant one per 3–5 gallon pot, spacing pots 12–16 inches apart.
Eggplant: ‘Fairy Tale’ — Attractive, compact, container-friendly; handles heat well with consistent drip moisture. Use a 7–10 gallon pot and stake early.
Greens and Quick Crops (High Return per Square Foot)
Lettuce: ‘Buttercrunch’ — Heat-tolerant for a lettuce, performs well in troughs. Plant at 8–10 inch spacing. Great for a “harvest-from-the-door” herb/greens strip.
Kale: ‘Lacinato’ (Dinosaur kale) — Handles wind better than frilly types, keeps producing with regular harvesting. One plant per 5 gallon pot or 12–16 inches apart in beds.
Radish: ‘French Breakfast’ — Fast turnaround (often 25–35 days), ideal for filling gaps under taller crops. Sow thinly and keep evenly moist—drip excels here.
Herbs That Handle Rooftop Stress
Thyme: ‘German Winter’ — Wind-tough, drought-tolerant once established, and it doesn’t sulk if you reduce watering. Perfect for the windier corner of the roof.
Rosemary: ‘Arp’ — One of the more cold-tolerant rosemary options; thrives with excellent drainage. Use a gritty potting mix and a container that won’t stay soggy.
Basil: ‘Prospera’ (downy mildew resistant) — Rooftops can still get humid pockets; this variety resists a common basil killer. Plant at 10–12 inches and pinch weekly for bushiness.
Pollinator and Tough-Beauty Plants (Design Glue)
Lavender: ‘Hidcote’ — Compact, fragrant, and a wind-tolerant anchor plant. Needs sharp drainage; place in a slightly drier irrigation zone or on fewer emitters.
Sedum: ‘Autumn Joy’ — A forgiving perennial for rooftop edges; helps soften hard lines and survives missed water cycles better than most.
These plants are also well suited to container growing, which is supported by extension guidance emphasizing adequate container volume and careful water management for edible crops in pots (University of Minnesota Extension, 2020).
Three Real-World Rooftop Scenarios (and How the Design Shifts)
Scenario 1: Renter Roof with No Hose Bib (The “Carry Water” Problem)
A renter has access to the roof but no spigot. They’re tired of hauling a watering can up flights of stairs. The winning design: a 30–40 gallon reservoir filled from indoor tap water using jugs once a week, paired with a solar pump/drip kit. Containers are grouped tightly in one zone to keep line runs short—no scattered pots.
Layout tweak: Reduce plant count slightly and prioritize high-yield crops (cherry tomatoes, peppers, basil, salad greens). Add a small folding cart near the door for refill day. If the roof is windy, a low lattice screen (weighted base, non-permanent) protects the planting zone without attaching to the building.
Scenario 2: Homeowner Roof Deck with Full Sun and a Spigot (The “Too Much Sun” Problem)
A homeowner has a spigot and 8–10 hours of sun. Plants grow fast, but containers dry out by mid-afternoon. Here, a hose-timer drip system can be stronger and cheaper than a reservoir pump. The layout can expand because pressure supports longer lines and more emitters.
Design move: Add shade management rather than reducing sun plants. A simple shade cloth panel (30–40% shade) over greens can prevent bolting, while fruiting crops stay in full sun. Set two irrigation cycles: 12 minutes early morning and 6 minutes mid-afternoon during heat waves.
Scenario 3: Windy High-Rise Roof with Partial Shade (The “Wind Tunnel” Problem)
On a higher roof, wind is the main stressor, and shadows from neighboring buildings reduce sun to 4–6 hours. This garden should be lower, heavier, and more focused on greens, herbs, and compact fruiting varieties.
Layout tweak: Use wider, lower planters and grow bags grouped behind a windbreak element (a bench, solid planter wall, or movable screen). Choose sturdier plants like kale, thyme, sedum, and compact peppers rather than tall indeterminate tomatoes.
Budget Planning (and Where Not to Cheap Out)
Costs vary by roof access and how polished you want the space to look, but here’s a realistic spread for a starter rooftop solar irrigation garden:
- Solar pump/controller kit: $120–$350
- 30-gallon reservoir + lid: $35–$90
- Drip tubing/emitters/filter: $25–$80
- Two 2 ft x 4 ft raised beds (lightweight): $160–$400 total
- Soil (15–20 cu ft total): $60–$160
- Optional pavers/tiles under zone (40–60 sq ft): $80–$250
Where to invest: filtration and quality emitters. Clogged drippers create “mystery wilting” that looks like disease but is really a dry root zone. Also invest in a sturdy trellis system; rooftop wind punishes flimsy cages.
DIY swaps: Use food-grade barrels from local beverage suppliers, repurpose sturdy milk crates as planter stands (with protective pads), and build raised beds from lightweight composite boards. If you’re renting, favor fabric grow bags—they’re light, affordable, and easy to move.
Maintenance Expectations: What You’ll Actually Do Each Week
A well-designed rooftop solar irrigation garden should reduce daily labor to quick check-ins.
Weekly time: plan on 30–60 minutes/week for pruning, harvesting, refilling the reservoir, and scanning for pests. During heat waves, add a second 10-minute check to ensure the reservoir hasn’t run dry and emitters are flowing.
Weekly checklist
- Refill reservoir (frequency depends on heat and plant size)
- Check filter and flush a line if flow seems uneven
- Pinch basil, tie tomatoes/peppers, harvest greens
- Inspect undersides of leaves for aphids/spider mites (common on hot roofs)
Seasonal tasks
- Spring: Test irrigation before planting day; start with fewer emitters and add as plants grow
- Mid-summer: Increase cycles slightly rather than flooding; top-dress containers with compost to stabilize moisture
- Fall: Reduce watering as nights cool; plant a final round of greens if sun hours allow
- Winter: Drain lines and store pump/controller if freezing is expected; protect containers from waterlogging
Details That Make the Garden Feel Designed (Not Just “Stuff on a Roof”)
Once irrigation is handled, design becomes about comfort and coherence. Repeat materials (matching grow bags or planters), align containers in clean rows, and keep a small staging surface for harvest tools. A rooftop garden looks intentional when edges are crisp: a paver border, a narrow gravel strip, or even a row of low sedums to soften the perimeter.
Also plan your “door-to-harvest” route. Put the herbs and salad greens closest to the entry—this is the daily pick zone. Put tomatoes and larger containers slightly farther back where you can stand and prune without blocking traffic.
If you take only one designer habit onto a roof, make it this: label your irrigation zones. A simple tag that says “Greens: 1 emitter” or “Tomatoes: 2 emitters” prevents accidental changes that cause uneven watering.
When the system is dialed in, the roof stops feeling like a place you have to manage and starts feeling like a place that supports you. You’ll notice the quiet wins: basil that doesn’t collapse after a hot day, tomatoes that don’t crack from inconsistent watering, and a garden that keeps going while you live your life below it.
Citations: U.S. Environmental Protection Agency (EPA) WaterSense, “Drip Irrigation” (2023). University of Minnesota Extension, container vegetable growing guidance (2020).