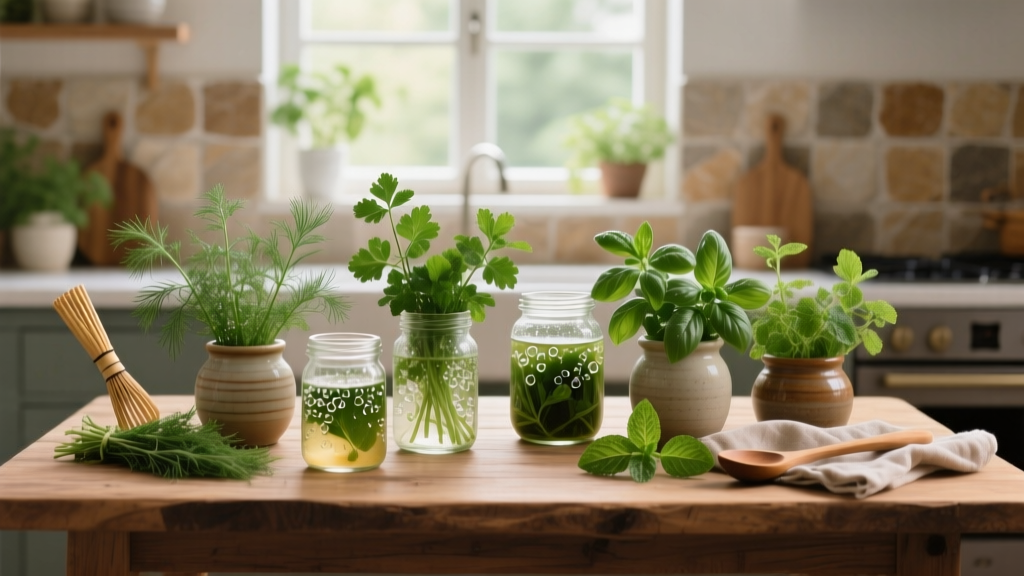
Kitchen Fermented Food Garden Herbs
The crocks are lined up on your counter: a jar of sauerkraut bubbling quietly, cucumbers on their way to becoming pickles, maybe a fizzing ginger bug that makes the whole kitchen smell alive. Then you reach for dill and realize the “fresh” bunch in the fridge has gone limp again. Fermentation is forgiving; herbs are not. The good news is that the herbs fermented foods crave—dill, garlic chives, horseradish, mustard greens, bay, thyme—are some of the easiest plants to design into even a small outdoor space. The trick is designing the garden like a prep station: close, organized, harvest-friendly, and timed to your fermenting calendar.
Let’s lay out a garden that feeds your jars all season: bright leaves for kraut, umbels for pickles, sturdy aromatics for brine, and roots for heat. I’ll walk you through layouts that work for renters and homeowners, with specific dimensions, spacing, and budget options so you can build it this weekend and be harvesting next week.
Design principles: think “brine-to-bed” efficiency
Place herbs where you’ll actually cut them
Fermenting herbs are “little-and-often” harvests. That means they should live near the path you already take—by the back door, next to the grill, or along the walkway where you can snip dill fronds without putting on garden shoes. If you have a choice, put your herb zone within 15 feet of the kitchen door. The distance sounds silly until you’re mid-brine and realize you forgot bay leaves.
Sunlight targets and microclimates
Most fermentation herbs produce best with 6–8 hours of direct sun. Leafy brassicas like mustard greens tolerate a bit less; bay and thyme want the brighter spots. If your space is shady, prioritize garlic chives, mint (in a pot), lemon balm, and parsley, then supplement dill with a sunny container placed where light is strongest.
One practical rule: reserve the sunniest 3 ft x 6 ft patch (or the brightest two containers) for dill and mustard, because they’re the plants you’ll harvest most during peak ferment season.
Design for “cut-and-come-again” harvesting
Fermentation doesn’t require perfect basil leaves; it requires reliable volume. Your layout should let you reach every plant without stepping on soil. In beds, keep the maximum reach to 24 inches from either side. In containers, cluster pots so you can water in one pass and harvest in another.
“A well-designed garden is one that supports repeated, easy harvesting—access is the first sustainability feature.” — Claudia West, landscape designer and co-author of Planting in a Post-Wild World (West & Rainer, 2020)
Layout strategies (pick one that fits your life)
Layout A: The “Pickle Patch” 4x8 bed (best for homeowners)
If you can spare a single raised bed, a 4 ft x 8 ft bed is the sweet spot: easy to reach, big enough for succession sowing, and it can anchor the whole fermented-food herb program.
Bed map concept: tall in the back, short in the front, with a dedicated “succession strip” for dill and mustard.
- Back row (north side): 2–3 horseradish crowns or one in a buried container to control spread.
- Middle blocks: garlic chives, thyme, oregano, and a compact bay in a pot sunk into the bed (so you can lift it for winter).
- Front strip (south side): dill and mustard greens, resown every few weeks.
Spacing notes: dill 8–12 inches apart; garlic chives 10–12 inches; thyme 12 inches; mustard greens 6–10 inches. Keep horseradish to one corner and give it a clear boundary—more on that in plant selection.
Layout B: The “Jar-to-Railing” container run (best for renters)
No bed? No problem. A line of containers can be more productive than a neglected in-ground corner—especially when you’re trying to harvest clean, tender herbs for brine.
A practical starter set:
- Three 5-gallon containers (about 12–14 inches wide) for dill succession, mustard greens, and garlic chives.
- Two 10–12 inch pots for thyme and oregano.
- One 14–18 inch pot for mint (always isolated) or lemon balm.
Place them where they get at least 6 hours of sun; if your balcony gets morning sun only, pick leaf-focused herbs (chives, parsley, mint) and grow dill in the brightest pot you have.
Layout C: The “Edible Border” along a walkway (best for tight side yards)
Side yards often get written off, but a 2 ft x 12 ft strip can become a fermentation herb border that looks intentional and stays easy to weed. The key is edging and repetition: plant thyme as a low front edge, then repeat clumps of garlic chives and oregano, with pockets for dill that you re-seed.
If the strip is against a fence, use the fence for vertical support and airflow—especially helpful for dill to reduce flopping.
Step-by-step setup (from blank space to first harvest)
- Measure and mark. Pick your footprint: a 4x8 bed, a 2x12 strip, or a container cluster about 6 feet long. Mark edges with a hose or painter’s tape.
- Confirm sun. Check sunlight at 9 a.m., 12 p.m., and 3 p.m. on a clear day. If you only get 4–5 hours, lean into chives, parsley, and mint; keep dill in the brightest spot.
- Build the soil base. Raised bed: fill with a blend close to 60% topsoil / 40% compost. Containers: use quality potting mix plus 20–30% compost for nutrient holding.
- Install irrigation shortcut. For beds, run a simple soaker hose; for containers, group pots on a tray line so you can water quickly. This is the difference between “cute herb project” and steady harvest.
- Plant perennials first. Put thyme, oregano, garlic chives, and bay in place so you’re not stepping around seedlings later.
- Sow successions. Sow dill and mustard every 2–3 weeks during your growing season so you always have tender greens and fresh fronds for brine.
- Mulch lightly. Use 1–2 inches of straw or shredded leaves in beds to keep soil consistent (especially important for leaf quality).
- Add labels. Fermentation herbs can look similar when young; labels prevent you from accidentally harvesting your slow-growing thyme like it’s mustard.
Plant selection: herbs that earn their space in fermented foods
These plants are chosen for three traits: they taste strong in brine, they regrow after cutting, and they fit home-scale gardens without constant fuss.
Dill (the non-negotiable)
Varieties: ‘Bouquet’ (classic, reliable umbels), ‘Fernleaf’ (compact for containers), ‘Mammoth’ (big heads for pickling).
Why it works: You want both fronds (fresh herbal top notes) and seed heads (deep, classic pickle flavor). Sow in clusters so you can harvest whole stems.
Spacing: 8–12 inches. Expect first serious cutting in 45–60 days.
Garlic chives (Allium tuberosum)
Variety: standard garlic chives (most seed packets are similar; quality seed matters more than cultivar).
Why it works: It’s the bridge between garlic and green onion—perfect for kimchi-style ferments and quick brines. It’s also extremely tolerant of container life.
Spacing: 10–12 inches per clump. Cut leaves to 2 inches tall and it rebounds.
Mustard greens (for kraut, kimchi, and heat)
Varieties: ‘Red Giant’ (bold, spicy leaves), ‘Mizuna’ (feathery, quick regrowth), ‘Florida Broadleaf’ (classic mustard punch).
Why it works: Mustards ferment fast and bring a clean heat. They also fill gaps while slower herbs settle in.
Spacing: baby leaf at 4–6 inches, full size 8–10 inches. Resow every 2–3 weeks.
Thyme and oregano (brine backbone)
Varieties: English thyme (‘Common Thyme’), lemon thyme (bright for vegetable ferments), Greek oregano (strong flavor that holds in brine).
Why they work: They’re small-footprint perennials that taste even stronger after a day in salt. Great for fermented peppers, carrots, and olives-style projects.
Spacing: 12 inches. Give them the driest, sunniest edge of the bed or a terracotta pot.
Bay (Laurus nobilis) in a pot
Variety: standard bay laurel.
Why it works: Bay adds structure and a savory note to kraut and pickles, and the plant doubles as a handsome patio shrub.
Cold note: In colder climates, overwinter indoors. Keep it in a 12–16 inch pot so it’s movable.
Horseradish (Armoracia rusticana) for roots and punch
Variety: common horseradish (named cultivars vary by region).
Why it works: Fresh horseradish turns simple ferments into something electric. A little goes a long way, and you can harvest roots in fall.
Control strategy: Plant in a 10–15 gallon nursery pot sunk into the bed, or dedicate a contained corner. It spreads aggressively if given freedom.
Comparison table: choose plants by space and fermentation role
| Plant | Best garden type | Sun need | Spacing / pot size | Fermentation use |
|---|---|---|---|---|
| Dill (‘Bouquet’, ‘Fernleaf’) | Bed or large pot | 6–8 hours | 8–12 in; 5-gal pot works | Pickles, brined beans, kraut accents |
| Garlic chives | Containers, borders | 4–8 hours | 10–12 in; 3–5 gal pot | Kimchi-style ferments, savory brines |
| Mustard greens (‘Red Giant’, mizuna) | Bed, trough planter | 5–8 hours | 6–10 in; wide planter | Kraut blends, spicy ferments, quick pickles |
| Thyme / Greek oregano | Edges, pots | 6–8 hours | 12 in; 10–12 in pot | Carrots, peppers, olives-style ferments |
| Horseradish | Contained bed corner | 6+ hours | 18–24 in; 10–15 gal pot | Root additions, kraut heat, relish |
Real-world scenarios: three spaces, three workable plans
Scenario 1: Apartment balcony with railing sun (6 feet of usable length)
You’ve got a 6-foot run of railing and a spot on the floor that gets the best light. Design it like a galley kitchen: everything in reach, nothing too wide.
Plan: Two railing planters for parsley and garlic chives, one 5-gallon pot for dill, one rectangular trough (at least 24 inches long) for mustard greens, and a 10-inch pot of thyme.
Why it works: You’ll harvest greens and chives weekly, and dill becomes your “big pot” crop. If wind is strong, tie dill to a small bamboo stake to prevent snapping.
Scenario 2: Small suburban patio plus one 4x8 bed
You want enough volume for serious fermenting: multiple jars at once, repeated batches, and winter freezer bags of herbs.
Plan: In the bed, plant two dill successions (front strip), mustard greens (second strip), garlic chives (two clumps), thyme and oregano at the driest edge, and horseradish in a sunk pot at the back corner. Keep bay in a decorative pot by the patio door.
Why it works: The bed gives you the volume for dill heads and mustard, while the patio pot of bay stays close to the kitchen for last-second harvesting.
Scenario 3: Narrow side yard (2 feet wide) with part-day sun
This space is common: a skinny strip, fence shade for part of the day, and soil that tends to dry out.
Plan: Edge the path with thyme every 12 inches. Behind it, alternate garlic chives and oregano clumps every 18 inches. Add dill in two “seasonal pockets” where sun is strongest; resow as space opens after harvest. Use mulch to keep moisture stable.
Why it works: The perennials create structure so the strip looks designed, while dill and mustard rotate through the sunny gaps.
Budget and DIY alternatives (so the garden matches your kitchen reality)
You can build this garden on a shoestring or treat it like a patio renovation. Here are practical cost anchors so you can plan without guesswork (prices vary by region, but these are common ranges).
- DIY raised bed (4x8) in untreated cedar/pine: often $80–$200 in lumber and screws.
- Soil/compost to fill a 4x8 bed (about 1 cubic yard): typically $50–$120 bulk delivery.
- 5-gallon nursery pots: often $5–$10 each, or free if you ask local nurseries.
- Seed packets (dill, mustard): commonly $3–$5 each.
- Perennial herb starts (thyme, oregano, chives): often $4–$8 per plant.
DIY swaps that still look good: Use food-grade buckets (drill drainage holes) instead of decorative pots, or build a simple border bed with scavenged bricks. If you want one “pretty” element, spend on a single bay laurel in a nice pot near the door; let everything else be utilitarian.
Maintenance expectations: the rhythm that keeps jars full
Plan on 30–60 minutes per week for watering, snipping, and quick weeding if you mulch and keep paths accessible. In heat waves, containers may need watering every day; beds usually hold longer.
Weekly tasks (in season)
- Harvest and reset: snip chives and thyme tips, cut mustard as baby leaf, and harvest dill as needed.
- Resow successions: plant a small patch of dill and mustard every 2–3 weeks.
- Check moisture: keep soil evenly moist for leafy herbs; let thyme/oregano dry slightly between watering.
Seasonal tasks
- Spring: start dill early, protect seedlings from cold snaps with a simple cover if needed.
- Mid-summer: dill may bolt fast; embrace it—those seed heads are prime pickling material. Resow in a slightly shadier spot to stretch the season.
- Fall: dig horseradish roots after a few frosts for best flavor; dry thyme/oregano for winter brines.
- Winter: bring bay indoors if needed; keep it in bright light and water sparingly.
Food-safety notes that influence garden choices
Fermentation is an agricultural practice and a kitchen practice at once. For home ferments, salt concentration and clean handling matter, but so does harvesting clean plant material. The USDA notes that successful vegetable fermentation relies on salt levels and proper conditions to encourage beneficial microbes (USDA, 2015). Practically, that means you want herbs that are easy to rinse and inspect—another reason container-grown dill and chives can outperform a muddy corner bed.
For sauerkraut and similar ferments, the science is well studied. A classic review in Food Microbiology describes how lactic acid bacteria drive vegetable fermentations under salty, anaerobic conditions (Buckenhüskes, 1997). Your garden’s job is to supply fresh, flavorful plant material consistently so you’re not tempted to “make do” with tired, off-smelling herbs.
Small design touches that make it feel like a real garden (not a herb pile)
Even if your priority is jars, aesthetics matter—especially for renters and anyone sharing outdoor space. Repeat shapes: two matching pots for chives, a row of thyme mounds, and one taller bay or dill clump as a focal point. Keep a narrow working edge—18 inches of clear path—so harvesting is pleasant instead of cramped.
If you’re short on space, use vertical cues: a simple bamboo tripod for dill, a small trellis for a cucumber vine nearby (because pickles love a supporting cast), and a tidy line of labels. The goal is the same as good kitchen design: fewer steps, fewer mistakes, better results.
When you can walk outside, cut a handful of dill heads, grab garlic chives for a kimchi batch, and pull mustard leaves for a spicy kraut blend—without hunting, without waste—the garden starts paying you back daily. That’s the moment the fermentation habit clicks into a lifestyle: jars on the counter, herbs at the door, and a garden layout that works like part of your kitchen.
Citations: USDA (2015) “Fermented Vegetables” (USDA Complete Guide to Home Canning, agriculture publication). Buckenhüskes, H.J. (1997) “Fermented vegetables,” Food Microbiology. West, C. & Rainer, T. (2020) Planting in a Post-Wild World.