Porch Heirloom Seed Saving Display
You step onto the porch with a cup of coffee and spot it again: that half-dead pot of petunias, the plastic watering can you never loved, and a chair you can’t sit on because it’s holding a stack of seed packets and labels. The porch is supposed to be an entryway, not a clutter zone—but it’s also the one place you visit every day. What if the porch became a living display that’s beautiful now and quietly producing next season’s seeds?
This design is for homeowners and renters who want a porch that performs: a compact layout for heirloom plants chosen specifically for seed saving, arranged like a curated exhibit. You’ll grow a few “signature” varieties, label them like a mini botanic garden, and integrate drying, storage, and storytelling into the decor—without turning your sitting area into a farm bench.
Design principles: make it visible, workable, and seed-safe
Start with a porch “map,” not a plant list
Before buying anything, measure and sketch. Most porches have a narrow band of usable space along the rail or wall. For seed-saving displays, you need three micro-zones:
- Growing zone: containers or rail planters where plants can mature to seed.
- Processing zone: a small surface for labels, paper bags, and harvest tools.
- Drying & display zone: an airy spot where seed heads or pods can dry neatly (and attractively).
As a baseline, a 4 ft x 8 ft porch corner can carry a complete display without blocking circulation. Keep a 36-inch clear walkway (accessibility-friendly and comfortable for carrying groceries).
Use the “triangle of use” layout
Think like a kitchen designer. Your hands will move between: (1) plants, (2) a work surface, and (3) drying/storage. Arrange these in a tight triangle so you’re not hunting for snips or labels.
One practical arrangement for many porches:
- Along the railing: 3–5 containers (your primary seed plants).
- Against the wall: a narrow console table (10–12 inches deep) for tools and envelopes.
- Above the table: a wall-mounted rack or hooks for drying bundles, paper bags, and a small framed “seed library” display.
Sunlight: choose seed crops that match your hours
Seed saving rewards patience and sunlight. Many porch gardens are 4–6 hours of direct sun (especially east-facing or shaded by eaves). Track your sun for a day and be honest. If you have 6+ hours, you can save seeds from fruiting crops (tomatoes, peppers) more reliably. If you have 3–5 hours, focus on herbs, lettuces, and flowers that still mature seed in partial sun.
For context, the USDA notes that outdoor seed drying generally requires low humidity and good airflow to reduce mold risk (USDA, 2011). Your porch can provide that airflow if you don’t cram plants too close and you keep drying bundles under cover.
Spacing is not optional—especially for seed heads
Seed-producing plants often get larger and leggier than their “harvest young” versions. Plan container spacing so air can move:
- 12–18 inches between medium containers (like 12–14 inch pots).
- 18–24 inches between large, seed-heavy plants (tomatoes in pots, tall flowers).
Airflow is a design element here. It keeps the display crisp and reduces mildew on seed heads and pods.
“Good design is actually about clearing space: for movement, for light, for use.” — Thomas Rainer, landscape designer and author (Rainer, 2015)
The porch layout: a designer’s “module” you can scale up or down
Module A: The Railing Gallery (plants as living specimens)
If you have a railing, treat it like a gallery ledge. Use 3–4 rail planters or rectangular boxes so the display reads as one composition rather than a scatter of pots. A strong starting size is 24 inches long x 8 inches wide x 7 inches deep per rail planter. Space them with 6 inches between to prevent crowding and allow easy watering.
Design move: repeat containers in the same material (all terracotta or all matte black resin) and vary plant texture/height for interest.
Module B: The Seed-Saving Console (the “workbench” that looks like furniture)
A narrow console table turns seed saving from “messy hobby” into “porch craft.” Look for:
- Length: 36–48 inches (enough for a tray, notebook, and drying screens).
- Depth: 10–12 inches (keeps walkway clear).
- Height: around 30 inches (comfortable standing work height).
On top: one shallow tray for snips/labels, one notebook, and one basket for paper bags. Underneath: store extra soil, empty pots, or a watering can in a clean bin.
Module C: The Drying Wall (vertical space does the heavy lifting)
Seed saving requires dry, labeled, breathable storage. Skip plastic bins for drying. Use:
- 3–5 hooks for hanging paper bags or bundled seed heads.
- A small rack or pegboard (around 18 x 24 inches) for envelopes, clips, and twine.
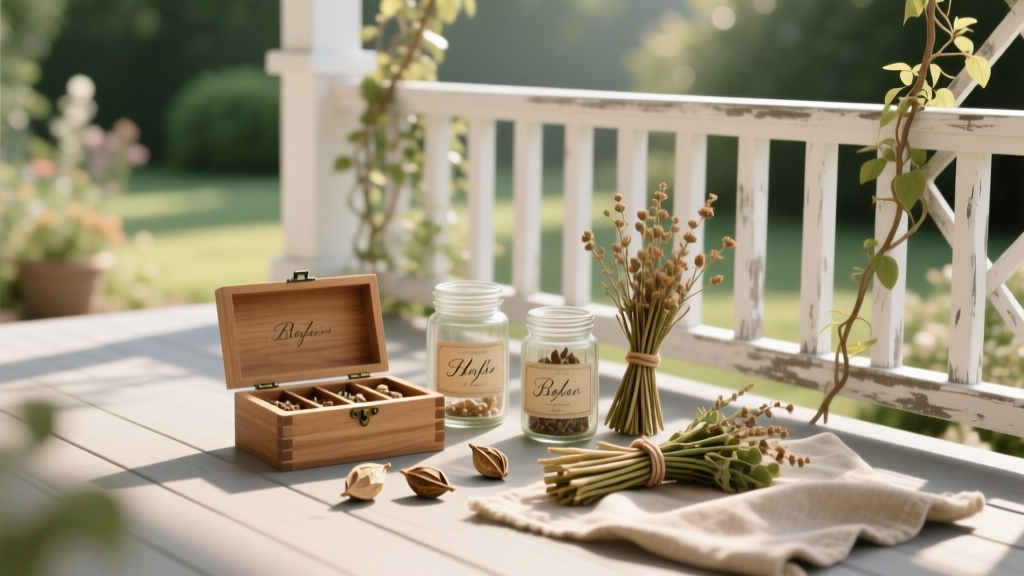
- One framed “seed library” shadowbox for your finished, labeled envelopes (it’s decor and accountability).
Keep drying material under the porch roof to avoid dew and surprise rain. Aim for a spot with consistent airflow, not a dead corner.
Plant selection: heirlooms that behave well in containers and produce reliable seed
For a porch display, you’re choosing plants for three traits: container performance, seed-saving simplicity, and visual charm. You’re also avoiding plants that need isolation distances you can’t realistically achieve (some squash and corn), unless you’re only saving seed from a single variety and can control pollination.
Top picks for porch seed saving (with varieties)
1) Basil (Ocimum basilicum) — ‘Genovese’ or ‘Mrs. Burns’ Lemon’
Basil flowers are pollinator magnets and make a gorgeous airy canopy. Let one plant bolt and seed while you harvest leaves from another. In a 10–12 inch pot, plant one basil per pot; pinch early, then stop pinching when you want flowers. Seeds dry easily and store well.
2) Lettuce (Lactuca sativa) — ‘Black Seeded Simpson’
A classic heirloom that’s forgiving in partial sun and doesn’t require fermentation or complicated processing. It gets tall when it bolts, which reads beautifully in a “specimen plant” way. Plant 2–3 in a 12-inch wide bowl, then thin to the strongest one for seed. Give it 12 inches clearance because the flower stalk can sprawl.
3) Calendula — ‘Resina’ or ‘Pacific Beauty’
Calendula is practically made for porch displays: cheerful blooms, medicinal history, and large, easy-to-harvest seeds. One plant per 10–12 inch pot. Deadhead early for bloom, then allow late flowers to mature seed for saving.
4) Marigold (Tagetes) — ‘Crackerjack’ (African marigold type)
Tall, architectural, and the seeds are beginner-friendly. It’s also a visual “anchor” plant at the ends of your railing lineup. One plant per 12–14 inch pot, and stake if your porch gets wind.
5) Tomato (Solanum lycopersicum) — ‘Principe Borghese’ or ‘Gardener’s Delight’
If you have 6–8 hours of sun, tomatoes are worth it. Choose a compact or cherry type that performs in containers. Use a 15–20 gallon pot, one plant per pot, with a sturdy cage. For seed saving, you’ll ferment seeds from ripe fruit—simple, but it takes a few days and a little counter space.
6) Pepper (Capsicum annuum) — ‘Jimmy Nardello’
Productive, beautiful, and seeds are straightforward: fully ripen pods to red, then dry seeds. One plant per 3–5 gallon pot.
Seed saving fundamentals (and which crops cross easily) are detailed by Seed Savers Exchange (Seed Savers Exchange, 2020). For porch conditions where you can’t isolate, prioritize self-pollinating crops like tomatoes and lettuce for truer-to-type seed.
Quick comparison: which plants fit your porch reality?
| Plant (Variety) | Min Sun | Container Size | Spacing | Seed-Saving Difficulty | Display Value |
|---|---|---|---|---|---|
| Lettuce (‘Black Seeded Simpson’) | 4 hrs | 12" pot | 12" | Easy | Airy stalks, soft green |
| Basil (‘Genovese’) | 5 hrs | 10–12" pot | 10–12" | Easy | Flowers + scent |
| Calendula (‘Resina’) | 4–6 hrs | 10–12" pot | 12" | Easy | Colorful blooms + seed heads |
| Tomato (‘Principe Borghese’) | 6–8 hrs | 15–20 gal | 24" | Medium (fermentation) | Fruit + vine structure |
| Pepper (‘Jimmy Nardello’) | 6+ hrs | 3–5 gal | 18" | Easy | Glossy fruit, upright habit |
Step-by-step setup: build the display in a weekend
This sequence keeps the porch usable the whole time and prevents the “I bought plants, now what?” scramble.
- Measure and mark circulation. Use painter’s tape to mark a 36-inch walking lane from door to steps.
- Place the console table first. Center it where you’ll actually work—near an outlet if you’ll use a small fan for drying, and near the door for quick access.
- Install the drying wall. Mount 3–5 hooks above the table (at about eye level) and add a small pegboard or rack for tools.
- Set your largest containers next. If you’re growing tomato/pepper, place those pots where they won’t block the door swing and can be staked/caged.
- Add the railing planters or matching pots. Aim for 3–5 “specimen” plants, not 12 random ones. Leave 6 inches between boxes.
- Mulch and label immediately. Add a 1-inch layer of mulch to reduce splash and fungus, then label with variety + date.
- Create a seed envelope station. Stock paper envelopes, a fine-tip marker, and clothespins in a small tray so labeling happens in real time.
Three real-world porch scenarios (and how I’d design each)
Scenario 1: The shaded rental porch (4 hours of sun, strict rules)
Constraints: limited drilling, partial sun, landlord doesn’t want heavy planters on rails.
Design response: go floor-based and herb/flower-heavy.
Layout: two 12-inch pots (calendula + marigold) flanking a small chair, plus a 36-inch folding console table that can be removed at move-out. Drying uses a freestanding garment rack or adhesive hooks rated for outdoor use (test first).
Planting: ‘Black Seeded Simpson’ lettuce in a wide bowl, basil in a 10-inch pot, calendula in another 10–12 inch pot. You’ll still get a satisfying seed harvest with 4–5 hours sun, and it looks intentional rather than “temporary.”
Scenario 2: The sunny front porch with neighbors close by (8 hours sun, privacy matters)
Constraints: you want beauty, but also a subtle screen; you don’t want drying seed heads to look messy from the street.
Design response: use tall plants as a soft screen and keep drying behind a side wall.
Layout: a tomato in a 20-gallon pot on the far corner (acts like a green column), peppers in 5-gallon pots nearer the wall, and a clean row of railing planters with basil and calendula. Put the drying wall on the side that’s least visible from the street; use uniform kraft paper bags clipped neatly so it reads like a curated display.
Extra detail: add a small sign—“Saving ‘Jimmy Nardello’ seeds—ask me about it”—and suddenly the porch becomes neighborhood-friendly instead of weird.
Scenario 3: The tiny apartment stoop (2–3 hours sun, barely any depth)
Constraints: minimal space, low sun, you still want seed saving.
Design response: go vertical and micro-scale; treat it like a living seed vignette.
Layout: one narrow shelf unit (10 inches deep) against the wall; 2–3 small pots; a single hook rail for drying paper bags. Keep the doorway clear and choose plants that tolerate lower light: lettuce for seed (it will bolt slower, but it can still flower), plus a small calendula if you get any direct sun at all.
Seed strategy: save fewer seeds, but save the right seeds. Even one envelope of lettuce seed can mean dozens of plants next season.
Budget: what it costs, and where to swap in DIY
A porch seed-saving display can be done on a tight budget or made into a showpiece. Here are realistic ranges:
- Containers: $8–$25 each for 10–14" pots; a 20-gallon fabric pot is often $12–$20.
- Rail planters: $15–$35 each for 24" boxes (or DIY from food-safe buckets cut lengthwise if you’re careful with drainage).
- Potting mix: expect $12–$18 per 2 cu ft bag; a tomato in a 20-gallon pot may take about 3 bags depending on mix and amendments.
- Console/work surface: $40–$120 for a narrow table; DIY option: a $25 folding shelf plus a sealed plywood top.
- Seed-saving supplies: paper envelopes ($5–$10), clothespins ($3–$6), a pair of snips ($10–$20).
If you want one clean number to plan around: a solid, attractive setup with 5–7 containers and a small drying wall often lands around $150–$300, depending on what you already own.
Seed-saving workflow: keep it tidy so it stays decorative
Make labels part of the aesthetic
Use the same label style on every pot: a simple stake or a small tag tied with twine. Include: variety name, sow date, and a note like “saving seed” so no one deadheads your best seed heads by accident.
Drying without mess
Two clean methods that work on porches:
- Paper bag method: clip a labeled bag to a hook, drop in seed heads/pods, and let them dry. The bag contains debris.
- Screen tray method: a shallow mesh tray on the console table for larger seeds (beans, marigolds). Keep it out of rain and bring it in if humidity spikes.
For tomatoes: scoop seeds into a jar, add a little water, label it, and let it ferment for a few days before rinsing and drying. It’s not hard—but it’s worth planning a spot so it doesn’t take over your kitchen.
Maintenance expectations: a realistic rhythm
Plan on 30–60 minutes per week for watering, deadheading (until you stop to set seed), checking for pests, and labeling. During peak summer heat, you may water containers 3–5 times per week depending on pot size and sun.
Seasonally:
- Spring: potting up, staking, early pinching of basil, setting up labels.
- Mid-summer: stop deadheading select blooms so seeds mature; monitor mildew and aphids.
- Late summer/fall: harvest and dry seeds, clean envelopes, store in a cool, dry place; compost spent plants.
- Winter: review notes, test germination on older seeds, refresh your display with empty jars, labeled envelopes, and a plan for next year.
Container feeding matters because seed production is energy-intensive. A simple routine: top-dress with compost mid-season and use a diluted liquid fertilizer every 2–3 weeks for heavy feeders like tomatoes and peppers.
Small design details that make the whole thing feel intentional
Repeat materials. If you can, pick one finish for containers and one for hardware. Cohesion makes seed drying look curated instead of accidental.
Use one “hero” plant. A single tomato in a handsome pot with a sturdy cage becomes sculpture. Everything else supports it.
Keep negative space. You’re designing a display, not a plant rescue mission. Leave one small area empty—your future self will need a landing spot for harvests.
Invite interaction. A small basket of blank envelopes and a pen makes it easy to label seeds the moment you harvest. This is the difference between “I’ll do it later” and actually saving viable, true-to-type seed.
When the porch is working, you’ll notice it: you sit down at the end of the day and the plants look like decor, the drying bags hang neatly like little lanterns, and your seed envelopes stack up like a season-long story. Next spring, you won’t be buying replacements for that sad pot by the door—you’ll be planting a porch legacy.
Sources: USDA (2011) guidance on seed drying/storage principles; Seed Savers Exchange (2020) crop-specific seed saving recommendations; Rainer, T. (2015) design principle quote on space, light, and use.