Kitchen Living Salad Wall Ideas
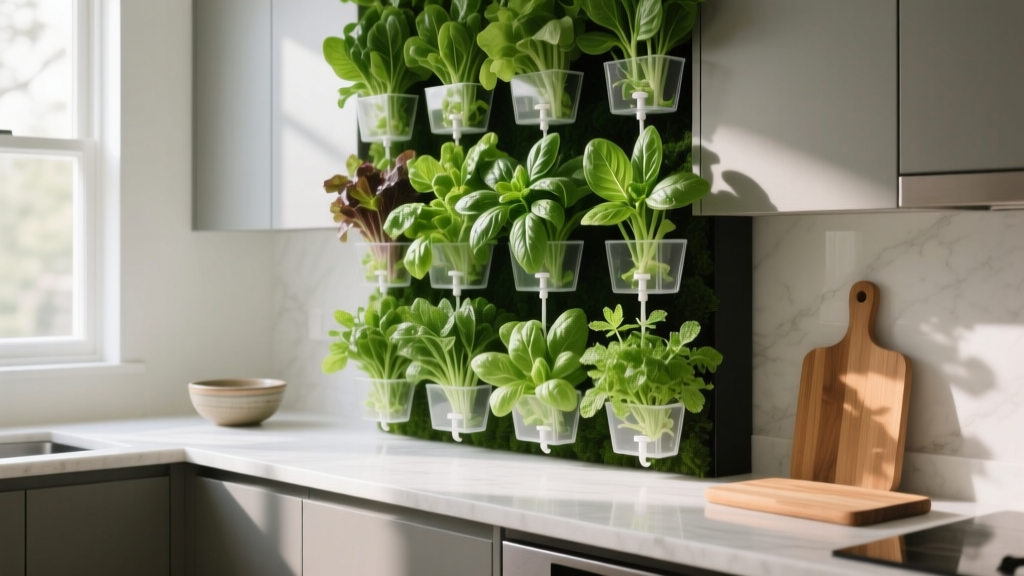
It’s 6:15 p.m., you’re hungry, and the salad greens in the crisper are already limp. You glance at the sunlit patch by the kitchen window—the one that’s too narrow for a table and too awkward for a “real garden”—and think: this space could feed me. A living salad wall turns that unused vertical strip into a daily harvest zone: crisp lettuce, peppery arugula, snips of herbs, even edible flowers—fresh enough that the bowl can be on the table in under 2 minutes.
This article walks you through designing a kitchen-adjacent salad wall like a landscape designer would: start with the site, choose a layout that fits your constraints, then plant varieties that behave well in shallow root zones. You’ll get dimensions, spacing, sunlight targets, realistic budgets, and three real-world scenarios (renter, busy family, and small-house minimalism) to help you copy a plan that actually works.
Start with the wall you already have: microclimate and workflow
A salad wall is half garden, half kitchen tool. Before you buy anything, stand in the spot where you’ll harvest. Can you reach it with one hand while holding a bowl? Can you water without dripping on the floor? Good design is less about fancy systems and more about friction-free habits.
Measure three things first (and write them down)
Use a tape measure and note these numbers. They’ll dictate everything from container choice to plant spacing.
- Wall width and usable height: A common “in-between” area is 24–48 inches wide. A highly productive setup can fit in 30 inches wide x 60 inches tall.
- Depth you can spare: For kitchens, 6–10 inches of depth keeps walkways functional. Many leafy greens thrive in 6–8 inches of soil depth.
- Light hours: Aim for 4–6 hours of direct sun, or bright indirect light all day. If you’re under 3 hours of direct sun, plan on shade-tolerant greens or supplemental LEDs.
Design around clean harvesting
Put “cut-and-come-again” greens at chest height where your scissors land naturally. Place trailing plants (like nasturtium) higher so they cascade without smearing soil onto leaves below. And keep the watering point accessible—if watering feels annoying, the wall will slowly become a wall of regret.
“Successful edible gardens are designed first for access and repeatable routines. If you can’t comfortably reach, water, and harvest, it won’t be maintained.” — University of California Agriculture and Natural Resources (UC ANR), Home Vegetable Gardening guidance (2020)
That idea shows up again and again in productive garden research: ease of access is a yield multiplier because it increases consistency.
Layout strategies that fit real kitchens (and real budgets)
There isn’t one “right” salad wall. There are a few patterns that adapt well to apartments, patios, and tight side yards. Pick the layout that matches your wall surface and your watering tolerance.
Strategy 1: Pocket planters for fast, lightweight installs
Fabric pocket planters are the quickest way to go vertical. They’re ideal for renters because they can hang from a curtain rod, a French cleat, or a freestanding rack.
Best for: leafy greens and herbs with shallow roots (lettuce, arugula, cilantro, chives).
Typical pocket size: 7"–10" wide pockets with 4"–6" depth.
Spacing: 1 lettuce plant per pocket or 3–5 herb plugs per pocket.
Design note: Pocket walls dry out quickly. If you travel or forget to water, move to a trough or drip-irrigated system.
Strategy 2: Stacked trough shelves for “real soil” performance
If you want a salad wall that behaves like a raised bed, use horizontal trough planters on sturdy brackets or a shelving unit. This gives you more soil volume, more consistent moisture, and better yields.
Recommended trough dimensions: 24"–36" long, 6"–8" deep, 6"–8" wide.
Shelf spacing: Leave 12"–16" between shelves so plants get light and you can harvest comfortably.
This is the layout I use most often for kitchen-adjacent gardens because it’s forgiving. Lettuce stays tender longer and basil doesn’t sulk as quickly.
Strategy 3: Modular hydroponic panels for ultra-clean indoor walls
If your “kitchen wall” is actually inside the home (no soil mess allowed), hydroponic towers or wall panels can work beautifully—especially with a timer and a catch tray.
Best for: lettuces, arugula, baby kale, basil, mint (watch mint’s vigor), and small Asian greens.
Light target indoors: 12–14 hours under LEDs if you don’t have a bright window.
Cost reality: Hydroponic kits often start around $80–$200 and go up from there. They pay you back in convenience more than in strict dollars.
Compare the three systems at a glance
| System | Best location | Upfront cost (typical) | Watering cadence | Best plants |
|---|---|---|---|---|
| Fabric pocket wall | Covered patio, balcony, bright window | $25–$60 | Every 1–2 days in warm weather | Lettuce, arugula, cilantro, chives |
| Stacked trough shelves | Outdoor wall, fence, sunny side yard | $60–$180 | 2–3x/week (more in heat) | Lettuce, kale, basil, parsley, spinach |
| Hydroponic panel/tower | Indoors near outlet; low-mess zones | $80–$300 | Top off reservoir weekly | Leafy greens, basil, baby greens |
Proportion and spacing: make it feel calm, not cluttered
A living salad wall should read like a composed green backdrop, not a jumble of containers. Use repetition: the same trough repeated three times looks intentional and makes maintenance simpler.
Use the “reach rule” for placement
Most adults can comfortably reach between about 24" and 72" from the floor without stretching. Keep your main harvest band (greens and herbs you cut daily) within that zone. Put occasional harvest plants (thyme, oregano) slightly lower or higher.
Plant spacing that prevents bitterness and bolting
Overcrowding heats up foliage and reduces airflow—two things that push salad greens toward bitterness and early flowering.
- Leaf lettuce: space 6"–8" apart (one plant per 6–8" spot in troughs).
- Baby leaf “cut-and-come-again” sowing: broadcast thinly, then thin to about 1"–2" between seedlings for baby leaf harvest.
- Kale (dwarf types): 10"–12" per plant in troughs; harvest outer leaves.
- Basil: 8"–10" spacing; pinch tips weekly for branching.
For indoor walls, keep airflow moving. A small oscillating fan on low can reduce disease pressure and helps stems stay sturdy.
Plant selection: varieties that earn their space on a salad wall
Vertical gardens reward plants that are quick, compact, and forgiving. Choose greens bred for containers and repeated harvests. Also, mix textures: frilly, round, dark, lime—your eyes eat first.
Lettuces that thrive in shallow soil
1) ‘Buttercrunch’ (butterhead): Tender, heat-tolerant for a butter type, and stays sweet when cut young. Great for troughs with 6–8" soil depth.
2) ‘Black Seeded Simpson’ (leaf): Fast and reliable—excellent for cut-and-come-again. If you want harvest within 30–40 days, this is a strong pick.
3) ‘Little Gem’ (mini romaine): Compact heads fit small pockets and troughs. It gives you that romaine crunch without needing big-root volume.
Greens that add bite and nutrition
Arugula ‘Astro’: Mild-to-peppery, quick, and forgiving. Harvest baby leaves often to keep flavor balanced.
Spinach ‘Bloomsdale Long Standing’: Better bolt resistance than many spinach types; appreciates consistent moisture. Use it in the lower tier where it gets a little shade.
Dwarf kale ‘Dwarf Blue Curled Vates’: Compact structure and steady harvest. It’s also one of the easiest “salad wall anchors” because it holds shape and looks good all season.
Herbs that behave well vertically
Basil ‘Genovese’ or ‘Prospera’: ‘Prospera’ is bred for downy mildew resistance, a common basil issue in humid summers.
Chives: Clean, upright, and perennial in many climates—ideal for the top tier where you snip often.
Parsley ‘Italian Flat Leaf’: Deep flavor and strong regrowth after cutting; place mid-level for easy harvesting.
Mint (in its own pot): Great in salads, but aggressive—contain it in a dedicated pocket or small pot so it doesn’t take over.
Edible flowers and “chef’s garnish” plants
Nasturtium ‘Alaska’: Leaves and flowers are edible, and it cascades beautifully from upper tiers. It also tolerates leaner soil better than many herbs.
Viola/pansy: Cool-season color and edible petals. These shine in the shoulder seasons when lettuces are at their best.
For safe edible flowers, use pesticide-free starts and confirm edibility from an Extension source. The North Carolina State Extension Gardener Plant Toolbox is a solid reference (NCSU Extension, 2023).
Three real-world salad wall scenarios (and layouts you can copy)
Scenario A: The renter’s no-drill balcony wall (30" wide)
Site: A balcony that gets 4 hours of morning sun and bright shade after noon.
Layout: A freestanding shelving rack (like a 5-tier unit) with three shallow troughs on the middle tiers.
Why it works: No holes in the wall, easy to move for storms, and troughs hold enough moisture that you’re not watering twice a day.
Planting plan: Top trough: nasturtium + chives. Middle trough: ‘Buttercrunch’ + ‘Little Gem’. Lower trough: spinach + parsley (more shade-friendly).
Budget: Rack $35–$60, three troughs $30–$45, potting mix $15–$25, seedlings $20. Total often lands around $100–$150.
Scenario B: The busy family’s patio “salad bar” (6 feet long)
Site: A patio fence line with 6+ hours of sun, hot afternoons, kids running through.
Layout: Two 36" troughs mounted at 36" height (comfortable harvest height), plus one lower trough at 24" for sturdier plants.
Why it works: Adults can harvest quickly while grilling; kids can pick cherry tomatoes nearby (optional) without trampling a bed.
Planting plan: Upper troughs: mixed leaf lettuce (two varieties for succession). Lower trough: dwarf kale + basil (basil likes the warmth).
Time expectation: Harvesting is 2–3 minutes most nights. Watering and quick inspection totals about 20–30 minutes per week once established.
Scenario C: The tiny-house kitchen window wall (indoors, 18" deep max)
Site: Inside, next to a bright window but not enough direct sun in winter.
Layout: A compact hydroponic counter-to-wall unit with a catch tray, plus a small clip-on LED bar.
Why it works: No soil indoors, no gnats from overwatered pots, and predictable growth when outdoor beds are frozen.
Lighting: Set LEDs for 12–14 hours/day. Keep the light 6–10" above the canopy and raise it as plants grow.
Planting plan: ‘Black Seeded Simpson’ for constant leaf harvest, arugula for bite, basil for fragrance and fast regrowth.
Step-by-step: build a stacked trough salad wall (the most forgiving DIY)
This approach balances productivity, cost, and ease. You can mount to a fence, exterior wall studs, or use a freestanding shelf for renters.
- Choose your footprint. For a starter wall, aim for 36" wide with 3 troughs stacked vertically. Total height with spacing is usually 60"–72".
- Pick supports rated for weight. Wet potting mix is heavy. Plan roughly 8–12 lb per gallon of wet soil mix. Use heavy-duty brackets into studs, or a rack designed for storage loads.
- Add drainage control. Drill drainage holes if needed, then place a slim gutter or catch tray beneath each trough. Outdoors, you can let it drain to a bed; indoors, you need a tray.
- Fill with a moisture-smart mix. Use a quality potting mix (not garden soil) and blend in 20–30% compost for nutrient buffering. Vertical planters dry faster, so consider a small portion of coconut coir for water retention.
- Plant in “harvest zones.” Put frequent cutters (lettuce, basil) in the middle tier. Put trailing nasturtium at the top. Place shade-tolerant spinach lower.
- Water deeply, then top off. First watering should run through the pot. After establishment, water when the top 1" is dry.
- Start a succession schedule. Every 2 weeks, reseed a small section of baby greens or swap one lettuce plant. This prevents the whole wall from peaking and declining at once.
Sunlight, heat, and season planning (so your wall doesn’t stall)
Leafy greens are happiest in cool-to-mild temperatures. If your wall bakes in afternoon sun, use design to create “micro-shade.” A simple shade cloth can keep lettuces from bolting in heat waves.
A practical target is 4–6 hours of sun for most greens. More sun is fine if the wall stays evenly moist and gets airflow—but in many kitchens, reflected heat from walls can cook plants faster than you expect.
For climate guidance, Cooperative Extension resources consistently emphasize matching cool-season crops to cooler periods; for example, many lettuces and spinach perform best in spring and fall conditions (University of Minnesota Extension, 2022).
Budget options and smart DIY swaps
You can build a salad wall in a weekend without overspending. The biggest cost drivers are the support structure and whether you automate watering.
- Shoestring ($40–$80): Reuse a sturdy bookcase or metal rack, add recycled containers with drainage, and use seed packets instead of starts. Hand-water.
- Midrange ($100–$200): New rack + matching troughs, quality potting mix, seedlings for quick payoff, and a simple catch tray system.
- Higher convenience ($200–$400): Add a basic drip kit with a timer, or choose a hydroponic unit