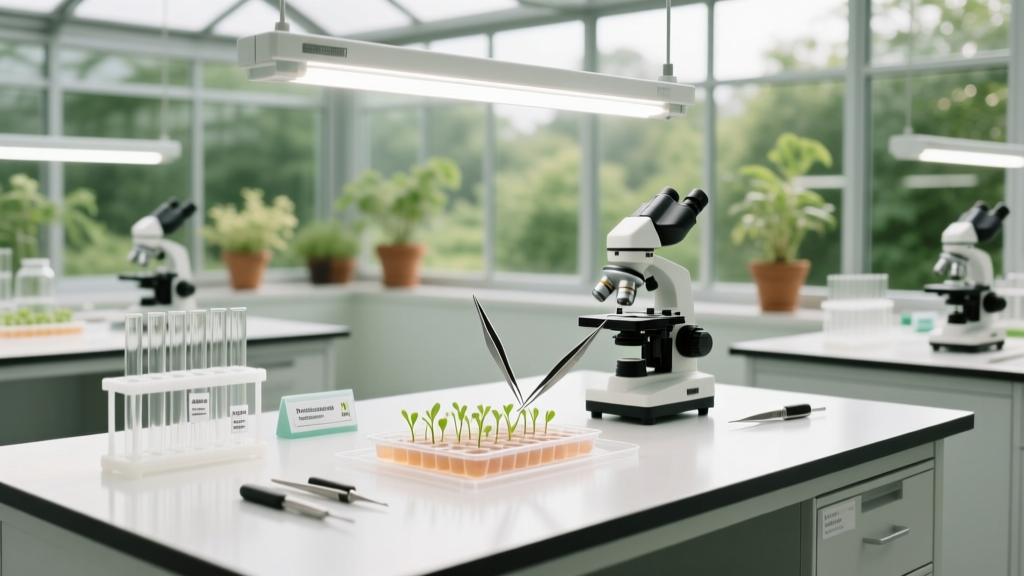
Greenhouse Grafting Laboratory Setup
The first time you try to graft in a typical backyard greenhouse, it usually goes like this: you’ve got a razor blade in one hand, rootstock in the other, and the sun suddenly pushes the temperature from “pleasant” to “sweaty.” A gust sneaks under the door and dries your scion wood right as you’re lining up cambium. Meanwhile, potting mix dust floats onto your cut surfaces like seasoning you didn’t ask for. Grafting can feel fussy—not because you lack skill, but because the space isn’t doing any of the work with you.
Let’s fix that by treating your greenhouse like a small laboratory: clean workflow, predictable climate, and a layout that keeps delicate plant tissue hydrated and organized from cut to healing. Think of this as a project you can build in a weekend, then refine over a season—whether you’re a homeowner with a 10 ft x 12 ft greenhouse or a renter with a 4 ft x 6 ft lean-to or balcony greenhouse.
Design principles: a lab mindset in a garden space
Start with a “clean-to-dirty” workflow
In a grafting setup, contamination and dehydration are the two quiet saboteurs. Layout solves both. Arrange your greenhouse so you move in one direction:
- Clean zone: tools, scions, labels, alcohol wipes, grafting tape—no soil.
- Cutting zone: a stable bench where you work standing comfortably.
- Healing zone: high humidity, lower light, steady warmth.
- Potting/holding zone (dirty zone): soil, mixing tub, finished plants.
This flow prevents you from carrying potting mix dust back toward open cuts, and it keeps your “hands-on” time calm and efficient.
Right-size your bench: ergonomics beats extra square feet
Your bench is the heart of the lab. Aim for a working surface 24–30 inches deep so you can reach tools without leaning, and set height at 36 inches for comfortable standing cuts. If you’re seated, 28–30 inches can work with a stool. Even in a compact greenhouse, one good bench improves success rates more than adding another shelf.
Control the microclimate where it matters (not everywhere)
You don’t need to heat and humidify the entire greenhouse like a tropical conservatory. Instead, create a dedicated healing microclimate with a healing chamber or humidity tent. For many grafts, callusing happens best when moisture is high and temperature is moderate and steady; a small enclosed zone is cheaper and easier to stabilize than the full structure.
For example: a 27-gallon clear tote or a 2 ft x 4 ft mini-shelf wrapped in plastic becomes a callusing station with a seedling heat mat underneath. You’re building a “room within a room.”
Layout strategies for real greenhouse footprints
Plan a simple aisle that never gets blocked
Give yourself a clear path for carrying trays without clipping stems. Target an aisle width of 24 inches minimum; 30 inches feels luxurious in a home greenhouse. If your greenhouse is narrow, put the bench on one side and vertical storage on the other, leaving the aisle down the middle.
A practical 10 ft x 12 ft layout (homeowner classic)
Here’s a layout I use often for a standard backyard greenhouse:
- North wall: 8 ft long potting bench (dirty zone), 24 in deep
- East side: 6 ft clean bench (cutting zone), 30 in deep, with pegboard above
- South side: healing rack (2 ft x 4 ft shelf wrapped in plastic) away from intense midday sun
- Center aisle: 30 in clear
This keeps the clean bench out of the potting mess, and the healing area sheltered from the harshest light.
A 4 ft x 6 ft lean-to (renter-friendly) layout
In a small lean-to, every inch needs a job:
- One 4 ft wall: fold-down clean bench, 18–20 in deep
- Opposite wall: vertical rack for trays and a slim “dirty bin” for potting mix
- Healing chamber: stacked clear totes on a small wire shelf (footprint 18 in x 36 in)
The fold-down bench is the space-saver: it turns grafting into an event you set up and pack away, which renters often prefer.
Light management: grafting likes bright shade, not glare
Fresh graft unions desiccate quickly in intense sun. Plan for 6–8 hours of bright, indirect light for healing seedlings and tender grafts. Use a 30–50% shade cloth on the sunniest exposure during peak weeks. If your greenhouse bakes in midsummer, move the healing chamber to the shadiest corner and focus on airflow.
Sunlight targets depend on crop. Tomatoes and cucurbits can handle brighter conditions once healed, but the first days after grafting are gentler.
Step-by-step setup: build the grafting lab in one weekend
- Map your zones with painter’s tape. On the greenhouse floor, tape off clean bench, potting area, and healing station so you can “walk” the workflow before building.
- Install the clean bench. Use a sealed plywood top or stainless table. Aim for 36 in height and at least 24 in x 48 in surface area.
- Add a tool wall. Hang a small pegboard or magnetic strip for blades, alcohol spray, clips, and labels. Keep tools above the bench, not on it.
- Create the healing chamber. Use a clear tote or plastic-wrapped rack. Add a thermometer/hygrometer inside and target 85–95% relative humidity for the first couple days for many soft-stem grafts.
- Stabilize temperature. Put a seedling heat mat under the chamber if needed. A common setpoint for callusing is around 75–82°F, depending on crop and technique.
- Set up sanitation. Keep 70% isopropyl alcohol, a small lidded trash bin, and paper towels at the clean bench. Wipe the bench before each session.
- Dial in gentle lighting. If natural light is harsh, hang shade cloth; if it’s dim, add a 2 ft LED shop light above the healing rack on a timer.
- Label like a professional. Pre-write plant tags with rootstock/scion variety and date. Your future self will thank you when evaluating success rates.
Plant selection: reliable varieties for a home grafting program
Pick crops where grafting solves a real problem: soilborne disease, vigor, yield stability, or short seasons. These pairings are popular because they’re forgiving and available to home growers.
Tomatoes: disease management and long-season stamina
Scions (fruit varieties):
- ‘Sungold’ (cherry): vigorous and productive; grafting helps it keep producing when soil stress rises.
- ‘Brandywine’ (heirloom slicer): cherished flavor but can be less robust; grafting often boosts plant strength and consistency.
- ‘Big Beef’ (hybrid): reliable baseline scion for testing your technique.
Rootstocks:
- ‘Maxifort’: widely used for vigor and soil disease tolerance; a strong choice when you’re learning because it powers through minor setbacks.
- ‘Beaufort’: slightly less aggressive than Maxifort; helpful when you want vigor without overly lush growth.
Spacing note: once healed and planted, grafted tomatoes often benefit from a bit more room—plan 24–30 inches between plants in-bed, with strong trellising.
Cucumbers: stronger roots for heat and disease pressure
Scions: ‘Diva’ (parthenocarpic), ‘Marketmore 76’ (classic slicer). These perform well for home gardeners and are easy to evaluate.
Rootstocks: common squash-type rootstocks are often used for cucumber grafting. Choose a commercially available cucurbit rootstock marketed for cucumber compatibility, especially if you’ve struggled with wilt or root stress.
Apples and pears (bench grafting): ideal for a true “lab bench” approach
If you want a winter/early spring project that feels wonderfully precise, bench grafting fruit trees is perfect for a greenhouse lab. Work with dormant scionwood and rootstocks at the clean bench, then heal in a protected area.
- Apple scions: ‘Honeycrisp’ (if available locally), ‘Liberty’ (disease-resistant), ‘Granny Smith’ (pollination partner in many regions).
- Apple rootstocks: M.26 (semi-dwarf), M.9 (dwarf, needs staking), or MM.111 (more vigorous, drought-tolerant).
- Pear scions: ‘Bartlett’, ‘Bosc’.
Fruit tree grafting is less about humidity tents and more about organized storage, sharp tools, and controlled callusing conditions.
Equipment choices and costs: spend where it changes outcomes
You can build a functional grafting lab without turning your greenhouse into a medical facility. Here are realistic ballpark costs (US), with DIY swaps that keep performance high:
- Sturdy bench/table: $80–$250 (DIY: sealed plywood on sawhorses ~$60)
- Seedling heat mat (with thermostat): $35–$90
- Thermometer/hygrometer: $12–$30
- Shade cloth (30–50%): $25–$70
- Grafting clips/tape kit: $15–$45
- LED shop light (2 ft): $20–$50
If you only splurge once, make it the thermostat-controlled heat mat. Temperature stability is one of the biggest variables you can actually control.
| Feature | DIY Healing Tote | Plastic-Wrapped Shelf Chamber | Purchased Propagation/Grafting Chamber |
|---|---|---|---|
| Typical footprint | 18 in x 24 in | 24 in x 48 in | Varies (often 24 in x 48 in) |
| Estimated cost | $15–$40 | $40–$120 | $150–$600 |
| Humidity control | High (easy to seal) | High (depends on wrap) | High (often designed for it) |
| Best for | Small batches, renters | Ongoing weekly grafting | High volume, maximum consistency |
| Downside | Limited space, can overheat | Takes floor space | Higher cost |
What research and standards suggest (and how that affects your layout)
Good grafting outcomes come from predictable healing conditions. University extension programs consistently emphasize careful environmental control during healing—exactly what your layout is meant to provide.
“The healing period is a critical stage; maintaining high humidity and moderate temperatures reduces water stress and improves graft success.” — University of Minnesota Extension, 2020
Design implication: your healing station deserves its own sensor and its own “envelope” (tote or tent). Don’t rely on the greenhouse’s general conditions to do a precision job.
Sanitation matters too. The U.S. Centers for Disease Control and Prevention notes that 70% alcohol is generally more effective than higher concentrations for surface disinfection because it evaporates less quickly and penetrates better (CDC, 2024). In a grafting lab, this translates to a simple habit: wipe tools between varieties and whenever you suspect sap buildup.
Citations: University of Minnesota Extension (2020); Centers for Disease Control and Prevention (CDC) (2024).
Three real-world setups (with the design choices that made them work)
Scenario 1: The homeowner with a 10 ft x 12 ft greenhouse and clay soil
The problem: tomatoes looked great early, then stalled midseason due to soil stress and disease pressure. The layout solution was a dedicated grafting bench plus a healing rack shaded on the south side. They grafted ‘Brandywine’ and ‘Sungold’ onto ‘Maxifort,’ then planted out with 30-inch spacing and strong vertical trellises. The key design choice wasn’t fancy gear—it was keeping the clean bench away from potting soil and giving the healing rack stable warmth.
Weekly expectation: 30–45 minutes to sow rootstocks/scions in sequence, plus 20 minutes to check healing chamber conditions during graft week.
Scenario 2: The renter with a 4 ft x 6 ft lean-to and limited power access
The problem: they wanted to graft cucumbers for stronger summer production but couldn’t run multiple devices. The solution: a small clear tote chamber placed inside the greenhouse, warmed passively by daytime heat and buffered at night with a simple water jug thermal mass (a capped 1-gallon jug). They used a fold-down clean bench and did grafting early morning when humidity was naturally higher. The design win was portability: everything packed into one lidded bin when not in use.
Budget version: skip the heat mat, spend on shade cloth and a good hygrometer, and graft during stable weather windows.
Scenario 3: The busy family gardener running “micro-batches” every two weeks
The problem: they couldn’t manage one big grafting day. The layout solution was a permanent, small-scale production line: a clean bench always ready, pre-labeled trays, and a shelf chamber that could hold 48–72 seedlings at a time. They scheduled sowing so rootstocks were started 3–5 days before scions (timing varies by variety and conditions), keeping stem diameters aligned for easier cuts. The design goal was reducing setup friction—because consistency is what busy people can actually maintain.
Spacing, timing, and environmental targets you can actually measure
Use measurable targets so you’re not guessing:
- Bench clearance: keep 12 inches of open space on each side of your cutting mat for tools and labels.
- Healing chamber humidity: aim for 85–95% RH initially; vent briefly if condensation drips onto leaves.
- Healing temperature: keep a steady range around 75–82°F for many vegetable grafts; avoid big day-night swings.
- Light during first days: bright shade; avoid direct midday rays hitting the chamber.
- Seedling tray spacing: leave at least 1 inch between cell packs inside the chamber for airflow.
Maintenance expectations: the lab only works if it stays pleasant to use
A grafting lab shouldn’t become another neglected corner. Plan light maintenance that fits real life.
Weekly (15–30 minutes): wipe the clean bench, empty the lidded trash, restock alcohol and paper towels, check blade sharpness, and review your labels/logbook. If you’re actively healing grafts, add 10 minutes for chamber checks—temperature, humidity, and a quick vent if needed.
Monthly (30–60 minutes): wash totes/trays with soap and water, then sanitize. Sweep the greenhouse floor to reduce soil dust drifting into the clean zone. Inspect shade cloth ties and door seals.
Seasonal tasks: In spring, recalibrate your workflow for higher volume (more trays, more labels, more scions). In summer, prioritize heat management—shade cloth on, vents opened, and healing chamber moved to the coolest corner. In fall/winter, transition to bench grafting fruit trees if that’s your interest, and use the greenhouse as a clean workshop on cold days.
DIY alternatives that still feel professional
If you’re watching budget or renting, you can still create that “calm lab” feeling with clever substitutions:
- Clean bench top: a cheap laminate shelf panel is easier to wipe than raw plywood.
- Tool organization: a kitchen magnetic knife strip holds grafting knives and keeps them off the soil-dust zone.
- Healing chamber: clear storage bins plus binder clips to hold plastic wrap tight.
- Humidity boost: damp (not dripping) paper towels on a raised rack inside the tote—keep water away from stems.
- Thermal stability: water jugs as thermal mass when you can’t run heat at night.
The goal is repeatability. When your tools are always where your hands expect them to be, grafting stops feeling like a high-wire act and starts feeling like a satisfying craft session.
If you want your greenhouse to earn its footprint, this lab setup is one of the most space-efficient upgrades you can make. It doesn’t demand more square footage—just clearer zones, a stable healing corner, and a bench that invites you to slow down and make clean cuts. The first time you carry a tray of neatly labeled grafts into a softly lit healing chamber and realize nothing is rushing you—that’s when the greenhouse stops being just a shelter and becomes a workspace designed for success.