Townhouse Courtyard Transformation Ideas
You step outside with a cup of coffee and immediately hit the same two problems: a hard rectangle of paving that bounces heat in summer, and a view straight into a neighbor’s kitchen. The courtyard is technically “outdoor space,” but it doesn’t feel like a garden yet—more like a light well with a chair. The good news is that townhouse courtyards are incredibly designable because they’re contained. With a few smart layout moves—often in the first 48 inches from your door—you can turn the space into an outdoor room with privacy, planting, and purpose.
I’m going to walk you through this like a real project: measure, decide on a layout, choose materials that behave well in small spaces, and then pick plants that thrive in courtyards (where light and airflow can be tricky). You’ll also see three real-world scenarios with specific dimensions, costs, and plant lists you can copy.
Start with a quick “site read” (10 minutes that saves weeks)
Before sketching anything, take three measurements and one observation:
- Courtyard footprint: Measure length and width. A very common townhouse courtyard is about 12 ft x 18 ft (216 sq ft), but yours may be 8x14 or 15x25.
- Door swing + walking lane: You need a clear path of at least 36 inches from the door to wherever you naturally walk (trash bins, gate, seating).
- Height you can use: Note fence height and any overhead balconies. Vertical space is your “bonus square footage.”
- Sunlight hours: Count direct sun. Many courtyards get 3–5 hours of direct light (often midday), with bright shade the rest of the day.
Also listen: does it echo? Courtyards often amplify noise. Planting and soft surfaces will help.
Design principles that make small courtyards feel bigger
1) Plan the courtyard as two zones, not one
Small spaces feel cramped when every function fights for the middle. Divide the plan into:
- Movement zone: A simple route, usually along one edge, 36–42 inches wide.
- Living zone: Seating/dining tucked into a “room” defined by a rug, planters, or a pergola.
This is the same logic used in interior design—clear circulation makes everything feel calmer.
2) Use the “rule of 18 inches” for planting depth
In courtyards, soil volume is everything. If you can only spare a narrow strip, aim for 18 inches of planting depth minimum. That’s enough for climbers, compact shrubs, and perennials without constant drought stress. If you can go deeper—24–30 inches—you can support small trees in raised planters.
3) Think vertical first: privacy comes from height, not bulk
When you can’t expand outward, you expand upward. A slim trellis with a climber gives privacy without swallowing floor space. It also interrupts sightlines from upper windows. Plan for at least 6 ft of screening height; 7–8 ft is better if local codes allow.
4) Keep hardscape simple and run it in one direction
Busy paving patterns shrink a space visually. Large-format pavers (for example, 24 in x 24 in) or decking boards running the long direction make the courtyard feel longer. If drainage is an issue, consider permeable joints or a narrow gravel channel along the low side.
“Green infrastructure is a cost-effective, resilient approach to managing wet weather impacts that provides many community benefits.” — U.S. Environmental Protection Agency (EPA), 2023
That principle applies at courtyard scale: a little permeability reduces puddles and protects foundations.
Layout strategies you can copy (with dimensions)
The “L-shaped planter + corner room” layout
Best for: square or near-square courtyards that feel exposed.
Create an L-shaped raised planter in two edges, leaving one clear walking edge. A practical build is 18–24 inches wide and 18 inches tall. The corner becomes a natural seating nook.
Key move: Put the tallest plants at the back corner and step down toward the door (tree → shrub → perennial). That gives privacy without blocking light.
The “center strip” layout for very narrow courtyards
Best for: long, narrow footprints like 8 ft x 20 ft.
Keep circulation along one side (36 inches), then run a planted strip or trough down the middle (16–20 inches wide) with stepping pads crossing it. This breaks the “bowling alley” effect.
The “wall-to-wall vertical garden” layout (renter-friendly)
Best for: renters or anyone avoiding permanent construction.
Line one fence with three to five large containers (16–20 inch diameter) and add a tension-wire trellis system that can be removed later. Use a folding café set and a roll-up outdoor rug to define the living zone.
Materials that behave well in townhouse courtyards (and what they cost)
Courtyards are hard on materials: reflected heat, wind tunnels, and intermittent shade. Here are reliable options with real numbers to help you budget:
| Material | Best use | Typical cost | Courtyard behavior |
|---|---|---|---|
| Large-format concrete pavers (24"x24") | Main patio surface | $6–$12 per sq ft (materials) | Clean look; fewer joints; can feel hot in full sun |
| Composite deck tiles | Covering ugly slab (DIY) | $8–$15 per sq ft | Fast install; good for renters; needs level base |
| Pea gravel + edging | Permeable path or strip | $2–$5 per sq ft | Great drainage; crunch underfoot; needs weed barrier |
| Cedar slat screen | Privacy wall accent | $20–$35 per linear ft (DIY varies) | Warm texture; weathers to silver; periodic sealing helps |
| Steel raised planter kits | Crisp planters | $150–$350 each (approx. 2'x6') | Modern; warms soil early; can dry faster in summer |
DIY alternative: For an 18" tall raised bed, untreated pine is cheaper upfront, but it breaks down quickly in damp shade. If budget is tight, use heat-treated (HT) pallets for a temporary planter liner or choose cedar for longer life.
Plant selection that actually works in courtyards
Courtyards are microclimates: warmer near walls, windier at corners, and often shaded for part of the day. The most reliable planting approach is to mix structure (evergreens), seasonal color, and climbers for height.
Privacy and structure (evergreen backbone)
- Clumping bamboo (Fargesia robusta or Fargesia rufa): Non-invasive clumps (unlike running bamboo), great for narrow screens. Plant in a bed with 24 inches depth or a trough. Space plants 3 ft apart for a dense screen. Works well with 4–6 hours of sun or bright shade.
- Japanese holly (Ilex crenata ‘Sky Pencil’): Upright and narrow—ideal where you have only 18 inches of width. Use as living columns by the door.
- Yew (Taxus x media ‘Hicksii’): Excellent for shade and shearing into a clean hedge. Slow-growing, which is helpful in tight spaces.
Small trees for courtyards (root-friendly and high impact)
- Amelanchier (Amelanchier lamarckii): Multi-stem, spring flowers, good fall color, and a light canopy that doesn’t black out the courtyard. Needs a container/bed at least 30 inches wide for comfort.
- Japanese maple (Acer palmatum ‘Bloodgood’ or ‘Sango-kaku’): Perfect for bright shade. Protect from strong wind tunnels. In hot courtyards, afternoon shade helps prevent leaf scorch.
- Olive (Olea europaea ‘Arbequina’): For sunnier courtyards (ideally 6+ hours). Use a large pot (20–24 inches diameter) and excellent drainage.
Climbers that earn their keep (height without floor space)
- Star jasmine (Trachelospermum jasminoides): Evergreen, fragrant, and tidy. Thrives with sun to part shade and handles reflected heat well once established.
- Clematis ‘Etoile Violette’ or ‘Nelly Moser’: Great for adding color without bulk. Keep roots cool with a low perennial at the base.
- Climbing hydrangea (Hydrangea anomala subsp. petiolaris): One of the best climbers for shade. Slow to start, then impressive.
Courtyard perennials and grasses (texture, movement, long season)
- Hellebores (Helleborus x hybridus): Early blooms in shade; evergreen-ish foliage in mild climates.
- Heuchera (‘Caramel’, ‘Obsidian’): Colorful foliage for part shade; mix two varieties for contrast.
- Sedge (Carex oshimensis ‘Evergold’): Brightens shade and behaves neatly at edges.
- Lavender (Lavandula angustifolia ‘Hidcote’): For sunny courtyards; keep airflow in mind and avoid soggy soil.
Spacing reality check: In tight beds, “label spacing” is optimistic. If a plant says 24" wide, give it 18–24 inches and commit to light pruning. For grasses and sedges, 12–18 inches is typically fine.
Three real-world courtyard transformations (scenarios you can steal)
Scenario 1: The shaded 10 ft x 16 ft courtyard with privacy issues
Site conditions: Bright shade, about 2–3 hours of direct sun in summer, neighboring windows on two sides.
Layout: L-shaped raised planter, 18 inches wide, wrapping the back and one side. A 42-inch clear path from door to gate.
Planting plan:
- 1x Amelanchier lamarckii multi-stem (back corner focal point)
- 3x Taxus ‘Hicksii’ for dark evergreen structure (spaced 30 inches)
- 5x Hellebores + 7x Carex ‘Evergold’ to brighten the base layer
- 1x climbing hydrangea on a trellis panel for soft wall coverage
Cost sketch: DIY timber raised bed materials $250–$450, soil/compost $120, plants $300–$700 depending on size. Total range: $670–$1,270.
Designer tip: Paint the back fence a matte dark color (charcoal or deep green). It visually recedes, and foliage pops.
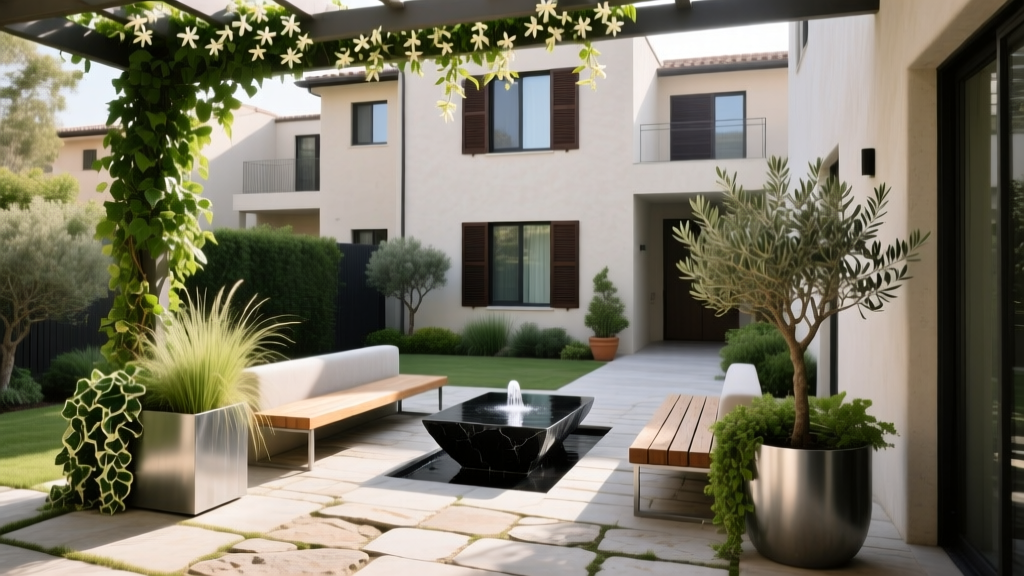
Scenario 2: The sunny 12 ft x 18 ft entertainer courtyard (heat + glare)
Site conditions: 6–8 hours of summer sun, reflective walls, hot paving.
Layout: Define a dining rectangle with a pergola footprint about 8 ft x 10 ft. Use large planters as “corners” to make it feel intentional, leaving a 36-inch service path along one edge.
Planting plan:
- 2x olives in 22-inch pots (frame the seating area)
- 1–2x star jasmine on wires to soften the hottest wall
- 6x lavender ‘Hidcote’ spaced 16 inches for a low fragrant border
- 3x Salvia ‘Caradonna’ for pollinators and long bloom
Cost sketch: Pergola kit $600–$1,800, two large pots $120–$300, plants $250–$600. Add a shade sail instead for $80–$250 if you want a lighter, renter-friendly solution.
Comfort upgrade: Swap one section of hard paving for a 3 ft wide gravel strip with planting—less glare, more cooling, better drainage.
Scenario 3: The rental courtyard 8 ft x 14 ft (temporary, portable, high impact)
Site conditions: Mixed sun/shade, rules against drilling into masonry, limited budget.
Layout: One wall gets a line of containers (privacy), the opposite stays open for a chair and small table. Add a narrow “green runner” down the side using three rectangular troughs.
Planting plan (portable):
- 3x Fargesia rufa in long trough planters (screening without invasiveness)
- 2x heuchera + 2x Carex in smaller pots for layered foliage
- Herb pot: rosemary + thyme (sunny corner)
Cost sketch: Five to seven containers $20–$80 each (mix thrifted and new), potting mix $60–$120, plants $200–$450. Total: $360–$1,130 depending on how large you buy. You can cut costs by starting with 1-gallon plants and letting them fill out over a season.
Step-by-step setup: a practical build sequence
When courtyards go sideways, it’s usually because the build order wasn’t planned. Here’s the sequence I use to keep projects smooth.
- Measure and sketch to scale. Even a simple grid works. Mark doors, drains, spigots, and any vents you must keep clear.
- Decide your circulation line first. Lock in a 36–42 inch path from door to gate/storage.
- Choose one “anchor” feature. Examples: a small tree in a pot, a bench, or a dining set. Place it before anything else.
- Add vertical structure. Trellis, wire system, or a slatted screen. Make sure you can still access fences for maintenance.
- Build or place planters. For raised beds, line with landscape fabric, then fill with a mix of compost and topsoil. Avoid pure compost—it settles too much.
- Run irrigation (optional but worth it). A simple drip line with a timer often costs $60–$150 and prevents container failure in heat.
- Plant in layers. Start with trees/shrubs, then climbers, then perennials/groundcovers.
- Mulch and finish. Add 2 inches of mulch in beds to reduce watering and soften the look.
- Light last. Solar is fine for accent, but low-voltage LED is more reliable. Aim for warm color temperature (around 2700K) for a welcoming feel.
Budget planning: where to spend, where to save
Spend on:
- Soil volume. Healthy soil is the difference between lush and constantly struggling. More soil buffers heat and watering mistakes.
- One statement plant. A multi-stem serviceberry or a well-shaped Japanese maple anchors the whole courtyard.
- Privacy structure. A trellis or screen is a one-time purchase that changes daily comfort.
Save on:
- Small pots and accessories. Use thrifted containers (just add drainage holes) and unify the look with one paint color.
- Perennials. Buy smaller sizes and plant more densely for faster coverage.
- DIY ground surface overlays. Deck tiles or outdoor rugs can transform an ugly slab without demolition.
Maintenance expectations (realistic time and seasonal rhythm)
A well-designed courtyard should not demand daily attention. Plan for about 30–60 minutes per week in the growing season, plus seasonal check-ins.
Weekly (spring through early fall)
- Watering: Containers may need watering 2–4 times per week during heat waves; beds usually 1–2 times depending on rainfall.
- Quick tidy: Deadhead salvias/lavender lightly, remove yellow leaves, check for pests.
- Sweep hardscape: Keeps algae down in shady courtyards and makes the space feel cared for.
Seasonal tasks
- Spring: Top-dress containers with fresh compost, check trellis ties, prune winter damage.
- Summer: Mulch if soil is baking; watch for spider mites on stressed plants in hot, dry corners.
- Autumn: Light prune to maintain walkway clearance; plant bulbs (like alliums or narcissus) where there’s enough sun.
- Winter: Protect tender pots from freeze-thaw (move against a wall, elevate slightly). Evergreens still lose moisture—water on mild days if soil is dry.
Design notes grounded in research (so your choices age well)
Two research-backed ideas matter in courtyards: stormwater handling and biodiversity.
Permeable surfaces and planted areas reduce runoff and puddling—an issue in enclosed spaces. The EPA highlights green infrastructure’s value for managing wet weather and delivering co-benefits (EPA, 2023). Even a narrow gravel strip or a planter that captures roof drip can reduce nuisance flooding at the back door.
Plant diversity matters even at micro scale. The Royal Horticultural Society notes that simple actions—like growing a range of flowering plants—support garden wildlife and pollinators (RHS, 2024). In practice, that means pairing structural evergreens with long-bloomers like salvia, lavender (sun), or hellebores (shade), so something is feeding insects across seasons.
Citations: U.S. Environmental Protection Agency (EPA), “What is Green Infrastructure?” (2023). Royal Horticultural Society (RHS), wildlife and pollinator gardening guidance (2024).
Finishing touches that make it feel like a room
Once the layout and plants are in, focus on two sensory upgrades:
- Lighting at eye level: A soft wall wash on a trellis or uplight on a small tree makes the courtyard usable after dark without harsh glare.
- Sound softening: A small bubbling fountain or water bowl can mask neighbor noise. Even a simple ceramic bubbler can be impactful in a reflective courtyard.
The goal is not to cram in features—it’s to make the courtyard feel intentional. A clear path, a defined seating zone, and vertical planting usually do 80% of the work. Once those are right, you’ll find yourself stepping out more often, not because the courtyard is “finished,” but because it finally works with how you live.