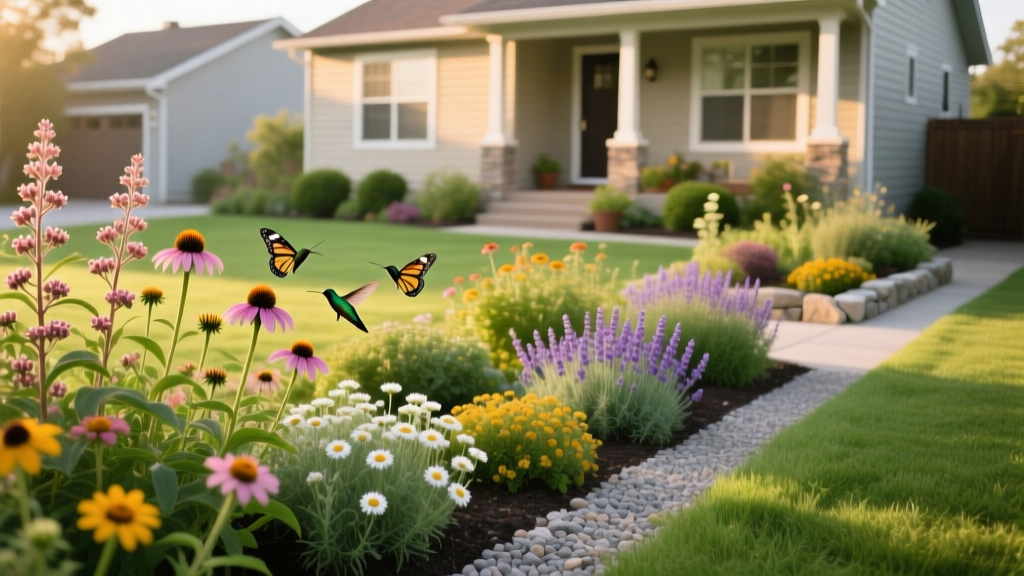
Front Yard Pollinator Highway Design
The mailbox is leaning, the lawn is tired, and every spring you swear you’ll “do something” with the strip between the sidewalk and the porch. Then the heat hits, the grass browns out, and the front yard becomes a glaring, empty stage. Meanwhile, the only “visitors” are ants on the driveway and a few exhausted bees zigzagging across a sea of mulch and concrete. If your front yard feels like a missed opportunity, you’re exactly who a pollinator highway is for: a designed corridor of nectar, host plants, and shelter that turns a typical entry view into a living, working garden.
Think of this as a landscape designer’s walk-through: we’ll set a clear route (the “highway”), choose plants that bloom in sequence, and lay them out so your space looks intentional from the street—while still doing real ecological work.
Start With the “Highway” Concept: One Clear Route, Many Stops
A pollinator highway isn’t a wild tangle. It’s a connected ribbon of resources that helps bees, butterflies, and beneficial insects move through neighborhoods. In front yards, the win is that the layout reads cleanly to neighbors and passersby: a repeating edge, deliberate plant groupings, and a strong seasonal rhythm.
Measure the Site Like a Designer (10 Minutes That Saves You Hours)
Grab a tape measure and note four numbers: total bed length, bed depth, sun hours, and how close you are to foot traffic. Here’s a common front-yard template you can adapt:
- Parkway/hellstrip strip: 4 ft wide × 20 ft long (80 sq ft)
- Foundation bed: 6 ft deep × 15 ft long (90 sq ft)
- Front walk border: 2 ft wide × 25 ft long (50 sq ft)
That’s 220 sq ft of potential habitat—enough for a true bloom sequence if we plan it well.
Sunlight Hours Drive Plant Choices (Not Wishful Thinking)
Before you buy anything, do a quick sun check: morning, noon, and late afternoon. Most high-nectar perennials want 6–8 hours of sun. Part sun plants can thrive with 4–6 hours. Less than 4 hours? You can still build a pollinator corridor—just shift toward shade-tolerant blooms and foliage structure.
Layout Strategies That Make a Pollinator Garden Look “Front-Yard Appropriate”
Use the “Matrix + Moments” Method
For curb appeal, you want repetition (matrix) with a few bold features (moments). The matrix might be drifts of low, tidy plants that knit everything together. The moments are the taller, showier perennials that pull your eye from the street.
Rule of thumb: Aim for 70% matrix plants and 30% moment plants. This ratio keeps the design calm, even when it’s buzzing with life.
Design for Layers: Low Edge, Mid Body, Tall Back
Layering is your best tool in a front yard because it creates a clean visual gradient:
- Edge (8–18 inches tall): tidy, repeatable, sidewalk-friendly
- Mid layer (18–30 inches): bulk of blooms and host plants
- Back layer (30–48+ inches): vertical accents, fall nectar, seed heads
Keep anything above 30 inches at least 18 inches back from the sidewalk edge so it doesn’t flop into the walking path.
Plant in Clumps for Efficient Foraging
Pollinators forage more efficiently when the same plant is grouped. The Xerces Society recommends planting flowers in “clumps” to help pollinators find and use resources effectively (Xerces Society, 2023). In practical terms: repeat groups of 3, 5, or 7 of a plant rather than scattering singles.
Build Bloom Continuity: March Through October
A real highway has reliable stops. Your front yard should, too. Prioritize at least 3 distinct bloom windows:
- Early season: supports queen bumblebees and emerging natives
- Mid season: keeps populations building
- Late season: critical fuel before migration/dormancy
“Planting for continuous bloom throughout the growing season is one of the most effective ways to support a diversity of pollinators.” — Xerces Society guidance on pollinator habitat (Xerces Society, 2023)
Three Real-World Front Yard Scenarios (With Layouts That Actually Fit)
Scenario 1: The Sunny 4-Foot Parkway (Heat + Road Salt)
Space: 4 ft × 20 ft, full sun (7+ hours), reflected heat, occasional drought.
Design move: A crisp edge of low plants, mid-layer color blocks, and two vertical “beacons” to bookend the strip.
Spacing plan:
- Edge plants spaced 10–12 inches apart
- Mid-layer perennials spaced 14–18 inches apart
- Vertical accents spaced 24–30 inches apart
Scenario 2: The Part-Sun Foundation Bed (Morning Sun, Afternoon Shade)
Space: 6 ft × 15 ft, 4–5 hours sun.
Design move: Use shade-tolerant bloomers plus pollinator-friendly shrubs for structure. Add a small “landing pad” of flat-topped flowers near the walkway where butterflies can feed without battling wind.
Scenario 3: The Renter-Friendly Front Walk Border (Containers + Removable Beds)
Space: 2 ft × 25 ft plus porch area, mixed light.
Design move: Repeat containers every 5–6 feet like streetlights, connecting them with a narrow ribbon of low annuals or a temporary edging bed you can lift later. This reads intentional, doesn’t require major digging, and moves with you.
Plant Selection: Specific Varieties That Perform and Feed Pollinators
Choose plants with high nectar/pollen value, long bloom time, and sturdy garden manners. Avoid heavily doubled flowers (often less accessible). Where possible, prioritize regionally native species, but don’t be afraid to use well-behaved non-natives if they extend bloom and don’t escape.
Sunny “Highway” Core Plants (Reliable, Long Bloom)
1) Purple coneflower (Echinacea purpurea ‘Magnus’)
Why it works: long bloom, sturdy stems, seed heads feed birds later, easy in average soil. Plant in clumps of 3–7, spaced 18 inches.
2) Catmint (Nepeta ‘Walker’s Low’)
Why it works: early and repeat bloom, tidy mound, softens edges, drought tolerant once established. Space 18–24 inches. Great matrix plant.
3) Threadleaf coreopsis (Coreopsis verticillata ‘Zagreb’)
Why it works: fine texture, long yellow bloom, heat tolerant. Space 12–18 inches. Keeps the design from feeling heavy.
4) Anise hyssop (Agastache foeniculum ‘Blue Fortune’)
Why it works: a magnet for bees, long summer bloom, upright habit. Space 18 inches.
5) Goldenrod (Solidago ‘Fireworks’)
Why it works: late-season nectar powerhouse, arching form, excellent for fall. Space 24–30 inches. Place toward the back layer or as a “beacon.”
Host Plants (Because Nectar Alone Isn’t the Whole Story)
6) Milkweed (Asclepias tuberosa)
Why it works: monarch host plant, orange summer bloom, drought tolerant. Space 18 inches. In tidy designs, use it as a mid-layer clump with a neat edge in front.
7) Switchgrass (Panicum virgatum ‘Northwind’)
Why it works: structure, winter habitat, upright form that reads “designed.” Space 24–30 inches. Pair with late-season bloomers.
Part-Sun Performers (Foundation Bed Heroes)
8) Mountain mint (Pycnanthemum muticum)
Why it works: pollinator traffic is intense, handles part sun, silvery bracts look refined. Space 18–24 inches. (It can spread; edge it with a spade once a year.)
9) Hardy geranium (Geranium ‘Rozanne’)
Why it works: extremely long bloom, excellent groundcover, good for tidy edges. Space 18–24 inches.
10) Oakleaf hydrangea (Hydrangea quercifolia ‘Pee Wee’)
Why it works: shrub structure for a front yard, summer bloom, beautiful foliage. Place with 3–4 ft of width in mind; keep it off tight walkways.
Early-Season Jumpstart (Critical for Emerging Pollinators)
11) Crocus (Crocus tommasinianus)
Why it works: early pollen/nectar, naturalizes, fits under perennials. Plant bulbs 3 inches deep, 3 inches apart.
12) Prairie smoke (Geum triflorum)
Why it works: spring bloom + ornamental seed heads, stays compact, drought tolerant. Space 12–15 inches.
A Quick Comparison: Choosing the Right “Backbone” Plants
| Plant | Bloom Window | Best Sun | Typical Height | Design Role |
|---|---|---|---|---|
| Nepeta ‘Walker’s Low’ | Late spring–summer (reblooms) | Full sun | 18–24 in | Matrix/edge softener |
| Echinacea ‘Magnus’ | Summer | Full sun | 30–36 in | Mid-layer “moment” |
| Agastache ‘Blue Fortune’ | Mid-summer–fall | Sun–part sun | 24–36 in | Pollinator beacon |
| Solidago ‘Fireworks’ | Late summer–fall | Full sun | 36–48 in | Late-season anchor |
| Panicum ‘Northwind’ | Late summer (seedheads)–winter interest | Full sun | 48–60 in | Structure + habitat |
Step-by-Step Setup: From Lawn to Highway (DIY-Friendly)
Below is a process that works for homeowners and renters (with tweaks), and it’s realistic to complete over a weekend plus planting time.
- Mark the bedline with a hose or string. For a clean, designed look, use long curves or straight lines—avoid wiggly edges. A bed depth of 4 ft is a sweet spot for layered planting without crowding.
- Remove turf using one of two methods:
- Fast method: sod cutter rental (~$90/day in many areas) plus disposal.
- Budget method: sheet mulching: cardboard + 3 inches compost + 2 inches mulch; wait 6–8 weeks (or start in fall for spring planting).
- Improve soil strategically. You don’t need to amend everything. Add compost in planting zones: about 1 inch over the bed (roughly 0.6 cubic yards per 200 sq ft). Avoid over-fertilizing; many pollinator plants prefer leaner soil.
- Lay out plants in pots first. Set your matrix plants in repeating drifts, then place taller “moments” as punctuation every 6–8 ft. Step back to the sidewalk and adjust until it reads calm.
- Plant and water in. Dig holes twice the pot width, plant at soil level, and water deeply. Plan on 1 inch of water/week for the first 4–6 weeks.
- Mulch lightly (especially around crowns). Use 1.5–2 inches shredded mulch, keeping it an inch away from stems.
- Add one small sign if your neighborhood is skeptical. A simple “Pollinator Habitat” marker often prevents well-meaning complaints and signals intention.
Budget, Costs, and Smart Shortcuts
Let’s put real numbers to it. For a 200 sq ft front-yard pollinator highway:
- Plants: 45–60 perennials (mix of 1-gallon and plugs). Expect $4–$8 per plug and $12–$18 per 1-gallon in many garden centers.
- Mulch: about 1.25 cubic yards at 2 inches depth for 200 sq ft. Bulk mulch often runs $35–$55/yard plus delivery.
- Compost: $40–$60/yard bulk (or bagged for more).
- Edging (optional): steel edging can run $2–$4 per linear foot; a crisp spade-cut edge is free.
Budget ranges:
- DIY budget build: $250–$600 (more plugs, sheet mulching, minimal edging)
- Mid-range: $700–$1,400 (more 1-gallon plants, delivered mulch/compost, a few shrubs)
- Design-forward splurge: $1,500–$2,500 (specimen shrubs, steel edging, dense initial planting)
DIY alternative that still looks designed: start with 3 anchor species (e.g., Nepeta, Echinacea, Solidago) and repeat them strongly, then add seasonal “layers” each year. This staged approach keeps year-one costs down and prevents impulse buying.
Making It a Real “Highway”: Connectivity and Pesticide Choices
If you want the garden to function, not just bloom, avoid systemic insecticides and be careful with any pesticide use. The U.S. Environmental Protection Agency notes that pollinators can be exposed to pesticides through pollen and nectar (EPA, 2024). Practically, that means: skip prophylactic treatments, tolerate minor leaf damage, and use targeted methods (hand-picking, strong water spray, or least-toxic soaps used at dusk when pollinators are inactive).
Also, keep the corridor continuous: repeat key plants across separate beds (walk border + foundation + parkway), or connect with containers. Even a 15–20 ft ribbon of repeating blooms can act like a “mini corridor” in dense neighborhoods.
Maintenance Expectations: What You’ll Actually Do, Week to Week
Good news: once established, this is less work than lawn. Year one is about watering and weeding; year two is editing and enjoying.
Time per week:
- Weeks 1–8: 30–45 minutes/week (watering checks, spot weeding)
- After establishment: 15–30 minutes/week during the growing season
Seasonal task list:
- Spring: cut back stems (or leave some until consistent warm temps), divide or edge spreaders like mountain mint, top-dress with 0.5 inch compost if needed.
- Summer: deadhead selectively (not obsessively), water during drought (deep soak every 7–10 days if rainfall is absent), watch for plants leaning into walkways and do a quick trim.
- Fall: leave seed heads on coneflower and grasses; they’re habitat and winter structure. Plant bulbs for early bloom.
- Winter: do nothing but admire frost on grasses—this is when your “designed” structure pays off.
Small Details That Make the Design Feel Finished
Edge discipline: A crisp edge (spade-cut or edging) is the simplest way to signal intention. If you do one thing for neighborhood friendliness, do this.
Repeat one color: Choose a repeat bloom color that appears in every bed (for example, purple/blue via Nepeta and Agastache). This makes separate patches read like one project.
Include a “pause”: Add one stepping stone, a small bench, or a boulder. Pollinator gardens look better when there’s a moment for the human eye to rest.
Three Mini Case Examples You Can Borrow (No Perfect Yard Required)
Case A: The corner lot with wind
They placed two clumps of switchgrass ‘Northwind’ 6 ft apart as wind-filter “posts,” then filled between with Agastache and coneflower. The grasses stopped the garden from looking flattened and created sheltered pockets where butterflies actually landed.
Case B: The shaded porch approach
A homeowner with 4 hours of sun near the house used oakleaf hydrangea ‘Pee Wee’ as the backbone, underplanted with ‘Rozanne’ geranium and pockets of mountain mint. The result looked like a classic foundation planting but carried steady bee activity from late spring through summer.
Case C: The renter with strict rules
They set five containers (each 18 inches wide) along the walk, planted with nepeta, salvia, and trailing thyme, then added a removable, narrow bed of annual alyssum as a connector. Everything moved to the next home, and the repeating pots created a clear “corridor” feeling even without in-ground planting.
The best front yard pollinator highway isn’t the biggest or most expensive—it’s the one that stays blooming, stays connected, and looks intentional from the curb. If you can commit to a clean edge, clumped plantings, and a bloom sequence that runs from early spring bulbs to fall goldenrod, your front yard stops being a problem to solve and becomes a route that living things can rely on—right up to your front door.
Citations: Xerces Society (2023). Pollinator habitat guidance emphasizing clumped plantings and season-long bloom; U.S. Environmental Protection Agency (EPA) (2024). Pollinator exposure pathways to pesticides via pollen/nectar and risk considerations.