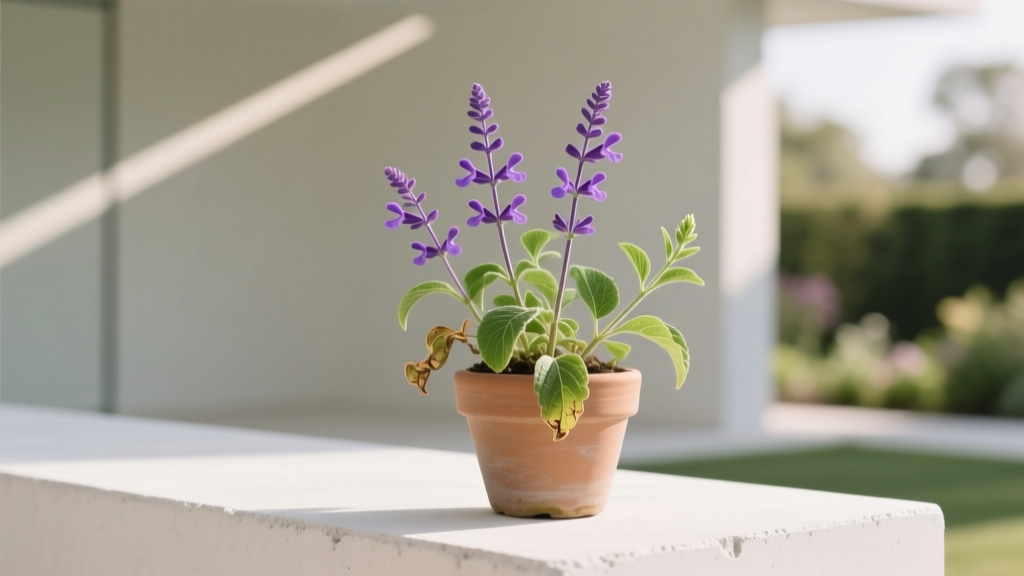
How to Acclimate Salvia to New Conditions
You bring home a gorgeous salvia from the nursery, plant it the same afternoon, water it well… and three days later it looks like it’s been through a drought and a windstorm. Leaves sag, flowers fade, and you start second-guessing everything. Here’s the surprising part: most “new plant failures” aren’t about your soil being terrible or your thumb not being green. They’re about a sudden change in conditions—light, wind, temperature, and moisture—hitting a plant that was grown in a protected environment. Salvias are tough once established, but they can sulk (or crash) if you don’t ease them into their new reality.
I’ve acclimated salvias through spring cold snaps, scorching patio heat, and that classic situation where a plant goes from a greenhouse to full sun in one afternoon. This article lays out a practical, repeatable way to help salvias transition with minimal stress—whether you’re moving a plant outdoors, transplanting into the ground, or shifting a pot from shade to sun.
What “acclimation” means for salvia (and why it matters)
Acclimation is the process of gradually adjusting a plant to new light intensity, temperature swings, wind exposure, and watering patterns. Nursery-grown salvias are often raised under shade cloth, consistent irrigation, and protection from wind. When they move into a home garden, the changes can be dramatic—especially if you plant during a heat wave or right before a cold, wet spell.
Extension research consistently points to transplant shock as a major cause of early plant stress: disturbed roots, altered moisture availability, and increased transpiration from sun and wind exposure. The University of Minnesota Extension emphasizes that root disturbance and water imbalance are primary drivers of transplant stress (University of Minnesota Extension, 2020). Similarly, Royal Horticultural Society guidance notes that hardening off (gradual exposure) reduces leaf scorch and growth checks when plants move outdoors (RHS, 2023).
“Hardening off is the controlled introduction of plants to outdoor conditions—light, temperature and wind—so tissues toughen and water loss stays manageable.” — Royal Horticultural Society guidance (RHS, 2023)
Three real-world acclimation scenarios (and what changes)
Salvia acclimation isn’t one-size-fits-all. Here are three common situations I see in home gardens, and the specific stressors at play.
Scenario 1: Nursery pot to in-ground planting (same sun exposure)
Main stressors: root disruption, soil moisture differences, and microbial shift. Even if the sun exposure is similar, the ground dries and drains differently than a potting mix.
Scenario 2: Indoor overwintered salvia moving outdoors in spring
Main stressors: light intensity jump (window light is weak compared to sun), wind, and cold nights. This is classic “hardening off” territory.
Scenario 3: Container salvia moved from part shade to full sun (or onto hot pavement)
Main stressors: heat build-up in the pot, higher evaporation, and leaf scorch. A black nursery pot on concrete can run dramatically hotter than the surrounding air.
Step-by-step: A dependable 7–10 day acclimation plan
If you only take one thing from this guide, take this plan. It works for most salvias—ornamental sages like Salvia nemorosa, S. greggii, and S. farinacea—and it’s especially important for tender salvias moving outdoors.
Day 1–3: Start sheltered and bright
- Place the plant outdoors in bright shade (under a tree canopy or on the north/east side of a building) for 2–4 hours, then bring it back to shelter.
- Avoid wind tunnels. Wind is a bigger shock than many gardeners realize.
- Keep night exposure conservative: if nights drop below 50°F (10°C) for tender salvias, bring them in or provide protection.
Day 4–6: Introduce gentle morning sun
- Give 1–2 hours of morning sun (before 11 a.m.), then move back to bright shade.
- Check moisture daily (more on watering below). A plant acclimating to sun can go from “fine” to “wilting” in a single warm afternoon.
Day 7–10: Increase sun and time outdoors
- Increase sun exposure by 60–90 minutes per day if the plant is holding steady (no scorch, no repeated midday collapse).
- By day 10, most salvias can stay out full-time in their target spot—assuming weather is cooperative.
Temperature guardrails: If a late cold snap is forecast, pause the process. Many salvias tolerate cool weather once established, but a newly transitioned plant is more vulnerable. For spring moves, I like a minimum nighttime range of 45–50°F (7–10°C) for steady progress.
Light acclimation: prevent scorch and stalling
Light is the big one. A salvia leaf formed in lower light has thinner cuticles and fewer protective pigments. Put it into full sun too quickly and you’ll see bleaching or crisp brown patches—often within 24–72 hours.
Signs you increased light too fast
- Bleached patches on upper leaves (especially on the south/west side)
- Leaf edges turning tan and crispy
- Flowers shriveling quickly even when soil is moist
What to do if scorch happens
- Move the plant back to bright shade for 3–5 days.
- Water deeply once (don’t “sip” daily unless the pot is truly drying fast).
- Resume morning sun only, increasing exposure more slowly—think 30–45 minutes increments.
Pro tip: If you’re planting in-ground, you can use temporary shade cloth (30–40%) or even an upside-down laundry basket for afternoon protection during the first week—just keep airflow decent.
Watering during acclimation: enough to root, not enough to rot
Watering is where most acclimation attempts go sideways. New gardeners often overwater to “help,” while experienced gardeners sometimes underwater because “salvia is drought-tolerant.” Both can be true at different stages.
Golden rule: match water to root access
Right after transplanting, roots are limited to the original root ball and a small interface zone with the surrounding soil. That means the plant can’t access deep moisture yet. You’re aiming to keep the root ball evenly moist—like a wrung-out sponge.
Concrete watering numbers you can use
- In-ground, week 1: water slowly with 0.5–1 gallon per plant every 2–3 days if no rain and temps are 70–85°F (21–29°C).
- In-ground, week 2–3: shift to 1 gallon every 4–6 days, encouraging roots to explore.
- Containers (10–12 inch pot): water until 10–15% drains out the bottom, then wait until the top 1 inch of mix is dry before watering again.
If you’re dealing with a heat wave (highs above 90°F / 32°C) or steady wind, shorten intervals. But don’t fall into the habit of frequent light watering—it trains roots to stay shallow and can keep the crown too wet.
Troubleshooting watering problems (symptoms and fixes)
Symptom: Plant wilts at midday but recovers by evening
- Likely cause: normal temporary transpiration stress, especially during acclimation.
- Fix: provide afternoon shade for 3–7 days; water early morning, not at noon; mulch (see soil section).
Symptom: Persistent limp leaves morning and night
- Likely cause: root ball dried out (common when potting mix repels water) or roots are waterlogged.
- Fix: check the root ball moisture by finger test 2 inches deep. If dry, soak the pot/root ball in a bucket for 10–15 minutes then let drain. If soggy, improve drainage and pause watering until it’s only slightly moist.
Symptom: Lower leaves yellowing and dropping
- Likely cause: too much water + low oxygen at roots, especially in heavy soil.
- Fix: reduce frequency; ensure the crown isn’t buried; consider lifting and replanting slightly higher if the site stays wet.
Soil and planting: set the roots up for fast recovery
Salvias hate sitting wet. Most prefer well-drained soil, and many perennial salvias perform best in moderately fertile ground rather than rich, heavily amended beds.
Planting depth and crown care
- Plant so the top of the root ball is level with the soil surface, or even 1/2 inch high in heavier soils.
- Keep mulch pulled back 2 inches from the crown to prevent rot.
Mulch: a quiet acclimation tool
A 1–2 inch layer of fine mulch or shredded bark moderates soil temperature and moisture swings. This is especially helpful in scenario 1 (new in-ground planting) and scenario 3 (hot patio conditions). Just don’t smother the crown.
Soil texture adjustments (practical, not fussy)
- Heavy clay: plant slightly high; incorporate coarse compost in a broad area (not just the hole); consider adding grit or expanded shale if drainage is poor.
- Very sandy soil: add compost to improve water-holding, then mulch to reduce evaporation.
Feeding: less in the first weeks, more after you see new growth
Fertilizer is not a cure for transplant shock. In the first couple of weeks, too much nitrogen can push soft growth before roots are ready, making the plant more prone to wilting and pests.
Feeding timeline that works
- Week 0–2: skip fertilizer unless the plant is clearly nutrient-starved (rare for nursery stock).
- After you see new growth (often day 14–21): apply a light feeding—either a balanced slow-release at 1/2 label rate or a liquid feed at 1/4 strength.
Many salvias flower better with modest fertility. If you feed heavily, you may get lush stems and fewer blooms—especially with S. greggii types.
Method comparison: hardening off vs. planting immediately with shade protection
Gardeners often ask me if they can skip the shuffle of moving pots in and out. You can—if you compensate with temporary shade and close watering attention. Here’s how the two methods stack up in real, practical terms.
| Method | Time to implement | Risk of leaf scorch | Watering workload (first 10 days) | Best use case |
|---|---|---|---|---|
| Gradual hardening off (7–10 days) | 10–15 minutes/day handling + monitoring | Low if increased by 60–90 minutes/day | Moderate; check daily, water every 2–4 days in-ground | Indoor-to-outdoor moves; tender salvias; spring weather swings |
| Plant immediately + temporary shade (30–40% shade cloth) | 1 setup session (20–40 minutes) | Medium; depends on shade placement and heat | Higher; soil around new root ball can dry fast | Busy schedules; large plantings; when you can irrigate reliably |
| Plant immediately, no shade | Fastest | High in full sun, especially above 85°F (29°C) | Unpredictable; often leads to reactive overwatering | Only when conditions are mild (65–75°F / 18–24°C) and overcast |
If you want the most consistent results, use the hardening-off method. If you need speed, plant and shade—but be disciplined about moisture and airflow.
Common acclimation problems (what you’ll see, what to do)
These are the issues I run into most often when salvias are adjusting to a new spot. The key is reading the plant’s timing: problems that show up in the first 3–10 days are usually environmental shock, not disease.
Problem: Leaves curl and feel dry, but soil is damp
- Likely cause: wind stress + sun intensity driving transpiration faster than roots can supply.
- Fix: move to wind protection; add temporary shade for afternoons; ensure deep watering early morning. Don’t add fertilizer.
Problem: Stems flop after transplant
- Likely cause: disturbed root anchoring and soft greenhouse growth.
- Fix: lightly stake for 1–2 weeks; pinch tips only after you see new growth; avoid heavy pruning immediately.
Problem: Flower drop right after planting
- Likely cause: normal stress response; plant redirects energy to roots.
- Fix: deadhead spent blooms; keep care steady. Flowers usually return within 2–4 weeks if conditions are good.
Problem: Powdery mildew shows up during acclimation
- Likely cause: crowded foliage + humid nights, especially if you’re overwatering late in the day.
- Fix: water in the morning; thin for airflow; avoid overhead watering. If needed, treat with labeled options like horticultural oil or potassium bicarbonate, following the product directions.
Powdery mildew is more about airflow and plant stress than “dirty gardens.” Keeping the plant from swinging between drought-stress and overwatering helps a lot.
Special notes by salvia type (because not all salvias behave the same)
“Salvia” covers a lot of ground. Acclimation principles are similar, but tolerance varies.
Perennial salvias (e.g., Salvia nemorosa, S. × sylvestris)
- Generally cold-hardy and handle spring acclimation well.
- Often prefer full sun; once established, can handle moderate drought.
- Benefit from a post-bloom cutback, but wait until the plant is clearly growing again after transplant.
Tender salvias (e.g., Salvia farinacea in cooler climates, some S. greggii selections)
- More sensitive to cold nights; use the 50°F (10°C) rule as a conservative guide for outdoor overnights.
- Appreciate excellent drainage—especially in containers.
Big-leaf, moisture-leaning salvias (some shade-tolerant species)
- Acclimate them to sun very cautiously; many prefer bright shade or morning sun only.
- If leaves are large and thin, assume they will scorch faster than small, textured foliage.
Case files from real gardens (what worked and what didn’t)
Case 1: The patio pot that kept wilting every afternoon. A gardener moved a flowering S. greggii from a nursery bench into a 12-inch pot on west-facing concrete. Air temps were only 86°F (30°C), but the pot zone overheated. Fix: we slid the pot into a larger, light-colored cachepot (air gap insulation), added 1 inch mulch on top of the mix, and provided afternoon shade for a week. Wilting stopped within 48 hours.
Case 2: The in-ground salvia that yellowed from the bottom up. This one was planted into a clay pocket and watered daily “just to be safe.” Lower leaves yellowed and stems looked dull. Fix: we stopped daily watering, pulled mulch back from the crown, and gently lifted/replanted 1/2 inch higher. Within 10–14 days, new growth appeared and the yellowing slowed.
Case 3: Indoor overwintered salvia with instant sunburn. The plant went from a sunny windowsill to full outdoor sun on a bright day. Leaves bleached within 2 days. Fix: we cut the worst leaves, moved to bright shade for 5 days, then reintroduced 90 minutes of morning sun and increased slowly. It took about 3 weeks to look “normal,” but it recovered fully.
Quick checklist: acclimate salvia like a pro
- Increase sun gradually over 7–10 days; start with bright shade.
- Protect from wind during the first week—wind can be more stressful than heat.
- Water deeply but not constantly: aim for 0.5–1 gallon every 2–3 days at first (in-ground), adjusting for weather.
- Plant at the right height; keep mulch 2 inches back from the crown.
- Hold fertilizer until you see new growth (often day 14–21).
When a salvia struggles after a move, don’t assume it’s “not a salvia spot” yet. Most of the time, the plant just needs a calmer ramp into sun, wind, and your particular watering rhythm. Give it that ramp, and you’ll usually see the turnaround: firmer stems, cleaner new leaves, and flowers that last instead of collapsing in a weekend.
Sources: University of Minnesota Extension transplanting guidance (2020); Royal Horticultural Society hardening off guidance (RHS, 2023).