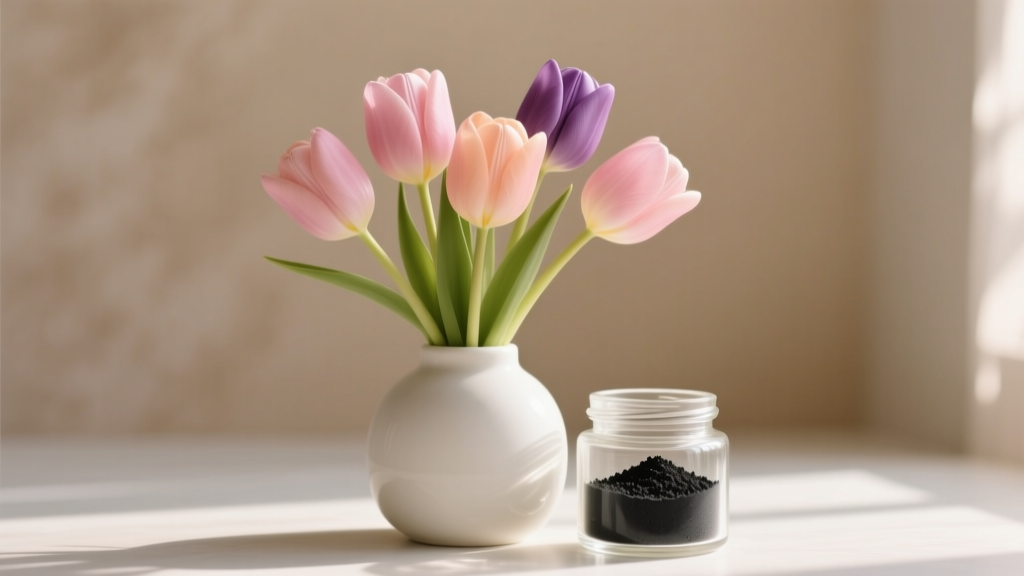
How to Use Activated Charcoal with Tulips
You plant tulip bulbs in fall, you do everything “right,” and then spring arrives with a gut punch: a few shoots emerge, stall, and topple over. When you dig gently, you find the culprit—soft, brown, sour-smelling bulb tissue. It’s one of those problems that feels unfair because it often starts months earlier, when soil stayed too wet a little too long. Activated charcoal can’t undo rot, but used correctly it can tip the odds back in your favor—especially in containers, bulb storage, and those “my soil is fine until it rains for a week” gardens.
I use activated charcoal as a practical tool: it helps manage excess moisture around bulbs, reduces odors associated with anaerobic conditions, and gives you a cleaner, more forgiving root zone when conditions aren’t perfect. It’s not a fertilizer, and it’s not magic. But it’s one of those small, inexpensive steps that can prevent a $20 bag of specialty bulbs from turning into compost.
What activated charcoal actually does (and what it doesn’t)
Activated charcoal is carbon processed to create a huge internal surface area. In gardening terms, that means it can adsorb (bind on the surface) certain compounds and odors and can help “buffer” a damp, stagnant pocket of potting mix. It’s widely used in terrariums and orchid culture for a reason: it’s helpful when air is limited and water can linger.
What it’s good for with tulips:
- Reducing that sour, anaerobic smell in overly damp potting mixes (a sign oxygen is lacking).
- Helping keep the immediate bulb area cleaner in containers where drainage can be imperfect.
- Dusting minor bulb wounds to discourage opportunistic rot organisms from getting a foothold.
- Freshening storage boxes so bulbs don’t sit in a musty microclimate.
What it won’t do:
- It won’t “sterilize” soil or cure active fungal/bacterial bulb rot.
- It won’t replace drainage, proper watering, or correct planting depth.
- It won’t feed your tulips—charcoal contains essentially no plant nutrients in a usable form.
For grounded guidance on tulip culture and preventing bulb issues, Cornell University’s Flower Bulbs guide emphasizes well-drained soil and correct planting depth as the first line of defense (Cornell University Cooperative Extension, 2023). Likewise, the Royal Horticultural Society notes tulips dislike winter-wet conditions and benefit from sharp drainage and careful watering in containers (Royal Horticultural Society, 2022).
“Most bulb failures trace back to oxygen-poor, waterlogged conditions—not a lack of fertilizer.” — Notes compiled from extension-style bulb recommendations, echoed across university bulb culture publications (e.g., Cornell University Cooperative Extension, 2023)
Picking the right charcoal (this matters more than people think)
Use horticultural activated charcoal or aquarium-grade activated carbon. Avoid charcoal briquettes and anything with lighter fluid, binders, or added salts.
Quick checklist before you buy
- Label should say “activated charcoal” or “activated carbon.”
- No fragrances, no starter chemicals, no “easy light.”
- Granule size: small chunks (2–8 mm) are ideal for mixes; powder is best for dusting wounds.
Real-world scenarios where activated charcoal helps tulips
Here are three situations I see over and over—where charcoal is genuinely useful (and where it’s not just another product to buy).
Scenario 1: Container tulips that keep rotting despite “drainage holes”
You have holes, but the mix holds water like a sponge, or the pot sits on a saucer that never dries. Charcoal used as a thin layer and mixed into the root zone helps keep the bulb area from turning stagnant—but only if you fix drainage and watering too.
Scenario 2: Fall planting in a low spot that stays wet for 48–72 hours after rain
Charcoal in the ground can help a little, but it’s not the best solution. In beds, the winning move is improving drainage with grit/compost and planting on a slight mound. I’ll still use a light dusting on bulbs if I nick them during planting.
Scenario 3: Bulbs in storage that develop a musty smell or surface mold
Charcoal shines here. A small amount in the storage container can adsorb odors and keep the storage environment fresher while you maintain proper airflow and temperature.
How to use activated charcoal when planting tulips (containers)
Containers are where activated charcoal is most practical because you control the entire environment. Your goal is a mix that drains fast but doesn’t dry to dust overnight.
Container soil recipe (reliable and repeatable)
For a 10-inch (25 cm) pot, I like:
- 2/3 high-quality potting mix
- 1/3 drainage material (pumice, perlite, or coarse horticultural grit)
- 1–2 tablespoons (15–30 mL) activated charcoal mixed into the lower half of the pot
Important: don’t overdo charcoal. Too much can make the mix harder to re-wet evenly and is simply wasted material. In most home containers, about 1% by volume is plenty.
Step-by-step: planting with charcoal in a pot
- Choose a pot with drainage holes. For 10–12 tulip bulbs, use at least a 12-inch (30 cm) wide pot.
- Add mix to fill the pot about halfway.
- Sprinkle 1 tablespoon activated charcoal and lightly mix it into that lower layer.
- Set bulbs with pointed side up. Planting depth in pots: aim for 6–8 inches (15–20 cm) from bulb tip to soil surface.
- Backfill, firm gently, and water once until you see a steady stream from the drainage holes (not a trickle).
- Move the pot to a cold location for rooting: ideally 35–48°F (2–9°C) for 10–14 weeks.
This cold period is not optional for most tulips—it’s how they build roots and prepare to flower. If you’re in a mild-winter area, you may need to pre-chill bulbs at 35–45°F (2–7°C) for 10–12 weeks in a refrigerator (away from ripening fruit).
How to use activated charcoal when planting tulips (in-ground)
In beds, charcoal is a “supporting actor.” Drainage and planting depth do the heavy lifting.
Best use in-ground: dusting and micro-dosing
- If you accidentally scrape a bulb with your trowel, dust the wound with a pinch of charcoal powder before planting.
- In a known problem area, mix 1–2 cups of activated charcoal into every 10 square feet of planting zone, but only if you’re also adding drainage material (grit/pumice) and not creating a bathtub of compost.
Plant tulips 6–8 inches deep (deeper end for sandy soil), spaced 4–6 inches apart. If your soil stays wet, plant on a slight mound 2–4 inches higher than the surrounding grade so water moves away from the bulbs.
Watering tulips when using activated charcoal
Charcoal doesn’t “fix” overwatering; it just makes a damp zone less nasty. Treat watering as the main lever.
Fall and winter (rooting phase)
- In-ground: water at planting, then usually let rainfall do the job unless autumn is very dry. If you can squeeze a handful of soil and it clumps like modeling clay, don’t add water.
- Containers: after the initial soak, water lightly only when the top 1 inch (2.5 cm) is dry. In cold weather, that may be every 10–21 days, not weekly.
Spring (active growth)
When shoots are up 2–4 inches (5–10 cm), keep moisture steady but never soggy. A practical target in containers is to water when the pot feels noticeably lighter and the top inch is dry—then water thoroughly. Frequent sips encourage shallow roots and keep the bulb zone damp.
After flowering
Once petals drop, keep watering for about 2–3 weeks while leaves photosynthesize. Then taper off as foliage yellows. If you keep watering heavily into summer, you’re inviting bulb rot.
Soil and drainage: the real foundation
If you remember one thing: tulips tolerate cold; they do not tolerate sitting in water. Charcoal is a helper, not a substitute for drainage.
Drainage targets you can actually use
- Water should move through a container and exit freely within 30–60 seconds after a full soak.
- In beds, if a planting hole still has water in it 2 hours after filling, you have a drainage problem. Plant elsewhere or build a raised area.
Comparison table: charcoal methods that work (and when)
| Method | How much activated charcoal | Best for | What it improves | Where it falls short |
|---|---|---|---|---|
| Mixed into potting mix | 1–2 tbsp per 10-inch pot (about 15–30 mL) | Container tulips | Reduces stagnant odors; buffers wet pockets | Doesn’t replace drainage holes or a fast-draining mix |
| Thin layer below bulbs (“charcoal sprinkle”) | 1–2 tsp (5–10 mL) under planting area | Containers; forcing pots | Keeps bulb base a bit cleaner if moisture lingers | Too thick a layer can create an uneven moisture boundary |
| Dusting bulb wounds | A pinch of powder per bulb | Any planting where bulbs get nicked | Helps dry/clean minor wounds | Won’t save soft, already-rotting bulbs |
| Storage box deodorizer | 1–3 tbsp per storage bin | Summer bulb storage | Adsorbs musty odor; fresher microclimate | Still needs airflow and correct temperature |
Light and temperature: getting strong stems, not floppy tulips
Tulips need bright light during active growth. Outdoors, give them at least 6 hours of sun for the sturdiest stems. In partial shade they’ll often lean and stretch, especially in warm springs.
Temperature matters too:
- Rooting/chilling: 35–48°F (2–9°C) for 10–14 weeks
- Ideal spring growth: roughly 50–65°F (10–18°C)
- When temps push above 70°F (21°C) for long stretches, blooms fade faster and stems can get leggy
If you’re forcing tulips indoors, keep them cool once they come out of chilling. A bright room at 55–60°F (13–16°C) will give longer-lasting flowers than a warm, sunny windowsill above a radiator.
Feeding tulips (and how charcoal fits in)
Activated charcoal doesn’t feed tulips. The bulb is the pantry; your job is to support root function and rebuild the bulb after bloom.
Simple feeding schedule that works
- At planting (fall): mix a bulb fertilizer into the planting zone following label rates, or use a balanced slow-release like 5-10-10. Avoid high nitrogen.
- Early spring: when shoots are 2–3 inches tall, apply a light top-dress of bulb fertilizer.
- After flowering: skip feeding if foliage is already yellowing; feeding only helps when leaves are green and active.
One caution: activated charcoal can adsorb certain compounds. Don’t put fertilizer directly into a thick charcoal layer expecting it to “hold nutrients.” Instead, keep charcoal use modest and focus on good soil structure and correct fertilizer timing.
Common problems charcoal can help with (and problems it can’t)
Let’s get practical—here’s what I’d troubleshoot first in real gardens.
Troubleshooting: bulbs rot before sprouting
Symptoms: no emergence by mid-spring; bulbs are soft, brown, smelly.
Likely causes: waterlogged soil, poor drainage, planting too shallow in heavy soil, damaged bulbs.
What to do:
- Discard rotten bulbs (don’t compost if they’re mushy and foul).
- Replant in a faster-draining spot or container. Aim for at least 30–40% grit/perlite/pumice in pots.
- Use charcoal as a support: mix 1–2 tbsp into the lower pot zone and dust any bulb nicks with powder.
- Adjust watering: after fall planting, water once and then stop unless the mix dries out.
Troubleshooting: gray mold on stored bulbs
Symptoms: fuzzy gray patches, musty smell, bulbs shrivel or develop soft spots in storage.
Likely causes: storage too warm, too humid, poor airflow, bulbs stored touching.
What to do:
- Store at 50–60°F (10–16°C) in a breathable crate or paper bags, not sealed plastic.
- Space bulbs so they don’t touch; remove any suspect bulbs immediately.
- Add 1–3 tbsp activated charcoal in an open dish or sachet inside the storage bin to keep odors down.
Troubleshooting: floppy stems and flowers that don’t last
Symptoms: stems lean, fall over, blooms fade in 2–3 days.
Likely causes: insufficient light, too warm during growth, overwatering, overly rich nitrogen fertilizer.
What to do:
- Move containers to full sun (target 6+ hours).
- Keep forced tulips cool: 55–60°F is your friend.
- Water deeply but less often; don’t keep the pot constantly damp.
- Charcoal won’t fix flopping—this is light and temperature first.
Troubleshooting: tips of leaves brown, growth slow
Symptoms: leaf tips scorch, plants look stuck, soil surface crusty.
Likely causes: salt buildup from frequent fertilizing, inconsistent watering, potting mix drying too much between waterings.
What to do:
- Leach the pot: slowly run water through the container for 2–3 minutes to flush salts.
- Reset watering rhythm: water when top 1 inch is dry, then soak thoroughly.
- Charcoal can help adsorb some impurities, but flushing and better watering habits are the real fix.
A practical comparison: charcoal vs. “more drainage material” (what’s worth your effort)
If you’re deciding where to spend effort, here’s the honest hierarchy based on results I see in home gardens:
- Best payoff: improving drainage (container mix structure, raised planting area, pot choice).
- Second best: correct watering timing (especially in winter rooting).
- Useful add-on: modest activated charcoal in containers and storage.
As an example, in a 12-inch container, swapping from a water-holding mix to one with 30–40% grit/perlite typically reduces “stagnant wet pockets” dramatically. Adding charcoal at 1–2 tablespoons helps, but it won’t rescue a mix that stays swampy for days.
Best practices for different tulip setups
Case: You’re planting tulips in a decorative pot with no drainage
Don’t. If you must use the pot, slip a nursery pot with drainage inside it. Put a spacer under the inner pot so it’s not sitting in water. Charcoal at the bottom of a drain-less pot is a classic terrarium trick, but for tulips it’s a gamble—bulbs are far more likely to rot when water can’t escape.
Case: You’re forcing tulips indoors for winter blooms
Use charcoal sparingly and focus on chill time and temperature control:
- Chill bulbs 10–12 weeks at 35–45°F (2–7°C).
- Pot with a fast-draining mix and 1 tbsp charcoal mixed into the lower half of a 10-inch pot.
- After chilling, bring into bright light at 50–60°F (10–16°C). Warm rooms shorten bloom life.
Case: You garden in heavy clay and tulips struggle every year
Charcoal isn’t your fix; drainage is. Either grow tulips in containers (my recommendation for consistent results) or build a raised bed/mounded row. If you insist on in-ground, add coarse grit and plant on a slight mound so water moves away from bulbs. Use charcoal only as a bulb-wound dusting or a minor soil amendment—not as the main strategy.
Safety and common mistakes
- Don’t use BBQ briquettes: additives can harm plants and soil life.
- Don’t create a thick “charcoal layer”: more than about 1/2 inch (1.2 cm) in a pot can contribute to uneven moisture movement. A light sprinkle or mixed-in approach is safer.
- Don’t ignore the saucer: empty it after watering. A pot sitting in water defeats everything.
- Don’t expect charcoal to stop pests: it won’t deter squirrels, voles, or aphids.
If you build your tulip routine around drainage, measured watering, and proper chilling, activated charcoal becomes a smart little insurance policy—especially in containers and bulb storage. Use it with a light hand, pair it with gritty, fast-draining media, and you’ll see fewer mystery failures when spring weather turns cold and wet for a week longer than it should.
Sources: Cornell University Cooperative Extension flower bulb guidance emphasizing drainage and planting depth (Cornell University Cooperative Extension, 2023); container and garden tulip culture guidance highlighting avoidance of winter-wet conditions (Royal Horticultural Society, 2022).