How to Correct High pH Soil for Peace Lilies
You bring home a peace lily that looked bulletproof in the store. Two months later, it’s still alive, but it’s not thriving: new leaves come out pale, the older leaves yellow between the veins, and the plant just seems stuck. You water “when it feels dry,” you’ve even fed it, and yet it looks worse. The surprise for a lot of home gardeners is this: the problem often isn’t a lack of fertilizer at all—it’s that the soil pH is too high for the plant to use the nutrients you’ve already given.
Peace lilies (Spathiphyllum) aren’t picky about many things, but they are picky about one: they prefer slightly acidic conditions. When the potting mix drifts alkaline, iron and manganese become harder for the plant to absorb, and you start seeing chlorosis (that washed-out, yellow look) even though the nutrients are technically present.
This guide walks you through how to confirm high pH, how to correct it safely in a container, and how to keep your peace lily stable afterward—using practical methods that don’t rely on wishful thinking.
First: Confirm It’s Actually High pH (and Not Something Else)
A lot of problems mimic “high pH stress,” so don’t skip the quick checks. Peace lilies commonly show similar symptoms from overwatering, compacted soil, cold drafts, and mineral-heavy tap water.
What pH range should a peace lily have?
For most indoor peace lilies, a soil pH around 5.8–6.5 is a comfortable target. They’ll tolerate a bit outside that, but once you’re consistently above 7.0, micronutrient lockout becomes much more likely.
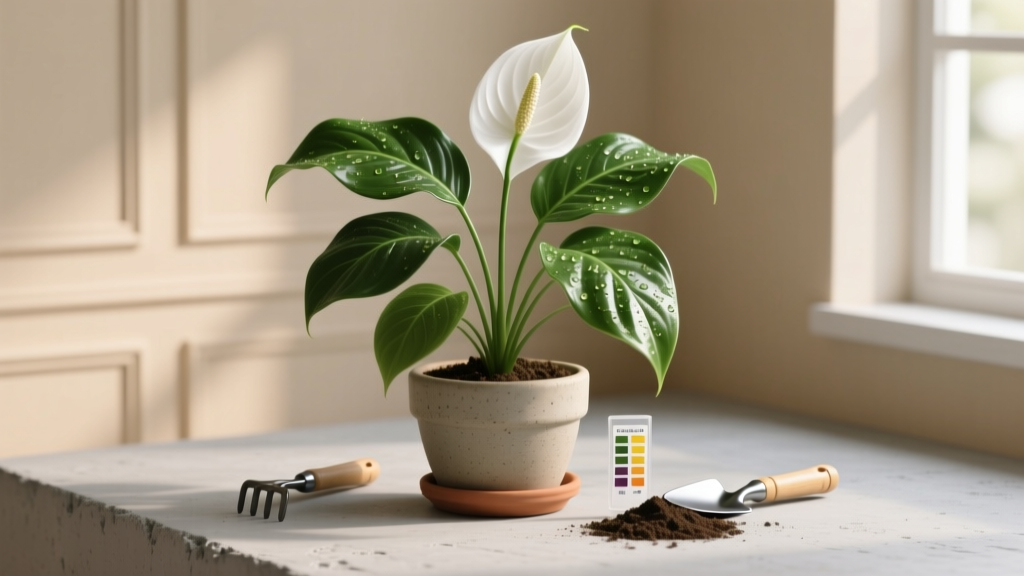
How to test pH correctly (in a pot)
- Use a soil slurry test for best accuracy: mix 2 tablespoons of potting mix with 2 tablespoons of distilled water, stir, let sit 10 minutes, then insert a pH probe or use a liquid test kit.
- If using test strips, wait until the sediment settles and dip into the clearer water.
- Use distilled water for the test—tap water can skew results if it’s alkaline.
If your reading is 7.2, 7.5, 8.0—that’s your smoking gun. If it’s 6.2 and the plant looks chlorotic, you’re likely dealing with something else (watering, root issues, pests, or salt buildup).
Quick symptom cross-check
- High pH / micronutrient lockout: new growth pale, yellowing between veins, overall “washed out,” slow growth.
- Overwatering / root stress: yellowing older leaves first, limp stems, sour soil smell, fungus gnats.
- Hard-water salt stress: crispy brown tips/edges, white crust on soil or pot rim.
Extension resources repeatedly point out that pH strongly influences nutrient availability and uptake; micronutrients like iron become less available as pH rises (University of Minnesota Extension, 2021). That’s why a plant can look “hungry” while sitting in fertilized soil.
Three Real-World Scenarios (and What Actually Works)
Scenario 1: The “perfect care” peace lily that stays pale
You water carefully and fertilize monthly, yet new leaves are light green and never deepen in color. You test soil and it reads 7.6. This often happens when the mix contains too much lime-based ingredient, or the plant has been watered for months with alkaline tap water. Fix is usually a repot into a more acidic, airy mix plus switching water sources.
Scenario 2: The peace lily in self-watering pot that declines slowly
Self-watering setups can concentrate minerals over time. You see white crust, tips brown, and pH reads 7.8. Here, you’ll usually need a flush and then either a repot or an ongoing plan using lower-mineral water. Simply “adding acid” rarely holds long-term if salts keep accumulating.
Scenario 3: The office peace lily watered from the breakroom sink
Office water is often hard and alkaline. The plant may survive for years but never looks lush. A simple change to filtered or rainwater plus a gentle acidifying approach often turns it around in 4–8 weeks.
Correcting High pH Soil: Choose the Right Method
There are two reliable paths: (1) reset the soil, or (2) gradually acidify while managing water chemistry. In a container, I’m biased toward solutions that are stable and hard to mess up.
| Method | How fast you’ll see improvement | Best for | Risk level | Notes / Data |
|---|---|---|---|---|
| Repot into fresh, slightly acidic mix | 1–3 weeks (new growth color improves) | pH > 7.2, compacted/old soil, rootbound plants | Low | Use pH 5.8–6.5 ingredients; refresh every 12–18 months |
| Flush salts + switch water source | 2–6 weeks | White crust, hard water, self-watering pots | Low–Medium | Flush with 3× pot volume; repeat in 30 days if needed |
| Elemental sulfur (top-dress) | 4–12 weeks | Mildly high pH (7.0–7.4) and stable conditions | Medium | Microbes convert sulfur to acid; slower indoors |
| Acidified irrigation water (carefully) | 1–4 weeks | High-alkalinity water source | Medium–High | Over-acidifying can burn roots; always measure pH |
“Soil pH affects the availability of nutrients… iron, manganese, and other micronutrients become less available in alkaline soils.” — University of Minnesota Extension (2021)
Step-by-Step: The Most Reliable Fix (Repotting to Reset pH)
If your peace lily’s soil pH is above 7.2, and especially if the mix is older than 18 months, repotting is usually the cleanest correction. You’re not just changing pH—you’re restoring air in the root zone, which peace lilies love.
What mix works (and why)
Aim for a mix that holds moisture but doesn’t stay swampy. Peace lilies like evenly moist conditions, but they need oxygen around the roots to avoid rot.
- Base: peat moss or coco coir (peat tends to be more acidic; coir is often closer to neutral)
- Structure: fine orchid bark or pine bark (adds acidity over time and improves airflow)
- Aeration: perlite or pumice
A practical recipe for a typical indoor pot:
- 2 parts peat-based potting mix
- 1 part fine orchid/pine bark
- 1 part perlite
Repotting steps (minimal drama for the plant)
- Pick a pot only 1–2 inches wider than the old one (too big stays wet too long).
- Water the plant 24 hours before repotting so roots are hydrated and flexible.
- Slide out the root ball and gently loosen the outer 1 inch of roots.
- Trim only truly dead roots (brown/black and mushy). Keep healthy roots (firm, light-colored).
- Set the crown at the same height as before—don’t bury it deeper.
- Water once to settle the mix, then let the top 1 inch dry before watering again.
Most peace lilies perk back up quickly after repotting if you keep them out of harsh sun and avoid heavy fertilizing for a few weeks.
Watering: The Hidden Driver of Rising pH
Many high pH cases come from the water, not the soil bag. If your tap water is alkaline or high in bicarbonates, every watering slowly nudges the potting mix upward.
Best watering habits for stable pH
- Use rainwater, distilled, or reverse-osmosis water when possible—especially if your tap water leaves white deposits.
- Water thoroughly until 10–20% drains out the bottom. This reduces salt buildup.
- Empty saucers after 10 minutes. Peace lilies like moisture, not stagnant water.
Flushing to remove alkaline salts (especially for self-watering pots)
If you see crust or suspect mineral buildup, flushing is simple and effective:
- Move the pot to a sink or tub.
- Run room-temperature water through the pot equal to 3× the pot’s volume (example: a 2-quart pot gets ~6 quarts of water).
- Let it drain fully for 30–60 minutes.
- Repeat once after 30 days if crust returns.
This doesn’t “fix” soil pH permanently if your water source is the cause, but it stops the ongoing mineral accumulation that keeps pushing pH up.
Light: Enough to Use Nutrients, Not So Much It Stresses the Plant
Correcting pH helps the plant access nutrients, but it still needs enough light to actually use them. In very low light, peace lilies stall, and you may misread that as a soil problem.
- Ideal indoor placement: bright, indirect light near an east or north window, or several feet back from a south/west window.
- Temperature sweet spot: 65–80°F (18–27°C). Avoid cold drafts below 55°F (13°C), which slows nutrient uptake and can increase yellowing.
- If using grow lights, aim for 10–12 hours daily at a reasonable distance (follow the fixture’s guidance).
Feeding: Don’t Fertilize Your Way Out of High pH
Here’s the trap: when leaves yellow, people feed more. If pH is high, extra fertilizer can build salts and stress roots, making symptoms worse.
Once you’ve corrected pH (or repotted), feed gently:
- Use a balanced houseplant fertilizer at 1/4 to 1/2 strength every 4–6 weeks during spring and summer.
- Skip fertilizer for 4 weeks after repotting.
- If chlorosis is pronounced, consider an iron chelate product labeled for houseplants as a short-term assist—follow the label exactly.
General nutrient availability shifting with pH is well established; at higher pH, iron availability drops sharply, which is why chelated iron can provide temporary relief while you correct the underlying cause (North Carolina State Extension, 2020).
Acidifying water: a cautious, measurable approach
If your water source is consistently alkaline, you can acidify irrigation water—but do it like a careful craftsperson, not by guessing. The goal is not “as acidic as possible.” The goal is consistent, mild acidity.
- Target irrigation water pH around 6.0–6.5.
- Mix acidifier in water, then test with a pH meter or reliable test kit before watering.
- Never pour vinegar straight into the potting mix. It creates hot spots.
Because water alkalinity (bicarbonates) varies widely by location, there is no universal “1 teaspoon per gallon” recipe that’s safe. If you want a repeatable setup, use a pH meter and adjust drop-by-drop, then record your ratio for your specific water.
Soil Management: Keeping pH from Drifting Back Up
Once corrected, your main job is keeping conditions stable.
What pushes pH higher over time?
- Hard, alkaline tap water used week after week
- Potting mixes amended with lime or that contain alkaline composts
- Fertilizer salts accumulating in pots without enough runoff
- Old, broken-down potting mix that compacts and holds residues
Maintenance routine that works in real homes
- Every watering: water to runoff (10–20%) and don’t let pots sit in drained water.
- Every 2–3 months: check for crust, flush if needed.
- Every 6 months: test soil pH if you’ve battled high pH before.
- Every 12–18 months: refresh or repot to keep the mix airy and chemically stable.
Common Problems Tied to High pH (and How to Fix Them)
When pH is off, peace lilies often show problems that look like pests or “mystery disease.” Here are the ones I see most often in home settings, with specific actions.
Problem: Yellow leaves with green veins (chlorosis)
Most likely cause: high pH causing iron/manganese lockout, or roots stressed from salts.
What to do:
- Test soil pH. If it’s > 7.2, prioritize repotting or a controlled correction plan.
- Flush the pot with 3× volume if mineral buildup is suspected.
- After pH is addressed, use a chelated micronutrient supplement once, then reassess new growth over 2–4 weeks.
Problem: Brown tips and edges
Most likely cause: salt buildup from fertilizer and/or hard water; sometimes low humidity, but salts are the usual culprit when crust is present.
What to do:
- Switch to rain/RO/distilled water for at least 30 days.
- Flush as described above.
- Reduce fertilizer to 1/4 strength and feed less often.
Problem: Drooping even though soil is wet
Most likely cause: oxygen-starved roots (overwatering, compacted mix), sometimes worsened by salts.
What to do:
- Check drainage holes and empty any reservoir.
- Let the top 1–2 inches dry before watering again.
- If the mix is dense or older than 18 months, repot into a bark/perlite-aerated mix.
Problem: No blooms (but leaves seem okay)
Most likely cause: light too low, or the plant is constantly stressed (including pH drift and root issues).
What to do:
- Increase light to bright-indirect and keep temperatures steady at 65–80°F.
- After soil correction, feed lightly every 4–6 weeks in the growing season.
Troubleshooting: Quick Diagnosis by Symptom (Fast, Practical)
If you want a “do this next” checklist, here it is.
If your pH is 7.0–7.4 (mildly high)
- Flush once with 3× pot volume.
- Switch water source (rain/RO/distilled) for at least 6 weeks.
- Retest pH in 30 days. If it’s still climbing, repot.
If your pH is 7.5+ (clearly high)
- Plan to repot within 7–14 days if the plant is actively declining.
- After repotting, pause fertilizer for 4 weeks.
- Keep light bright-indirect and avoid temperature swings below 55°F.
If you corrected pH but new growth is still pale after 6 weeks
- Confirm you’re not overwatering (roots need air).
- Check that the plant is warm enough (65–80°F) and getting decent light.
- Consider a one-time micronutrient supplement (chelated iron/manganese) and watch the newest leaves for improvement.
A Few Notes From the “I’ve Seen This Go Sideways” File
Don’t overcorrect. Chasing pH aggressively can create more problems than the original issue. Peace lilies handle slightly acidic soil well, but they don’t enjoy swings. If you drop pH too far too fast, you can stress roots and stall growth.
Don’t assume all “acidic” products are safe indoors. Some sulfur products smell, and some acidifiers are too strong for casual use. Repotting and water-source changes are boring—but boring is reliable.
Watch the new leaves, not the old ones. Leaves already damaged by chlorosis rarely turn perfect again. The real success marker is that the newest leaves emerge a stronger green within 2–8 weeks.
When peace lilies finally get the pH and water chemistry they like, they respond in a way that feels almost personal: firmer leaves, deeper color, steadier growth, and blooms that don’t look like they’re struggling to happen. If you fix the root zone first—air, moisture balance, and pH—the rest of the care becomes straightforward.
Sources: University of Minnesota Extension (2021); North Carolina State Extension (2020).