Seed Scarification Techniques for Fruit Trees
The first time you try to grow fruit trees from seed, it can feel like the seeds are ignoring you on purpose. You clean the pits, tuck them into potting mix, keep them moist… and weeks later you’ve got nothing but fungus gnats and disappointment. Here’s the surprising truth: many fruit tree seeds are designed to not sprout right away. Tough seed coats and built-in dormancy protect them from germinating at the wrong time in nature. Scarification—physically or chemically weakening that seed coat—is often the missing step that turns “nothing happened” into healthy seedlings.
I’ve used scarification to wake up stubborn seeds from apples, pears, plums, peaches, apricots, cherries, persimmons, pawpaws, and even some citrus relatives. The trick is matching the technique to the species and being gentle enough to help the seed, not injure it. This guide lays out practical scarification methods, the supporting care basics (watering, soil, light, feeding), and troubleshooting for the problems gardeners actually run into on the potting bench.
First, a quick reality check: scarification vs. stratification
Scarification breaks or thins a hard seed coat so water and oxygen can get in. Stratification is a cold (or warm) treatment that satisfies internal dormancy. Many fruit trees need both.
- Hard coat problem: Seeds take forever to imbibe (absorb water) or rot before they swell.
- Dormancy problem: Seeds swell but still don’t germinate without a cold period.
Apples and pears typically need cold stratification (often 60–90 days around 34–41°F / 1–5°C), while some Prunus (plum/peach/apricot) seeds may benefit from careful scarification of the pit plus stratification. Your job is to open the door (scarification) and then give the seed the seasonal cue (stratification).
“For many woody plants, dormancy is a combination of seed coat restrictions and physiological dormancy; addressing only one factor may not produce uniform germination.” — Oregon State University Extension publication (2018)
When scarification helps (and when it can backfire)
Scarification is most useful when you see one or more of these patterns:
- Seeds sit for 30+ days in moist media without swelling.
- Seeds mold on the outside before they ever plump up.
- Germination is extremely staggered—one sprouts at week 3, another at week 12.
It can backfire when you damage the embryo. With fruit trees, that risk is real—especially if you nick too deep or soak too long in hot water. Think “tiny assist,” not “major surgery.”
Scarification methods that work for fruit tree seeds
Below are the methods I rely on most, including where each fits and what to watch for.
1) Mechanical scarification (sandpaper, file, or nicking)
This is the most controlled method for medium-to-large seeds (or kernels removed from pits). You physically thin a small spot on the seed coat.
Best for: persimmon, some stone fruit kernels (once extracted), hardy citrus relatives, and any seed with a noticeably tough shell.
Step-by-step (sandpaper method):
- Hold the seed firmly and rub one small area on 120–220 grit sandpaper.
- Stop when you see a slight color change or a thinner-looking patch—do not expose the embryo.
- Soak the seed in room-temperature water for 12–24 hours. Discard floaters only if they remain floating after 24 hours (some viable seeds float at first).
- Sow immediately or move into stratification, depending on species.
Master gardener tip: If you’re nicking with a knife, nick the side of the seed, not the pointed end where embryos often sit closer to the surface.
2) Hot water scarification (careful, but useful)
Hot water scarification softens hard coats without cutting. The danger is cooking the embryo, so temperature control matters.
Best for: some hard-coated fruit relatives and hedgerow fruits; occasionally useful for persimmon and certain wild fruit seeds.
How to do it safely:
- Bring water to a boil, then remove from heat.
- Let it cool to 180°F (82°C) (use a thermometer).
- Pour over seeds in a heat-safe container.
- Let seeds soak as the water cools for 12–18 hours.
- Sow or stratify.
If you can’t measure temperature, skip this method. Guessing wrong is how seeds turn to mush.
3) Hydrogen peroxide soak (gentle + reduces mold)
This isn’t classic scarification, but it’s a practical “half-step” that helps water penetrate and knocks back surface pathogens—especially when you’re doing long stratification in a bag.
Best for: apple, pear, quince seeds during stratification prep; any seed that tends to mold.
- Soak seeds 10 minutes in 3% hydrogen peroxide.
- Rinse well, then sow or stratify.
University guidance commonly recommends sanitation steps for damping-off prevention; Colorado State University Extension discusses hydrogen peroxide as a disinfectant option in propagation contexts (2020).
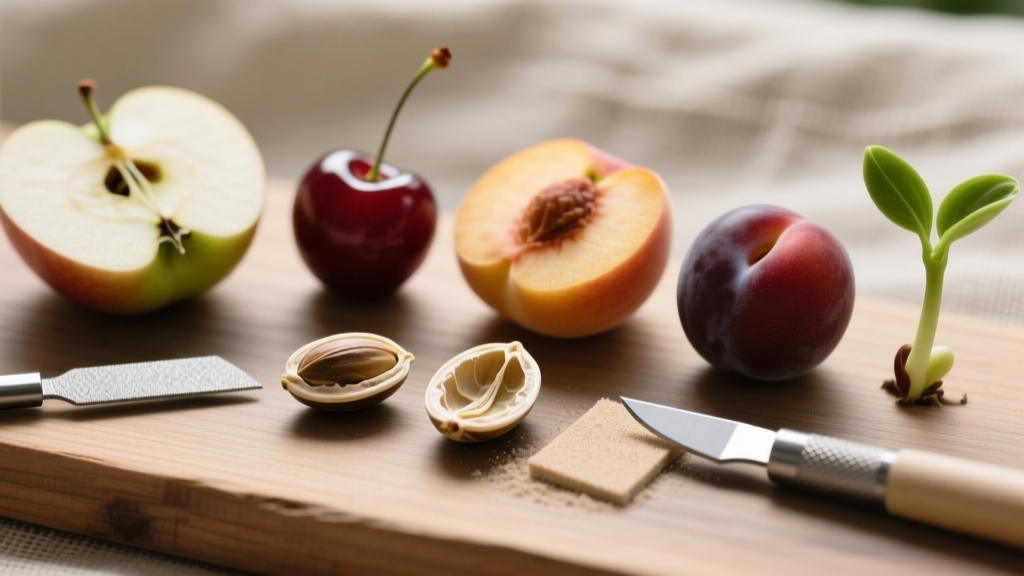
4) Pit cracking for stone fruits (the “nutcracker” approach)
Peaches, plums, apricots, and cherries often come in a hard pit. Sometimes the embryo is fine, but water takes too long to reach it through the woody endocarp. Carefully cracking the pit and removing the kernel can speed things up and improve germination uniformity.
Best for: peach, apricot, plum—especially if you’re stratifying and want more consistent results.
How to do it without crushing the seed:
- Dry cleaned pits for 7–10 days at room temperature (less slippery, less likely to crush).
- Use a bench vise or a nutcracker with slow pressure. Stop as soon as you hear a crack.
- Pick out the kernel. If it’s nicked or smells bitter/rotten, discard.
- Soak the kernel 12 hours, then stratify (commonly 60–90 days at 34–41°F).
Note: Some Prunus kernels contain compounds that can irritate if handled or ingested. Wash hands; don’t taste-test seeds.
Comparison table: scarification options at a glance
| Method | Typical time required | Risk level | Best use case | What “success” looks like |
|---|---|---|---|---|
| Mechanical (sandpaper/file) | 2–5 minutes per 10 seeds + 12–24 hr soak | Low–Medium (if you over-sand) | Hard-coated seeds; extracted kernels | Seeds swell within 24–72 hours in moist media |
| Hot water | 15 minutes setup + 12–18 hr soak | Medium–High (temperature mistakes) | Very hard seed coats when mechanical is impractical | Noticeable swelling after overnight soak |
| Hydrogen peroxide (3%) | 10 minutes + rinse | Low | Mold-prone stratification batches | Cleaner seeds; less fuzz/mold during 30–90 days chilling |
| Pit cracking (stone fruit) | 10–20 minutes per batch + 60–90 days stratification | Medium (crushing kernel) | Peach/plum/apricot for faster, more even germination | Higher % sprouting during first 2–3 weeks after chilling |
Three real-world scenarios (and what I’d do)
Scenario 1: Apple seeds from the fridge drawer that just sit there
You saved seeds from a great apple, dried them on a napkin, and planted them in a pot on the windowsill. A month later: nothing.
- Likely issue: not enough cold stratification.
- What I’d do: rinse seeds, soak 10 minutes in 3% hydrogen peroxide, then place in a zip bag with barely moist vermiculite and refrigerate at 34–41°F for 60–90 days. Check every 7–10 days for mold or early sprouting.
Washington State University Extension notes that many temperate fruit seeds require a moist chilling period to break dormancy (WSU Extension publication, 2021).
Scenario 2: Peach pits that mold in the pot before anything sprouts
You planted whole pits outdoors in a pot, kept it damp, and the surface goes fuzzy and sour-smelling.
- Likely issue: too wet + slow water entry through pit.
- What I’d do: crack pits, remove kernels, peroxide soak, then stratify kernels in barely moist medium (not wet) for 8–12 weeks at fridge temps. Plant kernels 1/2 inch (1.3 cm) deep in a gritty seed mix.
Scenario 3: Persimmon seeds that take forever and sprout unevenly
Persimmon can germinate like popcorn—one now, one much later—unless you help them along.
- Likely issue: tough coat + variable dormancy.
- What I’d do: lightly sand one spot on each seed, soak 24 hours, then warm stratify at 68–75°F (20–24°C) for 2–4 weeks before cold stratification for 8–12 weeks (species and seed source matter). Then sow and keep at 70–80°F (21–27°C) for germination.
Watering: the most common reason scarified seeds still fail
Scarified seeds take up water faster. That’s good—unless the media is soggy and oxygen disappears. Fruit tree seeds want consistent moisture, not mud.
- During stratification in a bag: medium should feel like a wrung-out sponge. If water drips when you squeeze, it’s too wet.
- After sowing: water thoroughly once, then keep evenly moist. For most seed trays, that’s a light water or misting every 1–3 days, depending on indoor humidity and heat mats.
- Rule of thumb: if the surface is staying shiny-wet for more than 24 hours, increase airflow and reduce watering.
Troubleshooting watering problems
- Symptom: seeds turn soft and brown, smell sour
Cause: waterlogged media + low oxygen
Fix: replace media with fresh, barely moist mix; add perlite; use a container with drainage; keep temps in the correct range (too cold + too wet is a rot recipe). - Symptom: seeds shrivel after scarification
Cause: media dried out during the first week (critical imbibition period)
Fix: cover pots with a humidity dome until germination, vent daily; or bottom-water to keep moisture stable.
Soil (and media): what to sow fruit tree seeds in
You can germinate in bagged seed-starting mix, but for fruit trees I prefer something that stays moist without compacting.
My go-to germination mix:
- 50% fine pine bark or coco coir
- 30% perlite
- 20% seed-starting mix or screened compost (optional, light)
Target a slightly acidic to neutral pH—roughly pH 6.0–7.0 works for most temperate fruit seedlings. Avoid heavy garden soil in small pots; it compacts and encourages damping-off.
Planting depth (don’t guess)
- Apple/pear: about 1/4–1/2 inch (0.6–1.3 cm)
- Stone fruit kernels: about 1/2 inch (1.3 cm)
- Larger seeds (persimmon/pawpaw): about 1 inch (2.5 cm)
Too deep is a classic failure: the seed spends its limited energy budget pushing through dense media and runs out before it reaches light.
Light: what seedlings need after germination
Scarification gets you to germination; light quality determines whether you grow sturdy seedlings or spindly threads.
- As soon as sprouts appear: give strong light immediately—don’t “wait until leaves open.”
- Grow light distance: keep LEDs about 6–12 inches (15–30 cm) above seedlings (follow your fixture’s output).
- Photoperiod: aim for 14–16 hours of light daily indoors.
Troubleshooting light problems
- Symptom: long, pale, leaning stems
Cause: not enough light / light too far away
Fix: move light closer, increase hours, rotate trays daily. - Symptom: scorched leaf edges under lights
Cause: light too close or heat buildup
Fix: raise lights by 2–4 inches, add a small fan for airflow.
Feeding: when (and how) to fertilize fruit tree seedlings
Most fruit seeds have enough stored energy to sprout and produce initial leaves. Fertilizer too early can burn tender roots—especially in small cells.
- When to start feeding: when seedlings have 2–3 true leaves.
- What to use: a balanced liquid fertilizer (for example 10-10-10 or similar) at 1/4 strength.
- Frequency: every 10–14 days during active indoor growth.
If you’re using a mix with compost, you may not need fertilizer for the first 4–6 weeks. Watch the leaves: steady, medium-green growth is the goal.
Common problems (and fixes that actually work)
Damping-off (seedlings collapse at the soil line)
Symptoms: seedlings sprout, then suddenly pinch in and fall over within 24–48 hours.
What helps:
- Use fresh, sterile seed mix and clean pots.
- Provide airflow: a small fan on low, aimed nearby (not blasting them).
- Water from the bottom and avoid keeping the surface constantly wet.
- Keep temperatures reasonable: most fruit tree seedlings do well around 68–75°F (20–24°C) after germination.
Mold during stratification (the fuzzy white bag problem)
Symptoms: white fuzz on seeds or media; musty smell in the bag.
Fix:
- Remove seeds, rinse, and soak 10 minutes in 3% hydrogen peroxide.
- Replace with fresh, barely moist vermiculite/perlite.
- Vent the bag for 1 minute every week to refresh oxygen.
Seeds split but don’t sprout
Symptoms: seed coat cracks; you see swelling, but no root emerges.
- Cause: temperature swings or media drying at a critical time.
- Fix: stabilize conditions—steady moisture, steady temps. If they’re in stratification, keep them consistently at 34–41°F. If they’re in germination, keep them near 70–80°F depending on species.
Uneven germination (a few sprout, most lag behind)
Cause: inconsistent scarification, mixed seed maturity, or incomplete stratification.
Fix:
- Scarify each seed the same way (same number of sandpaper strokes; same soak time).
- Extend stratification by 2–4 weeks for the laggards.
- Keep a notebook—dates matter more than people think in seed work.
A practical workflow I use for most temperate fruit tree seeds
If you want a repeatable process, this is the one I teach neighbors when they show up with a bag of pits and big plans.
- Clean: remove all fruit flesh; rinse well.
- Sanitize (optional but helpful): soak in 3% hydrogen peroxide for 10 minutes; rinse.
- Scarify (if needed): sand one small spot or crack pits and remove kernels.
- Soak: 12–24 hours in room-temp water (especially after mechanical scarification).
- Stratify: moist medium in a bag at 34–41°F for 60–90 days (common range for many temperate fruits; adjust by species).
- Sow: plant at correct depth in airy mix; label with date and variety/source.
- Aftercare: steady moisture, strong light 14–16 hours, start feeding at 2–3 true leaves.
One last piece of hard-won advice: seedlings from fruit don’t reliably “come true” from seed. An apple seed won’t necessarily give you the same apple. But for rootstocks, breeding fun, or just learning, growing fruit trees from seed is incredibly satisfying—and scarification is often the difference between a tray of life and a tray of compost.
If you try one method this season, make it mechanical scarification plus correct stratification timing. It’s low-tech, consistent, and forgiving—exactly what you want when you’re working with seeds that were built to wait you out.