Fall Garden: Soil Testing and Lime Application
The best time to fix soil problems is when you’re not racing plant growth—and that window opens now. Fall is your chance to test, interpret, and correct soil pH so lime has months to react before spring planting. If you wait until March, you’ll be trying to move pH with one hand while seedlings demand nutrients with the other. Over the next 4–12 weeks, you can sample soil correctly, apply lime at the right rate, and set your beds up for healthier roots, fewer nutrient deficiencies, and stronger yields next season.
Use this as a practical, “what to do this week” plan. The priorities below assume you’re working between late summer harvest and the first hard freeze—roughly 6–10 weeks before your average first frost date. (If you don’t know your frost date, look it up by ZIP code and write it on your calendar today.)
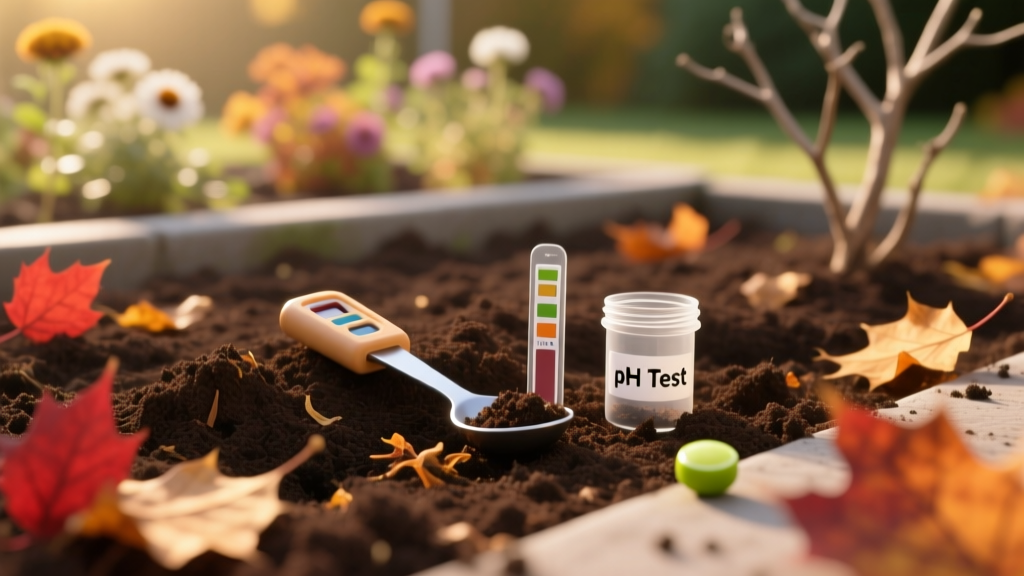
Priority 1: Test Your Soil First (Do This This Week)
Lime is not a fertilizer you “sprinkle just in case.” It’s a pH amendment. Too little does nothing; too much can lock up iron, manganese, and phosphorus, and it can make blueberries and other acid-lovers struggle for years. Start with a soil test.
Best timing for fall soil sampling
Collect samples when soil is workable (not muddy, not frozen). Ideal conditions are when daytime highs are still above 50°F and before repeated freezes. Aim for:
- 8–10 weeks before first frost if you want results and time to lime this fall.
- 4–6 weeks before first frost is still workable for sampling and ordering lime.
- If you’re already past frost, you can still sample on thawed days, but lab turnaround may slow.
How to take a soil sample that’s actually useful
Most “bad” soil tests are really bad samples. Follow the extension-style method: take multiple subsamples, mix, and submit a composite.
- Sample each distinct area separately (front bed vs. back bed, lawn vs. vegetable garden, raised bed vs. in-ground).
- From each area, collect 10–15 cores at a consistent depth:
- Vegetable beds: 0–6 inches
- Lawns: 0–4 inches
- Perennial borders: 0–6 inches (or match your cultivation depth)
- Avoid unusual spots: compost piles, fertilizer bands, pet spots, ash dumps, and dripline puddles.
- Air-dry the mixed sample indoors on paper (not in the oven), then bag and label.
Many state labs report lime needs in pounds per 1,000 sq ft or as a target pH. Follow the lab’s lime recommendation rather than guessing.
Extension services consistently emphasize that soil testing is the foundation for liming decisions. For example, Penn State Extension notes that lime recommendations are based on soil pH and buffering capacity (CEC/soil type), not just pH alone (Penn State Extension, 2023). Similarly, University of Minnesota Extension explains that sandy soils change pH more easily than clay or organic soils, so lime rates must match soil texture and buffer capacity (University of Minnesota Extension, 2020).
“Soil pH is a measure of acidity, but how much lime is needed depends on the soil’s buffering capacity… two soils can have the same pH and require different amounts of lime.” — University of Minnesota Extension (2020)
Priority 2: Apply Lime Correctly (Once Your Results Are Back)
Lime takes time. In many soils, meaningful pH change can take 3–6 months, with ongoing adjustment beyond that. That’s why fall is prime: rain, freeze-thaw cycles, and time all help incorporate and react lime before spring planting.
Know your lime type: calcitic vs. dolomitic vs. fast-acting
- Calcitic lime (calcium carbonate): raises pH and supplies calcium.
- Dolomitic lime (calcium-magnesium carbonate): raises pH and supplies magnesium. Use if your soil test indicates low Mg.
- Pelletized lime: easier to spread, often faster initial reaction, but still follow the recommended rate.
If you garden in raised beds with frequent compost additions, your pH may drift upward over time. Don’t assume you need lime just because it’s fall—test first.
Rates and reality: what to expect
As a working rule, many garden soils need anywhere from 20–80 lb of lime per 1,000 sq ft to make a meaningful shift, but heavy clay or high-organic soils may require more. Some labs cap single-application rates to avoid overshooting. If your recommended rate is high, split it:
- Apply half now, then half in spring, or
- Apply two-thirds now and retest next fall before repeating.
Application method by garden type
Vegetable beds (in-ground)
- Spread lime evenly when soil is dry enough to walk on without compacting.
- Incorporate into the top 4–6 inches if you’re turning beds anyway (best pH correction speed).
- If you’re no-till: apply to the surface and rely on winter moisture and biology; expect slower change.
Lawns
- Apply with a calibrated spreader.
- Water in if rain isn’t expected within 24–48 hours.
- Pair with fall aeration if your turf is compacted; aeration can improve soil contact.
Raised beds
- Use the bed’s square footage (not your whole yard) to calculate rates.
- Mix thoroughly into the root zone if you’re reworking soil; uneven mixing can create pH “layers.”
Temperature and moisture thresholds that matter
- Apply lime when soils are not frozen and daytime temps are typically above 40°F.
- Avoid applying right before a heavy downpour (runoff risk), especially on slopes.
- If your first hard freeze (28°F or lower) is imminent, prioritize spreading and leave incorporation for a warmer day if needed.
Priority 3: Plant the Right Crops While You Wait (And After You Lime)
Soil testing doesn’t pause your fall garden. You can keep planting while you wait for results—just avoid heavy liming directly in the seed furrow or transplant hole until you know the rate. If your beds are already reasonably close to target pH, light adjustments won’t disrupt fall crops.
What to plant now (by frost window)
Count backward from your average first frost date. These timelines assume cool-weather crops and typical maturation windows.
- 8–10 weeks before first frost: broccoli transplants, cabbage, kale, collards; direct-seed carrots and beets (in faster-cooling climates, choose short-season varieties).
- 6–8 weeks before first frost: lettuce, spinach, arugula, radishes, turnips; cilantro and dill.
- 3–5 weeks before first frost: radishes, baby greens, scallions (for overwintering in milder zones), quick Asian greens.
For many gardens, fall planting success hinges on soil temperatures more than air temperatures. Cool-season seeds often germinate best when soil is roughly 45–75°F depending on the crop—another reason early fall is valuable.
What to plant for spring payoff: garlic and cover crops
- Garlic: plant about 2–4 weeks after first frost in many regions, or when soil temps drop near 50°F and are trending downward. Mulch after planting.
- Cover crops: winter rye, oats (winter-kill in colder areas), crimson clover (milder zones). Seed timing is often 4–6 weeks before first frost for good establishment.
If your soil test indicates low pH and you plan to grow brassicas heavily next year, correcting pH now can help reduce issues like nutrient stress and poor growth. (It won’t eliminate clubroot if it’s present, but maintaining a more neutral pH is a common management tool in brassica rotations.)
Priority 4: Prune With Restraint (Fall Is Not the Time for Everything)
Fall pruning is about safety, sanitation, and avoiding disease—not shaping everything in sight. The wrong cut at the wrong time can stimulate tender growth or invite infection.
What to prune now
- Dead, diseased, damaged wood anytime you see it (sanitize tools between cuts if disease is present).
- Spent raspberry canes (summer-bearing): remove fruiting canes at ground level after harvest.
- Tomatoes and cucurbits at season end: remove and dispose of diseased vines to reduce overwintering pathogens.
What to avoid pruning now
- Spring-flowering shrubs (lilac, forsythia, azalea): pruning now removes next year’s buds.
- Most fruit trees: major pruning is generally better during dormancy (mid-winter) to reduce disease pressure and avoid stimulating growth before cold snaps.
Priority 5: Protect Soil and Plants as Nights Cool
Fall protection is mostly about two things: preventing soil structure damage and preventing disease/pest carryover. A lime plan works best when the soil you’re improving stays in place and stays biologically active.
Mulch and leaf management that supports liming
- Apply 2–3 inches of shredded leaves or clean straw to bare beds after liming (or after cover crop seeding).
- Keep mulch pulled back from crowns of perennials to reduce rot.
- Shred leaves before using; whole leaves mat and shed water.
Frost protection: simple thresholds to watch
- When forecasts call for 36°F overnight, be ready with frost cloth for tender greens and late tomatoes.
- At 32°F, many warm-season plants will be damaged; harvest basil, peppers, and remaining tomatoes.
- At 28°F (a hard freeze), expect major dieback; prioritize pulling diseased plants and protecting perennials.
Priority 6: Prepare for Next Season (This Is Where Soil Testing Pays Off)
Once you have test results, fall becomes your easiest planning season. Write down: current pH, target pH, lime recommendation, and the date you applied it. That record makes next year’s adjustments accurate instead of repetitive.
Monthly schedule: a practical fall timeline
| Time window | Soil testing & lime | Planting | Cleanup & protection |
|---|---|---|---|
| Late Aug–Mid Sep (10–8 weeks before frost) | Collect samples; submit to lab; mark bed maps | Start/plant brassica transplants; seed carrots/beets | Remove diseased summer crops as they finish |
| Mid Sep–Early Oct (8–6 weeks before frost) | Review results; source calcitic vs dolomitic lime | Seed lettuce, spinach, radish; start cover crops | Mulch pathways; set up row cover supports |
| Early–Late Oct (6–3 weeks before frost) | Apply lime on a dry day; incorporate if turning beds | Finish cover crops; plant quick greens | Drain hoses; sanitize stakes/cages |
| Late Oct–Nov (around first frost to 2–4 weeks after) | Apply remaining split lime (if recommended); note dates | Plant garlic when soil is near 50°F and cooling | Mulch garlic; protect perennials; leaf mulch beds |
Fall pest and disease prevention (don’t carry problems into spring)
Many common garden issues overwinter in debris, soil, or on tools. Fall cleanup reduces next year’s pressure.
- Tomato diseases (early blight, septoria): remove infected leaves and vines; don’t compost heavily diseased material unless your pile reliably heats. Clean cages and stakes.
- Powdery mildew on squash: remove vines promptly after frost; rotate cucurbits away from that bed next year.
- Apple scab/fruit tree disease carryover: rake and remove fallen leaves under trees; many pathogens persist in leaf litter.
- Slugs: reduce dense, wet hiding spots; pull boards/flat stones, and keep mulch from staying soggy near crowns.
- Rodents in mulch: don’t pile mulch against tree trunks; install trunk guards where vole damage is common.
Regional Reality Checks: Adjust the Plan to Your Zone and Soil
Soil testing and lime application are universal tasks, but the “right week” depends on your frost date, rainfall pattern, and soil type. Use these scenarios to adapt without guessing.
Scenario 1: Short fall, early freeze (USDA Zones 3–4; Upper Midwest, Northern New England, high elevations)
If your first frost often lands in mid-September to early October, you may have a narrow runway. Prioritize speed:
- Sample soil in late summer; don’t wait for October.
- If lab turnaround is slow, use a reputable local lab with quicker processing or plan lime application as soon as results arrive.
- Consider pelletized lime for faster handling and easier spreading when weather windows are tight.
- Choose cover crops that establish fast before cold: oats (winter-kill) or winter rye (tough, reliable).
Scenario 2: Mild fall, long growing window (USDA Zones 7–9; Mid-Atlantic, parts of the South, coastal climates)
When your first frost may not arrive until late November (or later), you have time—but rainfall patterns matter.
- Soil test anytime from early fall through winter, but apply lime when you can avoid wash-off on slopes.
- Keep planting: successive sowings of greens can continue as long as nights stay mostly above 32°F and you can protect during cold snaps.
- Watch for fall disease pressure in humid spells; increase spacing and airflow, and avoid overhead irrigation late in the day.
Scenario 3: Clay soil vs. sandy soil (any zone)
Your soil texture changes how lime behaves.
- Heavy clay/high organic matter: higher buffering capacity; it can take more lime (and more time) to shift pH. Incorporation helps.
- Sandy soils: pH shifts more quickly; follow recommendations carefully to avoid overshooting. Split applications are often safer.
Scenario 4: You garden with lots of compost and wood ash
If you regularly add wood ash, your pH may already be climbing. Ash can raise pH quickly and adds salts; it can also overcorrect. In that case:
- Do not add lime until the soil test confirms need.
- Stop ash applications if pH is already near your crop target (often 6.2–6.8 for vegetables, depending on crop and soil test guidance).
Quick Reference: What to Prepare, What to Buy, What to Record
Shopping and tool checklist (get it ready before results arrive)
- Soil probe or clean trowel and bucket (for sampling)
- Soil test submission supplies (bag, label, form)
- Spreader (handheld for small beds; broadcast for lawns)
- Chosen lime source (calcitic or dolomitic as recommended)
- Gloves, dust mask/eye protection (lime is irritating to breathe)
- Garden notebook or digital record
Record-keeping checklist (this saves money next year)
- Date sampled, date results received
- Area sampled (sq ft) and a simple bed map
- Soil pH and buffer index/CEC (if provided)
- Lime recommendation (rate and lime type)
- Date applied and method (surface vs incorporated)
- Rainfall/irrigation notes for the following 2 weeks
Action Timeline: The Next 14 Days
If you want a simple marching order, use this two-week sprint. Adjust earlier if your first frost is coming fast.
Days 1–3
- Look up your average first frost date; count back 6 weeks and write it down.
- Pull samples from each garden area (10–15 cores per area).
- Submit samples; order any needed supplies (spreader calibration materials, lime options).
Days 4–7
- Plant fall greens and radishes; set up hoops for row cover if you use it.
- Start removing diseased summer crop debris as beds open up.
- Shred leaves for mulch stockpile.
Days 8–14
- When results arrive, buy the correct lime (calcitic vs dolomitic) and measure the area carefully.
- Pick a dry day above 40°F to apply; water in if no rain within 48 hours.
- Mulch bare soil or seed a cover crop immediately after bed cleanup.
Fall soil testing and lime application are quiet work—no dramatic harvest photo, no instant gratification. But it’s the kind of work that shows up next spring when seedlings root deeply, nutrients become available when plants need them, and you’re not scrambling to fix pH in the middle of planting season. Get the sample right, follow the lab rate, and give lime the one thing it needs most: time.