Spring Garden Planning Guide for Maximum Yield
Spring isn’t “getting ready” season—it’s decision season. The choices you make in the next 2–6 weeks determine how much you harvest for the next 4–6 months. Miss the planting window for peas by two weeks and you’ll fight heat stress; prune fruit trees after bud break and you’ll cut off this year’s crop; ignore soil temperature and seeds will rot. The opportunity is simple: line up your planting dates, soil temps, and frost protection now, and you’ll harvest earlier, longer, and heavier.
Use this guide like an almanac: start with what must happen first, then move down the list. If you do nothing else this week, do the “Priority 1” tasks.
Priority 1: Right-now planning that multiplies yield
Lock in your frost dates and temperature triggers
Everything in spring hinges on your local average last frost date and soil temperature. Don’t guess—use a local extension frost-date tool or your state climatology data. Then plan around these concrete thresholds:
- 10–14 days before your last frost: finish bed prep, set up hoops/row cover, start hardening off cool-season transplants.
- At soil 40°F (4°C): peas, spinach, radish, onions, and brassicas can go in (as seed or transplants depending on crop).
- At soil 50°F (10°C): carrots, beets, lettuce, potatoes, and many herbs germinate reliably.
- At soil 60°F (16°C): beans, sweet corn, squash, and cucumbers become dependable (faster germination, less rot).
- After nights stay above 50°F (10°C): tomatoes, peppers, basil, and eggplant transplant with less stress.
Concrete date examples (adjust to your location): in many Zone 6 locations, the average last frost clusters around April 15–25; in Zone 5 it’s often May 1–15; in Zone 8 it may be March 1–20. Your microclimate can shift these by a week or more—especially if you garden in a frost pocket or an urban heat island.
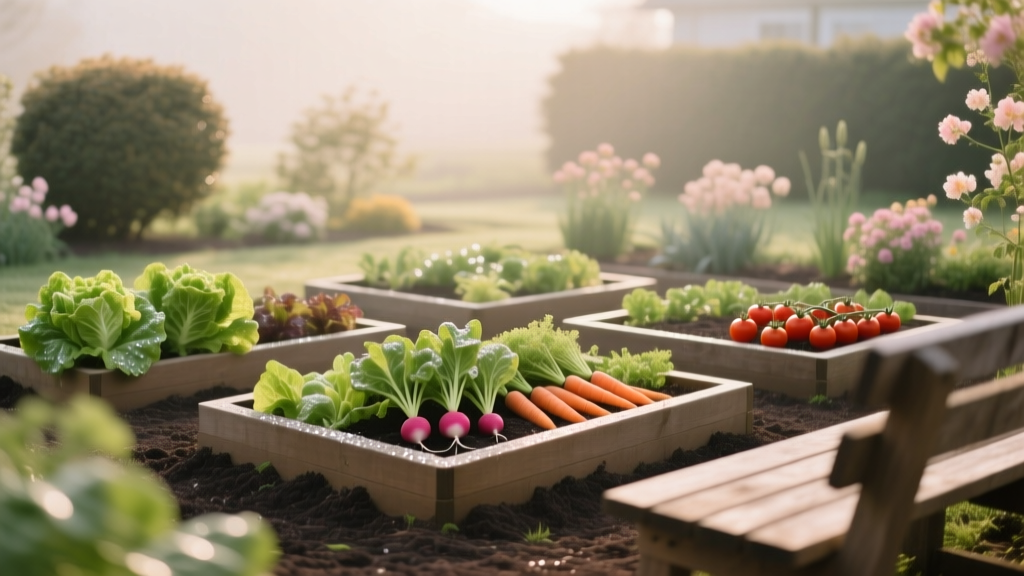
Do a 15-minute bed inventory (then don’t change it impulsively)
Maximum yield comes from matching crops to space and timing, not from adding more varieties. Walk the garden and write down:
- How many beds/containers you have and their sun hours (6+ hours is your “fruiting crop” zone).
- What’s already planted (garlic, strawberries, perennials).
- Where last year’s nightshades (tomatoes/peppers/potatoes) grew—don’t repeat them in the same spot if disease was present.
Then plan for succession planting: instead of planting one huge lettuce patch, plant smaller batches every 10–14 days in spring for steadier harvests.
Soil test now (or at least correct the common yield-limiting issues)
If you can do one “professional” step this spring, make it a soil test. Many state labs return results in 7–21 days, which still fits spring timing. Extension services consistently recommend soil testing to guide lime and fertilizer decisions rather than guessing (University of Minnesota Extension, 2020).
If you can’t test in time, avoid over-fertilizing and focus on structure: add compost and correct pH only when you have data. For many vegetables, a pH range near 6.0–7.0 supports nutrient availability.
Priority 2: What to plant (and when) for a longer harvest window
Weeks 6–4 before last frost: cold-hardy sowing and transplanting
These crops thrive in cool soil and give you early wins without hogging summer space:
- Direct sow: peas, spinach, arugula, radish, turnips.
- Set out: onion sets, shallots, leeks (transplants), cabbage family seedlings (broccoli, kale, cabbage).
- Plant: seed potatoes as soon as soil is workable and above roughly 45°F (7°C) for reliable emergence.
Yield move: Interplant radishes with slower crops (carrots, cabbage) to harvest something before the canopy closes.
Weeks 4–2 before last frost: the “shoulder season” sweet spot
This is when many gardens stall because people wait for warm weather. Instead, fill gaps with crops that tolerate a light frost:
- Direct sow: carrots, beets, Swiss chard, more lettuce.
- Transplant under cover: lettuce heads, hardy herbs (parsley), and brassicas for earlier harvest.
For carrots and beets, moisture consistency is the yield driver. Keep the seedbed evenly damp for 7–14 days until germination—use burlap, boards, or row cover to hold moisture, then remove as seedlings emerge.
At/after last frost: warm-season seeds with backup protection
Don’t plant by calendar alone; plant warm-season seeds when soil temps support fast germination. Cold soil equals slow emergence, rot, and pest pressure.
- At soil 60°F (16°C): beans and sweet corn.
- At soil 65°F (18°C): cucumbers and squash (especially if your soil stays wet).
Yield move: Plant a first sowing of beans, then a second sowing 2–3 weeks later. You’ll extend harvest without a single huge glut.
2 weeks after last frost (or when nights stay above 50°F): tomatoes and peppers
Tomatoes and peppers sit and sulk in cold nights. For most gardens, transplanting 10–14 days after last frost is more productive than forcing them out early. If you must plant early, use protection (see “What to protect”).
“Soil temperature is a better predictor of seed germination success than air temperature.” — Oregon State University Extension, 2019
Regional scenario planning: adjust your spring planting strategy
Scenario 1: Cold-spring Midwest/Northeast (Zones 4–6, wet soils)
If April is cold and rainy, prioritize drainage and delay warm-seeded crops until soil warms. Use raised beds or plant on slight ridges. In these regions, seed rot and damping-off increase when soils sit below 55°F (13°C) for long stretches.
Scenario 2: Mild-winter South (Zones 8–10, early heat)
Spring can jump from perfect to hot quickly. Push peas, lettuce, and brassicas earlier (often January–March). Shift to heat-tolerant greens (Malabar spinach, amaranth) sooner, and plan shade cloth by the time highs approach 85°F (29°C) if you want lettuce to last.
Scenario 3: High-elevation/short-season West (Zones 3–6 at elevation)
Your last frost may be late (even early June), but sun intensity is high. Use low tunnels and black plastic or landscape fabric to pre-warm soil by 2–4 weeks. Choose short-season varieties (55–70 days) and start more crops indoors to transplant.
Priority 3: What to prune (and what not to touch yet)
Fruit trees: prune before bud break for structure and sunlight
For apples and pears, late winter to early spring pruning (before bud break) supports strong structure and light penetration—both critical for fruit quality. If buds are swelling fast, prioritize removing dead, damaged, and crossing branches first.
- Remove watersprouts and inward-growing branches.
- Aim for an open canopy where sunlight reaches fruiting wood.
- Disinfect tools between trees if fire blight or cankers were present last year.
Do not prune spring-flowering shrubs (lilac, forsythia, many hydrangeas) until after bloom, or you may remove this year’s flowers.
Raspberries and blackberries: prune by type for higher yields
Identify whether you have summer-bearing (floricane) or fall-bearing (primocane) raspberries. Spring pruning mistakes are a top reason for low berry yield.
- Summer-bearing: remove dead canes; thin to the strongest canes (often 4–6 per linear foot); tie to supports.
- Fall-bearing: for one big fall crop, cut all canes to the ground in late winter/early spring; for two crops, remove only dead floricanes and keep primocanes.
Strawberries: clean up and feed the crown
As soon as snow melt and new growth appears, rake off dead leaves (gently) to reduce disease carryover. Avoid burying crowns with compost. Top-dress with compost around plants, not on them.
Priority 4: What to protect (frost, wind, pests, and spring diseases)
Frost protection that actually works
Spring’s most common yield-killer is early planting followed by a radiational frost. Prepare protection before you need it:
- Row cover (floating fabric): can add roughly 2–6°F of protection depending on weight and setup.
- Low hoops + plastic: higher protection but must vent on sunny days to prevent overheating.
- Watering before a freeze: moist soil holds more heat than dry soil; water earlier in the day before a cold night.
Watch for danger when forecasts call for 32°F (0°C) or lower, especially after warm days that push tender growth.
Cutworm, flea beetle, and slug prevention (start before damage)
Spring pests hit fast because seedlings are small and defenseless.
- Cutworms: place collars (cardboard strips or paper cups with bottoms removed) around transplants at planting time; keep weeds down where moths lay eggs.
- Flea beetles on brassicas: cover seedlings immediately with row cover; damage early slows growth and reduces yield potential.
- Slugs: remove boards and debris near beds; water in the morning (not evening); use iron phosphate bait if pressure is high.
For integrated pest management timing and thresholds, extension programs recommend monitoring first and using targeted controls rather than routine spraying (University of California Agriculture and Natural Resources, 2021).
Spring disease prevention: reduce leaf wetness and soil splash
Many early diseases begin with cool, wet conditions and splashing soil:
- Mulch after soil warms: a light mulch reduces soil splash onto lower leaves (tomatoes later, but it matters now for early greens too).
- Water at the base: avoid frequent overhead watering that keeps foliage wet.
- Spacing matters: thin seedlings to improve airflow; crowded plants stay wet longer and yield less.
Seedling damping-off watch: If you’re direct sowing into cold, wet soil, avoid overwatering and don’t bury seed too deep. Fast germination is your friend—another reason to respect soil temperature thresholds.
Priority 5: What to prepare (beds, systems, tools, and yield math)
Bed prep: prioritize soil structure over “perfectly clean” beds
Work soil only when it’s ready. If you can squeeze a handful and it forms a sticky ball, wait—working wet soil creates compaction that lasts all season. A simple test: squeeze, then poke; if it crumbles, you can work it.
- Add 1–2 inches of compost to vegetable beds if you don’t already have rich organic matter.
- Use a garden fork or broadfork to loosen without flipping layers when possible.
- Rake smooth only where you’re sowing small seeds (carrots, lettuce).
Set up irrigation before planting volume increases
Maximum yield depends on steady moisture—especially for leafy greens, root crops, and fruit set later. Drip lines or soaker hoses installed now prevent weeks of inconsistent watering.
- Test your system for leaks and clogs.
- Stake lines so they stay put during planting and weeding.
- Plan for 1–1.5 inches of water per week total (rain + irrigation), adjusting for soil type and wind.
Fertilizer timing: feed what’s growing, not bare soil
Apply nutrients close to when plants can use them. Over-applying early can leach away (especially nitrogen) and can push weak, pest-prone growth.
- Mix balanced organic fertilizer into planting rows for heavy feeders (brassicas, corn) at planting time.
- Side-dress leafy greens when they have 3–4 true leaves.
- Hold most tomato/pepper feeding until after transplant establishment (about 10–14 days).
Use a simple rotation to cut disease and boost yield
Rotate by plant family where you can:
- Nightshades: tomato, pepper, potato, eggplant
- Brassicas: cabbage, broccoli, kale, radish
- Alliums: onion, garlic, leek
- Cucurbits: cucumber, squash, melon
If space is tight, prioritize rotating tomatoes and potatoes away from last year’s location to reduce soil-borne disease carryover.
Spring schedule you can follow (adjust to your zone)
| Time window | What to do | Targets & thresholds | High-yield notes |
|---|---|---|---|
| 6–4 weeks before last frost | Prep beds; sow peas/spinach; transplant brassicas; set onion sets | Soil 40–50°F; cover ready for 32°F nights | Start successions every 10–14 days |
| 4–2 weeks before last frost | Sow carrots/beets/lettuce; plant potatoes; prune fruit trees (if not done) | Soil ~50°F+; potatoes when soil workable | Keep seedbed evenly moist 7–14 days for carrots |
| Last frost week | Harden off transplants; direct sow more greens; set up trellises | Watch forecasts for 32°F dips | Trellises now prevent root damage later |
| 1–2 weeks after last frost | Plant beans/corn if soil warm; transplant tomatoes if nights >50°F | Soil 60°F+; nights 50°F+ | Row cover early reduces wind stress and pest pressure |
| 3–6 weeks after last frost | Second sowings (beans, carrots); mulch; begin targeted feeding | Consistent moisture; thin seedlings for airflow | Mulch reduces soil splash and early disease |
Fast checklists (print these mentally and start today)
This week: the “maximum yield” shortlist
- Find your average last frost date and mark it on your calendar.
- Measure soil temperature in the morning for 3 days (aim for a consistent trend, not one warm afternoon).
- Prep at least one bed for early sowing; amend with compost if needed.
- Set up row cover/hoops before you plant tender crops.
- Start a succession plan: write down what you’ll sow every 10–14 days (lettuce, radish, cilantro).
Before you transplant warm-season crops
- Nights consistently above 50°F for tomatoes/peppers (or protection in place).
- Drip/soaker irrigation tested and working.
- Trellises/cages installed (do it now to avoid stabbing roots later).
- Mulch staged nearby but not piled against stems.
- Cutworm collars ready; row cover ready for wind and cold snaps.
Three common spring mistakes that cap yield (and the fixes)
Mistake 1: Planting warm-season seeds into cold soil.
Fix: Wait for soil temps—60°F is a reliable benchmark for beans and corn. If you’re impatient, warm the bed with clear plastic for 7–10 days before sowing, then remove at planting.
Mistake 2: Skipping thinning.
Fix: Thin carrots, beets, and lettuce early. Overcrowding creates small roots, stretched heads, and more disease. Thin in two passes: first at 1–2 inches tall, again once you can see which seedlings are strongest.
Mistake 3: Forgetting spring pest pressure until damage is obvious.
Fix: Use row cover on brassicas from day one. For slugs, remove hiding spots and water mornings. For cutworms, collar transplants at planting time—one minute per plant saves an entire row.
Yield-focused crop pairings for spring beds
Interplanting (done simply) increases yield per square foot without chaos:
- Carrots + radishes: radishes mark the row and harvest before carrots need space.
- Lettuce + onions: shallow roots, different growth rates; harvest lettuce as onions size up.
- Broccoli + spinach: spinach produces early; broccoli fills in later.
Keep it practical: only pair crops with similar water needs, and avoid mixing plants that make harvesting difficult.
Extension-backed notes to keep your decisions grounded
Two spring planning points are consistently supported by university guidance:
- Test soil before making major amendments: Soil testing is the standard recommendation for home gardeners to manage pH and nutrients efficiently (University of Minnesota Extension, 2020).
- Use integrated pest management (IPM): Monitor pests, use barriers and cultural practices first, and apply targeted controls when needed—especially in spring when seedlings are vulnerable (University of California Agriculture and Natural Resources, 2021).
If you want one habit that raises yield without adding work, it’s this: keep a simple spring log. Record your sowing dates, soil temps, first harvest, and any pest flare-ups. Next spring you’ll plan from your own microclimate data, not generic averages.
Spring rewards the gardener who moves early on cool-season crops, waits for soil warmth for warm-season seeds, and treats frost protection like essential equipment—not an afterthought. Get your first sowings in as soon as soil hits 40–50°F, line up successions every 10–14 days, and keep row cover within arm’s reach until your nights stabilize. The harvest you want starts with the next week of choices.