Winter Garden: Indoor Microgreen Production
When outdoor beds are frozen and daylight is short, your most productive “winter garden” is the one you can run on a shelf. Microgreens turn a slow season into weekly harvests—often in 7–14 days—and they let you keep your hands in soil (or grow mats) without waiting for spring thaw. The opportunity is immediate: if you start a tray this weekend, you can be cutting greens before the next cold front arrives, even if you’re in USDA Zone 3 with a -20°F forecast or in Zone 9 where winter is just cool and wet.
This guide is organized by what matters right now: what to plant first for quick wins, what to prune (yes, microgreens need “haircuts”), what to protect to avoid mold and gnats, and what to prepare so you can keep a steady rotation through winter. You’ll also find a simple schedule table, regional scenarios, and specific thresholds (temperatures, dates, and timing) so you can act without guessing.
Priority 1: What to plant (start these trays first)
Microgreens thrive in a narrow band of indoor conditions: 60–75°F air temperature, consistent moisture (not saturation), and bright light. Your first priority is choosing crops that germinate reliably in winter indoor air, don’t require complicated blackout steps, and have a predictable harvest window.
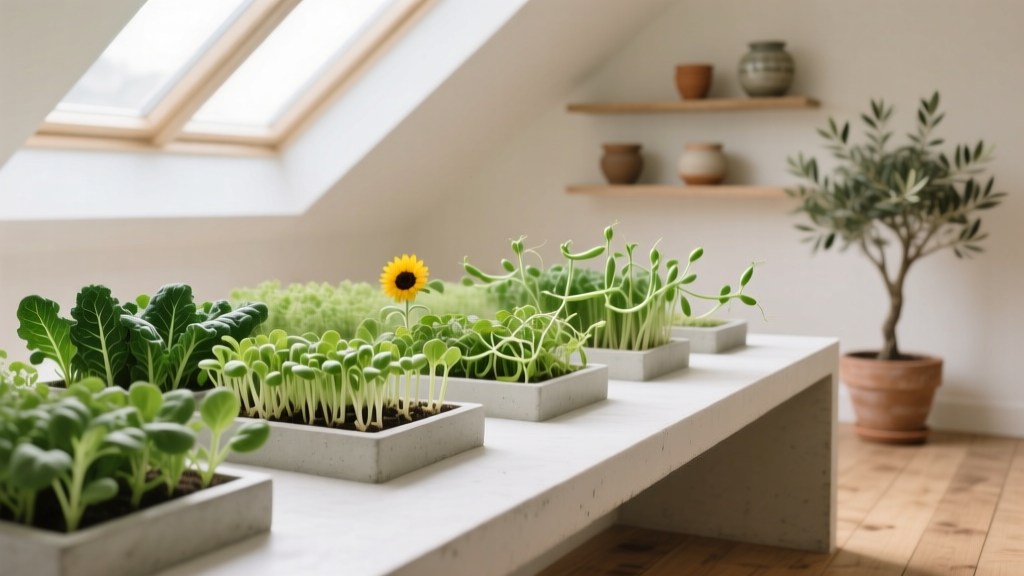
Start-now microgreens for the fastest winter harvests
If you want success on your first winter run, start with these dependable crops:
- Radish (e.g., ‘Rambo’, ‘Sango’): harvest in 7–10 days; strong flavor; tolerates cooler rooms down to 60°F.
- Broccoli: harvest in 8–12 days; mild; forgiving on moisture.
- Mustard: harvest in 7–12 days; spicy; watch humidity to prevent damping-off.
- Pea shoots: harvest in 10–14 days; heavier seed; needs a bit more light and airflow.
- Sunflower (black oil): harvest in 10–14 days; hearty; prefers slightly warmer rooms (65–75°F).
For deeper winter (holiday travel, lower light, cooler houses), radish and broccoli are the most consistent. If your home runs cool at night—say 58–62°F—expect the harvest date to slide a few days later.
Seeding rates and tray choices (avoid the #1 winter mistake)
The most common winter failure is sowing too thick, then keeping trays too wet in low-airflow rooms. Dense sowing plus stale air equals mold. Use shallow trays (10x20) with drainage, and aim for a single dense layer—not a pile.
- Radish/broccoli/mustard: cover the surface evenly; seed should mostly touch but not stack.
- Peas/sunflower: soak seeds and seed more sparsely than you think; these expand and crowd fast.
If you don’t have dedicated microgreen trays, a recycled clamshell can work for one cycle, but drainage is usually poor. In winter, poor drainage is a mold invitation. Prioritize drainage holes and a waterproof lower tray.
Timing: build a winter rotation you can keep
Instead of planting one giant tray and getting overwhelmed, run a simple cadence:
- Every 7 days: start one tray of a fast crop (radish or broccoli).
- Every 14 days: start one tray of peas or sunflower.
That rhythm yields harvests nearly every week. If you’re timing around holidays, count backward from when you want greens. For example, to have radish microgreens for a January 15 meal, seed around January 5–8 (assuming a 7–10 day window at 65–70°F).
Priority 2: What to prune (microgreen “haircuts,” thinning, and tray resets)
Microgreens don’t get pruned like shrubs, but winter indoor production still benefits from timely cutting and cleanup. The goal is to harvest at peak quality and prevent disease from carrying over to the next tray.
Harvest timing: cut before problems start
Harvest most microgreens when the cotyledons (seed leaves) are fully open and the first true leaf is just emerging. Waiting too long in winter indoor conditions increases the chance of mold near the soil line and can produce tougher stems.
- Radish/mustard: typically best at 7–10 days.
- Broccoli: typically best at 8–12 days.
- Pea/sunflower: typically best at 10–14 days.
Use clean scissors or a harvest knife and cut just above the media. If you see fuzzy growth at the base, harvest what’s clean immediately, then discard the rest—don’t compost questionable trays indoors.
Thin only when it fixes airflow
Thinning is not usually part of microgreens, but it’s a useful winter intervention when germination is uneven and dense patches stay wet. Remove small handfuls to create “air channels” across the tray. This simple step can stop a mold problem from spreading.
Tray reset checklist (do this the day you harvest)
- Dump spent media into an outdoor compost pile if conditions allow; if compost is frozen, bag and store outside until thaw.
- Wash trays with hot soapy water, then sanitize (see protection section).
- Wipe down shelves and catch trays; spilled nutrient water is fungus fuel.
- Start the next tray within 24–48 hours to keep your winter rhythm.
Priority 3: What to protect (prevent mold, gnats, and winter indoor setbacks)
Winter microgreens fail for predictable reasons: low light, high humidity, cold windowsills, and stagnant air. Protection is mostly about controlling moisture and sanitation.
Temperature and humidity thresholds that matter
Microgreens grow best with stable warmth and moderate humidity:
- Ideal air temperature: 65–75°F (growth slows below 60°F).
- Target relative humidity: around 40–60%; sustained humidity above 70% increases mold risk.
- Avoid cold glass: keep trays at least a few inches away from windows where the surface temperature can drop well below room temperature at night.
If your house dips to 55–58°F at night (common in many Zone 5–7 homes), place trays on an interior shelf and use lights for gentle warmth rather than a cold windowsill.
Lighting: treat winter sun as unreliable
Short days and weak winter sun make leggy microgreens. Use a simple shop light or LED grow light and aim for consistency:
- Photoperiod: 12–16 hours of light daily.
- Distance: keep lights close (often 2–6 inches above the canopy) to reduce stretching, adjusting to avoid heat stress.
Extension guidance commonly emphasizes adequate light for indoor edible plant production; for example, University of Minnesota Extension discusses the need for sufficient light intensity and duration for indoor growing, especially during low-light months (University of Minnesota Extension, 2020).
Airflow is your winter disease prevention tool
A small fan on low, aimed past trays (not directly blasting seedlings), dramatically reduces fungal issues by drying the surface and strengthening stems.
“Good air circulation helps reduce excess moisture on plant surfaces and can limit development of foliar diseases in indoor growing areas.”
—General indoor plant disease prevention principle emphasized in extension materials (e.g., Purdue Extension, 2019)
Set a fan on a timer to run during the light period. If you see condensation on domes or windows near trays, airflow needs improvement or your watering is too heavy.
Watering: bottom-water to avoid damping-off
Top watering in winter often leaves stems wet for too long. Bottom-watering is more reliable:
- Add water to the bottom tray.
- Let the growing tray wick water for 10–20 minutes.
- Pour off excess—do not leave trays sitting in water all day.
If you’re using blackout domes for the first few days, remove them as soon as most seeds have sprouted—typically by day 2–4—to reduce humidity buildup.
Pest watch: fungus gnats, aphids, and pantry pests
Winter indoor growing changes pest pressure. Outdoors are quiet, but indoors you can see repeat issues because warmth allows continuous life cycles.
- Fungus gnats: most common; thrive in consistently wet media. Prevention: let the surface dry slightly between waterings, bottom-water, use yellow sticky traps, and avoid storing open potting mix indoors.
- Aphids: less common on microgreens but can hitchhike on houseplants. Keep microgreens separate from infested houseplants; wash hands and tools between areas.
- Rodents/pantry pests: store seed in sealed containers; don’t leave pea or sunflower seed bags open in garages or basements.
Sanitation: simple, repeatable, and effective
Sanitation is your winter insurance policy. Research and food-safety guidance for sprouts and similar products emphasize hygiene because warm, moist conditions favor microbial growth. Cornell University’s sprout safety guidance highlights the importance of sanitation and careful handling (Cornell University, 2017).
Use this routine:
- After each harvest, wash trays and tools with soap and hot water.
- Sanitize trays using a dilute bleach solution (follow label directions) or a food-safe sanitizer, then rinse and dry.
- Keep a “clean zone” shelf: no houseplants, no reused soil bags, no dripping watering cans.
Priority 4: What to prepare (systems that make winter microgreens effortless)
Once your first trays are up, preparation becomes the difference between “a fun experiment” and steady winter production. The goal is a simple station you can maintain even during cold snaps, travel, or busy weeks.
Set up a one-shelf microgreen station
You don’t need a greenhouse. You need a predictable microclimate.
- Shelf: wire rack or sturdy table away from exterior doors.
- Light: LED bar or shop lights on a timer.
- Waterproofing: boot trays or spill trays under everything.
- Air: small oscillating fan on low.
- Thermometer: inexpensive unit to confirm you’re holding 65–75°F.
Soil vs. mats vs. coco coir (winter practicality comparison)
| Growing Medium | Winter Pros | Winter Watch-outs | Best Crops |
|---|---|---|---|
| Soilless mix (peat/coir-based) | Buffers moisture; forgiving for beginners | Can stay too wet in cool rooms; gnats if overwatered | Broccoli, radish, mustard |
| Coco coir | Good moisture control; fewer gnats than rich mixes | Needs consistent watering; can dry at edges under lights | Most crops; great all-around |
| Grow mats (hemp/jute) | Clean setup; easy tray cleanup | Moisture can be uneven; mold if airflow is poor | Radish, broccoli (lighter-seeded crops) |
Monthly schedule: keep harvests coming from December to March
| Month | What to Start Weekly | What to Adjust | What to Watch |
|---|---|---|---|
| December | 1 tray radish or broccoli every 7 days | Increase light to 14–16 hours as days shorten | Holiday travel: start smaller trays; avoid overwatering |
| January | Add 1 pea or sunflower tray every 14 days | Keep trays off cold windows; maintain 65–75°F | Mold risk rises if house is closed up; run fan daily |
| February | Continue weekly starts; test one new variety | As daylight improves, reduce legginess by lowering lights | Fungus gnats from indoor potting mix; use sticky traps |
| March | Ramp to 2 trays/week if you want more harvest | Begin hardening plans for outdoor cool-season greens after last frost | Allergy season dust: keep growing area clean and wiped down |
Timeline: your first 14 days (repeatable workflow)
- Day 0 (Seed): moisten media, sow evenly, press seeds, mist once, optionally cover for blackout.
- Day 2–4: uncover when most seeds have sprouted; move under lights; start gentle airflow.
- Day 4–6: begin bottom-watering; keep surface from staying glossy-wet.
- Day 7–10: harvest radish/mustard; reset trays within 24–48 hours.
- Day 10–14: harvest peas/sunflower; sanitize and reseed.
Real-world winter scenarios (adjustments by region, home, and USDA zone)
Indoor microgreens are less about your outdoor zone and more about your indoor climate—but zone still affects your home’s humidity, heating patterns, and daylight behavior. Use these scenarios to adapt quickly.
Scenario 1: USDA Zone 3–5, deep freeze outside (subzero weeks)
If outside temperatures are routinely below 0°F and your home heating runs dry, you may see crispy edges and uneven germination near vents.
- Keep trays away from forced-air vents and exterior doors.
- If indoor RH drops below 30–35%, lightly mist the air around (not onto) seedlings or run a humidifier across the room—then compensate with airflow to prevent mold.
- Choose fast crops (radish, broccoli) and avoid leaving blackout domes on too long; dry air plus domes can cause wild moisture swings.
Outdoor frost dates still matter for your broader winter plan. In many Zone 4 locations, the average last spring frost can be around May 10–20—microgreens bridge the gap so you’re harvesting now while you wait to start spring beds.
Scenario 2: USDA Zone 6–7, heated homes with low winter light
Many Zone 6–7 gardeners keep homes around 62–68°F in winter. Growth will be steady but slightly slower without strong lighting.
- Run lights 14–16 hours daily from December 1 to February 15 to compensate for short days.
- Prioritize a fan: closed windows and mild winter temps often mean stagnant indoor air.
- Expect peas and sunflower to take closer to 14 days at the cooler end of the range.
If your area gets winter thaws and rainy stretches, fungus gnats can become persistent indoors. Store potting media sealed and don’t keep wet trays around after harvest.
Scenario 3: USDA Zone 8–10, mild winters with higher humidity
In warmer zones, homes may be less heated and indoor humidity can sit high—especially during rainy periods. That shifts your risk from “too dry” to “too damp.”
- Keep relative humidity under 60–65% near trays if possible.
- Use bottom-watering and pour off excess every time—standing water is the fastest path to mold.
- Choose less mold-prone crops (radish, sunflower) and be careful with basil microgreens, which are slower and more humidity-sensitive.
Warm-zone gardeners often have active outdoor gardens year-round. Microgreens still make sense as a clean, fast indoor crop during stormy weeks or when outdoor pests pressure leafy greens.
Winter pest and disease prevention: practical rules that stop most problems
Microgreens are quick, but problems move faster indoors. Use these rules as a winter checklist.
Prevent damping-off and fuzzy mold
- Don’t over-seed; density is the root of many winter failures.
- Use airflow daily; a fan is more effective than most “cures.”
- Water from below and avoid leaving wet stems overnight.
- Sanitize trays between crops; don’t “just rinse” in winter when drying is slow.
Prevent food-safety issues (microgreens are eaten fresh)
Microgreens are typically consumed raw. Treat your setup like a small kitchen prep space:
- Wash hands before seeding and harvesting.
- Use clean water and clean containers.
- Refrigerate harvested greens promptly and dry them well; wet greens spoil faster.
Food-safety guidance for sprouts and similar products emphasizes cleanliness because warm, moist growing conditions can support microbial growth (Cornell University, 2017). If anyone in your household is immunocompromised, consider cooking microgreens or choosing mature greens grown under stricter controls.
Right-now checklists (printable mindset)
Today (30–60 minutes)
- Pick two crops: one fast (radish or broccoli) and one hearty (pea or sunflower).
- Set up a waterproof tray area and a light on a timer (14–16 hours).
- Sanitize one tray and one pair of scissors.
- Seed your first tray and label it with the date.
This week
- Add a small fan for airflow; run it during light hours.
- Switch to bottom-watering by day 4–6.
- Check nighttime room temperature; keep it above 60°F if possible.
Every harvest day
- Harvest at peak (usually 7–14 days, crop-dependent).
- Remove all spent media and roots from the growing area.
- Wash, sanitize, dry trays; wipe shelves.
- Seed the next tray within 24–48 hours.
Winter is when small, repeatable systems beat big ambitions. A single shelf producing one tray a week can supply garnishes, sandwiches, salads, and stir-fries all season—without waiting for soil to thaw or day length to return. Start a tray now, then let your calendar (not the weather) dictate your harvests: one sowing each week, one cleanup each harvest day, and steady greens through the coldest stretch of the year.