Winter Garden Tool Sharpening and Repair
The fastest way to lose a precious late-winter workday is to discover your pruners won’t cut, your shovel won’t bite, and your mower won’t start. Winter is the narrow window when gardens are quieter, your schedule is more flexible, and tool maintenance actually pays you back—immediately—when pruning season ramps up and early sowing begins. If you sharpen and repair now, you’ll prune cleaner (fewer disease openings), dig faster (less strain), and avoid spring breakdowns when parts are scarce or repair shops are booked solid.
Use this guide as a seasonal checklist: prioritize cutting tools first, then digging tools, then engines and irrigation. Most tasks can be done indoors at a bench on any day above 40°F (comfortable enough for solvents and safe handling), and many repairs are best completed 4–8 weeks before your average last frost date so you’re ready when buds swell.
Priority #1 (This Week): What to Prepare — Sharpen and Tune Cutting Tools
Start with anything that makes a plant wound: hand pruners, loppers, pruning saws, hedge shears, and grafting knives. Sharp tools make smaller, cleaner cuts that heal faster and reduce tearing—especially important when you’ll soon be pruning apples, pears, grapes, cane berries, and roses.
Timing targets (use these numbers)
- Now through mid-winter: Sharpen hand tools anytime you can work safely indoors.
- 6–8 weeks before last frost: Finish sharpening pruners and saws so you’re ready for late-winter pruning.
- Below 32°F: Avoid doing solvent-heavy cleaning outdoors; bring tools inside to prevent flash rust and frozen residues.
- At ~45–55°F daytime highs: Many temperate fruit trees begin moving toward bud swell; have pruners ready before this window hits.
- By March 1 (many Zones 6–7) or by April 1 (Zones 3–5): Aim to complete pruning tool tune-ups before your main pruning season peaks.
Sharpening hand pruners (bypass style)
Bypass pruners are the workhorse for live stems. Sharpen only the beveled cutting blade; the hook/anvil side is typically not beveled.
- Disassemble if possible (take a photo first). Remove sap and grit with a stiff brush and a citrus-based degreaser.
- Flatten the back side of the blade with a few light passes of a fine stone only if there are burrs—don’t create a new bevel.
- Match the factory bevel (commonly ~20–30°). Use a mill file or diamond paddle, pushing in one direction along the bevel.
- Remove burr with a couple light strokes on the flat side.
- Reassemble and test. The blades should meet cleanly without wobble.
Repair checkpoint: If pruners “chew” stems even when sharp, the pivot bolt may be loose, the blade may be nicked beyond honing, or the spring is failing. Replace springs and blades rather than fighting dull steel.
Sharpening loppers and hedge shears
Loppers sharpen similarly to bypass pruners but often need a larger mill file for consistent angle. Hedge shears typically have long bevels—use a file and keep your strokes uniform end to end. Tighten pivot bolts so blades don’t twist mid-cut.
Sharpening pruning saws
Most modern pruning saws use impulse-hardened teeth that are not meant to be filed; they’re replaced when dull. If yours is a traditional saw with settable teeth, use the correct file and a saw set.
- Replace impulse-hardened blades when they start binding or polishing instead of biting.
- Clean resin from teeth with a resin remover; a dirty saw feels dull.
Disinfecting tools (disease prevention you can do today)
Winter is prime time for sanitation. Plant pathogens can ride on blades from cankers, fire blight strikes, and virus-infected brambles. Clean first (disinfectants don’t work well through sap), then disinfect.
- 70% isopropyl alcohol: fast, effective, and doesn’t require rinsing.
- Bleach solutions can corrode metal; if used, rinse and oil immediately.
“Disinfecting pruning tools can help prevent the spread of certain diseases… alcohol wipes or sprays are convenient and effective.”
—University of Minnesota Extension (updated guidance, 2020)
Extension guidance consistently emphasizes tool sanitation when diseases are present. For example, Utah State University Extension (2019) notes that cleaning and disinfecting tools is part of good plant disease management, especially when pruning out infected wood.
Checklist: cutting-tool tune-up (30–90 minutes per tool batch)
- Remove sap/resin and soil
- Check for cracks at pivots and handles
- Sharpen to original bevel angle
- Deburr and test on scrap wood
- Tighten pivots; replace worn springs
- Disinfect, dry, then oil lightly
- Label any tools needing parts so you can order now
Priority #2 (Next 1–2 Weeks): What to Prepare — Repair and Condition Digging Tools
Shovels, spades, hoes, cultivators, and edging tools don’t just “work or not.” A sharpened spade slices roots cleaner and digs with less effort—noticeable when soils are cold and heavy. The goal is not knife-sharp; it’s a clean, beveled edge that bites.
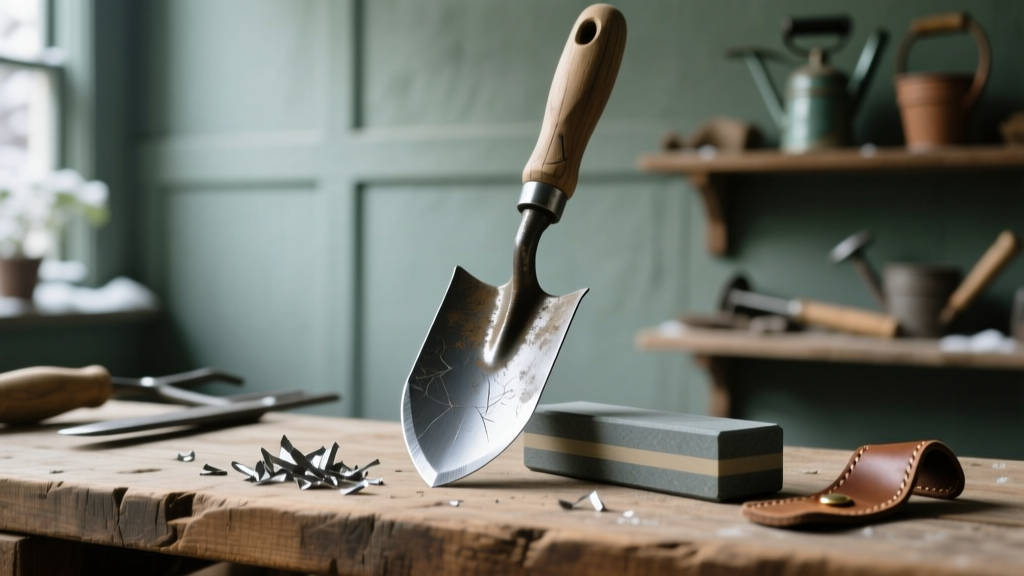
Shovel and spade sharpening
- Clamp the blade and file the leading edge to a 45°-ish bevel.
- File away mushrooming and dings; keep the bevel even.
- Sand lightly and oil the metal to slow rust.
Handle repair (wood and fiberglass)
Winter’s dry indoor air is ideal for handle work because finishes cure well.
- Wood handles: Sand splinters, then apply boiled linseed oil (thin coats). Replace loose heads; wedges and new rivets are cheap.
- Fiberglass: Inspect for cracks near the head; retire tools that flex or splinter.
Rust removal that doesn’t wreck your tools
- Light rust: steel wool + oil.
- Moderate rust: soak in vinegar or use a chelating rust remover; scrub, rinse, dry thoroughly.
- Finish: wipe with a thin coat of oil or paste wax.
Checklist: digging-tool rehab
- File a consistent bevel on spades/hoes
- Remove rust; protect with oil or wax
- Check handle tightness; re-wedge or re-rivet
- Sand and oil wood handles
- Hang tools off the floor to prevent moisture wicking
Priority #3 (By Late Winter): What to Prepare — Service Power Tools and Small Engines
Shops book up as soon as temperatures flirt with spring. If you want your mower, tiller, snowblower (still useful), or leaf shredder ready, service it now—ideally 8–10 weeks before grass green-up. In many areas that’s late January through early March, depending on USDA zone.
Temperature and storage thresholds
- Below 20°F: plastic becomes brittle; avoid forcing recoil starters and stiff cables.
- Above 50°F for a few hours: good window to test-run engines outdoors with proper ventilation.
Quick engine maintenance sequence
- Fuel: If fuel is older than 30–60 days and not stabilized, drain or run it out. Ethanol blends attract water.
- Air filter: replace paper; wash and oil foam.
- Spark plug: inspect and replace if fouled; set gap to manufacturer spec.
- Oil: change if due; cold starts are hard on oil.
- Belts/cables: inspect for cracks and fraying; replace now, not in April.
- Blade sharpening (mower): sharpen and balance; a bent blade should be replaced.
Safety note: Run engines outdoors only. Winter garages trap carbon monoxide.
Monthly shop schedule (so you don’t do everything at once)
| Month | Best focus | Goal | Notes by USDA zone |
|---|---|---|---|
| December | Hand pruners, loppers, saws | Clean, sharpen, order parts | Zones 3–5: indoor-only work is ideal; Zones 8–10: you may already be pruning lightly |
| January | Digging tools + handle repair | File edges, fix handles, rust control | Zones 6–7: prepare for late-winter pruning; Coastal areas: watch humidity—oil tools well |
| February | Power equipment service | Fuel system, filters, blade sharpening | Zones 8–10: mower may wake early; Zones 3–5: focus on tune-ups before March thaw |
| March | Final checks + staging | Stage tools by task; disinfect again | Zones 6–7: peak pruning window; Zones 3–5: be ready for first warm spell |
Right Now: What to Prune (and How Tool Prep Prevents Problems)
Tool sharpening and repair matters most when pruning season hits. Clean, sharp tools reduce ragged cuts that invite canker fungi. Timing depends on region and plant type; below are practical winter targets that align with dormancy and disease pressure.
Scenario 1: Cold-winter climates (USDA Zones 3–5; sustained freezes)
If your winter lows routinely hit -10°F to -30°F, delay pruning of cold-sensitive plants until the harshest cold passes. Many gardeners aim for late February to March, or closer to 4–6 weeks before last frost, when worst cold is less likely but plants are still dormant.
- Prune: apple and pear (dormant pruning), grapevines (before sap flow), summer-bearing raspberries (remove dead canes).
- Hold off: stone fruits (peach, cherry, plum) until late winter/early spring to reduce disease risk and winter injury.
Scenario 2: Milder winters (USDA Zones 6–7; frequent thaws)
Temperature swings are your main challenge. A warm spell (several days above 50°F) can push buds, then a hard freeze damages tender tissues. Keep pruning flexible: sharpen tools now, then prune on stable stretches.
- Prune: dormant fruit trees on stable weeks; remove crossing branches and water sprouts.
- Sanitation: disinfect blades between visibly diseased cuts, especially on apples/pears with canker history.
Scenario 3: Warm-winter regions (USDA Zones 8–10; active winter growth)
In many warm zones, winter is when you’re actively growing cool-season crops and doing structural pruning. Your tool maintenance window is shorter because you’re using tools year-round.
- Prune: roses (timing varies locally), citrus deadwood, and storm-damaged limbs after cold snaps pass.
- Watch temps: if a freeze is forecast below 28°F, avoid pruning tender plants immediately beforehand; fresh cuts can increase damage.
Extension reference: Oregon State University Extension materials on pruning emphasize matching pruning timing to species and reducing disease entry with proper cuts and tool care (OSU Extension, 2021).
What to Protect: Winter Storage, Rust Prevention, and Rodent Damage
Winter damage to tools usually happens in storage: condensation, salt residue, and rodents chewing handles or cords. A few protective steps now will keep your repairs from unraveling.
Humidity and condensation control
- Keep tools off concrete floors; concrete wicks moisture.
- Hang tools on a wall rack; allow airflow around metal.
- Wipe metal with oil or paste wax after each winter cleaning session.
Battery tool protection (cordless systems)
Cold kills performance and can shorten battery life.
- Store lithium-ion batteries at 40–80°F if possible (indoors).
- Aim for 40–60% charge for longer storage; top off before spring workdays.
- Inspect chargers and cords for rodent damage before plugging in.
Pest prevention in the shed (rodents and overwintering insects)
Rodents commonly nest in stored equipment, especially in leaf bags, mower decks, and tractor compartments. They chew fuel lines and wiring.
- Remove nesting material (leaves, grass) from mower decks and engine shrouds.
- Store birdseed and pet food in sealed metal containers away from tools.
- Set traps early in winter; populations build fast in enclosed sheds.
What to Plant: Indoor Sowing and Tool-Related Prep (Don’t Skip Labels and Trays)
A tool-sharpening winter is also a seed-starting winter—because the same clean, organized workspace makes both easier. You may not be planting outdoors in frozen regions, but you can plant indoors and prep for soon-to-thaw beds.
Seed-start timing you can anchor to numbers
- Start onions from seed 10–12 weeks before last frost.
- Start peppers 8–10 weeks before last frost; tomatoes 6–8 weeks before last frost.
- Cool-season transplants (broccoli, cabbage) often start 6–8 weeks before last frost.
Why include this in a tool guide? Because clean cutting tools and clean seed-start gear both reduce disease. Damping-off fungi thrive in dirty trays—just like canker pathogens exploit ragged pruning cuts.
Sanitize seed-start supplies (fast winter task)
- Scrub trays and pots to remove biofilm.
- Disinfect, rinse, and dry completely.
- Replace old, crusted flats that won’t clean well.
Timelines You Can Follow (Two Options)
Fast-track timeline (one weekend)
- Saturday AM: clean and sharpen pruners, loppers, hand saw(s)
- Saturday PM: disinfect, oil, tighten pivots; order parts
- Sunday AM: file shovels/hoes; sand and oil handles
- Sunday PM: organize storage; set up a “pruning kit” bucket (alcohol, rag, spare bolts)
Steady timeline (3 weeks, low stress)
- Week 1: cutting tools (sharpen + disinfect routine)
- Week 2: digging tools + handle repair
- Week 3: power tools (blade sharpening, filters, belts, fuel)
Common Winter Problems—and Repairs That Actually Hold Up
Most tool failures in spring were visible in winter. Fixing them now is cheaper and safer.
Pruners won’t align
- Cause: worn pivot, bent blade, or grit in the joint.
- Fix: disassemble, clean, replace pivot hardware, and adjust tension so blades meet without binding.
Wood handles keep loosening
- Cause: shrinkage from dry storage, then swelling in damp conditions.
- Fix: re-seat the head, add a wedge, and oil the handle; store off the floor.
Rust returns immediately
- Cause: tool stored damp; residue left on metal.
- Fix: dry thoroughly after cleaning, then apply paste wax or a thin oil film; improve airflow in storage.
Mower blade “sharp” but cuts grass ragged
- Cause: blade out of balance or bent; deck packed with old clippings.
- Fix: balance after sharpening; replace bent blades; scrape deck clean before first spring mow.
Winter Tool Hygiene: Disease Prevention That Carries Into Spring
Winter is when many diseases are easiest to manage because plants are dormant and you can see structure clearly. Tool care supports that work.
- Cankers and dieback: prune out affected wood on dry days when temperatures are above 32°F so cuts are cleaner and surfaces aren’t icy.
- Fire blight risk (apples/pears): remove flagged shoots during dormant season when practical; disinfect tools when cutting suspect tissue.
- Virus management in brambles: don’t spread sap between plants; keep a spray bottle of 70% alcohol in your pruning kit.
Research and extension backing: Multiple land-grant extensions emphasize sanitation as part of integrated disease management, including cleaning and disinfecting pruning tools when working around infected plants (University of Minnesota Extension, 2020; Utah State University Extension, 2019).
Your Winter “Ready Rack”: Set Up a Grab-and-Go Tool Station
Once everything is sharpened, protect the edge you worked for. A simple station keeps tools sharp longer and reduces mid-season disease spread.
- Hang pruners and loppers; don’t toss them in a bucket where edges knock together.
- Keep a rag lightly oiled in a sealed jar for quick wipe-downs.
- Store a small sharpening paddle and alcohol wipes with your pruning gloves.
- Label a bin for replacement parts (springs, pivot bolts, extra blades).
If you do just one thing after reading this: sharpen and disinfect your primary pruners this week. You’ll feel the payoff on your very next cut—especially when late-winter pruning begins and every clean cut helps plants enter spring with fewer problems and less stress on you.