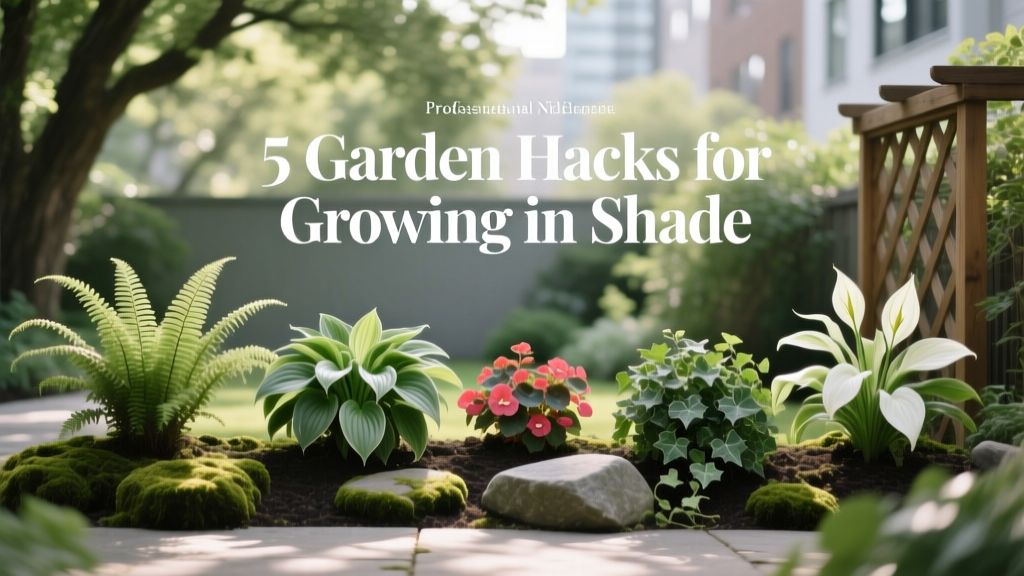
5 Garden Hacks for Growing in Shade
Most “shade garden failures” aren’t caused by a lack of sunlight—they’re caused by gardeners treating shade like a dim version of full sun. The common mistake is planting the right plant in the wrong kind of shade (dry shade under trees vs. bright shade beside a house) and then wondering why nothing thrives. Shade has rules, but once you work with them, you can grow shockingly lush greens, herbs, and flowers in spaces that look like they should only host moss and leaf litter.
Below are five shade-growing hacks I’ve watched outperform “standard advice” in real yards—especially in side yards, under tree canopies, and on north-facing patios. They’re grouped so you can troubleshoot your site first, then upgrade soil and light, then choose plants that actually love your conditions.
Group 1: Fix the Shade Itself (Before You Buy Plants)
Hack #1: Measure Your Shade Like a Pro (the 3-number shade map)
Shade isn’t one thing; it’s a combo of hours of direct sun, time of day, and how dry the soil gets. For one week, do a quick “shade map”: note direct sun hours (0–6+), whether that sun is morning or afternoon, and whether the soil is dry shade (under trees), moist shade (low spots), or average. The hack is accuracy—10 minutes a day beats guessing all season.
Real-world example: A north-facing side yard might get 2 hours of early sun (7–9 a.m.) but stay bright the rest of the day. That’s very different from a maple canopy spot that gets 0 hours of direct sun and bakes dry from root competition.
For a simple tool, use a phone compass + a note app. If you want to get nerdy, a $15 light meter app works fine for relative comparisons, but timing direct sun hours is still the fastest win.
Hack #2: Turn “Deep Shade” Into “Bright Shade” With White Bounce and Strategic Reflectors
In shade, you’re often short on usable light intensity, not just hours. You can cheat this by adding reflective surfaces where light can bounce into the planting zone. A flat white fence, a white-painted wall, or even a removable white panel can noticeably brighten a corner—especially if it faces east or south.
Specifics that work: Paint a fence panel with exterior white paint (often $25–$45 per gallon; one gallon covers roughly 250–400 sq ft). Or attach a 2 ft x 4 ft sheet of white corrugated plastic to a shady fence using zip ties—cheap, removable, and surprisingly effective.
Case example: In a townhouse courtyard that only received reflected light, adding a white trellis behind shade-loving lettuce boosted growth enough to harvest weekly instead of every other week. The plants didn’t get “more sun,” they got more usable brightness.
Group 2: Beat Root Competition and Dry Shade (Where Most Plants Tap Out)
Hack #3: Build a “Root-Barrier Micro-Bed” Under Trees (without digging a war)
Dry shade under trees is the hardest scenario because tree roots drink first, and your new plants get the leftovers. Instead of fighting roots by digging deep, build a raised micro-bed on top of the soil: lay down cardboard, add compost and topsoil, and edge it so it stays put. The trick is shallow and wide, not deep and narrow.
How to do it (quick specs): Mow/trim, then overlap plain cardboard (no glossy ink) by 6 inches. Add 3–4 inches of compost, then 3–4 inches of topsoil/leaf mold. Keep the finished bed depth around 6–8 inches so you’re not smothering the tree’s root flare. Edge with logs, bricks, or a simple ring of 1x6 boards.
DIY alternative: No lumber? Use a “log roll” edge—short sections of branchwood lined up like a low fence. Free, and it looks natural under trees.
Case example: Under an established oak, a gardener tried hostas three years in a row—each time they shrank by July. After installing two micro-beds (each about 3 ft x 6 ft), the same hosta varieties held size through late summer because they finally had a moisture-and-nutrient buffer above the thirstiest roots.
Source note: University of Minnesota Extension discusses the challenges of tree root competition and soil moisture limitations in shaded sites (University of Minnesota Extension, 2020).
Hack #4: Water Shade the “Opposite Way”: Deep, Infrequent, and Targeted With a Soaker Ring
Shade gardeners often overwater lightly because the soil surface looks dry—then they accidentally encourage shallow roots and fungal issues. A better hack is a soaker ring (a loop of soaker hose) that slowly wets the root zone, not the foliage. In dry shade, aim to moisten soil to about 6 inches deep per watering, then wait until the top 2 inches dry before repeating.
Practical setup: A 25 ft soaker hose is commonly $12–$25. Loop it around the planting pocket, cover it with 2 inches of mulch, and run it early morning. In many shade beds, 45–90 minutes once or twice a week beats 10 minutes daily.
Real-world example: Under spruce trees (classic dry shade), a soaker ring kept hellebores and epimedium alive through summer because water was delivered slowly enough to soak in rather than run off the needle layer.
Source note: Slow, targeted irrigation reduces leaf wetness duration and can help limit disease pressure compared with overhead watering; extension recommendations commonly emphasize watering at the soil level (Cornell Cooperative Extension, 2019).
Group 3: Soil and Mulch Moves That Make Shade Plants Take Off
Hack #5: Mulch Like a Shade Gardener (thin layers, the right material, and a simple ratio)
Mulch in shade isn’t just about moisture; it’s about keeping the soil evenly cool and feeding a fungal-friendly soil web that woodland plants love. The hack is to use a 2-inch layer (not 4 inches) and choose materials that don’t mat down and suffocate. Leaf mold, shredded leaves, or fine bark work better in shade beds than thick, chunky mulch that stays wet on top and dry underneath.
A simple mix: Combine 2 parts shredded leaves with 1 part finished compost and spread it 2 inches deep. Refresh with 1 inch in spring and again in fall if your trees drop a lot of debris.
Money-saving note: Bagged mulch can run $4–$7 per 2-cu-ft bag. Shredded leaves are free, and a basic electric leaf shredder (often $100–$180) can pay for itself in 1–2 seasons if you mulch multiple beds.
Planting Shortcuts: Pick Winners for Your Shade Type
Now that the site is dialed in, your plant choices become way easier. The quickest shortcut is matching plants to the three-number shade map you made earlier (sun hours, sun timing, dry/moist).
Scenario A: Dry shade under trees (0–2 hours of sun, soil dries fast)
Go for plants that evolved in woodland edges and can handle root competition once established: epimedium, hellebores, carex (sedges), heuchera, and some geraniums (like Geranium macrorrhizum). Plant in early fall (about 6–8 weeks before your first hard frost) so roots establish without summer stress.
Planting hack: Dig wide holes—2x the width of the root ball, not deeper—then top-dress with compost instead of burying the crown. In dry shade, crown rot from “too deep” planting is more common than people think because irrigation is inconsistent and mulch can trap moisture at the base.
Scenario B: Bright shade near a wall or fence (2–4 hours of morning sun, reflective light)
This is the sneaky “almost perfect” shade. You can grow leafy greens (arugula, spinach), cilantro, chives, and even compact hydrangeas if moisture is steady. Use the reflective hack and you’ll often get thicker leaves and better color than in hot sun.
Timing hack: In bright shade, sow lettuce every 14 days for steady harvest. You’ll avoid the “everything ready at once” problem and keep quality high because shade slows bolting.
Scenario C: Moist shade (low area, downspout splash zone, or heavy soil)
Moist shade needs plants that tolerate wetter feet and occasional slug pressure: ligularia, astilbe, some ferns, and certain hostas. The hack here is not adding more compost endlessly—improve drainage with structure. Mix in pine fines or shredded bark and avoid piling mulch against crowns.
Slug hack: Place a rough “grit ring” (crushed eggshells or horticultural grit) in a 3–4 inch band around prized plants, and keep mulch pulled back 1 inch from stems. It’s not magic, but it reduces easy travel routes in damp beds.
A Quick Comparison Table: Two Ways to “Improve Shade” (and when each wins)
| Method | Best for | Typical cost | Time to see results | Watch-outs |
|---|---|---|---|---|
| Reflective brightening (white fence, panels, trellis) | Courtyards, side yards, north-facing walls; bright shade goals | $10–$45 (DIY panel) or $25–$45/gal paint | Immediate (same week) | Glare near patios; keep panels secured in wind |
| Micro-bed over cardboard (6–8 inches deep) | Dry shade under trees; root competition zones | $0–$80 depending on compost/topsoil source | 2–6 weeks for better moisture; 1 season for plant performance | Don’t bury tree root flare; keep bed shallow and away from trunk |
Two “Insider” Moves That Make Shade Gardens Look Expensive (but aren’t)
Layer your plants by height and leaf texture, not flowers
Shade flowers can be subtle, but texture is where shade gardens shine. Pair bold leaves (hosta, ligularia) with fine texture (ferns, sedges) and medium texture (heuchera) for a designed look even when nothing is blooming. Think in threes: one bold, one fine, one medium—repeat that combo every 3–5 feet for instant cohesion.
Use “nurse pots” for the first summer in tough shade
If you’re nervous about planting directly into dry shade, use a nurse-pot approach: sink nursery pots into the micro-bed so the pot rim sits level with soil. It lets you control soil quality and moisture while plants establish, and you can pull the pot in a heat wave. After 8–12 weeks, transplant from pot to bed when roots are stronger.
Expert-backed reality check (so you don’t waste money)
“Shade is not a single condition—soil moisture and root competition often matter as much as light. Matching plants to the site is the fastest path to success.”
—Extension guidance summarized from University of Minnesota Extension (2020) and Cornell Cooperative Extension (2019)
That quote matches what experienced shade gardeners learn the hard way: you can’t compost your way out of dry shade if you ignore root competition, and you can’t “plant tougher” if the area is actually moist shade and crowns keep rotting. Your hacks should match your shade type.
Three quick case examples (so you can copy a playbook)
Case 1: Under a mature maple (dry shade). The gardener stopped digging holes between roots, built a 6-inch micro-bed, and switched to epimedium + hellebores. They ran a soaker ring 60 minutes once a week; survival went from “half dead by July” to full, evergreen clumps by fall.
Case 2: Narrow side yard with a fence (bright shade). They painted the fence white (one $35 gallon), added a trellis to bounce light, and succession-sowed greens every 2 weeks. Harvest improved without adding any fertilizer—light was the limiting factor.
Case 3: Downspout corner (moist shade). Instead of piling mulch, they redirected the downspout into a rain barrel and overflow hose, then planted astilbe and ferns where water remained. Slug pressure dropped after pulling mulch back 1 inch from crowns and using a grit ring around new starts.
Two sources worth keeping bookmarked
If you like to cross-check advice (smart), these are consistently solid:
University of Minnesota Extension (2020) on shade gardening challenges like soil moisture and tree-root competition.
Cornell Cooperative Extension (2019) guidance on watering practices that reduce foliar disease risk and improve irrigation efficiency.
Shade gardening gets a lot easier when you stop treating it like “less sun” and start treating it like a specific microclimate you can tweak. Measure the shade, bounce a little extra light, build soil above competing roots, and water in a way that actually reaches the root zone. Once those pieces click, shade stops being the place where plants limp along—and becomes the part of your yard that looks cool, calm, and intentionally designed.