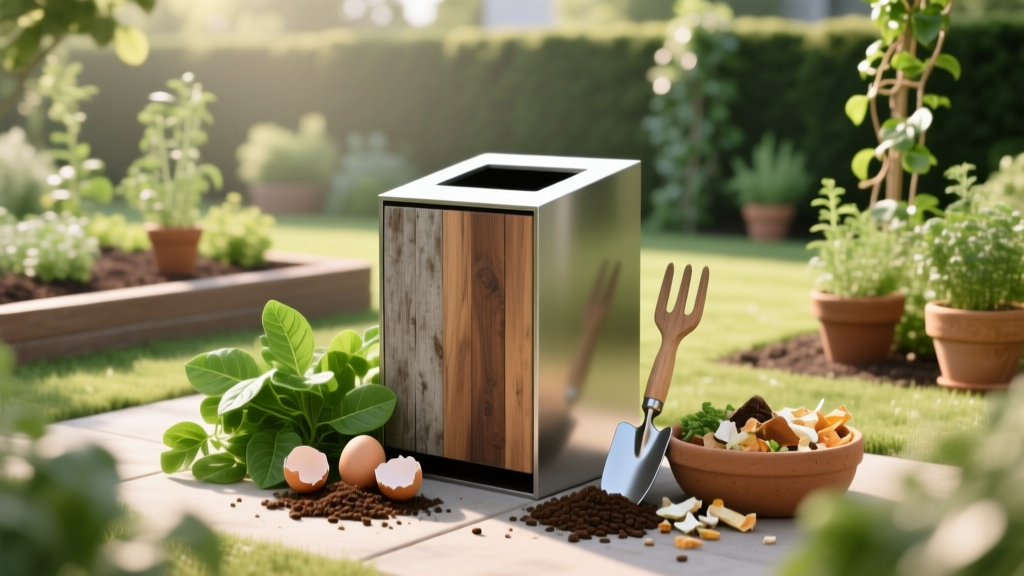
7 Garden Hacks for Better Compost
If your compost pile smells like ammonia or never seems to “cook,” the problem usually isn’t effort—it’s math. The most common mistake I see is tossing in kitchen scraps and calling it a day, which overloads the pile with nitrogen and water and leaves the microbes gasping for carbon and air. Get the ratios and airflow right, and you can turn the same materials into dark, crumbly compost in weeks instead of seasons.
One more surprise: “hot compost” isn’t magic—it’s a predictable temperature curve driven by oxygen, moisture, and a carbon-to-nitrogen balance. The science is well established, and it’s why small tweaks (shredding, layering, inoculating) can save you a lot of turning and waiting.
Group 1: Get the recipe right (so the microbes do the heavy lifting)
1) Nail the browns-to-greens ratio with a simple bucket system
Aim for roughly 2–3 parts “browns” to 1 part “greens” by volume (or about a 25–30:1 carbon-to-nitrogen ratio if you want to be nerdy). The fastest shortcut is keeping two containers: a 5-gallon bucket for dry browns (shredded leaves, torn cardboard) and a kitchen pail for greens (veg scraps, coffee grounds). Every time you dump greens, cover them with an equal or double volume of browns so fruit flies and odors never get a foothold.
Example: If you add 1 gallon of veggie scraps after meal prep, immediately add 2 gallons of shredded leaves or ripped cardboard. This one habit prevents the soggy, smelly “compost soup” that stalls piles.
2) Use a “lasagna layer” trick—thin layers beat big clumps
Big mats of grass clippings or a dense wad of wet leaves block oxygen. Instead, build in 2–3 inch layers: greens, then browns, then a sprinkle of finished compost or garden soil. Thin layers create lots of surface contact, which is where microbes work fastest, and it also keeps wet ingredients from forming anaerobic pockets.
Scenario: After mowing, don’t dump a thick grass slab into the bin. Spread clippings in a 2-inch layer and sandwich with 2–4 inches of shredded leaves. You’ll get heat without the rotten smell that comes from a grass “lasagna noodle.”
3) Hit the moisture target with the “wrung sponge” test (and a cheap fix)
Compost runs best around 50–60% moisture—damp like a wrung-out sponge, not dripping. Too wet drives out oxygen; too dry slows microbial activity to a crawl. Keep a $2 spray bottle or a small watering can nearby for dry spells, and stash a bag of shredded cardboard for rainy weeks to soak up excess.
Example: If you grab a handful and it drips, mix in 2–3 handfuls of torn egg cartons or corrugated cardboard. If it feels dusty and won’t clump, mist it and mix—don’t flood it.
Group 2: Speed hacks (faster breakdown with less turning)
4) Shred first: the 10-minute step that can cut compost time in half
Microbes don’t “eat” whole leaves; they work on surfaces. The shortcut is shrinking particle size: shred leaves with a mower, tear cardboard into strips, and chop chunky kitchen scraps. Many compost educators note that smaller pieces break down much faster because you increase surface area dramatically.
Real-world win: A neighbor of mine was waiting 8–10 months for leaf compost. After running leaves under a mower and layering with greens, they were screening finished compost in about 10–12 weeks in warm weather—same yard, same materials, just shredded.
Money-saving DIY: No chipper? Use a $0 workaround: put dry leaves in a trash can and “stir” with a string trimmer for 30–60 seconds (wear eye protection). It’s loud, but it works.
5) Build a pile that can actually heat up: minimum size + a quick temperature check
If your pile never warms, it might simply be too small to hold heat. A classic hot-compost guideline is a minimum of about 3 ft × 3 ft × 3 ft (roughly 1 cubic yard). Use a compost thermometer if you have one, but you can also do the “hand test”: if the center feels noticeably warm within 48–72 hours after building, you’re on track.
Extension resources consistently point gardeners to the 131–160°F zone for active composting; that’s where breakdown is fast and many weed seeds are less likely to survive if conditions are maintained. Washington State University Extension notes that a compost pile needs adequate oxygen, moisture, and the right mix to reach and sustain these hot temperatures (WSU Extension, 2020).
Scenario: Apartment gardener with limited space? Skip “hot compost” expectations and switch to a sealed bin + shredded inputs. You’ll still get great compost—just on a slower, steadier timeline.
“Most compost problems trace back to three things: too wet, too dry, or not enough air. Fix those and the pile almost always recovers.” — Colorado State University Extension compost guidance (CSU Extension, 2016)
6) Turn smarter, not harder: the “core swap” method (5 minutes, no heroics)
Turning works because it adds oxygen and moves undecomposed outer material into the hot center. The hack is a core swap: pull the center material out with a fork, toss the outer ring into the empty center, then put the center material back on the outside. You get the benefits of a full turn in about 5–7 minutes for a small bin—without trying to flip the entire pile like a pancake.
Timing tip: Do a core swap when the pile temperature drops below about 110°F after a heating cycle, or when you notice a slowdown (less warmth, fewer visible changes). This keeps decomposition humming without constant labor.
Case example: A busy family composting in a backyard bin did a core swap every 10–14 days instead of weekly full turns and still got finished compost by the end of a 12-week spring season.
Group 3: Odor, pests, and “problem piles” (fixes that actually stick)
7) Install a “biofilter cap” to stop smells and flies—no chemicals needed
If your compost attracts fruit flies, raccoons, or that sour odor, you need a top layer that acts like a filter. Keep a 3–6 inch “biofilter cap” of dry browns (shredded leaves, straw, wood shavings, or finished compost) on top at all times. This cap absorbs odors, discourages insects from laying eggs, and keeps the surface from drying out unevenly.
Example: When adding melon rinds or coffee grounds (both can get funky fast), bury them at least 8 inches deep and re-cap with dry browns. If you can’t bury (tumbler is full), freeze scraps until you can add browns and mix properly.
DIY alternative: No leaves? Tear up plain cardboard shipping boxes (remove glossy labels). Cardboard is an excellent odor sponge and it’s free.
Quick comparison table: pick a compost setup that matches your life
Different systems reward different habits. Here’s a practical side-by-side to help you choose (or troubleshoot) without overthinking it.
| Method | Best for | Typical active timeline | Effort level | Common failure point | Budget range (USD) |
|---|---|---|---|---|---|
| Open pile (1 cubic yard) | Fast, high-volume composting | 6–14 weeks in warm weather | Medium (turning helps) | Dries out or gets too wet without a cover | $0–$40 (DIY pallets/tarp) |
| Enclosed bin | Neat yards, fewer pests | 3–9 months | Low–medium | Compaction (not enough air) | $50–$200 |
| Tumbler | Small spaces, easy mixing | 8–16 weeks (with shredded inputs) | Low | Too wet; hard to add browns fast enough | $120–$300 |
| Worm bin (vermicompost) | Indoor/garage composting, food scraps | 2–4 months for castings | Low | Overfeeding; fruit flies if not covered | $40–$200 |
Three real-life compost situations (and the hacks that rescue them)
Compost advice often sounds universal, but your “best” compost method depends on what you’re actually dealing with: lots of lawn clippings, lots of kitchen scraps, or a tiny space. Here are three scenarios I see constantly, with the most effective shortcuts.
Scenario A: You have a mountain of fall leaves and not enough greens
Leaf-heavy piles tend to sit there looking unchanged, especially if leaves mat. Shred the leaves first, then add nitrogen in measured doses: 1–2 cups of coffee grounds per 5 gallons of shredded leaves, or mix in fresh grass clippings in thin layers. If you’re short on greens, a small amount of high-nitrogen fertilizer can work as a bridge—think 1/2 cup of blood meal per 20–30 gallons of leaves—then add water to reach that wrung-sponge moisture.
Cost note: Coffee grounds are often free from local cafes, while a bag of blood meal might run $10–$18. If your goal is budget compost, grounds + grass clippings are the cheapest accelerators.
Scenario B: Your compost is mostly kitchen scraps and keeps turning slimy
This is the classic nitrogen-and-water overload. The fix is not “more turning” first—the fix is adding carbon and structure. Keep a dedicated stash of dry browns right next to the compost (shredded cardboard, dead leaves, straw), and add at least 2 volumes of browns for every 1 volume of scraps until the pile stops looking wet and sticky.
Example: If you generate 3 gallons of scraps per week, plan to stockpile at least 6–9 gallons of dry browns weekly. That one planning number saves you months of stink and sludge.
Scenario C: You want compost fast, but you’ll only work on it twice a month
Great—design for that. Build a pile at least 1 cubic yard, shred inputs, keep moisture steady, and use the core swap method every 14 days. You’ll get the “good parts” of hot composting (heat and speed) without committing to weekly turning.
Reality check: If you can’t gather enough material to reach that size, switch strategies: do vermicomposting for food scraps and store browns (leaves/cardboard) until you can batch-build a larger outdoor pile.
A few insider tweaks that make every hack work better
These aren’t extra tips to memorize—they’re the small moves that make the seven hacks above feel almost effortless.
Cover your pile to control moisture. A tarp, a scrap of old carpet, or even a flattened cardboard box can prevent the “soaked by rain” problem that turns piles anaerobic. If you’re buying something, a basic tarp is often $8–$15, and it usually pays for itself in one season of not having to rebuild a ruined pile.
Keep a “brown bank.” The easiest composters I know always have a backup stash of dry carbon: a trash can of shredded leaves, a bag of sawdust from untreated wood, or a pile of torn cardboard. When you suddenly have a lot of wet greens (garden cleanup, kitchen party prep), you can balance the pile in minutes.
Don’t chase perfection—chase recovery. Even well-managed piles go off-script: a week of rain, an overload of citrus peels, a forgotten bucket of scraps. The fastest composters aren’t the ones who never mess up; they’re the ones who correct quickly by adding browns, restoring airflow, and adjusting moisture.
For deeper science-based compost guidance, strong public references include Washington State University Extension’s composting resources (WSU Extension, 2020) and Colorado State University Extension’s compost troubleshooting recommendations (CSU Extension, 2016). If you want to compost weeds and reduce pathogen risk, the U.S. EPA also summarizes the importance of maintaining hot compost temperatures (often cited in the 131°F+ range) and proper management practices (U.S. EPA, 2023).
Once you’ve got your pile behaving—warming up, shrinking steadily, smelling earthy—the best part is how repeatable it becomes. Keep your brown bank stocked, build with thin layers, and use the core swap when heat drops. Compost stops being a mysterious backyard chore and starts acting like a predictable kitchen recipe you can make on autopilot.