The Best Natural Way to Kill Garden Weeds
If you’ve ever dumped a “natural weed killer” mix over a patio crack and watched the weeds brown out… then pop right back up two weeks later, you’ve run into the most common mistake: treating weeds like a surface problem. Most weeds don’t “live” in the leaves you can see—they’re storing energy in crowns, rhizomes, and taproots, and they’re perfectly happy to regrow after a quick burn.
The real shortcut isn’t one magic spray. It’s using the right natural method for the weed you have, at the right time, and pairing it with a simple prevention step so you’re not doing the same job twice. Below are the natural weed-killing tactics that actually move the needle—organized by where the weeds are and how they behave.
Start With a Fast Weed “Diagnosis” (So You Don’t Waste Effort)
Tip: Match the method to the weed’s root system
Annual weeds (like chickweed) die if you stop them from setting seed; perennials (like bindweed) require repeated hits because they regrow from roots. If you’re seeing the same plant return from the exact same spot after you remove the top, assume perennial. Example: dandelions need root removal or repeated defoliation; crabgrass often just needs prevention next season.
Tip: Time your attack for maximum weakness
Weeds are easiest to kill when they’re small—ideally under 4 inches tall—because they have less stored energy. For many perennials, late summer to early fall is a key window since plants move sugars down to roots; repeated cutting then can starve roots faster. A practical schedule: do your “serious” perennial work in August–October and your quick annual cleanups anytime seedlings appear.
“Mulching is one of the most effective ways to manage weeds in home landscapes because it blocks light and reduces weed seed germination.” — University of Minnesota Extension (2023)
Fast Knockdown: Natural “Kill” Methods for the Tops
These methods shine when weeds are in hardscape cracks, gravel paths, or along fences—places you can’t easily hoe. They’re also useful as a first strike before you follow with prevention.
Tip: Boiling water for cracks and edges (cheap, shockingly effective)
Boiling water kills by rupturing plant cells on contact—no mixing, no residue, no waiting. Pour slowly so it penetrates the crown; use about 1–2 cups per small weed clump, and repeat in 7–10 days for stubborn perennials. Real-world example: a full kettle (about 1.7 liters) usually handles a 10–15 foot stretch of patio cracks if weeds are small.
Tip: Use a weed torch on gravel and pavers (don’t “char”—just wilt)
A propane torch is a time-saver for dry, non-flammable zones like gravel drives and paver joints; you’re aiming to heat leaves until they look glossy and limp (usually 1–2 seconds per plant), not incinerate them. A standard 20 lb propane tank often lasts several hours of spot-treating, which can be cheaper than buying repeated ready-to-spray “natural” products. Example: torch a driveway edge in 20 minutes, then come back one week later for the survivors.
Tip: Vinegar spray is best for seedlings, not established weeds
Household vinegar (5% acetic acid) is a contact burn—it doesn’t reliably kill roots, especially on perennials. If you use it, reserve it for tiny weeds in gravel or sidewalk cracks and apply on a hot, dry day for better burn-down; avoid windy days because it can damage nearby plants. Data point: you’ll usually see browning within 2–24 hours, but regrowth is common unless weeds are very young.
Tip: Salt belongs in hardscape only (and only in tiny doses)
Salt can sterilize soil and migrate with water, so it’s not a garden-bed tool. If you insist on using it, keep it to paver cracks where you truly don’t want anything growing, and apply sparingly—think a pinch per crack, not a broadcast treatment. Example: a teaspoon of salt scattered near a bed edge can ruin nearby soil structure and harm plants after rain moves it.
Root-Level Wins: Natural Methods That Actually Reduce Regrowth
If you want fewer repeats, focus here. These are the techniques that cut weeds off at the knees long-term without relying on harsh chemicals.
Tip: Pull after rain or after soaking for 20 minutes
Weeding dry soil is like trying to pull a nail from concrete—you snap the top and leave the root. Water the area for 20 minutes (or weed the day after a good rain) so roots slide out more completely. Example: in a vegetable bed, a quick sprinkler soak can turn a 45-minute frustrating weeding session into 15 minutes of clean pulls.
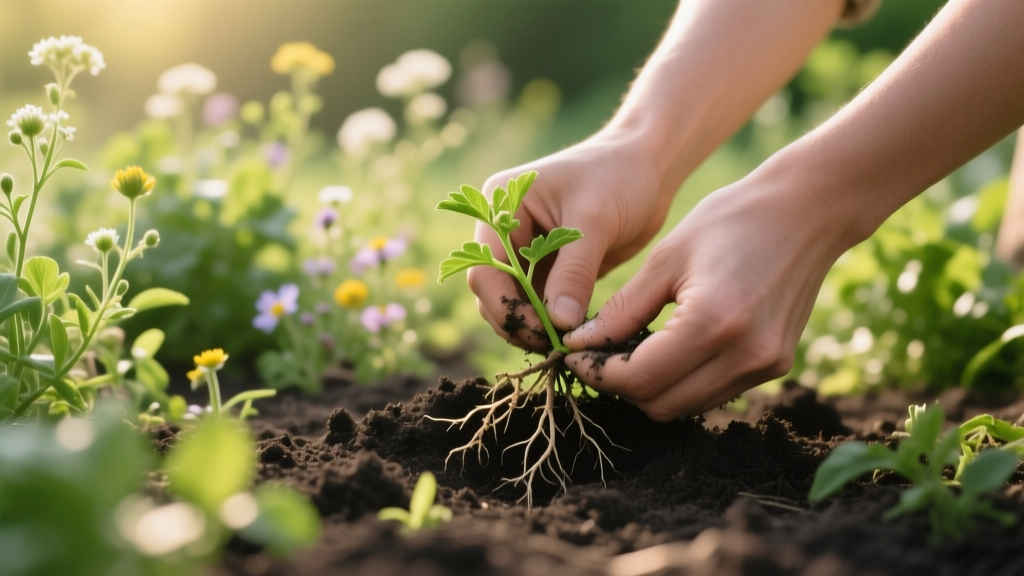
Tip: Use a dandelion dagger (or long weeder) and “pop” the crown
For taproot weeds, the goal is removing the crown—the growth point where leaves emerge. Slide the tool 2–3 inches from the center, angle under the crown, and lever up; if you get at least 3–4 inches of root, you’ve usually weakened regrowth dramatically. Example: a $12–$25 weeding knife can save hours if your lawn edge is loaded with dandelions.
Tip: Repeated “decapitation” beats heroic one-time pulls for bindweed and thistle
Deep-rooted perennials (bindweed, Canada thistle) often break and regrow when pulled. Instead, cut them at ground level every 7–14 days; the plant keeps spending stored energy to resprout and eventually fizzles. Real-world scenario: in a neglected fence line, consistent snipping for 8–10 weeks can reduce a bindweed patch dramatically without disturbing soil.
Tip: Solarize small areas with clear plastic during peak heat
Soil solarization uses the sun to heat soil hot enough to kill many weed seeds and shallow roots. Stretch clear plastic tightly over moist soil, seal edges with soil or boards, and leave it for 4–6 weeks during the hottest part of summer; the tighter the seal, the hotter it gets. UC Agriculture & Natural Resources notes solarization can effectively reduce weed pressure when done during warm periods (UC ANR, 2018).
Prevention That Feels Like a Cheat Code (Because It Stops Weeds Before They Start)
This is where natural weed control becomes easy. Kill what’s there, then block the next wave.
Tip: Mulch at the “sweet spot” depth: 2–3 inches for beds
Too little mulch lets light through; too much can smother desired plants and create soggy crowns. Aim for 2–3 inches of wood chips or shredded bark on ornamental beds, keeping mulch 2–3 inches away from plant stems. Example: one 2-cubic-foot bag covers about 8 square feet at 3 inches deep, so you can estimate cost quickly at the store.
Tip: Sheet mulch with cardboard + chips for weedy zones
For areas you want to convert (side yard, new bed), lay overlapping cardboard (6–8 inches overlap), soak it thoroughly, then add 4–6 inches of wood chips on top. This blocks light and creates a decomposing barrier that suppresses weeds for months while improving soil below. Case example: a 100-square-foot weedy patch often takes about 10–15 flattened shipping boxes and roughly 1 cubic yard of chips (often $0–$50 if you use free chip drops).
Tip: Use landscape fabric only under gravel, never in planting beds
In beds, fabric eventually clogs with soil and turns into a weed “mat” that’s miserable to maintain; weeds root into it, and pulling becomes a shredding mess. Under gravel paths, fabric can be helpful as a separator layer—paired with 2–3 inches of compacted gravel to reduce light and germination. Real-world example: a 3-foot-wide path is easier to maintain when you refresh gravel yearly than when you fight weeds rooted through fabric.
Tip: Close the canopy—plant densely to shade the soil
Sunlit bare soil is an invitation for weed seeds. Use groundcovers, tighter spacing, or living mulch so soil stays shaded and cooler, reducing germination. Example: in a sunny ornamental bed, spacing plants so leaves touch by midsummer can cut weeding time in half compared to wide bare gaps.
Natural Weed Control in Specific Real-World Scenarios
Different spots in the yard call for different “best” methods. Here are proven game plans that work because they match the environment.
Scenario 1: Weeds in patio cracks and driveway seams
Best natural combo: boiling water + follow-up torch + crack maintenance. Start with boiling water for immediate knockdown, then torch any survivors 7 days later (quick pass—just wilt). To slow regrowth, sweep polymeric sand into paver joints or top up joint sand; fewer gaps means fewer weed seedlings. Cost example: boiling water is basically free; a basic torch wand often runs $25–$60, and polymeric sand might be $20–$40 per bag depending on brand and coverage.
Scenario 2: Weeds taking over a vegetable garden bed
Best natural combo: shallow hoeing + mulch + fast re-cover. Slice weeds at soil level with a sharp hoe on a dry morning, then mulch the same day at 2–3 inches so light doesn’t hit exposed soil. Avoid deep digging that brings buried weed seeds to the surface; Iowa State University Extension emphasizes minimizing soil disturbance to reduce weed seed germination (Iowa State Extension, 2020). Example: do a 10-minute hoe pass every 5–7 days during peak growth instead of letting weeds get big and stealing water from tomatoes.
Scenario 3: A gravel path that keeps going green
Best natural combo: torch + rake + add fresh gravel. Torch to knock back growth, then rake out dead material so it doesn’t become soil for the next generation. Top up with 1 inch of fresh gravel once a year; that extra depth blocks light and improves drainage. Money-saver: buying a small truckload of gravel is often cheaper per cubic foot than bags—call local landscape suppliers and compare.
Scenario 4: Lawn weeds without nuking the grass
Best natural combo: hand tool removal + mow height + overseed thin spots. Use a dandelion tool to remove taproots after rain, then keep mowing height around 3–4 inches so grass shades soil and competes harder; many lawn weeds thrive in short, stressed turf. Patch thin areas with grass seed so weeds don’t claim bare soil—seed is often cheaper than repeated weed products over a season. Example: spot-pulling 20 dandelions per week for a month usually beats trying to “spray your way out” naturally.
Comparison Table: Pick the Right Natural Method Fast
| Method | Best For | Speed of Results | Root Kill? | Typical Cost | Big Caution |
|---|---|---|---|---|---|
| Boiling water | Cracks, edges, small weeds | Hours to 1 day | Sometimes (small weeds) | $0–$1 per treatment | Scald risk; avoid desired plants |
| Propane torch | Gravel, pavers, fence lines | Immediate wilting | Rarely (needs repeats) | $25–$60 tool + propane | Fire risk; avoid dry mulch/leaf litter |
| 5% vinegar spray | Seedlings in hardscape | 2–24 hours | No (usually) | $3–$6 per gallon | Drift damages plants; eye/skin irritation |
| Sheet mulching | New beds, weedy areas | Days to weeks | Weakens over time | $0–$50+ depending on chips | Needs overlap; can harbor slugs short-term |
| Hand weeding (after rain) | Beds, lawns, around plants | Immediate | Yes (if root removed) | $0–$25 tool | Slow if weeds are mature or soil is dry |
DIY Mixes and Money-Saving Swaps (What Actually Helps)
Tip: Skip soap-and-vinegar “recipes” near beds—use them only as hardscape spot treatments
Many DIY weed sprays combine vinegar + dish soap + salt; they burn foliage but create collateral damage risks in soil. If you use a DIY spray, keep it for driveway cracks only, apply with a narrow stream, and never before rain (runoff spreads it). Example: a $4 gallon of vinegar used carefully can replace a $12–$20 ready-to-spray product for the same limited use case.
Tip: Use free mulch sources to cut weed control costs dramatically
Wood chips from local tree services or municipal drops can turn a pricey mulching project into a near-free one. Ask for “fresh chips” and plan to apply them 4–6 inches deep for sheet mulching, or 2–3 inches for maintained beds. Real-world example: covering a 200-square-foot bed with bagged mulch can easily cost $100+, while a free chip drop can cover several hundred square feet if you’re willing to wheelbarrow.
Tip: Invest once in the right hand tools (they pay off fast)
A sharp hoe, a sturdy hand weeder, and a soil knife make natural weed control faster than any spray. If your weeding sessions feel endless, it’s often a tool issue, not a motivation issue. Example: spending $30–$50 total on tools can replace repeated purchases of “natural” weed killer that only browns tops and needs reapplication.
Small Habits That Keep Weeds From Coming Back
Tip: Don’t let weeds go to seed—one plant can create a long problem
The fastest way to “multiply” your work is letting a weed mature and drop seed. Make it a rule: if you see a weed with flowers or seedheads, remove it that day, even if you do nothing else. Example: keep a bucket by the garden gate and do a 3-minute seedhead patrol whenever you water.
Tip: Edge beds and paths so weeds don’t creep in sideways
Creeping grasses and runners invade from edges, not just from seed. Use a spade to cut a clean edge 2–4 inches deep once a month during peak growing season, or install a physical edging barrier where it makes sense. Example: a crisp edge along a mulched bed can stop bermudagrass from marching in and turning weeding into a weekly battle.
Tip: Refresh mulch lightly instead of letting it disappear
Mulch breaks down; once it thins below about 2 inches, weed pressure rises fast. Top up with 1 inch mid-season (or at least once a year) instead of waiting until the bed is bare again. Example: a single $6–$8 bag used as a “touch-up” can prevent a bigger $60 re-mulch later.
If you want the simplest “best natural way” in one line: knock weeds back fast (boiling water or a torch where appropriate), then block the next wave with 2–3 inches of mulch or a cardboard-and-chips sheet mulch layer. That pairing is what turns weeding from a recurring chore into a quick cleanup—and it’s the closest thing gardening has to a real shortcut.
Sources: University of Minnesota Extension (2023), Mulching and Weed Control guidance; UC Agriculture & Natural Resources (2018), Soil Solarization for Gardens and Landscapes; Iowa State University Extension (2020), home garden weed management recommendations.