8 Garden Hacks for Garden pH Management
Most gardeners who “fix” pH are really treating a symptom—then wondering why the same plants keep struggling. The common mistake is chasing a single magic number (like pH 6.5) without measuring where the soil is today, or without accounting for what actually moves pH long-term (texture, lime quality, irrigation water, and nitrogen source). The good news: pH is manageable if you use a few shortcuts that save time, money, and rework.
Below are eight proven hacks, grouped by what you’re trying to do: measure accurately, raise pH efficiently, lower pH safely, and keep it stable so you’re not fighting the same battle every season.
Quick wins: measure smarter before you amend
1) The “two-test” hack: screen fast, then confirm with a real soil test
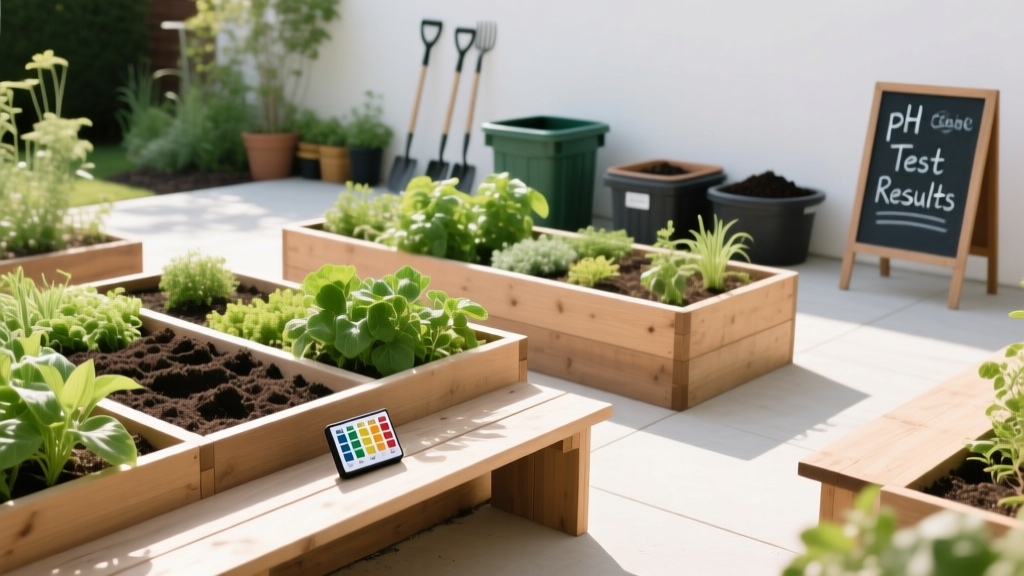
Headline: Use a $15–$25 DIY pH kit for quick scouting, but base amendments on one lab test every 2–3 years.
Cheap meter probes are notorious for drifting; colorimetric kits (the ones with powder + color chart) are usually more consistent for a quick check. Then, when you’re ready to actually add lime or sulfur, send one composite sample to a lab so you get pH and buffer pH (which controls how much lime you need). Many extension services recommend routine soil testing on a 2–3 year cycle for home gardens because guessing amendments can overshoot and take seasons to undo.
Real-world example: If your quick kit reads pH 5.4 in a bed that failed peas, don’t dump lime immediately—send a composite sample first. A lab result might show pH 5.8 but very high buffering (clay/organic matter), meaning it takes much more lime to budge than your neighbor’s sandy bed.
2) Composite sampling in 10 minutes: 10 plugs, one bucket, one answer
Headline: Take 8–12 small subsamples per bed (top 6 inches), mix in a clean bucket, and test that—not one random scoop.
Soil pH can vary dramatically across even a small yard, especially near downspouts, old foundation rubble, or where ash/compost was dumped. A composite sample averages those micro-zones so your amendment plan is right for the whole bed. Aim for a sampling depth of about 6 inches for vegetable beds (where most feeder roots live) and avoid recently fertilized spots for at least 2 weeks.
Scenario: A gardener in a 4' x 12' raised bed gets pH 7.6 from one corner and panics. Composite sampling reveals most of the bed is 6.8—the “hot” corner sits on leftover concrete chunks from an old path.
3) Don’t fight “phantom pH”: check irrigation water and fresh mulch first
Headline: If pH keeps bouncing back, test your water and look at what you’re adding weekly.
If your irrigation water is alkaline (common with well water), it can slowly push soil pH up—especially in containers and raised beds. Also, some fresh mulches and composts can temporarily affect surface readings (not necessarily the root zone). A simple water test strip or aquarium KH/GH kit (often $10–$20) can reveal whether your “mystery pH creep” is coming from the hose, not the soil.
Example: Your blueberry potting mix tests pH 5.2 after you acidify, but two months later it’s 6.2 again. A quick check shows your well water is high in alkalinity—switching to captured rainwater for even half your irrigations can slow the rebound.
Raising pH (making soil less acidic) without overshooting
4) Choose the right lime: pelletized for speed, ag lime for budget
Headline: Pelletized lime reacts faster and spreads easier; agricultural lime is cheaper per pound of calcium carbonate equivalent.
Pelletized lime is finely ground limestone formed into pellets, so it breaks down quickly after watering—great when you need a quicker response in a garden bed. Agricultural lime (powdery) is usually less expensive but dustier and slower to incorporate evenly. The key is to match the product to your timeline: if you’re planting in 4–6 weeks, pelletized is the convenient play; if you’re prepping in fall for spring, ag lime can save real money.
| Option | Best for | Speed | Typical cost (DIY retail) | Notes |
|---|---|---|---|---|
| Pelletized lime | Raised beds, quick correction | Faster (weeks to a couple months) | $6–$10 per 40 lb bag | Easy to spread; still needs watering and mixing |
| Agricultural lime (ground limestone) | Fall prep, larger areas | Slower (months) | $4–$8 per 50 lb bag | Dusty; best incorporated well |
| Wood ash (DIY) | Small tweaks + potassium boost | Fast at surface | $0 (if you have clean ash) | Easy to overdo; avoid around potatoes/blueberries |
Data point that matters: Many extension recommendations treat lime as a slow-and-steady amendment—incorporation into the top 6 inches and time (often months) is what makes it work, not a one-time sprinkle. For rate accuracy, labs use buffer pH to estimate lime requirement; that’s why Tip #1 saves so much grief.
Citation: Penn State Extension soil test guidance emphasizes that lime recommendations depend on both active soil pH and buffer pH, and that incorporation improves effectiveness (Penn State Extension, 2019).
5) The “half-rate, twice” trick: split lime applications to avoid lockouts
Headline: Apply 50% of the recommended lime rate, wait 8–12 weeks, retest, then decide on the second half.
Overshooting into high pH can reduce availability of iron, manganese, and phosphorus—especially in sandy soils and raised beds. Splitting the application gives the soil time to react and gives you a chance to stop at the sweet spot. This is especially useful if you’re relying on bag directions instead of a lab’s buffer-based recommendation.
Real-world example: A tomato bed tests at pH 5.3, and the gardener wants to jump to ~6.5. Instead of dumping the full calculated lime amount at once, they apply half in early spring, retest mid-summer, and only add the remainder if pH is still below target.
6) Wood ash: the free pH “nudge,” but measure it like salt
Headline: Use sifted, clean hardwood ash only in small doses—think “seasoning,” not “fertilizer.”
Wood ash can raise pH and supplies potassium, but it’s easy to over-apply and can spike salts. A cautious starting point is 5–10 lb of ash per 100 sq ft per year (spread thinly and watered in), and only on soils that test acidic. Keep it away from blueberries, azaleas, and potatoes (potatoes are more prone to scab in higher pH).
Scenario: A gardener saves ash from a winter wood stove and wants to “use it up” in spring. The hack is to apply it only to the acidic part of the lawn or a brassica bed, not across the whole vegetable garden—then retest in 6–8 weeks.
“Lime and ash are not ‘more is better’ amendments—once soil pH swings too high, it can take multiple seasons to bring it back down.”
—Extension soil management guidance (paraphrased)
Lowering pH (making soil more acidic) without stressing plants
7) Elemental sulfur: plan ahead and let microbes do the work
Headline: Use elemental sulfur for long-term acidification, but apply it months ahead (best in fall or very early spring).
Elemental sulfur must be converted by soil microbes to sulfuric acid, so it takes time and warmth—expect noticeable movement over 6–12 weeks in warm conditions, longer in cool weather. Mix it into the top 4–6 inches for best effect, and avoid piling it near plant crowns. If you need to move pH for blueberries or hydrangeas, sulfur is usually the steadier tool than “instant” liquid acids.
Concrete numbers to guide you: For small garden tweaks, many gardeners start with about 1–2 lb of elemental sulfur per 100 sq ft, then retest after 8–12 weeks (exact rate depends heavily on soil texture and starting pH). Sandy soil shifts faster; clay needs more sulfur for the same change.
Citation: University of Minnesota Extension notes that changing soil pH is a gradual process and that sulfur acidifies soil over time via microbial activity; they recommend soil testing and patience for meaningful change (University of Minnesota Extension, 2020).
8) Acidifying fertilizer hack: use ammonium-based nitrogen to gently steer pH
Headline: If you fertilize anyway, choose a nitrogen form that nudges pH in the direction you want.
Ammonium-based fertilizers (like ammonium sulfate) acidify soil over time, while nitrate-based sources tend to have less acidifying effect. This is a “steering wheel,” not a turbo button—but it’s a smart hack when you’re maintaining acid-loving beds or trying to prevent pH creep upward. Use label rates and split applications: for example, apply nitrogen in 2–3 smaller feedings spaced 3–4 weeks apart during active growth rather than one big hit.
Example: A gardener maintains a blueberry patch that keeps drifting toward neutral because of alkaline irrigation water. Switching part of their feeding program to an ammonium-based fertilizer (instead of a nitrate-heavy lawn fertilizer nearby) can help keep pH from climbing as quickly.
Cost note: This can be cheaper than repeated “pH down” liquids. A 5 lb bag of ammonium sulfate is often in the $10–$20 range and lasts many feedings in a small garden, while specialty acidifying liquids can run $15–$30 for a bottle that treats only a handful of waterings.
Three real-world pH problems (and how these hacks solve them)
Scenario A: Chlorotic hydrangeas in a new build (pH too high from construction debris)
New construction soil often hides crushed concrete and mortar dust, which can push pH upward. The fastest shortcut is Tip #2: composite sampling plus removing the obvious rubble in the planting zone. Then use Tip #7 (elemental sulfur) in fall so the microbes can work through spring, and mulch with pine fines or leaf mold to buffer the surface.
Specific move: If you find chunks of mortar in the top 8 inches, physically remove them before applying any sulfur—otherwise you’re paying to “acidify” a constant source of alkalinity.
Scenario B: Raised bed vegetables stall every summer (pH swings from inconsistent inputs)
Raised beds can change faster than native soil because they’re often lighter and get frequent compost additions. Use Tip #1 to run an annual quick pH screen in midsummer, and Tip #3 to check your irrigation water if readings creep up year after year. If your bed is acidic (below ~6.0) and you grow brassicas, Tip #5 (split lime) can stabilize growth without overshooting.
Money-saving detail: Instead of buying a new “garden soil” blend each year, spend ~$20–$30 on one lab test every couple of seasons and amend precisely. It’s almost always cheaper than re-filling beds because “nothing grows.”
Scenario C: Blueberries in containers that won’t stay acidic (water alkalinity problem)
Container media is small-volume, so water chemistry matters a lot. Use Tip #3 to test alkalinity and switch to rainwater for at least 1–2 waterings per week if your water is pushing pH up. For long-term control, Tip #7 (small, careful sulfur applications) beats constant liquid adjustments, and Tip #8 (ammonium-based feeding) helps maintain acidity between repotting cycles.
Specific routine: Retest container pH monthly during the growing season; pots can swing in 30 days in hot weather, especially if you fertigate.
Extra micro-hacks that make the 8 tips work better
Time your pH work around soil temperature: Sulfur acidification depends on microbial activity, so it moves faster when soil is warm (late spring through early fall). Lime can be applied any time the soil is workable, but fall application gives it months to react before spring planting.
Mix amendments—don’t top-dress and hope: Incorporating lime or sulfur into the top 4–6 inches speeds results and reduces uneven “hot spots.” In raised beds, a hand cultivator or small garden fork does the job in minutes for each 4' x 8' bed.
Target pH by crop, not by ego: Blueberries often want strongly acidic conditions (around pH 4.5–5.5), while many vegetables perform well around slightly acidic to neutral (~6.0–7.0). Chasing one universal number is how people end up with iron chlorosis on one side of the yard and clubroot-prone brassicas on the other.
Keep records like a mechanic: Write the date, product, and rate right on a bed map (even a phone note). When you retest in 8–12 weeks, you’ll know what actually moved the needle—and what was a waste of money.
Manage pH like you manage cooking: measure first, make small adjustments, and taste again before you add more. Once you start using composite samples, split applications, and the right amendment for the job, soil pH stops being a yearly mystery and turns into a predictable maintenance routine you can do in a couple of short sessions per season.