Coconut Coir vs Peat Moss for Seed Starting
The #1 seed-starting mistake I see (even from experienced gardeners) is assuming “seed-starting mix” is automatically neutral and gentle. Some peat-heavy mixes can be quite acidic right out of the bag, and some coir bricks can come loaded with salts if they weren’t properly washed—both can stall germination or leave seedlings looking weak for no obvious reason.
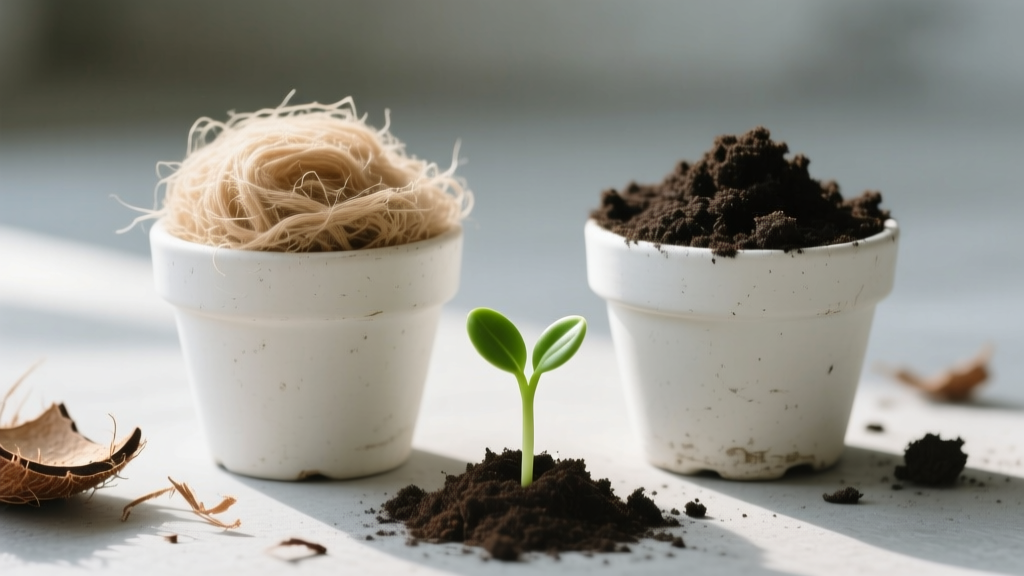
Peat moss and coconut coir can both grow great seedlings. The “best” one is usually the one you prep correctly for your water, your crops, and your schedule. Below are the practical, proven tweaks that matter more than brand names.
Quick reality check: what you’re actually buying
Tip: Treat coir like a processed product, not a “natural” one
Coir quality varies wildly based on how it was rinsed and buffered. If it’s high in soluble salts (especially sodium and potassium), seedlings can germinate and then stall at the cotyledon stage. If you’ve ever had a tray where half the cells look “frozen” in time, this is a prime suspect.
Example: If your coir brick label doesn’t mention “washed” or “buffered,” plan to rinse it and check runoff EC (details below) before using it for tomatoes or peppers.
Tip: Remember peat is naturally acidic—and seedlings notice
Peat moss typically has a low pH and is usually limed in commercial mixes, but raw peat or lightly amended peat mixes can still run acidic. Many seedlings tolerate it, but you’ll see slower root development in sensitive crops when pH drifts too low. A small amount of lime can stabilize pH for weeks.
Source: Cornell University’s Controlled Environment Agriculture resources note peat’s naturally low pH and common need for limestone amendment (Cornell CEA, 2018).
| Seed-Starting Factor | Coconut Coir | Peat Moss |
|---|---|---|
| Typical pH | ~5.5–6.8 (varies by processing) | ~3.5–4.5 (often needs lime) |
| Salt risk | Medium–High if not washed/buffered | Low |
| Water behavior | Re-wets easily; holds water well | Holds water well but can be hydrophobic when dry |
| Common gotcha | Stunted seedlings from high EC/salts | pH drift acidic; dry peat resists re-wetting |
| Typical cost (DIY mix portion) | Often $0.50–$1.50 per 10 L (brick-dependent) | Often $0.40–$1.20 per 10 L (bale-dependent) |
Costs vary by region, but the real cost difference often shows up in prep time: coir may need rinsing/buffering; peat may need wetting agent technique and lime adjustment.
Germination-first mix tweaks (the stuff that saves trays)
Tip: Use a “germination layer” that’s finer than your main mix
Seeds don’t need a fluffy, chunky mix; they need even moisture and good seed-to-media contact. Sift a small amount of your coir/peat mix through 1/8-inch hardware cloth (or a kitchen colander) and use that as the top 1/4 inch (about 6 mm) in each cell. This reduces air pockets that cause uneven sprouting.
Example: For tiny seeds like basil or snapdragon, a fine top layer can improve germination uniformity in a 72-cell tray enough that you’re not re-seeding a week later.
Tip: Nail the simplest seed-starting ratio: 2:1:1
If you want a reliable DIY seed-starting mix, start with 2 parts coir or peat, 1 part perlite, and 1 part vermiculite. The perlite keeps oxygen flowing (reducing damping-off), and vermiculite holds water right at the seed zone. This is a practical baseline you can adjust rather than guessing every season.
Example: Mix 8 cups coir + 4 cups perlite + 4 cups vermiculite for a small batch that fills about one standard 10x20 tray of 72 cells.
Tip: Don’t feed the tray—feed the schedule
Neither peat nor coir contains meaningful nutrition. Start feeding when you see the first true leaves, not at sowing. A simple routine: 1/4-strength liquid fertilizer once per week, then 1/2-strength after 10–14 days if seedlings stay pale.
Source: University of Maryland Extension notes that seedlings in soilless mixes require fertility once true leaves develop, and recommends diluted fertilization to avoid burn (UMD Extension, 2020).
Moisture control tricks (because most “seed starting problems” are water problems)
Tip: Pre-hydrate coir bricks with warm water and a measured target
Coir bricks don’t hydrate evenly if you rush them. Use 1 gallon (3.8 L) of warm water for a typical ~650 g brick (check your label), let it sit 15 minutes, then break and fluff, adding small splashes until it’s evenly damp. Properly hydrated coir should clump in your fist but crumble when poked.
Example: If you see dry “cores” in the middle of the brick, those dry pockets later become hydrophobic lumps in cells that refuse to wet.
Tip: Use the paper towel test to avoid soggy trays
Before filling cells, press a handful of mix onto a paper towel for 5 seconds. If the towel gets a wet ring bigger than a quarter, the mix is too wet for most seeds and increases damping-off risk. Add dry perlite or dry peat/coir until the towel shows only a faint damp patch.
Example: This is a lifesaver when you’re mixing in a bucket and accidentally over-water—no guessing, no waiting.
Tip: Bottom-water on day 3–4, not day 1
Top watering at sowing helps settle seeds and eliminate air pockets. After that, switch to bottom watering once seedlings hook (often day 3–4 for lettuce, 5–8 for tomatoes). Bottom watering keeps the surface drier, which discourages fungus gnats and damping-off organisms.
Example: In a 1020 tray, add 1/4 inch (6 mm) of water, let cells wick for 20 minutes, then dump the excess.
pH and salts: the invisible “seedling killers”
Tip: If you use peat, add lime intentionally (don’t trust “it’s in the bag”)
For DIY peat-based mixes, add 1 tablespoon of finely ground dolomitic lime per gallon of mix (about 15 mL per 3.8 L). Mix thoroughly and let it sit damp for 24–48 hours before sowing so the pH starts stabilizing. This one step reduces the “mystery yellowing” that shows up around week two.
Example: If your brassicas (broccoli, kale) look pale and stalled in peat, but perk up after transplant, pH imbalance is often the hidden reason.
Tip: If you use coir, do a quick salt check—even without fancy meters
The best method is an EC meter, but you can still do a basic screening: hydrate coir, then pour 1 cup of distilled water through 1 cup of damp coir in a colander and taste a single drop from the runoff (don’t do this if you used fertilizers). If it tastes noticeably salty, rinse again and consider blending with peat or composted bark instead of using pure coir for seed starting.
Example: Gardeners on well water often blame their tap water, but it’s sometimes the coir bringing the salts to the party.
“Electrical conductivity (EC) is one of the best quick indicators of potential salt stress in container substrates—high EC can reduce seedling growth even when everything else looks fine.” — Greenhouse growing guidance commonly emphasized in extension publications (e.g., NC State Extension, 2019)
Tip: Target a practical pH window instead of perfection
For most seedlings, a root-zone pH of about 5.8–6.5 keeps nutrients available and growth steady. If you’re not testing, your “insurance policy” is: lime peat mixes, and rinse questionable coir. You don’t need a lab; you need consistency.
Speed hacks: get stronger seedlings in less time
Tip: Use coir when you’re prone to letting trays dry out
Coir re-wets more easily than peat once it dries, which is a big deal if you work long shifts or travel. If you’ve ever had peat pull away from the sides of cells and refuse to absorb water, coir can be more forgiving. The shortcut is fewer emergency “soak the whole tray” rescues.
Case example: A gardener starting 6 trays of peppers in a dry basement found coir-based cells stayed evenly moist with every-other-day checks, while peat-based cells needed daily attention after the first week.
Tip: Use peat when you want the cleanest, lowest-salt start for picky crops
Peat is typically low in salts compared to poorly processed coir. If you’re starting sensitive seedlings (like strawberries from seed, some ornamentals, or slow germinators), peat-based mixes reduce one variable: EC surprises. Just don’t skip the lime step if you’re mixing from scratch.
Case example: A hobby grower starting lisianthus got better early root growth in a peat/perlite mix with lime compared to straight coir, which produced smaller plugs until the coir was rinsed twice.
Tip: Warm the root zone, not the room
Seedling heat mats are more effective (and cheaper to run) than heating an entire space. Aim for a soil temperature of 75–80°F (24–27°C) for tomatoes and peppers, and 65–70°F (18–21°C) for lettuce and brassicas. Once most seeds sprout, turn the mat off to prevent leggy growth.
Example: Keep the room at 65°F and let the mat do the work—your seedlings care about the root zone more than the air.
Preventing damping-off and fungus gnats (without weird potions)
Tip: Add a thin “dry cap” after sowing for fungus gnat control
After you sow and water in, top each cell with 1/8 inch (3 mm) of coarse vermiculite or coarse sand. The surface dries faster, which makes it harder for fungus gnats to lay eggs and for damping-off fungi to thrive. It’s a boring trick that works ridiculously well.
Example: In a basement grow area, this alone can drop fungus gnat sightings from “daily annoyance” to “rarely see one.”
Tip: Use airflow as a tool, not a guess
Set a small fan on low so seedlings barely flutter for a few hours a day. You’re not trying to blast them; you’re preventing stagnant humidity at the soil surface. This reduces the conditions damping-off likes, especially in peat-heavy mixes that stay moist on top.
Example: A $15 clip fan aimed across (not directly at) two 1020 trays can prevent that fuzzy white surface growth that shows up when domes stay on too long.
Money-saving moves (and when DIY beats bagged mix)
Tip: Stop buying “seed-starting mix” if you’re filling more than 3 trays
Bagged seed-starting mix is convenient, but it’s often overpriced for what it is. If you’re doing volume, buy a bale of peat or a coir brick, plus perlite and vermiculite, and mix your own. A common real-world comparison: filling four 72-cell trays can cost $20–$35 with specialty bags, or closer to $8–$15 with DIY ingredients, depending on local prices.
Example: If you start 300+ seedlings every spring, DIY mixing pays for itself in one season.
Tip: Stretch expensive ingredients with a “plug-only” approach
Use your best (and priciest) coir/peat mix only for the first container—like 128-cell or 72-cell plugs. When you pot up to 3–4 inch pots, switch to a cheaper potting mix you amend with extra perlite. This keeps the germination stage consistent without spending premium dollars on every pot-up.
Case example: A tomato grower starts 200 seedlings in premium coir/perlite plugs, then pots up into a basic mix plus 20% perlite—strong roots early, cheaper bulk later.
Tip: DIY substitute for vermiculite when you can’t find it
Vermiculite can be pricey or hard to source. For seed starting, you can swap in rice hulls (if available) or increase perlite and use a finer top layer to keep moisture even. It’s not identical, but it’s a workable workaround when shelves are empty in spring.
Example: Try 2 parts peat/coir : 1.5 parts perlite : 0.5 parts rice hulls, then cap with sifted mix for better moisture at the surface.
Choosing coir vs peat based on your situation (real-world scenarios)
Tip: If you’re on alkaline tap water, coir can be the easier match
Hard, alkaline water pushes pH up over time. Coir often starts closer to the seedling-friendly zone than raw peat, which can swing the other direction unless limed. If your water leaves white crust on pots, coir plus a light fertilizer routine is often smoother than fighting peat pH every season.
Scenario: A gardener with high-bicarbonate well water finds peat mixes drift unpredictably; coir-based mixes stay steadier with less tinkering.
Tip: If you chronically overwater, peat/perlite gives you a wider safety margin
Both hold water, but peat-based blends with enough perlite can be more forgiving for heavy-handed watering because they’re traditionally formulated for container air space. Coir holds water very well—great for consistency, but not as forgiving if you keep domes on too long and the tray never dries. If damping-off is your recurring villain, peat + extra perlite is a strong move.
Scenario: Starting in a cool garage where evaporation is slow, a peat/perlite mix with a vermiculite cap can reduce losses compared to straight coir.
Tip: If you hate re-wetting issues, coir wins—just rinse first
Peat can become hydrophobic if it dries out, and then water runs down the sides of cells instead of soaking in. Coir re-wets faster and more evenly, which is a legitimate quality-of-life upgrade. The tradeoff is you need to be picky about coir quality (washed/buffered) to avoid salt stress.
Scenario: Busy parents who can’t check trays daily often do better with coir-based plugs because one missed watering doesn’t permanently ruin the media.
My “use-it-tomorrow” recipes (peat version and coir version)
Tip: Peat-based seed-starting recipe that behaves predictably
Mix 10 quarts peat + 5 quarts perlite + 5 quarts vermiculite, then add 3 tablespoons dolomitic lime and dampen evenly. Let it rest 24 hours before filling cells so the moisture and lime distribute. This gives a light, airy mix that still holds enough water for steady germination.
Tip: Coir-based seed-starting recipe that avoids the salt trap
Hydrate and rinse coir if needed, then mix 10 quarts coir + 5 quarts perlite + 5 quarts vermiculite. If your coir is labeled “buffered,” you can usually skip extra steps; if not, do a second rinse and drain well. Pre-moisten so it clumps but doesn’t drip when squeezed.
Tip: A fast “rescue blend” when seedlings look stressed
If seedlings are stalling and you suspect either pH (peat) or salts (coir), pot up into a neutral, airy mix: 3 parts quality potting mix + 1 part perlite. This dilutes the problem fast and gives roots fresh oxygen. It’s not elegant, but it saves plants when troubleshooting would take longer than the crop cycle.
Peat is often easier to predict; coir is often easier to live with day-to-day. Pick the one that matches your habits, then use the prep tricks above to remove the usual failure points. Once you do that, the “coir vs peat” debate gets a lot less dramatic—and your trays get a lot more crowded with sturdy little seedlings.
Citations: Cornell Controlled Environment Agriculture (Cornell CEA, 2018) on peat pH and liming practices; University of Maryland Extension (2020) on fertilizing seedlings in soilless media; NC State Extension greenhouse substrate/EC guidance (2019) emphasizing EC as an indicator of salt stress.