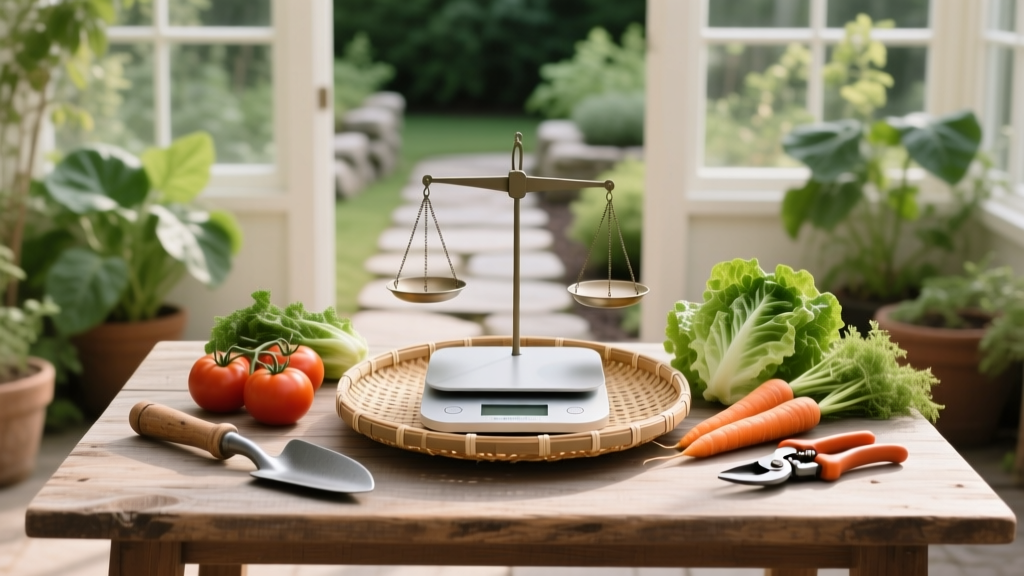
Making a Garden Harvest Scale Station
Most gardeners don’t actually know what their garden produces—because “a basket of tomatoes” feels satisfying until you try to compare seasons, track which bed earned its keep, or figure out how many pounds you need for salsa day. The common mistake is weighing harvests “whenever you remember,” on whatever kitchen scale happens to be free, which guarantees missing data and sticky messes. A harvest scale station fixes that by making weighing as automatic as washing your hands.
A good station isn’t fancy. It’s a small, weather-smart setup that lets you walk in from the garden, weigh fast, jot it down, and move on—without hunting for batteries, clearing counter space, or arguing with a wobbly bowl. The best part: once you start logging weights, your planting decisions get sharper within a month.
Start with a station that lives where the harvest lands
Put it within 10 steps of your “garden entrance”
Tip headline: Shorten the distance so weighing becomes automatic.
If you have to carry produce through the house first, you’ll “forget” to weigh it—every time. Put your scale station within about 10 steps of the door you use after harvesting (mudroom, garage, shed entry, or porch). The goal is: harvest → weigh → rinse/pack, in one flow.
Example: A raised-bed gardener sets the station on a garage workbench right inside the side door; everything gets weighed before it hits the kitchen sink.
Build the station around a washable surface (not a nice table)
Tip headline: Choose a surface you can hose, wipe, or sanitize.
Harvest stations get gritty—soil crumbs, tomato juice, beet stains, you name it. A plastic utility table, an old laminate countertop, or a sealed plywood top (two coats of exterior polyurethane) saves your “good” furniture. Keep a small microfiber towel and a spray bottle of soapy water right there so cleanup takes 30 seconds.
Example: One backyard grower repurposes a $20 used desk, then covers the top with a $12 sheet of vinyl floor remnant stapled underneath.
Use shade and level as your “accuracy upgrades”
Tip headline: Keep the scale out of sun and on solid footing.
Direct sun can heat a scale’s platform and mess with readings (and it’s brutal on LCDs). Set up in shade and make the surface level—shim with cedar shims or a folded piece of cardboard until the scale doesn’t rock. If your station lives in a shed, mount a small shelf at waist height so you’re not weighing on the floor.
Pick the right scale (and don’t overbuy)
Match the scale capacity to what you actually harvest
Tip headline: Most gardens do best with a 25–55 lb capacity scale.
If you harvest greens and tomatoes, a 25 lb capacity is often enough. If you grow melons, winter squash, or haul big baskets of potatoes, step up to a 50–55 lb bench scale. Accuracy matters too: look for at least 0.1 lb resolution (or 1 oz) so small harvests still count.
Example: A zucchini-heavy garden routinely brings in 18–22 lb at once; a 25 lb scale works, but a 55 lb scale prevents “overload” errors when the bucket’s extra full.
Bench scale vs. hanging scale: pick based on your containers
Tip headline: Bench scales are faster; hanging scales are dirt-tolerant.
Bench scales are the easiest for bowls, trays, and flats—set the container down, hit tare, and go. Hanging scales shine when your harvest comes in mesh bags or you want to weigh bulky items like pumpkins without balancing them. If you’re building one station, bench scales win for speed; if you’re weighing in the field, hanging scales are surprisingly handy.
| Feature | Bench (platform) scale | Hanging scale |
|---|---|---|
| Best for | Buckets, bowls, flats of berries, mixed harvest | Mesh bags, pumpkins, odd shapes |
| Typical capacity | 25–55 lb | 50–110 lb |
| Speed per weigh | Fast (tare + dump) | Slower (hook + steady) |
| Mess tolerance | Moderate (needs wiping) | High (less surface contact) |
| Typical cost | $25–$90 | $15–$60 |
Power choice: batteries are fine—if you store spares at the station
Tip headline: Dead batteries are the #1 reason stations get abandoned.
If your scale uses AAA batteries, tape a spare set in a little zip bag under the table edge. If you can get an AC adapter model, even better—especially in a mudroom or garage where an outlet is nearby. Plan for reality: you’ll notice the scale is dead only when your hands are full of beans.
Example: A community garden installs a plug-in bench scale in their tool shed; harvest logging jumps because no one has to troubleshoot power mid-harvest.
Containers, tare tricks, and “no-math” workflows
Standardize on two containers and label their tare weights
Tip headline: Use repeatable containers so you can weigh in seconds.
Pick two go-to containers: for instance, a 5-gallon bucket and a shallow tote. Weigh each empty container once, write the tare weight on painter’s tape (like “Bucket = 1.8 lb”), and stick it on the side. If your scale has tare, great; if it doesn’t, labeled tare keeps things moving.
Example: A tomato grower uses a dishpan for cherry tomatoes and a bucket for slicers—same containers every time, so family members can weigh without guessing.
Use a “dump and reset” routine for small fruits and greens
Tip headline: Weigh, dump into the rinse bin, and immediately reset tare.
Set your empty harvest bowl on the scale, hit tare, then add produce until you’re done picking. Record the weight, dump into a rinse tub, put the empty bowl back on the scale, and hit tare again. This keeps your readings clean and prevents “which container was this?” confusion.
Example: For beans: weigh 2.4 lb, dump into a colander for rinsing, reset—done in under a minute.
DIY alternative: a spring scale + bucket + mark-your-own “zero line”
Tip headline: No electricity? Use a $15 spring scale and keep it honest.
A simple spring hanging scale works in sheds with no power. Hook the bucket, then use a permanent marker to mark a “zero” point with the empty bucket attached (or just subtract the labeled tare). It’s not lab-grade, but it’s consistent—which is what you need for year-to-year comparison.
Make logging stupid-easy (because that’s what actually sticks)
Use a clipboard and a single sheet format you can fill in with dirty hands
Tip headline: If you need to open an app, you’ll stop logging by week two.
Hang a clipboard and use a simple log sheet with columns for date, crop, variety, weight, and notes. Pencil writes even when your hands are damp, and you can transcribe later if you want. The trick is reducing friction: one page for the month beats a complicated binder.
Example: A family garden tracks “Cucumbers (Marketmore) – 6/18 – 3.2 lb – first flush” and later uses those notes to predict peak weeks.
Use shorthand crop codes to speed up recording
Tip headline: Turn “Cherry Tomato Sungold” into “CT-SG.”
Write a small legend on the top of your sheet: CT-SG, ZU-BL (zucchini black beauty), BE-DT (beets detroit). When you’re weighing five things in a row, codes keep you moving. If you’re sharing the station, codes reduce “what did you mean by tomatoes?” arguments.
Weigh by “market unit” when you preserve or sell
Tip headline: Track in the units you actually use: pounds per batch, not just per day.
If you make sauce, you care about how many pounds you get per session. Create a line item like “Sauce batch #3” and weigh the tomatoes going into that batch (for example, 18.0 lb of paste tomatoes on a Saturday). The data becomes directly useful: you’ll know how many plants you need to hit your pantry goal.
Accuracy you can trust without getting obsessive
Calibrate monthly using a known weight you already have
Tip headline: Check accuracy with a 10 lb reference once a month.
You don’t need calibration weights. Use something consistent like two 5 lb dumbbells or a sealed bag of something labeled (pet food often comes in marked weights). Check the scale on the first harvest weekend of the month; if it’s off by more than 2%, replace batteries, re-level, and retest.
Keep the scale clean where it matters: feet, platform, and buttons
Tip headline: Grit under the feet causes wobble and weird readings.
Wipe the underside feet and the platform edges weekly—especially if you’re weighing right after digging potatoes or pulling carrots. Soil granules can make the scale sit unevenly and drift. A cheap paintbrush works great for flicking dirt out of button seams.
Don’t wash produce before weighing (unless you always do)
Tip headline: Moisture changes weights—consistency beats perfection.
Wet greens and rinsed roots can add noticeable water weight, especially when they drip into the container. Pick a rule and stick to it: weigh “field dirty” or “rinsed and drained for 2 minutes.” The point is comparable data across the season.
“Record-keeping is only useful if it’s consistent and simple enough to maintain during the busiest harvest periods.” — Oregon State University Extension, 2020
Design for mess, weather, and pests
Add a “dirty zone” and a “clean zone” so you don’t gum up the station
Tip headline: Two bins prevent chaos: one for unwashed, one for ready-to-process.
Set a dirty tote on the left and a clean tote on the right (or vice versa if you’re left-handed). Weigh from dirty, then transfer after shaking off debris or quick-rinsing. This keeps your scale from becoming a mud sculpture and makes harvest night feel organized.
Example: Root crops go into the dirty bin; tomatoes go straight to clean, reducing grit near the scale buttons.
Keep a lidded “rejects bucket” to stop fruit fly explosions
Tip headline: Rotting scraps near the station attract pests fast.
Have a small 2–3 gallon lidded bucket for split tomatoes, slug-damaged berries, and compostables. Empty it daily in peak season. This one habit dramatically reduces fruit flies and yellowjackets hovering around your weigh station.
Weatherproof the setup with a $10 storage tote “garage”
Tip headline: Protect the scale from humidity and dust when not in use.
If your station is outdoors or in an open shed, store the scale in a plastic tote with a lid between harvests. Add a silica gel packet (or a DIY pouch of dry rice in a breathable bag) to reduce moisture. It’s a small move that can extend a scale’s life by seasons.
Real-world station setups (steal these)
Scenario #1: Patio gardener with limited space (micro-station)
Tip headline: Use a folding shelf + compact scale + one log sheet.
Mount a small folding wall shelf (about 18" x 24") near your back door, and keep a 25 lb kitchen/bench scale in a lidded bin underneath. Your “station kit” is scale, pencil, clipboard, and two bowls that nest together. This setup can cost as little as $35–$60 if you already own a scale.
Example: A container gardener logs weekly harvests from 6 pots and realizes basil is outperforming a low-yield pepper—so next year they swap one pepper for two basil pots.
Scenario #2: Family backyard with kids helping (bulletproof station)
Tip headline: Make it kid-proof with labels, codes, and a “one job” flow.
Assign roles: one person weighs, one writes, one rinses. Use big container labels and crop codes so helpers don’t invent their own categories. Add a step stool if needed—better posture means fewer dropped bowls and fewer “oops, we forgot.”
Example: Kids harvest strawberries into a labeled bowl, put it on the scale, call out “SB 1.2!” and the adult logs it—fast, fun, and surprisingly accurate.
Scenario #3: Large garden or small market grower (high-volume station)
Tip headline: Upgrade to a 55 lb bench scale and a repeatable crate system.
When you’re harvesting in bulk, your station needs speed. Use stackable vented crates and a 55 lb scale with a large platform so crates don’t teeter. Keep a pre-printed log with the top 20 crops and checkboxes to reduce writing time.
Example: A grower harvesting for a farm stand weighs cucumbers by crate: “Crate A (tare 2.6 lb), net 24.4 lb,” and can price or pack without rehandling.
Turn weights into decisions (the fun part)
Track “yield per bed-foot” to compare crops fairly
Tip headline: One bed can look productive until you compare it to its footprint.
After a month, divide total pounds by the planted length or area. Example: 30 lb of tomatoes from a 10-foot row = 3.0 lb/ft. This helps you spot sleepers (like bush beans) and space hogs (like low-yield squash) in a way your memory won’t.
Log first harvest date and peak week—those two timestamps matter
Tip headline: Timing data makes next year’s schedule easier.
Write down the first harvest date for each crop and circle the week you hit your biggest total. Over time, you’ll know when to plan canning weekends or when to start checking for powdery mildew. Many extension resources emphasize recordkeeping to improve management decisions year to year (University of Minnesota Extension, 2019).
Use weights to plan preservation batches with fewer surprises
Tip headline: Know how many pounds you’ll need before you start blanching water.
If you freeze green beans and your bags are 1 lb each, you can stop harvesting when you hit 8 lb for an efficient batch. If you dehydrate tomatoes, you can track input weight and output jars so you can predict pantry space. The station becomes your “batch planner,” not just a nerdy data project.
Money-saving hacks that pay for the station
Buy used, but test these two things before paying
Tip headline: Used scales are fine if they tare reliably and don’t drift.
When buying secondhand, test tare three times in a row with the same bowl and confirm it returns to zero. Then put a known weight on twice and see if the number matches both times. A solid used bench scale can be $15–$30 instead of $60+.
Skip “smart” features unless you’ll truly export data weekly
Tip headline: Bluetooth logging sounds great… until harvest day.
App-connected scales cost more and often die by neglect (updates, pairing, dead phone). If you already keep garden notes digitally every week, go for it; otherwise, paper logging wins on reliability. The cheapest station is the one you actually use every harvest.
One station beats three “random scales” you can’t find
Tip headline: Centralize the tool and you stop re-buying it.
Gardeners often end up with a kitchen scale, a half-working luggage scale, and an ancient dial scale—none of them where you need them. Build one dedicated station and keep it stocked with pencil, tape, and spare batteries. It’s a simple way to stop spending $20 here and $25 there on replacements.
Once the station is in place, your harvest starts telling you the truth: which variety is worth the space, when your garden really peaks, and how much food you’re bringing home in a season. The setup takes an afternoon, the habit takes about a week, and the payoff shows up the next time you’re ordering seeds and you’re not guessing anymore.
Sources: Oregon State University Extension (2020), guidance on practical farm and garden recordkeeping; University of Minnesota Extension (2019), home gardening planning and management resources emphasizing tracking and seasonal decision-making.