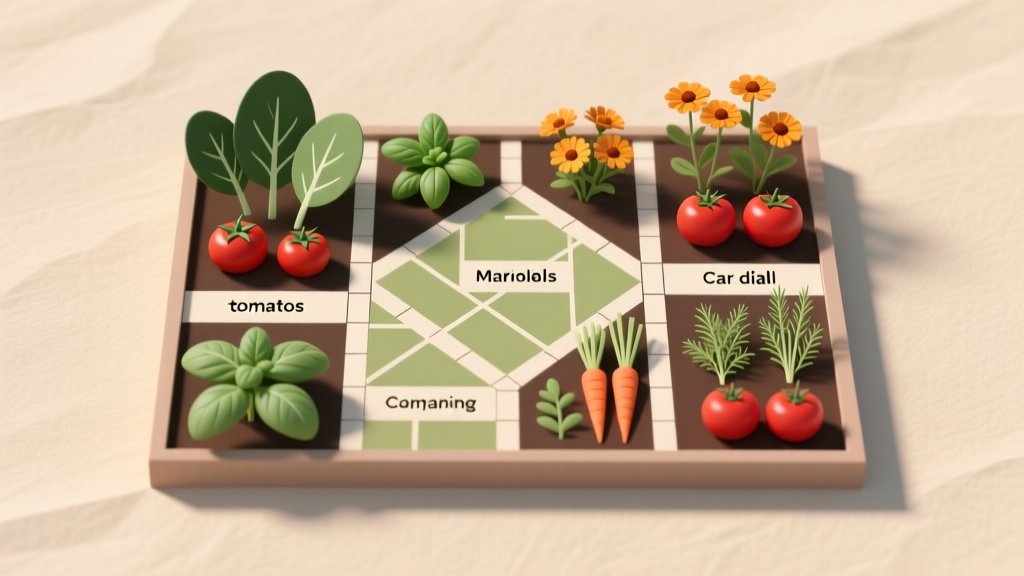
Backyard Companion Planting Map Layout
The tomato looks gorgeous in June—then July hits and the lower leaves yellow, aphids move in, and the basil you tucked “somewhere near it” is getting shaded out by a zucchini the size of a beach umbrella. If that sounds familiar, you don’t need more plants—you need a map. A companion planting layout isn’t a rigid rulebook; it’s a designer’s plan for putting the right plants close enough to help each other, far enough apart to breathe, and arranged so harvesting feels like a stroll instead of a wrestling match.
Below is a backyard companion planting map layout you can adapt to a patio corner, a rental-friendly raised bed, or a full suburban yard. I’ll walk you through design principles first (so you can customize), then give plant pairings with specific varieties, spacing, and a realistic budget and maintenance schedule.
Start with the site: map your light, wind, and walking lanes
Companion planting works best when you treat your garden like a small outdoor room: sunlight is your ceiling, paths are your hallways, and plants are your furniture. Before choosing a single variety, do a quick site read.
Sunlight hours: your layout’s “north star”
Most fruiting crops (tomatoes, peppers, cucumbers) want 6–8+ hours of direct sun. Leafy greens and many herbs are happy with 4–6 hours, especially in hot climates. Spend one day noticing where sun lands at three moments (morning, midday, late afternoon) and sketch it.
Keep in mind: as your plants mature, they create their own shade. Put tall crops on the north side (in the Northern Hemisphere) so they don’t cast long shadows over shorter companions.
Design for access: paths and reach
If you can’t reach it, you won’t harvest it—and pests will move in. For beds you access from one side, limit width to 2.5 ft. For beds you access from both sides, 4 ft wide is the sweet spot. Keep paths 18–24 in wide for comfortable stepping and a small garden cart.
Soil and water: group by thirst
Companion planting doesn’t override basic horticulture. Group plants with similar watering needs: cucumbers and basil like steady moisture; rosemary prefers drier conditions. If you mix them, the “wrong” plant always suffers.
The core layout strategy: a simple map you can scale
This layout is built around a repeatable module: one main bed for fruiting crops, one support bed for aromatics and flowers, and a narrow edge for greens. Think of it like a mini-farm with intentional neighborhoods.
Base plan (fits many backyards): two 4' x 8' beds plus one herb border
Dimensions: Two raised beds at 4 ft x 8 ft each, with a 2 ft path between them, plus a 1.5 ft x 8 ft ground-level or container herb border along the sunniest edge.
Why this works: You get enough space to rotate crops next season, you can trellis on the north side without shading everything, and you have a dedicated “beneficial insect strip” that doubles as a harvest zone for kitchen herbs.
Spacing rules that keep companion planting from turning into a jungle
Companions still need airflow. Use spacing as your guardrail:
- Tomatoes: 18–24 in apart (closer only with aggressive pruning)
- Peppers: 12–18 in apart
- Bush beans: 4–6 in apart in rows
- Lettuce: 8–12 in apart
- Marigolds: 10–12 in apart
These ranges align with common extension guidance; for example, the University of Minnesota Extension notes typical tomato plant spacing at about 18–24 inches depending on training system (University of Minnesota Extension, 2020).
Companion planting “roles”: assign each plant a job
Instead of memorizing every “good neighbor” list on the internet, think like a designer assigning roles. Each bed should include at least three roles: a star crop, a support crop, and a defender.
Role 1: Star crops (your main harvest)
These are the plants that justify the space: tomatoes, peppers, cucumbers, squash, eggplant. Give them the best light and the most consistent watering.
Role 2: Support crops (improve soil or microclimate)
Legumes like beans can contribute nitrogen over time (especially when residues are incorporated). Low-growing plants like lettuce can act as a living mulch early in the season, shading soil and reducing evaporation.
Role 3: Defenders (scent, flowers, and trap crops)
Aromatic herbs and flowering plants help by attracting beneficial insects and sometimes confusing pests. The USDA emphasizes that flowering resources support pollinators and beneficial insects in agricultural landscapes (USDA NRCS, 2014).
“Design is not just what it looks like and feels like. Design is how it works.” — Steve Jobs (quoted widely; applies perfectly to garden layouts where function is beauty)
Plant selection: varieties that earn their place (and why)
Below are reliable varieties that perform well in home gardens and fit companion planting patterns without requiring constant babying.
Tomato guild: tomato + basil + marigold + lettuce edge
Tomato: ‘Sungold’ cherry (vigorous, early, high yields) or ‘Celebrity’ (dependable slicer, good disease tolerance). Train on a trellis or sturdy cage on the north side of the bed.
Basil: ‘Genovese’ (classic pairing for kitchen use; thrives with similar moisture). Plant 8–12 in from tomato stems so it gets light but not crushed.
Marigold: ‘French Marigold (Tagetes patula)’ such as ‘Bonanza Mix’—compact, lots of blooms for beneficial insects. Place at bed corners and along the front edge.
Lettuce: ‘Buttercrunch’ along the south edge early in the season; it tolerates partial shade once tomatoes fill in.
Pepper guild: pepper + scallions + alyssum
Pepper: ‘California Wonder’ (sweet bell) or ‘Jalapeño M’ (reliable heat). Space 15 in apart in a staggered grid for airflow.
Scallion: ‘Evergreen Hardy White’ tucked between peppers at 4–6 in spacing; upright habit doesn’t steal light.
Sweet alyssum: ‘Carpet of Snow’ along bed edges to provide continuous small blooms that attract beneficial insects.
Cucumber guild: cucumber + dill + nasturtium
Cucumber: ‘Diva’ (parthenocarpic, productive, good for trellising). Put the trellis on the north side; plant cucumbers 12 in apart.
Dill: ‘Bouquet’ nearby to feed beneficial insects; give it its own pocket so it can bolt without shading cucumbers.
Nasturtium: ‘Jewel Mix’ to spill over the bed edge; it can act as a distraction plant for aphids and is edible.
A comparison table: three layout maps for different spaces
| Scenario | Footprint | Best crops | Companion “anchors” | Estimated cost (DIY) |
|---|---|---|---|---|
| Rental patio (containers) | 6 ft x 10 ft | Tomato, pepper, herbs, greens | Basil, marigold, alyssum | $120–$260 |
| Small backyard (2 raised beds) | 10 ft x 14 ft | Tomatoes, cucumbers, beans, lettuce | Nasturtium, dill, borage | $280–$650 |
| Suburban yard (4 beds + path) | 18 ft x 24 ft | Crop rotation + flowers + berries | Calendula, yarrow, chives | $700–$1,800 |
Step-by-step setup: build the map before you plant
This is the process I use when sketching a client’s edible garden so it looks intentional and stays manageable.
- Measure your usable rectangle. Example: mark out 10 ft x 14 ft with string. Keep at least 3 ft clear from fences if you need access for trimming or repairs.
- Draw paths first. Place a main path at 24 in wide so you can carry a watering can without brushing plants. Secondary paths can be 18 in.
- Place tall trellises on the north side. A 6 ft cattle-panel arch or simple T-post trellis can support cucumbers or tomatoes without shading the whole bed.
- Assign each bed a crop family for rotation. Bed A: tomatoes/peppers/eggplant. Bed B: cucumbers/beans/greens. Next year, swap.
- Add a flower-and-herb border. Even 1.5 ft wide is enough for alyssum, basil, dill, and marigolds—your pollinator buffet.
- Plant in layers. Stars first (tomato/pepper/cucumber), then supports (beans/lettuce), then defenders (flowers/herbs) to fill edges.
Three real-world scenarios (with practical maps you can copy)
Let’s translate the principles into lived-in spaces. These are the situations I see most often when homeowners and renters want maximum harvest without chaos.
Scenario 1: The renter’s patio—big yield, zero digging
Space: A sunny patio edge with 6 hours of sun, about 6 ft x 10 ft. Goal: salads and sauces all summer.
Layout: Use 5 containers: one 15–20 gallon fabric pot for a tomato, two 7–10 gallon pots for peppers, and two long planters for greens and herbs.
Companion map: Put ‘Sungold’ in the back (north), underplant with ‘Genovese’ basil (2–3 plants) and tuck marigolds at the pot edge. Peppers get scallions around the rim. Planters get ‘Buttercrunch’ lettuce and alyssum at corners.
Budget: Fabric pots ($8–$15 each), bagged potting mix (roughly 10–12 cubic feet total), a simple tomato trellis ($15–$35). Expect about $120–$260 depending on what you already own.
Scenario 2: The small backyard—two beds, one trellis, steady harvest
Space: A side-yard rectangle 10 ft x 14 ft with 8 hours of sun. Goal: tomatoes, cucumbers, and greens with minimal pest drama.
Layout: Two 4 ft x 8 ft beds with a 2 ft central path. Add a 6 ft trellis on the north edge of Bed 2.
Bed 1 (Tomato Bed): 3 tomatoes at 24 in spacing (back row), basil between them, marigolds at corners, lettuce and radishes as an early-season front edge.
Bed 2 (Trellis Bed): 3 cucumbers (‘Diva’) at 12 in spacing on the trellis, bush beans in a block in front (quick yield, tidy), dill and nasturtium on the sunny edge.
Cost reality check: Building two cedar beds can easily run $280–$650 depending on lumber prices. DIY alternative: use untreated pine (cheaper, shorter lifespan) or repurpose galvanized stock tanks (often $100–$200 each but long-lasting).
Scenario 3: The family yard—kid paths, pollinators, and a “no fail” rotation plan
Space: Open lawn area 18 ft x 24 ft, strong sun 7+ hours, with kids and pets running through. Goal: a garden that stays attractive even when missed for a week.
Layout: Four 4 ft x 8 ft beds in a square with a 3 ft cross-shaped path (wheelbarrow friendly). One bed is dedicated to flowers and herbs so the whole garden feels designed, not purely utilitarian.
Companion map:
- Bed A: Tomatoes + basil + marigolds
- Bed B: Peppers + scallions + alyssum
- Bed C: Cucumbers on trellis + dill + nasturtium
- Bed D: Beneficial strip: calendula, borage, chives, and a cut-and-come-again salad mix
DIY alternative: If building four beds is out of budget, make two beds now and mark the other two as mulched in-ground rectangles for flowers and herbs. You’ll still get the companion benefits without the upfront lumber cost.
Budget considerations: where to spend, where to save
If you spend on the right things, companion planting becomes cheaper over time because you’ll reuse structures and reduce losses.
- Spend: A sturdy trellis (a 16 ft cattle panel is often $25–$45), quality compost, and drip irrigation parts if you travel.
- Save: Start herbs and flowers from seed (marigolds, nasturtium, dill, alyssum). A $3–$5 seed packet can replace $30+ in nursery six-packs.
- Free upgrades: Use fallen leaves as mulch in autumn; aim for 2–3 in depth after shredding to reduce matting.
For soil, plan on roughly 21 cubic feet to fill one 4' x 8' bed to 8" depth. A practical blend is 50% topsoil and 50% compost, adjusted based on what’s available locally.
Maintenance expectations: what this layout asks of you
A good map should reduce weekly decision-making. Here’s what to expect if you’re growing through a typical warm season.
Weekly time: Plan on 45–90 minutes per week for watering checks, harvesting, and quick training/pruning. Add another 15 minutes after a storm to re-tie plants and look for damage.
Weekly rhythm (simple and effective)
- 5 minutes: Walk the beds and flip leaves to check for aphids/eggs.
- 10–20 minutes: Harvest (frequent picking keeps plants producing).
- 15 minutes: Trellis cucumbers/tomatoes; remove tomato suckers if you’re training single-stem.
- 15–45 minutes: Water deeply as needed; containers may need water every 1–2 days in heat.
Seasonal tasks that keep the system healthy
- Spring (planting month): Install trellises before planting; add 1–2 in compost to bed surfaces.
- Mid-summer: Succession sow basil and lettuce every 3–4 weeks if you want steady harvest.
- Late summer: Remove tired cucumber vines; sow fall greens in the open space.
- Fall: Pull spent plants, chop and drop healthy leaves, and mulch beds for winter protection.
Design notes on “bad neighbors” (and what to do instead)
Companion planting advice online can get superstitious fast, but a few practical separations are worth honoring. Keep mint in its own pot (it will run). Give rosemary and lavender a drier, well-drained container or edge zone, not in the same irrigation line as cucumbers. If you love brassicas (kale, cabbage), they do best in a dedicated bed with insect netting rather than sprinkled everywhere.
When in doubt, prioritize shared sun needs, consistent moisture needs, and enough spacing for airflow—then add flowers and herbs as edges and pockets. That’s how you get the companion “boost” without turning your bed into a competition.
Citations you can trust (and why they matter in a home layout)
Two quick references that align well with practical companion layouts:
- University of Minnesota Extension. “Growing tomatoes in home gardens” (spacing and training guidance), 2020.
- USDA Natural Resources Conservation Service (NRCS). Pollinator habitat and flowering plant resources for beneficial insects (general principle of providing blooms across seasons), 2014.
These aren’t “companion planting myth lists”—they’re fundamentals: plant spacing, airflow, and habitat for pollinators/beneficials. Your map gets stronger when it rests on those basics.
Once you’ve drawn your paths and placed your trellises, the rest becomes surprisingly enjoyable: you’re no longer squeezing plants wherever they fit. You’re composing a space where tomatoes have a sunny backbone, cucumbers climb like they’re meant to, basil fills the fragrant gaps, and flowers stitch it all together. The garden starts to feel less like a patch of chores and more like a designed corner of home—one that feeds you on purpose.