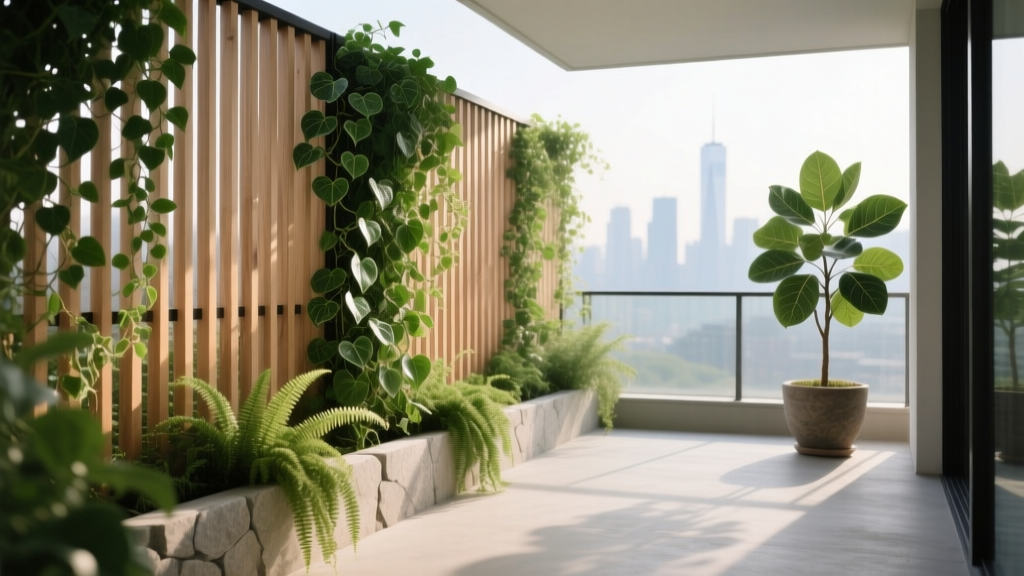
Balcony Privacy Screen with Plants
The first time you notice the “fishbowl effect” is usually at night: you’re on your balcony with a book or a glass of something cold, and across the way someone’s kitchen lights flick on—suddenly you’re both painfully aware you can see each other. Or maybe it’s daytime and the wind whips through, scattering napkins, drying out pots, and turning your calm corner into a drafty ledge. Privacy on a balcony isn’t just about blocking views; it’s about shaping a small outdoor room that feels protected, green, and yours.
Let’s design a plant-based privacy screen that looks intentional—more garden, less barricade. I’ll walk you through layout decisions, plant picks that behave well in containers, and a few real-life balcony scenarios so you can adapt the plan to your space and your rules (including renter constraints).
Start with the “outdoor room” idea: edges, height, and comfort
A balcony works like a miniature courtyard. The most successful privacy screens treat the railing and the side edges as the “walls,” then use plants to build height and softness. Before buying anything, decide which view you’re trying to block and how much height you actually need.
Measure the sightlines (not just the railing)
Stand where you sit most often—chair, lounge, or dining stool—and measure up from the floor to your eye level. For many adults seated, that’s roughly 42–48 inches (107–122 cm). If you’re blocking a neighbor across the gap, you’ll likely want plant height around 60–72 inches (152–183 cm) to feel truly screened when seated and partially screened when standing.
Also measure your balcony footprint. A common apartment balcony is about 4 ft x 10 ft (1.2 m x 3 m). The trick is creating height without stealing your walking lane.
Design principle: build in layers (base, mid, and canopy)
Think of your screen as three layers:
- Base layer (0–18 inches): trailing plants and fillers that soften pots and hide irrigation trays.
- Mid layer (18–48 inches): bushy plants that create density—this is where privacy starts.
- Canopy layer (48–84 inches): tall growers or trained climbers to block the upper sightlines.
Layering matters because a row of identical tall plants can look sparse at the bottom, leaving that awkward “legs visible” gap. A layered composition reads lush and intentional even in winter (if you choose at least one evergreen component).
Respect load, wind, and water from the beginning
Balcony gardens fail when weight and wind aren’t considered. Wet potting mix is heavy, and tall screens act like sails. As a rule, choose wide, stable containers, use saucers or trays, and avoid placing the tallest elements on the windiest corner unless they’re secured.
For wind, you’re not only preventing tipping—you’re preventing chronic leaf damage and soil drying. The Royal Horticultural Society notes that windy conditions increase transpiration and can rapidly dry containers, calling for closer watering and sheltering choices (RHS, 2023).
Layout strategies that work on real balconies
Below are designer-style layouts you can adapt to different balcony shapes. Each one solves a specific problem while keeping the space usable.
Strategy 1: “Railing run” for long, narrow balconies
If you have a typical narrow balcony (say, 4 ft deep), line the railing with rectangular planters or railing boxes, but keep the tallest plants in every other container. That staggered rhythm creates a thicker visual screen without a solid wall effect.
Spacing guidance: For tall, clumping grasses or narrow evergreens in containers, plan on 18–24 inches between centers to keep them from choking each other and to allow airflow (reduces mildew and spider mites).
Strategy 2: “Corner tower + soften” for maximum impact with fewer pots
If budget or watering time is tight, concentrate height in the corner where sightlines are worst (often where balconies face each other). Use one large container (15–20 gallons) for a tall evergreen or bamboo alternative, then add two medium pots to the sides for density at mid-height.
This approach uses fewer containers, which means fewer watering points and lower soil cost—often the difference between a screen that thrives and one that limps along.
Strategy 3: “Trellis wall” for renter-friendly privacy
A freestanding trellis in a heavy planter gives you a vertical plane without drilling into walls. You get privacy fast with a fabric or reed backing, then plants grow in to soften it.
“Vertical elements—trellises, screens, and columns—are essential tools for defining outdoor rooms, especially in small spaces where floor area is limited.” — Dee Hock, landscape designer and author of Small-Space Landscaping (Hock, 2018)
For a practical build, aim for a trellis panel around 24–36 inches wide and 60–72 inches tall. Use a container at least 16 inches wide so it doesn’t wobble in wind.
Sunlight and exposure: match the screen to your hours
Before you pick plants, estimate sunlight hours. Don’t guess based on compass direction alone; nearby buildings can turn a “south-facing” balcony into bright shade.
- Full sun: 6–8+ hours of direct sun (best for dense flowering and many grasses).
- Part sun/part shade: 3–6 hours (good for many evergreens and larger-leaved plants).
- Bright shade: 0–3 hours direct sun, but strong ambient light (great for hardy shade shrubs and vines like ivy, depending on local guidance).
Also note wind: upper floors and corner units dry out faster. If your balcony is windy, lean toward tough, flexible plants (grasses, certain evergreens) and away from brittle stems that snap.
Plant selection: privacy performers that behave in containers
The best balcony screen plants share three qualities: they’re dense enough to block views, they tolerate container life, and they don’t become messy, invasive headaches. Here are reliable choices, grouped by function.
Tall, narrow “backbone” plants (structure and year-round screening)
1) Arborvitae ‘Smaragd’ (Thuja occidentalis ‘Smaragd’)
A classic narrow evergreen with a tidy column shape. In containers, it offers strong year-round privacy and takes well to light shaping. Use a pot 18–22 inches wide with excellent drainage. Place one every 24–30 inches if you’re making a continuous screen.
2) Clumping bamboo ‘Fargesia rufa’ (or other Fargesia spp.)
If bamboo makes you nervous, you’re not wrong—running bamboos can be aggressive. But Fargesia is clumping, making it far more container-appropriate. It’s also flexible in wind. Give it consistent moisture and a pot 20+ inches wide. Great for part shade to sun (depending on heat intensity).
3) Bay laurel (Laurus nobilis)
A beautiful edible evergreen for milder climates. Trains well as a standard (lollipop form) or a clipped column. It’s less about speed and more about elegance—ideal if you want privacy with a Mediterranean feel.
Mid-layer density plants (where the “screen” actually becomes opaque)
4) Star jasmine (Trachelospermum jasminoides) on a trellis
Glossy leaves, fragrant flowers, and it handles training beautifully. It’s a privacy all-star because trained vines can fill the lattice with a living wall. Works best with 4–6 hours of sun; in deep shade it thins. Add a simple grid trellis and tie new growth weekly in peak season.
5) Feather reed grass ‘Karl Foerster’ (Calamagrostis x acutiflora ‘Karl Foerster’)
Upright, narrow, and architectural—excellent for balconies because it doesn’t sprawl. It gives strong seasonal privacy from spring through winter (seed heads persist). Use one plant per pot, and space pots 18–24 inches apart for a repeating screen effect.
6) Hydrangea paniculata ‘Bobo’ (dwarf panicle hydrangea)
If you have 4–6 hours of sun, this gives a dense, flowering mid-layer without requiring massive containers like bigleaf hydrangeas often do. It also provides a softer look if you dislike the “hedge” vibe.
Base and trailing plants (finish the edges and hide the mechanics)
7) Sweet potato vine (Ipomoea batatas cultivars)
Fast coverage, dramatic trailing, great for hiding pot rims and softening hard lines. Treat as seasonal in most climates.
8) Trailing rosemary (Salvia rosmarinus ‘Prostratus’)
Sunny balconies love this. It spills beautifully and smells fantastic when brushed. Bonus: edible.
9) Heuchera (Coral bells, varieties like ‘Caramel’ or ‘Obsidian’)
For bright shade or part shade, heucheras offer evergreen-ish foliage in milder climates and excellent color. They make pots look finished even when taller plants are still filling in.
Comparison table: pick your privacy strategy by constraints
| Option | Best for | Typical height | Light needs | Container size | Notes |
|---|---|---|---|---|---|
| Arborvitae ‘Smaragd’ columns | Year-round privacy, tidy look | 5–7 ft in containers | 4–8 hrs sun | 18–22 in wide pot | Slow-moderate growth; stable, evergreen screen |
| Fargesia (clumping bamboo) | Fastest “green wall” feel, wind tolerance | 5–8 ft | 3–6+ hrs (varies by heat) | 20–24 in wide pot | Needs consistent moisture; choose clumping types |
| Trellis + star jasmine | Renter-friendly vertical screen | 6–8 ft with trellis | 4–6 hrs ideal | 16–20 in pot | Fast coverage with training; fragrant blooms |
| ‘Karl Foerster’ grass repetition | Seasonal privacy, modern look | 3–5 ft | 6–8 hrs sun | 14–18 in pot | Winter presence; cut back once yearly |
Step-by-step setup: build a stable, lush screen (DIY-friendly)
This is the workflow I use when designing balcony screens for clients—simple, repeatable, and forgiving if you adjust later.
- Map your privacy zone: Mark the section of railing or side edge you need to block (e.g., 8 linear feet along the front rail). Decide your target height (often 60–72 inches).
- Choose your “spine” containers first: For an 8-foot run, plan 3 large pots (about 18–22 inches wide) spaced evenly, then fill gaps with narrower pots or railing planters.
- Add weight for wind stability: Place heavier pots at corners. If needed, add a paver at the bottom of tall containers (before soil) to lower the center of gravity.
- Use high-quality potting mix: Fill with a container mix (not garden soil). Mix in pine bark fines or perlite if your mix is dense. Leave 1–2 inches of headspace for watering.
- Install a trellis where needed: If using a freestanding trellis, secure it to the container with brackets or a sturdy insert. Aim for a panel at least 60 inches tall for meaningful privacy.
- Plant tallest first, then mid, then trailing: Set your arborvitae/bamboo/grass first, then add mid-layer shrubs or vine pots, then finish with trailing plants around edges.
- Mulch the surface: A 1-inch layer of fine bark mulch reduces evaporation and makes pots look finished.
- Water deeply and check drainage: Water until it runs out the bottom. If water pools on top, fix it now (clogged holes or overly compacted mix).
- Train and pinch for density: Tie jasmine stems horizontally across trellis squares and pinch soft tips on shrubs to encourage bushiness.
Budget and DIY alternatives (privacy without overspending)
A plant privacy screen can be built in phases. Here are realistic cost ranges you can plan around (prices vary by region, but the proportions hold).
Example budget for an 8-foot balcony run:
- 3 large planters (18–22 inch): $45–$120 each (resin to ceramic) = $135–$360
- Potting mix (about 6–10 cu ft total): $12–$20 per 2 cu ft = $36–$100
- 3 backbone plants (arborvitae/bamboo/bay): $35–$90 each = $105–$270
- Fillers + trailers (6–10 small plants): $6–$18 each = $36–$180
- Trellis panel (optional): $25–$80
Total typical range: $337–$990 for a substantial, layered screen.
DIY cost-cutter ideas:
- Use fabric grow bags (10–20 gallon) at $8–$20 each, then slip them into thrifted baskets (with a hidden tray). The look can be surprisingly polished.
- Create instant privacy backing with a reed fence roll tied to the railing using UV-resistant zip ties ($20–$60 depending on length), then let plants soften it.
- Propagate trailers like sweet potato vine or tradescantia from cuttings to fill edges cheaply.
Three real-world balcony scenarios (and exactly what I’d plant)
Use these as templates. You can swap varieties based on your climate, but keep the structure and spacing.
Scenario 1: Sunny, windy high-rise balcony (6–8 hours sun)
Problem: Wind dries everything out and tall plants lean. You need a screen that flexes, not snaps.
Layout: “Railing run” with heavier anchor pots at corners.
Planting plan (10-foot railing):
- 4 pots (18-inch wide) with Calamagrostis ‘Karl Foerster’, spaced about 24 inches apart
- 2 pots with rosemary (upright variety) to add evergreen mass at mid-height
- Trailing rosemary or sweet potato vine to spill over edges
Why it works: Ornamental grasses handle wind and sun, and their upright habit screens without turning into a sail-like solid wall. Rosemary adds evergreen density and fragrance.
Scenario 2: Bright shade balcony facing another building (0–3 hours sun)
Problem: You want privacy, but sun-loving screens become thin and unhappy.
Layout: “Corner tower + soften,” plus a trellis to increase vertical plane.
Planting plan (corner focus):
- 1 large pot (20-inch) with Fatsia japonica (bold leaves read dense even with fewer stems)
- 1 trellis pot (16–18 inch) with climbing hydrangea (Hydrangea anomala subsp. petiolaris) if your climate supports it, or ivy where appropriate and permitted
- 3–5 heucheras around the base in mixed colors for year-round-looking foliage
Why it works: Big leaves create the feeling of privacy faster than small leaves in shade. A trellis increases perceived enclosure without requiring sun-dependent bloom.
Note: Some climbers (like English ivy) are considered invasive in parts of North America; always check local guidance before planting.
Scenario 3: Renter balcony with strict rules (no drilling, minimal mess)
Problem: You need privacy now, but you can’t attach anything permanently.
Layout: Freestanding trellis planters with a temporary backing.
Planting plan (two-station screen):
- 2 large rectangular planters (roughly 36 in L x 16 in W x 16 in H) placed at each end of the seating area
- Each planter gets a 72-inch trellis panel + Trachelospermum jasminoides (star jasmine)
- Add trailing plants (sweet potato vine or nasturtium) to soften the base
Why it works: You get an immediate “wall” from the trellis backing, then the vine turns it into a living feature. Everything moves with you when you relocate.
Maintenance expectations (what it really takes)
A balcony privacy screen is a small garden, but it’s still a garden. Containers are less forgiving than in-ground beds because they dry faster and nutrients wash out more quickly.
Weekly time: Plan on 20–45 minutes per week in peak season for watering checks, quick pruning, and tying in climbers. In hot weather or wind, you may water 3–5 times per week (sometimes daily for small pots).
Seasonal task list
- Spring (1–2 sessions): Top-dress with compost, refresh mulch, begin feeding. Inspect for winter damage.
- Summer (ongoing): Deadhead, pinch for density, check for spider mites and aphids (especially on stressed balcony plants). Train vines weekly.
- Fall (1 session): Reduce feeding, remove tired annual trailers, assess which plants need upsizing.
- Winter (as needed): Protect pots from freeze-thaw cycles with insulation wrap in cold climates, and water evergreens during mild dry spells.
For watering efficiency, a simple drip kit with a reservoir can be a sanity-saver. The U.S. Environmental Protection Agency notes that drip irrigation can reduce water use by delivering water directly to roots with less evaporation and runoff (EPA, 2024).
Fine-tuning: make the screen look designed, not accidental
The difference between “a row of pots” and “a designed privacy screen” is repetition and restraint. Repeat one primary plant form (columns, grasses, or trellis panels) and limit your color palette to two or three foliage tones. Then add one accent—like a glossy-leaved vine or a flowering shrub—so it feels curated.
Finally, think about nighttime. A single warm LED uplight aimed into a grass clump or a small string light along the trellis makes the screen feel like a feature, not a workaround. If you keep it subtle, the lighting also increases privacy by drawing attention inward to your balcony room rather than outward to neighboring windows.
Once your screen is in place, give it one growing season to knit together. The first month looks like “plants in pots.” By month three, it starts to read like a green wall. By next year, with a little pinching and training, you’ll have that rare balcony feeling: sheltered, leafy, and comfortably your own.
Sources: Royal Horticultural Society (RHS), container and wind-related growing guidance, 2023. U.S. Environmental Protection Agency (EPA), WaterSense/irrigation efficiency guidance including drip irrigation principles, 2024. Dee Hock, Small-Space Landscaping, 2018.