Rooftop Tomato Cage Design Options
The first time you watch a rooftop tomato plant catch a gust of wind, you understand why “just stick it in a pot” isn’t a plan. The sun is bright, the reflective heat is real, and the roof edge funnels breezes that can snap a main stem right when fruit starts to blush. Then there’s the practical stuff: a landlord who won’t let you drill into anything, a door that must swing clear, and a weight limit nobody can quite confirm. A good rooftop tomato cage isn’t only a support—it’s a structural element in your whole layout, like a tiny piece of architecture designed to survive summer.
Let’s design this the way a landscape designer would: read the site, choose a cage system that matches the microclimate and rules, and lay out plants so you can water, harvest, and live your life without tripping over a jungle of vines.
Start with the rooftop “site audit” (5 minutes that saves a season)
Before you buy cages, map three forces: sun, wind, and access. Tomatoes will forgive a lot, but rooftops amplify extremes.
Sun and heat: aim for 6–8+ hours
Most fruiting tomatoes perform best with full sun; on many rooftops that’s the easy part. The trick is managing heat stress from radiant surfaces. If your roof membrane is dark, pots can run hotter than ground gardens. Plan for 6–8 hours of direct sun, with a little afternoon protection if your roof is a heat trap (a light shade cloth panel can be the difference between flowers setting fruit or dropping).
Wind: design for gusts, not breezes
Wind is the silent cage-killer. A standard lightweight wire cone that works in a backyard can become a sail on a roof. If your roof is exposed, treat “anchoring” as a design requirement, not an upgrade.
Access: leave a true working lane
You’ll need room to move a watering can, check ties, and harvest. Leave at least 24 inches of walkway between containers or between a container row and a parapet. If you’re using large grow bags or half-barrels, 30 inches is even better so your hips aren’t brushing foliage (which can spread disease via wet leaves).
Design principles for rooftop tomato cage layouts
Principle 1: Build a stable base before you build height
On rooftops, a cage is only as stable as the container beneath it. Favor wide, heavy bases that resist tipping. For indeterminate tomatoes, a 20–25 gallon container gives you both root volume and ballast; for compact determinates, 10–15 gallons can work if you don’t push height too hard. If weight is a concern, use wide plastic planters rather than narrow ceramic, and add stability by clustering containers so they buffer each other from wind.
Principle 2: Let the layout do some of the wind work
Place your tallest cages on the leeward side of the rooftop (the side protected by a parapet wall, stair bulkhead, or railing with wind screen). A parapet that’s even 36–42 inches tall can reduce wind at plant level. If your roof is totally open, design a “windbreak row” with sturdy cages and a permeable screen (like lattice or mesh) rather than a solid barrier that can create dangerous turbulence.
Principle 3: Keep a harvest corridor and a tie-in zone
Tomatoes need weekly attention: pruning, tieing, and picking. Make it easy. I like a simple layout: containers in a line with cages facing the walkway, and a “tie-in zone” behind them where you can tuck extra stems without blocking the path. Think of it like theater seating: you want every fruit cluster to be reachable without stepping into pots.
Principle 4: Match cage type to tomato habit (and your patience)
Indeterminates keep growing until frost—choose a system that can extend past 5 feet. Determinates top out and set fruit in a flush—choose sturdier but shorter supports with less ongoing training. If you choose the wrong cage, your plant will punish you with snapped branches right when you want sandwiches.
Rooftop tomato cage design options (and how to lay them out)
| Design option | Best for | Typical height | Footprint per plant | Wind stability | Approx. cost (per plant) |
|---|---|---|---|---|---|
| Heavy-duty welded wire cage (cylinder) | Indeterminate slicers, long season | 60–72 in | 18–24 in diameter container zone | Good if anchored | $25–$60 |
| String trellis to an overhead frame | Multiple plants in a row; renters who can use freestanding frames | 72–96 in | 18–24 in spacing in a trough/row | Excellent when braced | $10–$30 (plus frame) |
| Florida weave (stake-and-twine) | Determinate or semi-determinate; budget builds | 48–60 in | 18–24 in spacing | Fair to good | $4–$12 |
| Tripod/teepee bamboo cage | Small rooftops; cherry tomatoes | 60–84 in | 16–20 in | Good if legs are wide | $8–$20 |
| Compact patio cage (short cone) | Dwarf/determinate in containers | 36–48 in | 14–18 in | Fair | $6–$18 |
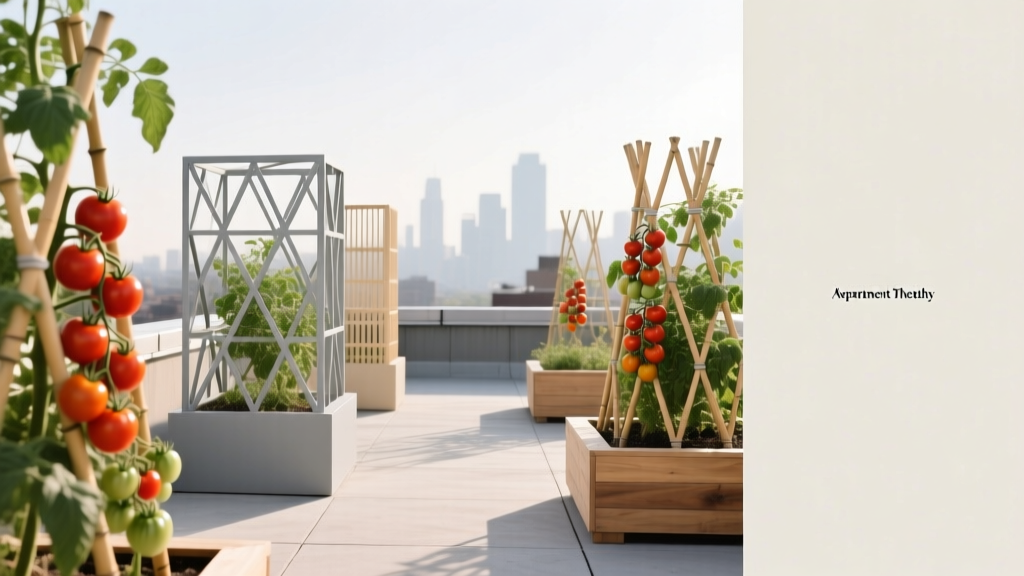
Option A: Heavy-duty welded wire cylinder (the “mini silo”)
This is the classic designer choice for a single feature plant: one big pot, one serious cage, clean lines. Use concrete reinforcing mesh or heavy-gauge livestock panel cut and formed into a cylinder. For rooftop use, make the diameter at least 18 inches so your hands can reach in to harvest without tearing foliage.
Layout strategy: Place these along the protected edge of the roof, or stagger them so each cage shields the next. Keep 24–30 inches between container rims so airflow stays good—especially on humid rooftops where leaves can stay wet overnight.
Anchoring: Instead of staking into soil (not possible in containers), zip-tie the cage to 2–3 bamboo stakes pushed into the pot, then add a strap from the cage base to the container handles or to a paver placed on the soil surface as ballast.
Option B: String trellis on a freestanding frame (the “rooftop pergola line”)
If you want multiple plants but a tidy footprint, a string trellis is hard to beat. The key is the frame: two vertical posts with a top bar, plus diagonal bracing so the whole thing doesn’t rack in wind. If you can’t bolt anything down, build a freestanding base with weighted planters at each post.
Layout strategy: Run a single trellis row parallel to your main walkway, like a green wall you can harvest from both sides. Space plants 18–24 inches apart. This makes pruning and tieing fast because every stem has a string “lane” to climb.
“Tomato plants benefit from being kept off the ground; staking and trellising improve air circulation and can reduce foliar disease pressure.” — University of Minnesota Extension, 2023
Why it works on rooftops: A well-braced frame behaves like a single structure. Instead of each cage wobbling, the row shares load during gusts.
Option C: Florida weave (economical, fast, surprisingly elegant)
This is a classic field technique adapted for containers or long planters. Drive sturdy stakes into each container (or use a trough with internal bracing), then weave twine around stakes to cradle stems as they grow.
Layout strategy: Best for determinates or compact indeterminates you plan to prune lightly. You’ll get a clean hedge effect—great for renters who want a controlled look.
Cost note: A roll of tomato twine and a bundle of stakes can support 6–10 plants for under $30 total, depending on materials.
Option D: Bamboo tripod/teepee (lightweight with smart geometry)
Bamboo is light, which is good for rooftops—but you must give it a wide stance. A narrow teepee tips. Build a tripod with legs spread to form a 24–30 inch base circle, then lash securely at the top and add a mid-level ring of twine for stiffness.
Layout strategy: Great in corners where a cylinder would block movement. Position the open side toward the walkway so harvest is easy.
Step-by-step: a rooftop cage setup that holds up in wind
This is my go-to sequence for a single indeterminate tomato in a container—repeat it in a row for a cohesive layout.
- Choose the container size: 20–25 gallons for indeterminate slicers; 10–15 gallons for determinate or dwarf types.
- Place the pot before filling: A filled container can weigh 80–120 lb depending on media and water. Avoid dragging it across roofing.
- Set drip saucer strategy: If runoff is an issue, use a large saucer and keep mulch on top to reduce splash and mess.
- Install the cage first: Push cage legs/stakes down into the empty pot area so you’re not crushing roots later.
- Add growing media and plant: Plant deep, burying part of the stem. Water in thoroughly.
- Anchor the cage: Use UV-resistant zip ties to connect cage to internal stakes, then add a ballast paver on the soil surface if needed.
- Mulch 2 inches: Straw or shredded leaves reduce evaporation—critical on roofs.
- Add the first tie at 12–18 inches: Use soft tomato clips or cloth strips; avoid thin wire that girdles stems.
Tomato varieties that behave well on rooftops (and why)
Rooftops reward tomatoes that set fruit reliably in heat, resist cracking, and don’t become unmanageable vines unless you’re committed to pruning. Here are designer-friendly picks with specific cage matches.
Compact and container-reliable
‘Patio Choice Yellow’ (dwarf/determinate): Stays compact, fruits early, and looks cheerful in a front-and-center pot. Pair with a 36–48 inch patio cage and a 10–12 gallon container.
‘Bush Early Girl’ (determinate): Gives you that classic slicer flavor without a towering vine. Works well with Florida weave or a 48–54 inch sturdy cage. Good option when wind is an issue because you’re not building a 7-foot sail.
‘Tiny Tim’ (dwarf): Great for renters with a small roof or fire-escape-style terrace where you need low height. Use a short cage or even a simple stake; 5-gallon containers can work, though 7 gallons is more forgiving.
Cherries that keep producing (and forgive missed pruning)
‘Sungold’ (indeterminate cherry): Famous for flavor, and it’s vigorous—plan on a 6-foot cage or a string trellis. On rooftops, the sweetness can be incredible due to strong sun, but you must keep watering consistent to reduce stress.
‘Sweet 100’ (indeterminate): Heavy clusters need strong support. This is where a welded wire cylinder shines; the cage becomes a fruit chandelier frame.
Slicers for people who truly want sandwiches
‘Celebrity’ (determinate): A steady, widely adapted performer that’s manageable in containers with a medium cage and light pruning.
‘Better Boy’ (indeterminate): Great fruit size, but commit to either a tall cylinder (72 inches) or a string trellis. If you don’t want weekly tying, choose something less vigorous.
Design note: If you have only 6 hours of sun (rather than 8+), prioritize cherries and early determinates; they tend to deliver better yields in slightly less-than-ideal light.
Three rooftop scenarios (real-world layouts you can copy)
Scenario 1: The renter’s “no-drill” roof deck (space: 6 ft x 10 ft)
You’ve got a small deck area, a table, and you need the door clear. The win here is a single trellis row against the railing using a freestanding frame weighted by planters.
Layout: Two 10–15 gallon pots with ‘Bush Early Girl’ plus one 15–20 gallon pot with ‘Sungold’ at the end. Keep 24 inches between pots. Put the tallest plant at the corner where it won’t shade the others.
Budget range: $120–$250 for containers + soil + a DIY frame, depending on what you already own.
DIY alternative: Use two large containers as “anchor feet” for the frame posts. No drilling, and the structure is removable at the end of the season.
Scenario 2: The exposed, windy roof (parapet is low, gusts are common)
Here, your design goal is low center of gravity and shared support.
Layout: Use 3–4 determinates like ‘Celebrity’ or ‘Bush Early Girl’ in 15–20 gallon wide containers, arranged in a block (two by two). Support them with Florida weave using stout stakes in each pot. Put a permeable wind screen (mesh) on the windward side if allowed.
Spacing: 24 inches between container centers, with a 30-inch service lane on the leeward side.
Why this works: Shorter plants + shared twine structure = fewer snapped leaders and less top-heavy sway.
Scenario 3: The sunny penthouse roof with a long run (space: 3 ft x 16 ft along a wall)
This is where you can create a “tomato gallery” that looks intentional from indoors.
Layout: A continuous row of containers, each 20–25 gallons, with welded wire cylinders. Plant a rhythm: ‘Sungold’ (cherry), ‘Celebrity’ (slicer), ‘Sweet 100’ (cherry), ‘Better Boy’ (slicer). Keep 30 inches between pots if you can; 24 inches minimum with disciplined pruning.
Cost expectation: If you buy heavy-duty cages, plan $25–$60 each; four plants can mean $100–$240 just for cages, but they last for years. A DIY cylinder made from remesh can cut that significantly.
Budget planning and DIY cage builds
Rooftop gardening can get pricey fast because containers and soil add up. The good news: cages are one of the easiest places to save money without sacrificing performance—if you build thoughtfully.
Cost-saving swaps that still look good
DIY welded wire cylinder: Concrete remesh panels are often cheaper per square foot than “premium” cages. Cut a section about 5 feet tall, form into a cylinder 18–20 inches wide, and secure with hog rings. Add an extension ring later if your indeterminate wants more height.
Bamboo + twine tripod: For cherries, three 8-foot bamboo poles can create a tall, light cage. Lash the top tightly and add two twine rings at 24 and 48 inches for stiffness.
Secondhand stakes and frames: Check local reuse stores. A slightly rusty metal conduit frame can be cleaned and repainted, and it will outlast most store-bought cages.
Maintenance expectations (rooftop reality, week by week)
Plan on 30–60 minutes per week for a small rooftop set-up of 2–4 plants. In peak heat, watering checks become near-daily, even if you only water deeply every other day.
Weekly rhythm (10 minutes here, 10 minutes there)
- Tying and training: Add new ties every 7–10 days as stems climb.
- Pruning: For indeterminates, remove suckers below the first flower cluster if you want fewer, larger fruits and better airflow. Determinates need only light cleanup.
- Water management: Rooftops dry fast. Consistent moisture helps prevent cracking and blossom-end rot.
- Quick pest scan: Check undersides of leaves for aphids and look for hornworm chew marks.
Seasonal tasks that keep the layout functional
Early season: Install cages at planting—don’t wait. Once growth starts, forcing a cage into a pot is a root-crushing mess.
Midsummer: If plants are outgrowing cages, don’t panic. You can “top” indeterminates (pinch growing tips) to slow vertical growth and redirect energy to ripening. On rooftops, this is often the most practical move.
Late season: Remove lower leaves to improve airflow and reduce disease. As temperatures drop, prune lightly to expose fruit to sun for ripening.
Safety, weight, and water: practical notes you shouldn’t skip
Weight: A saturated container can be heavy; a 20–25 gallon pot with wet mix can easily exceed 80 lb. Spread containers out rather than clustering all weight in one corner. If you’re renting, it’s wise to ask building management about load limits for roof decks and terraces.
Water runoff: Be intentional with saucers and overflow. A rooftop garden that drips onto a neighbor’s patio becomes a political problem fast.
Food-safe materials: Avoid treated lumber in direct contact with soil for edible crops unless you know the treatment is appropriate for garden use.
Design cues from research (so your choices have backup)
Two core ideas—support and airflow—show up repeatedly in extension guidance for tomatoes.
University of Minnesota Extension notes the value of staking/trellising to keep plants off the ground and improve air circulation (University of Minnesota Extension, 2023). This matters on rooftops where humidity can linger in dense foliage pockets despite constant wind.
And when it comes to spacing and light, Cornell University’s home gardening resources emphasize full sun and adequate spacing to reduce disease and improve productivity (Cornell Cooperative Extension, 2020). Rooftop layouts that feel “roomy” often outperform tighter, more crowded arrangements even if you grow fewer plants—because each plant stays healthier and produces longer.
If you want your rooftop tomatoes to look intentional—not like a summer accident—choose one cage style and repeat it. Keep your walkway clear, put the tallest structures where wind is softened, and match variety vigor to the height you can realistically support. Do that, and the rooftop stops being a hostile place for tomatoes and starts acting like what it really is: a bright, warm microclimate where fruit can ripen beautifully, right outside your door.
Sources: University of Minnesota Extension (2023); Cornell Cooperative Extension (2020).