Deck Outdoor Yoga Garden Surround
The deck is warm under your feet—until the neighbor’s mower kicks on, the wind tosses last year’s leaves into the corners, and the afternoon sun turns your mat into a hotplate. You roll your shoulders, trying to settle in, but your gaze catches a clutter of hose reels and plastic pots. The space is “fine” for grilling, yet somehow it fights you when you try to practice yoga outside.
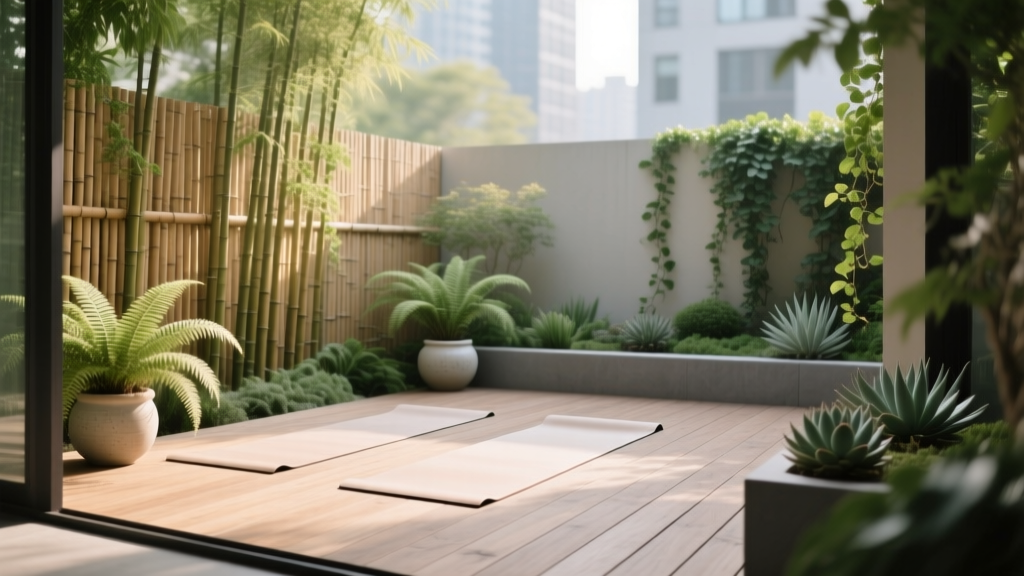
This project is about giving your deck a calm perimeter—soft, fragrant, and private—without swallowing the floor space you need for movement. Think of it as designing a supportive room with living walls: plants, screens, and textures that shape quiet, filter sound, and feel good to be near. I’ll walk you through a layout that works for homeowners and renters, with real dimensions, plant spacing, costs, and maintenance expectations.
Start With the Yoga Footprint: The Deck Must Still Function
Before you buy a single pot, reserve the “practice rectangle” so the garden surround doesn’t creep inward over time.
Minimum clear space (and why it matters)
Most yoga mats are about 24 inches x 68 inches. For comfortable transitions and a little “sway room,” plan a clear zone of 6 feet x 8 feet (48 sq ft). If you practice with a partner or do wide-limbed flows, step up to 8 feet x 10 feet.
Design rule: keep a 24-inch circulation band from the deck door to the practice zone so you’re not squeezing past pots with a cup of tea or a rolled mat.
Sunlight target for comfort
For most people, the sweet spot is 3–6 hours of direct sun, then bright shade. Morning sun (east or southeast exposure) is ideal—warm enough to feel alive, not so intense you rush through savasana. If your deck faces west and bakes after 2 p.m., your surround will need a little more vertical shade (trellis, tall planters, or a lightweight sail).
Data note: UV intensity and glare are real comfort issues outdoors. The U.S. Environmental Protection Agency (EPA, 2023) recommends checking the UV Index and using shade strategies when UV levels are high (generally 6+). That’s not just a beach problem—it’s a deck-at-4-p.m. problem.
Layout Strategies That Feel Like a Garden Room (Not a Storage Zone)
The best deck yoga surrounds use three layers: a low “edge,” a mid-height “soft wall,” and one taller element that sets the mood and blocks sightlines. This makes the deck feel enclosed without feeling cramped.
Strategy 1: The 18-inch “soft edge” that keeps you centered
Along the deck railing or perimeter, aim for a planting band that reads as continuous but stays slim. The magic depth is 16–18 inches: enough for lush pots, narrow enough to preserve floor space.
Use rectangular planters (or planter boxes) in repeating sizes rather than a jumble of round pots. Repetition calms the eye—exactly what you want before practice.
Strategy 2: Privacy without heaviness—screen at head height
When you’re on the mat, your head is low and your sightlines are different. You don’t need a 7-foot solid fence to feel private; you need a filtered screen that interrupts the neighbor’s windows and gives you a green backdrop.
- Target screen height: 60–72 inches (roughly eye level when standing, and enough to block seated views).
- Place screens where you face most: usually at the “head” of the mat, where you look during standing poses.
“The most successful outdoor rooms balance prospect and refuge—giving you a view out, but also a sense of being held.” — Sarah Susanka, architect and author, The Not So Big House (1998)
Strategy 3: A single focal anchor—so the mind stops scanning
Give your gaze one place to land: a sculptural grass in a tall pot, a small tree in a tub, or a water bowl. One focal point reduces visual noise, which is especially helpful if you’re practicing on a busy street or in a shared yard.
Keep it simple: one large statement container reads calmer than five small “interesting” items.
Three Real-World Layouts (Choose the One That Matches Your Deck)
Below are three scenarios I design for most often: a narrow rental balcony, a mid-size family deck, and a sun-blasted rooftop. Each uses the same principles, scaled to fit.
Scenario A: Rental balcony (3 feet x 10 feet) with railing
You can’t give up much walking space, and you may not be allowed to drill into walls. Here’s a renter-friendly surround:
- Reserve the practice zone: keep 3 feet x 6 feet clear (you’ll practice lengthwise).
- Add railing planters: use 3–4 railing boxes, each 24 inches long, for herbs and soft scent.
- Create a corner privacy blade: place one tall, narrow planter (12 inches x 12 inches x 30–36 inches tall) with a clumping grass.
- Install a no-drill trellis: a freestanding trellis panel in a weighted pot (or a folding screen) behind the tall planter.
Budget: $120–$300 depending on planter materials. DIY option: food-grade buckets inside simple wood sleeves, or thrifted containers unified with one paint color.
Scenario B: Family deck (12 feet x 16 feet) that also hosts dinners
This is the sweet spot for a true “garden room” surround. You can keep an 8 feet x 10 feet yoga area and still fit a bistro set.
- Mark the yoga zone with an outdoor rug that’s 6 feet x 9 feet or larger (leave your mat on top).
- Build an 18-inch perimeter band using four rectangular planters (roughly 36 inches long x 16 inches wide x 16 inches tall) spaced evenly.
- Add a “green headboard” at the mat’s facing end: two tall planters with a trellis between them (overall width about 6 feet).
- Keep one entry gap of 30–36 inches so you’re not stepping over pots to practice.
Budget: $450–$1,200 depending on planter quality and whether you add a small water element. DIY alternative: build planter boxes from cedar fence pickets and line with heavy pond liner.
Scenario C: Rooftop or west-facing deck with intense sun (6+ hours)
Here, shade and wind management are design priorities. Your surround should cool the deck and reduce glare.
- Place shade first: one shade sail or offset umbrella, sized around 8 feet x 10 feet, positioned to cover the mat during your practice hours.
- Choose wind-stable containers: heavier pots (or add gravel in the bottom) so tall plants don’t topple.
- Use silver/gray foliage and drought-tolerant aromatics that won’t sulk.
- Mulch containers with 1 inch of gravel or pine fines to slow evaporation.
Budget: $300–$900. DIY alternative: a canvas drop cloth turned into a shade panel with grommets and rope, paired with sturdy weighted bases.
Planting Design: Calm Structure, Soft Scent, and Low-Mess Leaves
Your plant palette should do three jobs: screen (privacy), soothe (scent and texture), and behave (minimal litter on the deck). Avoid plants that constantly drop petals, sticky sap, or spiky debris where bare feet land.
Structure plants (the backbone)
These create the “walls” and hold the design together even when flowers fade.
- Clumping bamboo (Fargesia rufa or Fargesia robusta): Excellent privacy without invasive running roots. In large containers, place plants 24–30 inches apart for a dense screen. Works best with 4–6 hours sun and consistent moisture.
- Dwarf arborvitae (Thuja occidentalis ‘Danica’ or ‘Hetz Midget’): Compact evergreen structure; tidy and low-litter. Space 24 inches apart in long planters. Best in sun to part sun.
- Feather reed grass (Calamagrostis ‘Karl Foerster’): Upright, architectural, and not floppy. Use as a focal point in a tall pot; one plant can anchor a corner. Prefers sun; tolerates part shade.
Scent and sensory plants (the “exhale” layer)
Fragrance is powerful outdoors—use it at nose height near where you set your mat or sit after practice.
- Lavender (Lavandula angustifolia ‘Hidcote’ or ‘Munstead’): Classic calming scent; thrives in sun and sharp drainage. Space 12–18 inches apart. Keep off damp, shady corners.
- Rosemary (Salvia rosmarinus ‘Arp’ for colder areas, ‘Tuscan Blue’ for larger tubs): Evergreen fragrance and culinary use. One plant in a 14–18 inch pot is a handsome, upright accent.
- Sweet box (Sarcococca confusa): Shade-friendly with winter fragrance, ideal for north-facing decks. Use in medium pots; slow-growing, well-behaved.
Soft spillers (to blur edges and hide planter rims)
- Creeping thyme (Thymus serpyllum): Low, fragrant, bee-friendly, and tolerates some drying. Great along planter edges where you brush past.
- Licorice plant (Helichrysum petiolare): Silver trailing foliage that reads calm and reflective in hot sun.
- Trailing rosemary (‘Prostratus’): Drips beautifully over tall containers; drought-tolerant once established.
Pollinator note: If you practice barefoot and want fewer bees on the deck boards, place the most nectar-rich bloomers (like thyme and lavender) in planters 2–3 feet away from the mat zone rather than right beside it. You’ll still enjoy them visually and aromatically without sharing your down-dog space.
Container Choices Compared (Cost, Weight, Longevity)
Planters are your “construction materials” on a deck. Choose them the way you’d choose cabinetry: based on durability, weight, and how they look in repetition.
| Planter Type | Typical Cost (per 16–20" pot) | Weight | Best For | Watch Outs |
|---|---|---|---|---|
| Resin/HDPE | $25–$80 | Light | Renters, rooftop decks, moving layouts | Can look “plasticky” up close; anchor in wind |
| Terracotta | $20–$70 | Medium | Lavender/rosemary (great drainage) | Cracks in hard freezes; tips more easily when tall |
| Fiberglass | $80–$250 | Light-Medium | High-end look, big sizes without heavy weight | Cost; choose UV-stable products |
| Wood (cedar/redwood) | $60–$200 | Medium | Long troughs, custom sizes | Needs liner; eventual rot if constantly wet |
| Concrete | $60–$180 | Heavy | Windy sites, permanent layouts | May exceed deck load comfort; hard to move |
Step-by-Step Setup: Build the Surround Without Overcrowding
This is the sequence I use on site to keep the design clean and functional.
- Measure and tape your yoga zone. Use painter’s tape to mark 6 feet x 8 feet (or your chosen size). Live with it for a day.
- Choose one “material family” for planters. One color, two shapes max. Repetition reads calmer than variety.
- Place the tallest elements first. Put screens/trellis planters where you need privacy most—usually 1–2 key sightlines. Aim for 60–72 inches tall.
- Build the mid-layer. Add evergreen structure in medium planters along the perimeter, leaving a 30–36 inch entry gap.
- Fill the soft edge. Add lavender/thyme/licorice plant in smaller pots clustered in 2s and 3s (clusters feel intentional).
- Dial in irrigation. Decide now: watering can, hose wand, or a simple drip line. Consistency is what keeps a deck garden looking designed.
- Finish with one focal piece. A tall grass, a simple bowl fountain, or even a smooth stone grouping beside the mat “head” gives your eyes a resting place.
Watering, Drainage, and Deck-Friendly Details
Deck gardens fail when water management is an afterthought. Protect the boards, reduce algae slip, and make watering easy enough that you’ll actually do it.
Drainage rules that prevent soggy pots
- Use pots with drainage holes; place them on risers or pot feet to keep water from pooling.
- For most container shrubs, a practical soil volume is at least 10–15 gallons. Under-sizing containers is the fastest way to stressed plants and constant watering.
- Top-dress with 1 inch of gravel or pine fines to reduce splash and fungus.
Simple irrigation options (with realistic costs)
If you’re watering more than 6 containers, consider a basic drip kit. A starter kit often runs $30–$70, and it can cut the “forgot-to-water” cycle that makes deck gardens look tired.
Water efficiency matters. The U.S. Environmental Protection Agency (EPA, 2024) notes that efficient irrigation and watering practices can significantly reduce outdoor water waste—drip systems and targeted watering are a practical step for container-heavy spaces.
Plant Pairings That Work (And How Many to Buy)
Here are three ready-to-build “modules” you can repeat around your deck. Repetition is the trick: pick one module and use it 2–4 times.
Module 1: Privacy corner (one tall pot + one trellis)
- 1 clumping bamboo (Fargesia) in a 20–24 inch wide pot
- 1 trailing rosemary or licorice plant to spill over the rim
Why it works: vertical height, evergreen feel, and movement in breeze—without a messy leaf drop.
Module 2: Scent band (three medium pots)
- 2 lavender (‘Hidcote’), each in a 12–14 inch pot
- 1 rosemary (‘Arp’ or ‘Tuscan Blue’) in a 14–18 inch pot
Why it works: calming fragrance, sun tolerance, and a palette that looks intentional year-round.
Module 3: Shade-friendly calm (two pots + one spiky accent)
- 1 sweet box (Sarcococca confusa)
- 1 fern (e.g., Japanese painted fern, Athyrium niponicum) if your site is truly shady
- Optional: 1 slender grass-like accent such as sedge (Carex) in a narrow pot
Why it works: you still get structure and texture where lavender would fail.
Budget Planning and DIY Alternatives That Still Look Designed
A deck yoga surround can be done in a weekend with a modest spend, or it can be a phased upgrade. The key is investing first in the “bones”: a few larger planters and one privacy element.
Three budget tiers (real numbers)
- Starter (around $200–$350): 4–6 resin planters, herbs + one grass, one outdoor rug. DIY trellis from bamboo stakes and jute.
- Mid-range (around $500–$900): 2 tall planters + trellis, 4 trough planters, mix of lavender/rosemary/evergreen structure, drip kit.
- Premium ($1,200–$2,000+): fiberglass planters, larger specimen plants, integrated lighting, small recirculating water bowl or fountain.
DIY upgrades that read high-end
- Unify container color: one paint tone across mismatched pots is the fastest visual cleanup.
- Build a screen wall: a freestanding lattice panel weighted by two long planter boxes (no deck drilling required).
- Add soft lighting: warm LED string lights or solar uplights aimed at grasses (keep fixtures off the practice zone to avoid glare).
Maintenance Expectations: Keep It Serene Without Making It a Chore
A deck surround should support your practice, not become another weekend obligation. Plan for small, frequent care rather than occasional marathon sessions.
Weekly time estimate
Expect 30–60 minutes per week in peak season (late spring through early fall) for watering, quick deadheading, and sweeping leaves. In cooler months, it often drops to 10–20 minutes per week.
Seasonal task list
- Spring (1–2 hours total): refresh potting mix top layer, slow-release fertilizer for shrubs, prune winter damage.
- Summer (10 minutes, 2–3x/week in heat): deep water containers; check for spider mites on stressed plants; trim spillers to keep walkways clear.
- Fall (1 hour): cut back grasses if you prefer tidy winter lines; clean deck corners; bring tender plants closer to the house for warmth.
- Winter (as needed): water evergreens during dry spells when temps are above freezing; group pots together to reduce wind desiccation.
If you travel frequently, choose more evergreen structure (arborvitae, sweet box) and fewer thirsty annuals. A simple drip timer can be the difference between “retreat vibe” and “crispy pots.”
Small Details That Make the Space Feel Like a Practice Studio
Once the surround is planted, the final layer is sensory comfort—things you feel and hear as much as you see.
- Deck comfort: a thin outdoor rug under the practice zone reduces splinters and makes kneeling poses more pleasant.
- Sound buffering: dense foliage helps, but even a small bubbling water bowl can mask street noise if placed 3–5 feet from the mat edge.
- Storage that disappears: a weatherproof bench for blocks/straps keeps your deck from becoming a gear pile.
When you step onto the deck, you should feel the space guiding you: a clear place to move, a soft green boundary, a screen where you need it, and a focal point that quiets the mind. Start with the footprint, build the privacy layer, then add scent and softness. After that, it’s just repetition—plants in calm groups, containers in a consistent style, and enough open board space to roll out the mat without negotiating obstacles.
Your practice doesn’t need a perfect garden. It needs a supportive one—designed to meet you where you are, on the deck you already have.