Balcony Self-Sufficient Herb Garden
The first time you try to cook on a weeknight and realize the basil has turned black in the fridge again, you start eyeing the balcony differently. Not as “outdoor storage,” but as a tiny supply chain. The goal isn’t a Pinterest-perfect jungle—it’s a reliable ribbon of flavor you can cut from while the pasta water boils. On a balcony, self-sufficient doesn’t mean “never buy herbs.” It means your layout, plant choices, and routine are designed so you can harvest most weeks with minimal fuss, even if you rent and can’t drill a single hole.
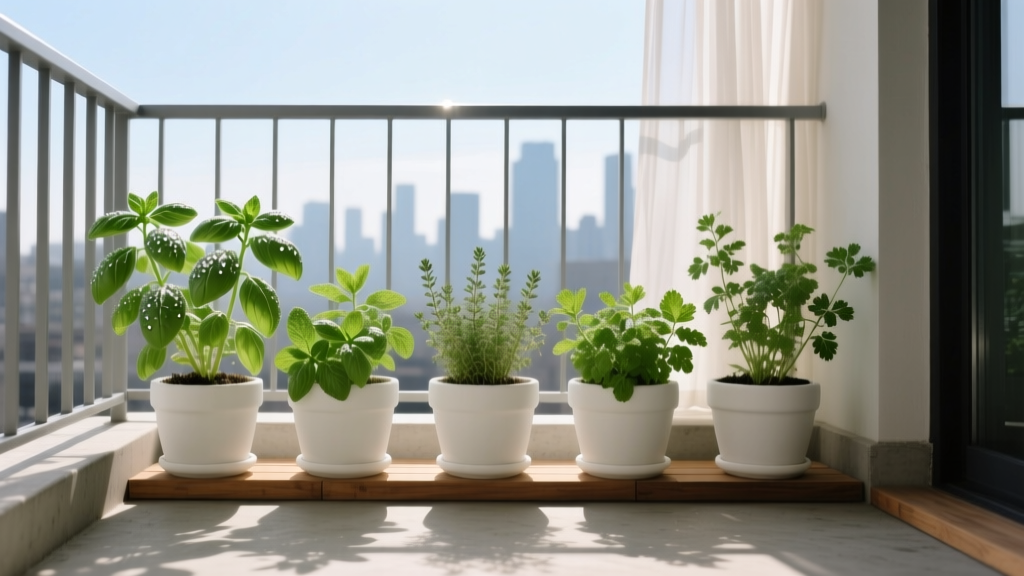
Picture a standard apartment balcony: a 6 ft x 10 ft (about 60 sq ft) rectangle, one sunny edge, one shaded corner, and a door swing you keep bumping with pots. We’ll design a compact herb system that respects traffic flow, captures light, manages water without leaks, and keeps plants producing—so your kitchen has a steady, rotating lineup of herbs from spring through fall, with a few stalwarts (like chives and thyme) that carry through winter in mild climates.
Start With a Balcony “Floor Plan,” Not a Plant List
As a designer, I start by treating your balcony like a micro-yard with zones. Herbs are forgiving, but your success hinges on three constraints: light, wind, and water. On many balconies, the difference between “thriving basil” and “sad basil” is literally 18 inches of shadow.
Measure the space in five minutes
Use a tape measure and jot down these numbers:
- Usable length and depth (exclude door swing). Example: 8 ft x 3 ft usable strip.
- Railing height (often 36–42 in) for planters that hang safely.
- Sun hours: track direct sun on a weekend. Many herb gardens need 6+ hours for best yields; partial-sun balconies can still produce with smarter plant choices.
- Wind exposure: high floors dry pots fast and snap tender stems.
- Water rules: HOA/landlord restrictions, drip marks below, and where runoff can go.
Pick a layout strategy: linear, corner, or “galley”
Most balconies fall into one of these patterns:
- Linear rail run: planters along the brightest edge, keeping the floor clear.
- Corner pantry: a vertical shelf or ladder rack in the sunniest corner.
- Galley: one narrow row along the railing + one slim row against the wall, leaving a central path (minimum 24 in wide so you can turn with a watering can).
Design Principles That Make a Balcony Herb Garden “Self-Sufficient”
1) Put your “daily cutters” closest to the door
Design for habit. Place basil, parsley, cilantro, chives—anything you clip often—within one step of the door. When herbs are easy to reach, you harvest more consistently, which keeps many of them tender and productive.
2) Match containers to root behavior (and your watering reality)
Small pots dry out fast, especially in wind. For most culinary herbs, I prefer containers that are at least:
- 8–10 in diameter for compact herbs (thyme, oregano)
- 10–12 in diameter for basil, parsley, cilantro
- 12–16 in diameter for mint (always isolated), rosemary, or a mixed “Mediterranean” pot
For self-sufficiency, choose fewer, larger containers rather than many tiny ones. Larger soil volumes buffer heat and moisture swings—meaning fewer emergency waterings.
3) Build a “light ladder”: tall at the back, low at the front
Keep the tallest plants (rosemary, bay, lemongrass) to the wall side or the back corner so they don’t shade low growers. On rail planters, stick with low-to-medium herbs (thyme, chives, trailing oregano) so light still hits everything behind them.
4) Treat water management like a design feature
Balcony gardens fail more often from inconsistent watering than from bad soil. Use saucers, self-watering planters, or a simple tray system so you’re not dripping on neighbors.
“Container plants can dry out quickly, especially in hot, windy conditions; check containers daily in summer.” — Royal Horticultural Society (RHS), 2023
If daily checks sound like too much, build your layout around self-watering reservoirs or a low-tech wick system (details below).
5) Use the right potting mix—don’t improvise with yard soil
Container herbs need aeration and drainage. A high-quality potting mix is worth it, and it’s lighter for balconies. As a baseline, plan for 1.5–2 cubic feet of potting mix to fill several medium containers.
Research supports the value of compost for productivity and soil function. The USDA notes that compost can improve soil structure and water-holding capacity (USDA NRCS, 2020). In containers, that translates to fewer drought stress events and steadier growth.
A Practical Layout: The 60-Square-Foot “Herb Circuit”
Here’s a tested layout for a typical 6 ft x 10 ft balcony that gets at least 5–7 hours of sun on one side. Adjust lengths, but keep the logic: harvest near the door, sun-lovers in the bright lane, shade-tolerant herbs tucked back.
Zone A: Door-step harvest strip (2–3 containers)
Place three 10–12 in pots within arm’s reach of the door:
- Genovese basil
- Flat-leaf parsley
- Chives (or garlic chives)
Spacing: Leave 2–3 in between pots for airflow and easy lifting.
Zone B: Railing run (2–4 railing planters)
Use two to four railing planters, each about 24 in long. These are ideal for low herbs and trailing types:
- Thyme (creeping or English)
- Oregano (choose a compact cultivar)
- Strawberry mint (only if isolated in its own rail planter with a root barrier pot)
Design note: If wind is strong, skip hanging planters and instead place rectangular troughs on the floor tight against the railing.
Zone C: Corner “pantry shelf” (vertical rack with 4–6 pots)
A narrow shelf unit (24 in wide, 12–16 in deep) creates vertical capacity without eating your walking path. Top shelf gets the most sun; bottom shelf gets partial shade.
Top: rosemary, sage. Middle: cilantro (spring/fall), dill. Bottom: mint (contained), lemon balm (contained), or extra parsley.
Plant Selection: Varieties That Perform in Containers
Self-sufficient means you’re choosing herbs that (1) regrow after cutting, (2) tolerate containers, and (3) match your light. Below are reliable performers with specific cultivars that handle balcony life.
Full-sun heroes (6+ hours direct sun)
- Basil ‘Genovese’: classic flavor, fast regrowth when pinched weekly. Keep one plant per 10–12 in pot for best airflow.
- Thyme ‘English’ (Thymus vulgaris): drought-tolerant, woody structure, great for rail planters. Likes to dry slightly between waterings.
- Oregano ‘Greek’ (Origanum vulgare subsp. hirtum): strong flavor, dependable perennial in mild climates; compact and productive in a 10 in pot.
- Sage ‘Berggarten’: broad leaves, less leggy than common sage in containers; a 12 in pot gives it stability in wind.
- Rosemary ‘Arp’: one of the more cold-tolerant rosemaries; excellent in a 14–16 in pot with sharp drainage.
Partial-sun workhorses (3–5 hours direct sun)
- Parsley ‘Giant of Italy’ (flat-leaf): productive in cool weather; tolerates partial sun and keeps going with regular harvest.
- Chives (Allium schoenoprasum): tough, perennial, and forgiving. A clump in a 8–10 in pot will feed omelets for years.
- Cilantro ‘Santo’: slower to bolt than many; best in spring/fall or with afternoon shade.
- Mint ‘Spearmint’ or ‘Kentucky Colonel’: high yield in partial sun; always keep in its own pot to prevent takeover.
One “tea and garnish” pot (optional, but useful)
- Lemon balm (Melissa officinalis): bright flavor, very easy—but like mint, it spreads. Keep contained.
- Nasturtium ‘Alaska’: edible leaves and flowers; trails nicely from a rail planter and attracts beneficial insects.
Safety note for renters: If you have pets, research toxicity. Some herbs and companion plants can be problematic if chewed in quantity.
Comparison Table: Container Options for a Self-Sufficient Setup
| Container Type | Best For | Typical Size | Watering Frequency (summer) | Approx. Cost (USD) |
|---|---|---|---|---|
| Self-watering pot with reservoir | Basil, parsley (thirsty herbs) | 10–12 in diameter | Every 3–7 days | $20–$45 each |
| Standard terracotta pot + saucer | Thyme, oregano (prefer drier cycles) | 8–12 in diameter | Every 2–4 days | $8–$18 each |
| Rectangular trough planter | Mixed herb combos, railing line | 24 in long | Every 2–5 days | $18–$40 |
| Fabric grow bag | Budget builds, good drainage | 3–5 gallon | Every 1–3 days (dries faster) | $3–$8 |
Step-by-Step Setup (Designed for Renters)
This sequence builds stability first (layout and water control), then plants. Plan about 2–3 hours for the initial setup.
- Map the sun lane. Mark the brightest 2–3 ft strip with painter’s tape and reserve it for basil, rosemary, thyme, oregano.
- Protect the balcony surface. Lay a waterproof tray, boot mat, or deck tiles under your main cluster. A 2 ft x 3 ft heavy-duty tray helps catch overflow.
- Place the biggest containers first. Put the heaviest pots (rosemary, sage) near a wall for wind stability. Keep at least 24 in of clear walking path.
- Install the vertical shelf (if using). Choose a shelf that’s 12–16 in deep so it doesn’t crowd your path. Secure with non-drill straps if needed.
- Add potting mix. Fill containers, leaving 1–2 in headspace for watering. Mix in compost at roughly 20–30% by volume if your potting mix is low in organic matter.
- Plant with spacing in mind. One basil per 10–12 in pot; one rosemary per 14–16 in pot; 2–3 thyme plants can share a 24 in trough, spaced 6–8 in apart.
- Water deeply once. Water until a little drains out, then empty saucers after 20 minutes if you’re worried about soggy roots (especially for rosemary and thyme).
- Label and date. A simple tag with planting date helps you time replacements (basil often needs a midseason refresh).
- Start a harvest rhythm. Pinch basil weekly; cut parsley outer stems; snip chives monthly to 2 in above soil to keep tender regrowth.
Three Real-World Balcony Scenarios (and How I’d Design Each)
Scenario 1: The windy, high-rise balcony (10th floor, full sun, fast dry-out)
Design move: Go heavier, fewer pots. Choose terracotta or ceramic for weight, and cluster pots to reduce wind exposure. Add a simple windbreak: a bamboo screen tied to the railing (no drilling) can cut leaf scorch.
Plant picks: Rosemary ‘Arp’, thyme, oregano, sage—Mediterranean herbs tolerate drying cycles. Basil can work, but use a self-watering pot and pinch often to prevent wind-tattered stems.
Maintenance reality: Expect 15–25 minutes of watering checks 4–6 days per week in peak summer unless you use reservoirs.
Scenario 2: The shady balcony (3–4 hours sun, bright indirect light)
Design move: Put plants on a stand so they “see” the sky. A shelf that lifts pots 18–24 in off the floor can increase usable light. Use lighter-colored containers to reflect light back into foliage.
Plant picks: Parsley ‘Giant of Italy’, chives, mint, lemon balm, cilantro (spring/fall). Skip rosemary if you can’t give it brighter conditions; it will limp along, then resent you.
Self-sufficient trick: Grow micro-crops in rotation: sow cilantro every 3–4 weeks in a small trough for a steady supply before it bolts.
Scenario 3: The narrow “galley” balcony (2.5–3 ft deep, door in the middle)
Design move: Keep the floor nearly clear. Use railing planters and a wall-side slim bench (no deeper than 12 in) with pots tucked under and on top. Preserve a 24 in central path so you don’t turn gardening into an obstacle course.
Plant picks: Railing: thyme, trailing oregano, nasturtium. Bench pots: basil, parsley, chives. One statement pot: rosemary or bay (bay does well in containers but needs pruning).
Budget note: This is where DIY shines—repurpose a narrow shoe rack as a plant shelf with a waterproof liner.
Budget Planning: Two Builds That Actually Work
Costs vary by city, but these ranges are realistic for a starter herb system. The key is investing where it reduces replacement: containers and potting mix.
Budget Build (approx. $75–$140)
- 4 fabric grow bags (3–5 gallon): $12–$30
- 2 rectangular troughs (24 in): $36–$60
- 2 cu ft potting mix + compost: $20–$40
- Herb starts (6–10 plants at $4 each): $24–$40
DIY alternative: Use food-grade buckets with drilled drainage holes (place in a tray). It’s not glamorous, but it grows serious basil.
Low-Maintenance Build (approx. $160–$320)
- 4 self-watering containers: $80–$180
- 1 sturdy shelf unit (24 in wide): $40–$120
- Potting mix + compost + slow-release organic fertilizer: $30–$60
- Herb starts: $24–$50
Where the money pays you back: fewer wilted herbs, fewer replacements, fewer “I forgot to water” losses.
Maintenance Expectations: What It Takes to Keep It Productive
A balcony herb garden rewards consistency more than effort. Plan on 30–60 minutes per week in total during the growing season, plus quick watering checks during heat waves.
Weekly rhythm (spring through early fall)
- Harvest/pinch (10–15 minutes): Basil gets pinched above a node; parsley gets outer stems removed; thyme and oregano get light trims to prevent woody legginess.
- Watering (10–30 minutes): Frequency depends on wind and container type. Self-watering pots reduce this substantially.
- Grooming (5–10 minutes): Remove yellow leaves, check for aphids on new growth, rotate pots for even light.
Monthly tasks
- Fertilize lightly (especially basil and parsley). Containers leach nutrients faster; a diluted liquid feed or top-dress compost keeps growth steady.
- Replant fast bolters: cilantro and dill often need reseeding every 4–6 weeks in warm weather.
Seasonal moves
- Spring: Start with cool-season herbs (cilantro, parsley), then add basil when nights stay above ~50°F.
- Summer: Provide afternoon shade for cilantro; keep basil harvested to prevent flowering.
- Fall: Take cuttings of basil or sow a last round of cilantro. Move rosemary closer to the wall for warmth.
- Winter (if you keep plants outside): Group pots together for insulation; consider frost cloth on cold nights. Many herbs slow down rather than die if protected.
Small Details That Make the Garden Feel Effortless
Keep scissors outside. A dedicated pair of snips hung on a hook near the door turns harvesting into a 30-second habit.
Plant duplicates of your “must-have.” If you cook with basil constantly, grow two basil plants in separate pots. One can rest and regrow while you harvest the other heavily.
Use succession planting for steady supply. Instead of one big cilantro planting, sow a small patch every few weeks. This “staggered” approach creates a more self-sufficient rhythm than trying to force one planting to last all season.
Sources That Inform Good Practice
Two references I regularly lean on for container and compost best practices:
- Royal Horticultural Society (RHS). Guidance on container watering and container plant care, emphasizing rapid dry-out in warm/windy conditions (RHS, 2023).
- USDA Natural Resources Conservation Service. Notes on compost improving soil properties such as structure and water-holding capacity—principles that translate well to container media management (USDA NRCS, 2020).
Once your layout is set, the balcony stops feeling like a risky experiment and starts acting like a pantry. You’ll notice the small wins first: chives that come back after every cut, thyme that shrugs off a hot week, parsley that fills in again after you strip the outer stems. Give it a month, and you’ll walk out with scissors like it’s normal—because it is. Your balcony has become part of dinner.