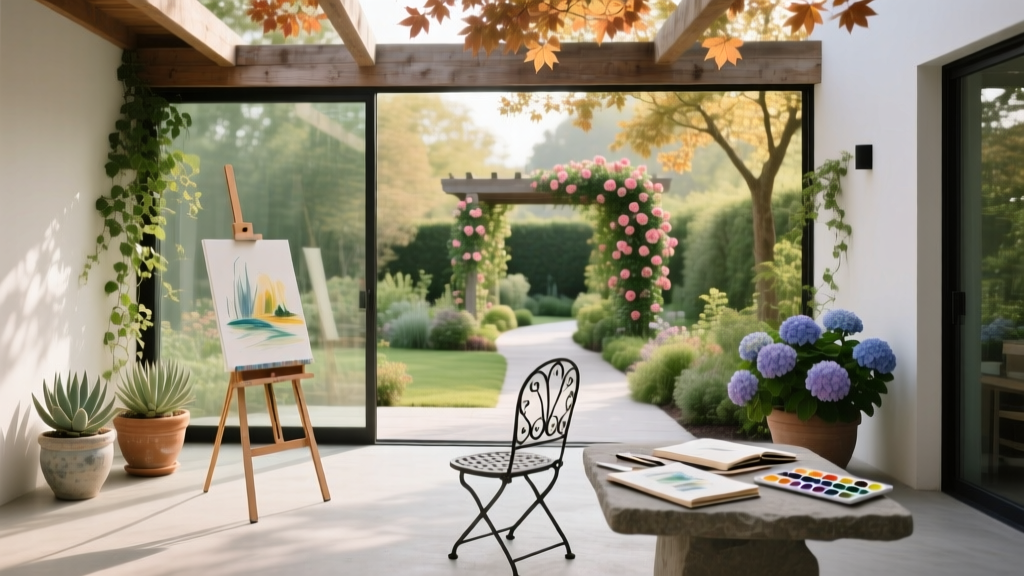
Patio Outdoor Art Studio Garden View
The easel is set up on the patio, your brushes are clean, and the light is almost perfect—until the wind flips your sketchpad, your coffee lands on the only dry chair, and your “garden view” turns out to be a recycling bin, a blank fence, and a patch of sun that disappears by 10:30 a.m. Outdoor creating is supposed to feel expansive, but most patios were never designed as studios. The good news: you don’t need more square footage. You need a layout that frames a view, controls glare, softens noise, and gives you a place to work that’s as practical as it is inspiring.
This design walk-through treats your patio like a small, highly functional room—one with a living wall, a shifting ceiling of light and shade, and a view that can be “edited” like a composition. We’ll build an outdoor art studio corner that looks out onto a garden scene built for you (and only incidentally for everyone else).
Start with the studio triangle: shade, storage, and sightline
Before buying a single plant, stand where you intend to paint/draw/photograph. Your comfort and sightline dictate everything. In small spaces, the best layouts are based on three anchors:
1) Shade control (so you can actually see your work)
Artists need stable light more than “full sun.” Aim for bright shade or dappled sun for most media. If you get 6+ hours of direct sun, plan for a shade layer (umbrella, pergola, sail, or a tall planting screen). If you only get 2–4 hours, use reflective surfaces and light-toned paving to bounce light into the studio corner.
2) Storage within one step
If your supplies live inside, you’ll stop using the patio studio. A weatherproof storage bench (or a sealed deck box) within 3 feet of your chair is the difference between “I’ll go out later” and “I’m already working.”
3) A curated sightline (your “frame”)
Your view is your subject. You can block the ugly, borrow the beautiful (tree canopy, sky), and build a focal point that reads well from a seated position. A focal point might be a sculptural pot, a small water bowl, a trellis with a climber, or a single small tree in a container.
Measure first: a patio studio layout that fits real bodies
A workable studio corner is surprisingly compact. Use these minimums as a starting point:
- Chair + working clearance: 30 inches wide by 36 inches deep for a seated setup.
- Easel footprint: about 24 inches wide by 24 inches deep (more for large canvases).
- Circulation path: keep a 36-inch path clear for comfort and accessibility; 30 inches is a tight minimum.
- Planter depth: at least 12–18 inches for shrubs and grasses; 18–24 inches for small trees.
On a common 10 ft x 12 ft patio (120 sq ft), the sweet spot is a studio zone about 6 ft x 7 ft plus a planting band around the edge. That still leaves room for a bistro table or a grill if needed.
Layout strategies that make the garden view feel intentional
Create a “viewfinder” with two layers: screen + focal point
Think like a photographer. First, place a soft screen to hide distractions: a row of tall planters, a trellis panel, or a slatted screen with climbers. Then, place one focal point that sits in the middle third of your view—where your eye naturally rests.
Spacing guidance: If you’re lining a wall with tall containers, set them 18–24 inches apart so foliage can knit together without looking like soldiers. For trellis panels, aim for 36–48 inches wide each; narrower panels look busy.
Use the “L-shaped planting border” to pull the eye outward
If your patio faces the garden, avoid planting only along the far fence; it reads flat from the patio. Instead, create an L-shape: one planting run along the fence and one coming toward the patio edge. This creates depth and gives you a foreground and background—gold for sketching and painting.
Control glare with matte materials and mid-tone surfaces
Bright white gravel and glossy tile can throw harsh light onto your page or canvas. Choose mid-tone pavers, matte porcelain, or wood decking with a natural finish. If you already have reflective paving, add a large outdoor rug in a neutral, non-glare tone under the studio area (aim for about 5 ft x 7 ft).
“People respond to landscapes as a sequence of scenes; the designer’s task is to edit views and guide attention.” — American Society of Landscape Architects (ASLA), 2016
Borrow microclimates: put the artist where the air is calm
Wind is the silent killer of patio studios. Position the chair so your body blocks the prevailing breeze, and use plants as baffles. A clump-forming grass or a hedge-like container shrub reduces turbulence without creating a dead, stagnant corner.
Step-by-step: set up the Patio Outdoor Art Studio Garden View
- Map sun and shade for one day. Note direct sun hours at 9 a.m., noon, and 3 p.m. If you get more than 5 hours of direct sun on the work area, plan shade.
- Choose your sightline and mark it. Sit in your chair, hold up a phone camera, and identify the view you want. Mark the center point with tape.
- Place the studio zone first. Set chair + easel + side table. Keep a 36-inch clear path behind you.
- Install shade (if needed). A 9-foot patio umbrella typically shades a small studio corner; a sail may cover larger areas but needs strong anchor points.
- Add storage within 3 feet. Weatherproof deck box or bench. Line the inside with a sealed bin for paper goods.
- Build the screen layer. Tall planters or a trellis panel where the “ugly” sits in your view (bins, HVAC, neighbor windows).
- Plant the focal point. One statement container: small tree, sculptural grass, or a bold shrub with a clean silhouette.
- Fill in with mid-height texture. Add 3–5 plants that read as a mass from your chair: repeated forms, limited palette.
- Light it for evening sessions. Warm LED string lights (2700K) overhead, plus a directed task light if you work after sunset.
Plant selection: varieties that behave well around an art studio
You’re designing for a working space, not just curb appeal. Favor plants that don’t constantly drop petals onto wet paint, don’t fling pollen everywhere, and don’t require daily fussing. Also: choose plants with readable silhouettes—plants that look good as shapes from 10–15 feet away.
Structure plants (your “composition anchors”)
- Japanese maple (Acer palmatum ‘Bloodgood’) in a large container (20–24 inch diameter): elegant branching, controllable size, and a strong silhouette for drawing. Works best with 4–6 hours of sun (afternoon shade in hot climates).
- Boxwood alternative: Ilex crenata ‘Sky Pencil’ (Japanese holly): vertical form for framing views; better disease resistance in many regions than traditional boxwood. Space containers 24 inches apart for a screen effect.
- Hydrangea paniculata ‘Little Lime’: sturdy blooms, reliable structure; place where it gets 4–6 hours sun for best flowering. Choose panicle hydrangea over bigleaf in colder climates for consistency.
Texture and movement (calming, not chaotic)
- Calamagrostis acutiflora ‘Karl Foerster’ (feather reed grass): upright, tidy, and great for filtering wind. Plant in containers or beds, spacing 18–24 inches.
- Lavandula angustifolia ‘Hidcote’ (English lavender): low, neat mounds; fragrance helps the studio feel like a retreat. Needs 6+ hours sun and sharp drainage. Space 18 inches.
- Salvia nemorosa ‘Caradonna’: vertical purple spires that read beautifully from a patio; drought-tolerant once established. Space 12–18 inches.
Foreground detail plants (for close-up beauty near your chair)
- Heuchera ‘Caramel’ (coral bells): dependable foliage color, great in shade/part shade (3–5 hours sun). Space 12–16 inches.
- Thymus vulgaris (culinary thyme): low, tough, and useful; happy in sun with minimal water. Space 10–12 inches.
- Helleborus x hybridus (hellebores): winter-to-spring interest in part shade, sturdy leaves that look good most of the year. Space 18 inches.
Why these work: They offer strong shapes, repeatable forms, and a long season of interest with manageable mess. They also pair well with containers—ideal for renters or patios with limited planting beds.
Pick the right planting approach for your patio: a quick comparison
| Approach | Best for | Typical footprint | Estimated cost range | Notes |
|---|---|---|---|---|
| Container border (row of pots) | Renters, flexible layouts | 12–18 in deep along an edge | $250–$900 | Fastest setup; easiest to rearrange for light and view |
| Raised planter box | Homeowners, cleaner look | 18–24 in deep, 6–12 ft long | $300–$1,500 | Better moisture stability; can double as a visual screen |
| Trellis + climbers | Privacy and vertical interest | 4–6 ft wide panel, 6–8 ft tall | $120–$600 | Great for blocking neighbors; choose non-invasive climbers |
Budget planning (and the DIY swaps that still look designed)
You can build this studio view in layers. A realistic mid-range budget for a 10x12 patio studio corner is $600–$1,200, but you can absolutely start around $200–$350 if you prioritize shade + one focal planter.
- Shade: 9-foot umbrella typically $80–$250; DIY shade sail kit $40–$120 plus anchors.
- Storage: deck box $60–$200; DIY alternative: sealed plastic tote inside a thrifted bench.
- Planters: large statement pot $50–$180; DIY alternative: food-safe half barrel or galvanized trough with drainage holes.
- Soil: plan on 1.5–3 cubic feet per large container; quality potting mix often $10–$20 per 1.5 cu ft bag.
- Plants: small tree in a pot $60–$200; perennials $8–$18 each.
A practical place to save: buy smaller perennials (4-inch pots) and plant densely for a quicker “full” look. A place not to skimp: potting mix and drainage—your plants are doing heavy lifting as architecture.
Three real-world scenarios (and how the layout shifts)
Scenario 1: Apartment renter with a 6 ft x 10 ft balcony patio
Constraint: Weight limits and no drilling into walls. Goal: privacy from neighbors and a greener view than the parking lot.
Design move: Create a lightweight “green wall” using three tall, narrow planters (each about 12 in x 12 in) placed along the railing. Use a freestanding trellis in each pot and plant a non-invasive climber like Trachelospermum jasminoides (star jasmine) in warm climates, or Clematis ‘Etoile Violette’ where it’s hardy.
Plant palette: one upright grass (Karl Foerster), one evergreen vertical (Sky Pencil holly), and trailing thyme at the base to soften edges. Add a single focal pot near the chair: heuchera for shade balconies; lavender for sun balconies.
Cost target: about $250–$500 using resin planters and small plants.
Scenario 2: Suburban homeowner with a 12 ft x 14 ft patio and a blank fence
Constraint: Fence feels like a stage backdrop; afternoon sun is harsh. Goal: a “studio view” that looks composed year-round.
Design move: Install an L-shaped raised bed (or container line) with a screen layer against the fence and a focal point at the inside corner of the L. Place the chair so you’re looking diagonally across the L—this adds depth instantly.
Plant palette: Hydrangea ‘Little Lime’ as the focal shrub, underplanted with salvia ‘Caradonna’ and heuchera ‘Caramel’ (if part shade). If full sun all day, swap heuchera for Nepeta ‘Walker’s Low’ (catmint). Add 1–2 Karl Foerster grasses to filter wind.
Shade fix: A pergola or umbrella to reduce glare; aim for bright shade during your working hours. The Royal Horticultural Society notes that many garden plants perform best when their light requirements are matched carefully to the site, particularly in shade and partial shade situations (RHS, 2023).
Scenario 3: Townhouse patio with wind tunnel effect and neighbor windows
Constraint: Gusts, privacy issues, and sound reflection off hard surfaces. Goal: a calmer microclimate and a view you’ll actually want to sit with.
Design move: Create a two-part screen: a slatted panel (freestanding or attached where allowed) plus dense, upright planting in front. The gap between slats reduces wind pressure more effectively than a solid wall, while plants catch the remaining turbulence.
Plant palette: Sky Pencil holly (or clumping bamboo where legal and contained), plus feather reed grass. Add hellebores in shaded corners for winter interest.
Hardscape softener: Outdoor rug and a couple of absorbent planters (plants + soil reduce reflected noise better than bare masonry). Cornell University’s urban horticulture work emphasizes the role of vegetation in moderating microclimates and improving comfort in built environments (Cornell University, 2018).
Sunlight planning by art medium (so your work surface behaves)
If you paint or draw outdoors, light matters as much as plants. Here’s a practical rule: aim for 2–3 hours of direct morning sun in the garden view (for sparkle), but keep your work surface in bright shade.
- Watercolor: avoid wind and direct sun on the paper; it dries too fast and creates hard edges.
- Acrylic: workable in more conditions, but direct sun accelerates drying; shade helps.
- Oil: stable shade reduces glare and helps you judge color more accurately.
- Photography: dappled shade creates interesting highlights, but too much contrast can be tricky—use the planting screen to soften.
Maintenance expectations: keep it studio-ready, not high-maintenance
Plan for 30–60 minutes per week for a container-based patio studio garden once it’s established. The time is mostly watering and quick grooming—small actions that keep the space inviting.
Weekly (growing season)
- Watering: containers may need water 2–4 times per week in hot weather; less in cool weeks. Check moisture 2 inches down.
- Deadheading: 5–10 minutes to keep salvias and nepeta blooming neatly.
- Sweep and reset: keep the studio corner clear—dust, leaves, and petals add up fast.
Monthly
- Fertilize containers: slow-release at label rates or liquid feed every 2–4 weeks depending on product.
- Check ties and trellis: climbers need gentle training to keep your “frame” clean.
Seasonal tasks
- Spring: prune grasses, refresh 1–2 inches of potting mix, clean furniture, check irrigation or hose fittings.
- Summer: adjust shade angle; move the focal pot slightly if your view shifts with foliage growth.
- Fall: cut back perennials selectively; leave grasses for winter structure if you like the look.
- Winter: cluster pots near a wall for protection; reduce watering but don’t let evergreens dry out completely.
Small upgrades that make the space feel like a real studio
Once the view is working, the studio details lock it in:
- A clamp-on task light aimed at your work surface for late sessions.
- A narrow rolling cart (18–24 inches wide) that can tuck beside the storage bench.
- A simple backdrop panel behind the focal plant—painted matte charcoal or deep green—to make foliage “pop” and reduce visual noise.
- A water bowl or tiny recirculating fountain as a steady focal sound if you have traffic noise (keep it easy to clean).
The best outdoor studio gardens don’t try to show everything at once. They edit. They repeat a few shapes. They give you a calm place to sit and a view with enough depth to explore for years. If you start with the studio triangle—shade, storage, sightline—then build the garden view in layers, you’ll end up with a patio that invites you out even when you only have twenty minutes to make something.
Sources: American Society of Landscape Architects (ASLA), 2016; Royal Horticultural Society (RHS), 2023; Cornell University Urban Horticulture, 2018.