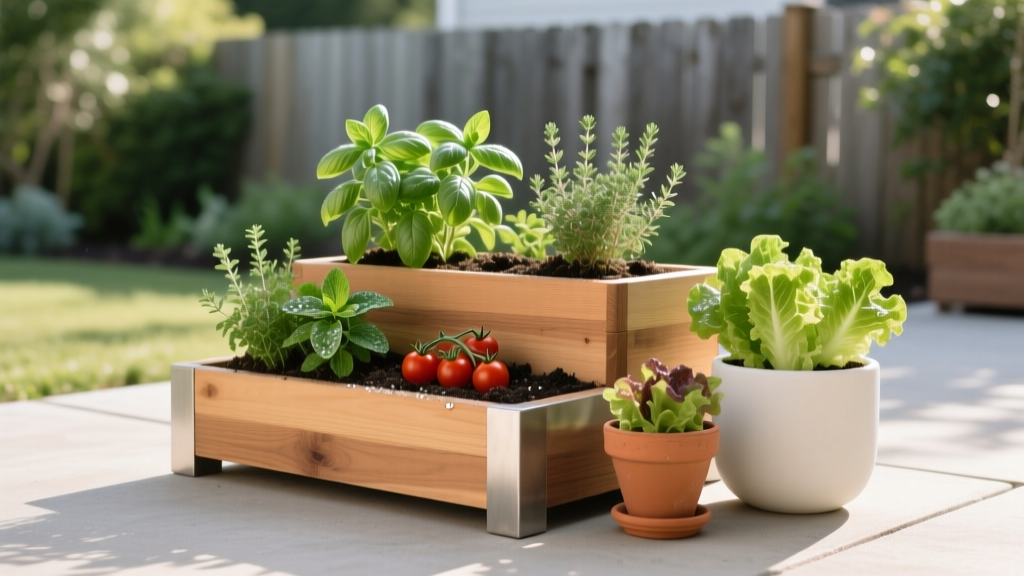
Deck Edible Landscape in Containers
The deck is spotless—until you notice it: a lonely grill, two chairs, and a view of everyone else’s greenery. You want food plants, but you don’t want a jumble of mismatched pots or a maintenance nightmare that makes you dread watering. The good news is that a deck can function like a small, highly designed edible landscape—one with structure, rhythm, and seasonal payoff—using containers as your “raised beds,” “hedges,” and “borders.” Let’s lay it out like a designer would, starting with space, light, and how you actually move through the deck.
Think of this as creating a room: you’ll define edges, set focal points, and keep the center open for living. The edible part comes from smart plant choices—varieties that behave well in pots, handle heat and wind, and look good enough to be the decor.
Start with a quick site read: sun, wind, and traffic
Before you buy a single pot, stand on your deck at three times: morning, midday, and late afternoon. Most edible crops need 6–8 hours of direct sun to thrive, especially fruiting plants like tomatoes and peppers. Leafy greens will manage with 3–5 hours and some bright shade, which is why they’re perfect for the “less ideal” corners.
Also notice wind. Decks can be surprisingly breezy, and wind dries containers fast. A simple windbreak—like a trellis panel or a row of taller containers on the windward side—can cut watering frequency in half during hot weeks.
Now watch your pathways. If you barbecue, entertain, or just carry laundry out there, protect a clear circulation lane. I design most decks with a 36-inch-wide main path (tight but workable) and aim for 42 inches if you routinely pass someone or carry trays.
Layout principles that make containers feel intentional
1) Build a “green wall” edge (privacy + productivity)
Instead of scattering pots, place your tallest growers along one edge to create a living screen. This does three jobs at once: defines the “garden zone,” shelters tender plants, and adds privacy for seating.
A practical template: line up 24-inch-diameter containers every 30–36 inches along the railing. These are your anchors—large enough for tomatoes, dwarf fruit, or trellised cucumbers.
2) Anchor the corners (so the middle can breathe)
Corners are where decks feel visually unfinished. Use two “corner anchors” in substantial planters—think 18–24 inches wide—filled with a long-season edible that reads as ornamental. Corner anchors keep the center open and prevent the space from feeling like a pot obstacle course.
3) Repeat shapes and materials (the designer’s shortcut)
Choose one pot color and two sizes, then repeat them. Repetition is what makes a container edible landscape look planned rather than improvised. My go-to pairing:
- Large: 20–24 inch diameter for fruiting crops and small shrubs
- Medium: 12–14 inch diameter for herbs, greens, and filler plants
If you love variety, do it with plants—not with five different pot styles.
4) Keep “reach distance” in mind (maintenance is part of design)
Anything you’ll harvest frequently (basil, cherry tomatoes, salad greens) should be within a comfortable reach of where you stand or sit. If you have to squeeze between pots to pick dinner, you won’t. A simple rule: keep harvest pots within 24 inches of the main path or seating.
Three layout strategies for real deck sizes
Scenario A: The 6' x 10' rental deck (minimal holes, maximum food)
This is the classic apartment deck: enough room for two chairs, not enough room for chaos. The key is to build vertically and keep a clear center strip.
- Layout: 3 large containers along the railing + 4 medium containers clustered near the door for herbs
- Traffic: maintain a 36-inch path from door to seating
- Vertical: 1 freestanding trellis panel (no drilling into the building)
Planting: two patio tomatoes, one compact cucumber, and a herb-and-greens cluster. This can produce steady salads and a surprising number of tomatoes without taking over your outdoor room.
Scenario B: The 12' x 12' family deck (edible + entertaining)
Here you can create zones: a “kitchen garden strip” and a “living strip.” I like a U-shape around the perimeter, leaving the center for a table.
- Layout: 6–8 large containers placed every 3 feet around two sides
- Center clearance: keep a 6' x 6' open zone for seating/dining
- Watering hack: hide a 5-gallon water jug and a watering can in a small deck box
Planting: mix a dwarf blueberry, peppers, eggplant, and trellised beans for a long, colorful season. Add trailing nasturtiums to soften pot edges and provide edible flowers.
Scenario C: The shady 8' x 14' deck (greens + herbs that actually like it)
If your deck gets only 3–4 hours of sun, skip the heartbreak crops (big tomatoes, melons) and lean into what shade does well: leafy greens, parsley, chives, mint (contained!), and compact roots like radishes.
- Layout: medium containers in clusters of three (odd numbers read natural)
- Best placement: sunniest corner reserved for a single “treat” crop (a cherry tomato if you can manage 5–6 hours, or a pepper if it’s warm)
- Reflective boost: light-colored pots and a pale wall behind plants can increase usable light
Container choices, soil volume, and a realistic budget
Edibles in containers succeed or fail based on soil volume. Bigger pots buffer heat and reduce daily watering.
| Container Type | Typical Size | Best For | Approx. Cost (USD) | Notes |
|---|---|---|---|---|
| Food-grade fabric grow bag | 10–20 gal | Tomatoes, potatoes, peppers | $6–$15 each | Lightweight; dries faster; great for renters |
| Resin or plastic planter | 18–24 in wide | Dwarf fruit, large herbs, eggplant | $25–$60 | Holds moisture well; choose UV-stable brands |
| Terracotta pot | 12–18 in | Herbs, greens, strawberries | $12–$40 | Classic look; dries quickly in wind/sun |
| Self-watering container | 18–24 in with reservoir | Greens, herbs, steady moisture crops | $40–$120 | Higher upfront cost; reduces watering frequency |
For a starter edible deck landscape, plan on $180–$450 depending on materials and how many containers you buy new. A practical mid-range shopping list might look like:
- 4 large containers ($30 each): $120
- 6 medium containers ($12 each): $72
- 2 bags of quality potting mix (2 cu ft each, ~$18): $36
- Slow-release fertilizer: $12
- Bamboo stakes/trellis: $20
DIY alternatives: use 5-gallon food-grade buckets (often free or <$5), drill drainage holes, and paint them a consistent color for a cohesive look. Even a row of identical buckets reads intentional if you repeat spacing and height.
Plant selection: varieties that behave well and look good doing it
Container edibles must be compact, productive, and resilient. The varieties below are chosen because they’re widely available, perform in pots, and contribute to an “edible landscape” feel—upright forms, trailing edges, and consistent color.
Fruiting plants (the showpieces)
- Tomato ‘Sungold’ (cherry): intense flavor and high yields; train on a sturdy trellis. Give it a 15–20 gallon container and 8+ hours sun. The orange fruit reads like ornament.
- Tomato ‘Patio Choice Yellow’: compact habit for tight decks; great for 10–12 gallon containers.
- Pepper ‘Lunchbox Red’: container-friendly, sweet snacking peppers; looks tidy and colorful. Works in a 3–5 gallon pot with 6–8 hours sun.
- Eggplant ‘Fairy Tale’: small, striped fruit and attractive foliage; performs well in a 5–7 gallon container.
Greens and quick crops (the reliable fillers)
- Lettuce ‘Salad Bowl’ (red or green): cut-and-come-again harvest; attractive mounded form. Space plants 6–8 inches apart in a wide bowl planter.
- Kale ‘Dwarf Blue Curled’: stays compact, handles temperature swings; strong structure in mixed containers.
- Radish ‘French Breakfast’: quick turnaround (~25–30 days), great for “between seasons” sowing in shoulder months.
Herbs (the “path-edge” plants you’ll use daily)
- Basil ‘Genovese’: thrives in heat; pinch weekly for bushiness.
- Thyme ‘German Winter’: drought-tolerant once established; trails nicely over pot edges.
- Chives: neat clumps, purple flowers that pollinators love.
- Mint ‘Moroccan’ (only in its own pot): unstoppable growth; treat it like a contained groundcover.
Edible ornamentals (the designer’s secret weapon)
- Nasturtium ‘Alaska’: variegated leaves, edible flowers, and a trailing habit that softens container rims.
- Strawberry ‘Albion’ (everbearing): tidy foliage and repeated fruiting; great in hanging baskets or strawberry pots with 6+ hours sun.
One data point to keep you honest: University of Minnesota Extension notes that most vegetables require at least 6 hours of direct sun for best production (University of Minnesota Extension, 2020). If your deck can’t deliver that, shift the plan toward greens, herbs, and shade-tolerant edibles rather than forcing tomatoes to struggle.
A simple, designer-style planting recipe (thriller, filler, spiller)
For each large container, use a structure-and-support approach that also looks composed:
- Thriller (vertical): tomato on a trellis, or a pepper/eggplant in the center
- Filler (mounding): basil, lettuce, or dwarf kale around the base
- Spiller (trailing): nasturtium or thyme over the edge
This method isn’t just aesthetic—it increases harvest density while shading the soil surface, which reduces moisture loss on hot decks.
“Container size is one of the most important factors in success. Larger containers hold more growing medium, which stays moist longer and provides more nutrients.” — University of Illinois Extension, 2019
Step-by-step setup: build the deck edible landscape in a weekend
- Measure and tape the layout. Use painter’s tape to mark a 36-inch path and the footprint of each container. Live with it for an hour—walk through, open doors, move chairs.
- Place the largest containers first. Put them along the edge/rail in a straight or gently staggered line, spacing centers about 30–36 inches apart.
- Add vertical supports before planting. Install tomato cages or trellises now so you don’t stab roots later.
- Fill with potting mix. Use high-quality potting mix (not garden soil). Leave 1–2 inches headspace for watering.
- Plant by water needs. Group thirstier plants together (tomatoes, cucumbers) so your watering routine is simple.
- Mulch the surface. Add 1 inch of straw or fine bark to slow evaporation and reduce splashback on leaves.
- Water deeply and label. First watering should saturate the full root zone. Labels matter when you’re learning what thrives in your microclimate.
- Add a “harvest station.” A small hook for snips and a bowl saves trips inside—and increases how often you harvest.
Maintenance expectations: what it really takes
Plan on 45–90 minutes per week for a 10–12 container deck once it’s established, plus quick daily checks during heat waves.
- Watering: In midsummer, many decks need watering 4–7 days per week, especially for tomatoes in fabric bags. Self-watering containers can reduce that to 2–4 days per week depending on weather.
- Feeding: Use a slow-release fertilizer at planting, then supplement with a liquid feed every 2–3 weeks for heavy feeders (tomatoes, peppers). The Royal Horticultural Society notes that container plants rely on you for regular watering and feeding because nutrients leach out over time (RHS, 2021).
- Pruning/training: Tomatoes need tying and pinching weekly; cucumbers need guiding back onto the trellis.
- Harvesting: Pick often. Frequent harvesting keeps basil leafy, lettuce tender, and peppers producing.
Seasonal rhythm helps: in spring, start with greens and herbs; in early summer, swap in warm-season fruiting plants; in fall, return to kale, lettuce, and radishes. If you want a strong shoulder season, keep a lightweight frost cloth on hand—something like a 6' x 10' piece costs around $12–$20 and can buy you extra weeks.
Three mini case examples to spark your own plan
Case 1: The renter who wanted privacy (and salsa ingredients)
A client with a 6' x 10' deck faced a direct view from neighboring windows. We built a “green wall” with three 20-gallon fabric bags: two tomatoes (‘Patio Choice Yellow’ and ‘Sungold’) and one trellised cucumber (‘Bush Champion’). In front, we placed four medium pots of basil, cilantro, chives, and marigolds. The result: a soft privacy screen by July and weekly harvests for salsa without violating lease rules or drilling rail planters.
Case 2: The entertainer who didn’t want the deck to feel like a farm
On a 12' x 12' deck, the homeowner wanted a dining table to remain the focal point. We used identical matte-black planters: six large pots along two edges (peppers, eggplant, dwarf kale) and two corner anchors with ‘Albion’ strawberries in elevated containers. A single herb cluster near the grill became the “chef zone.” The deck stayed open, but every edge had edible interest—like a landscape border you could snack from.
Case 3: The shady deck that kept “failing” at tomatoes
This one is common: only 3–4 hours of direct sun and a lot of frustration. We switched the goal from fruit to foliage. Two wide bowls of ‘Salad Bowl’ lettuce, a trough of parsley and chives, and a dedicated mint pot produced consistent harvests. We added one cherry tomato in the sunniest corner as an experiment—and treated it as a bonus, not the backbone. The owner reported using the space more because it looked lush earlier in the season and didn’t demand constant rescue.
Small details that make the design feel finished
Lighting: Add warm string lights overhead and a small solar lantern near the herb cluster. You’ll harvest more if the space feels inviting at dusk.
Color control: Pair purple-leaved basil or red lettuce with green herbs for contrast. A limited palette reads intentional, even when plants are at different stages.
One “signature” container: If you want a focal point, choose one standout pot—maybe a tall planter with strawberries cascading from the rim. Just one. The rest should support it.
The best deck edible landscapes don’t announce themselves as projects. They feel like a comfortable outdoor room—until you notice dinner growing along the edges. If you keep the path clear, repeat your containers, and choose plants that match your sun, you’ll end up with something that’s both livable and productive: a deck that feeds you, frames your view, and makes you want to step outside every day.
Citations: University of Minnesota Extension (2020); University of Illinois Extension (2019); Royal Horticultural Society (RHS) (2021).